

Today I want to share with you my first card of the year. I’m making a card or actually two versions of the same card for the first occasion that is coming up, which is Valentine’s Day. I’m creating a heart background, one simple black and white and for the other one I will use also watercolours.
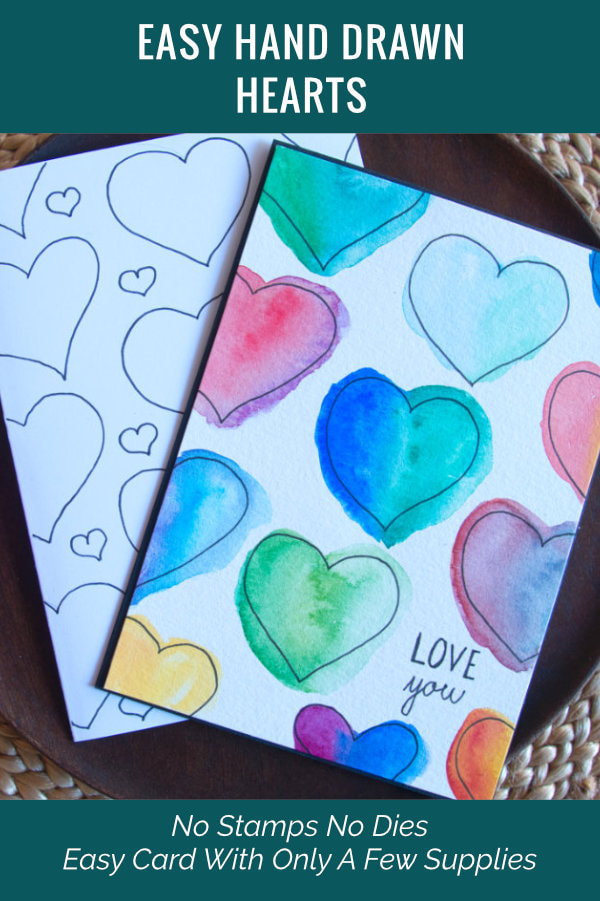
These cards will be a part of my new series, where I will be making cards for which you don’t need any stamps or dies or other special supplies that you often see card makers use. Therefore, if you want to make cards now and then or you are just starting and don’t want to spend too much money on supplies right away, these series might get you started and I hope you will get little bit of inspiration. Both cards start the same. You will need a pencil, eraser and a black fine liner. 
For the first card you will need a card base, for witch you don’t need any specialty card stock. I make my own card bases using an A4 size, 300 gsm heavy card stock, which I cut in half using my paper trimmer and then I fold each it in half to create an A6 size card that will fit in to a typical envelope.
If you do not have a a paper trimmer and don’t want to be buying one, then what you can do, is to buy already pre-scored card bases. They come usually in a pack together with envelopes. For the second card you will need a watercolour card stock (300 gsm/cold press), watercolours/watercolour palette, watercolour brush (I’m using size 7, size 6 is also good). You will also need a jar with water (I use two, one for clean and one for dirty water) and a paper towel. 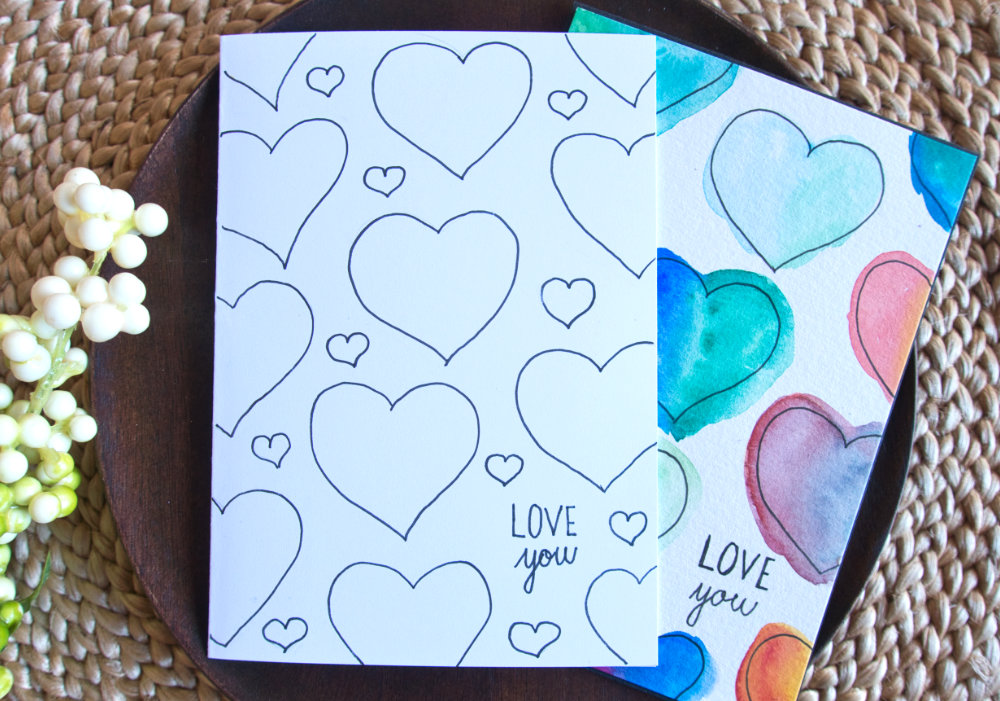
On the second card I use a card base using a black card stock and I trim down the watercolour card stock to A6 size panel. But again, if you do not want to buy a paper trimmer, then get yourself an A5 size block of watercolour card stock. This way you just fold it in half and you will get an A6 size card base. Yes, you will waste card stock this way, but at the beginning it doesn’t matter. You don’t need to buy the most expensive watercolour card stock.
To create the watercolour background, I did on both cards the same way. First, using my pencil, I wrote the sentiment in the bottom right corner. This is optional, you don’t have to do this, or if you have you can use a stamp. Then I drew a heart on a scrap of paper, which I cut out using my scissors, to create a stencil. I used the stencil to outline the hearts on the card base (first card) and on the watercolour panel (second card). I started in the middle and distributed the hearts evenly across the card, with the hearts on the edges being only partial. Just as you would have if you cut down a pattern paper. 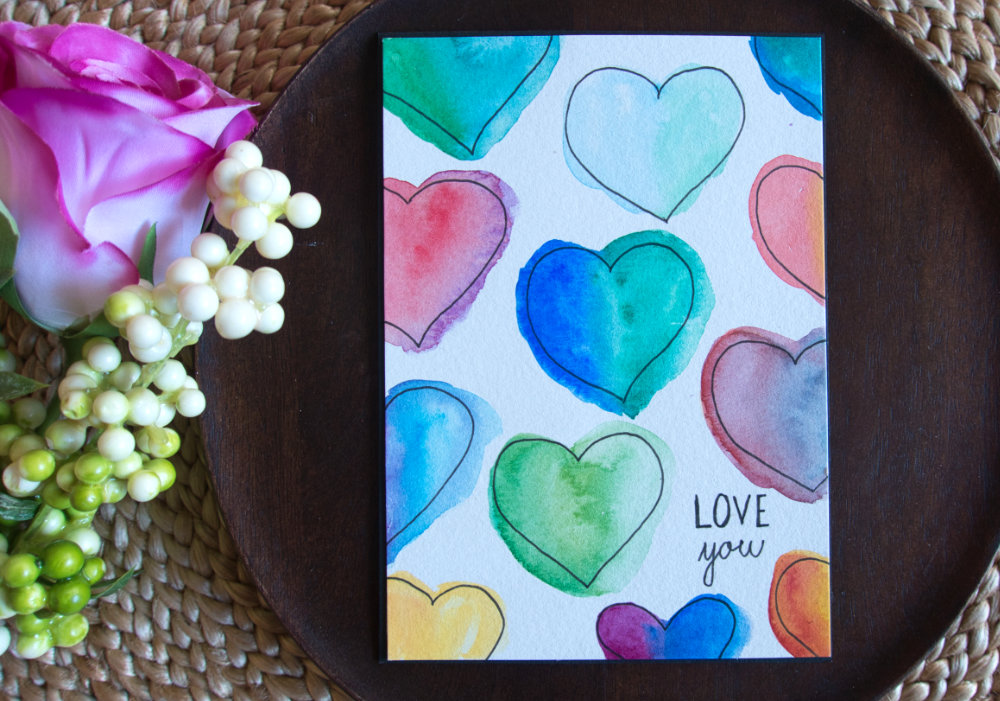
On the first card, since I wasn’t adding any colour, I added few smaller hearts, as I thought it look little bit too empty.
After I was done drawing the hearts I went back with the black fine liner. The black fine liner is waterproof, which is very important for the second card, where I will be using watercolours. I also recommend getting the fine liner and not a gel pen as they tend to smudge. I didn’t follow the lines of the pencil line exactly. For me it wasn’t important to have the hearts exactly the same, as I like the uneven look. I waited for the ink to dry about one or two minutes and then I took my eraser and erased the pencil lines. This has finished the first card. I think it looks very nice and simple. 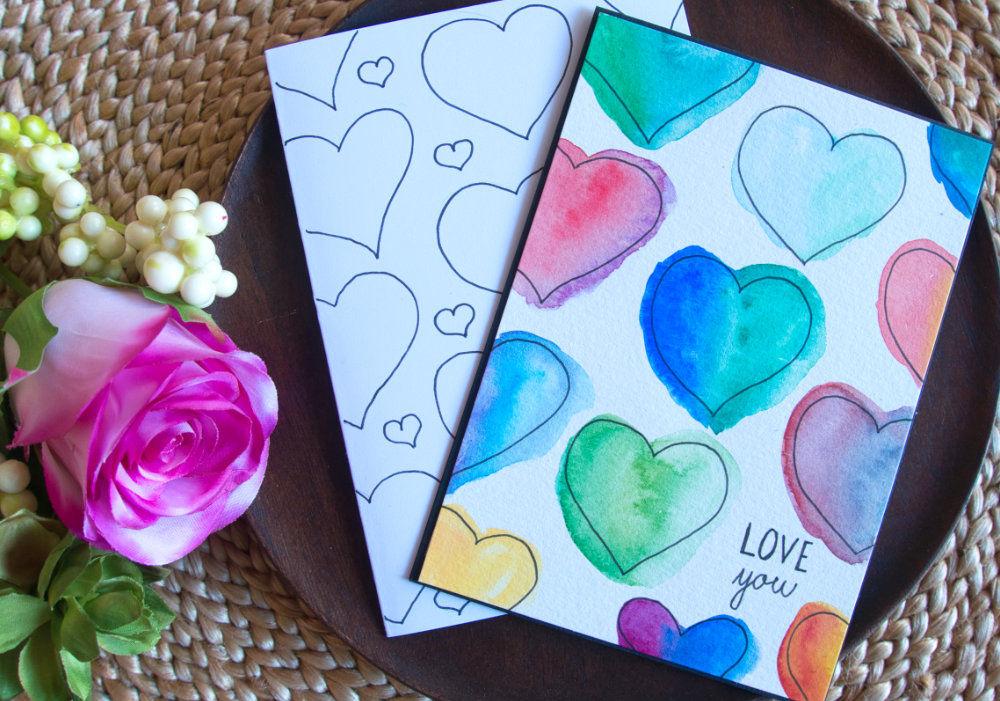
As I mentioned earlier and as you can see on the photos, on the second card I did simple messy watercolouring. Here I would recommend to experiment, if you are unsure about which colours to use. You can do the wet on wet technique, where you add a clear water on the card stock and then add the watercolours. Or you apply the watercolours directly on to the card stock. I tried various colour combination, or just one colour with an ombre effect. I tried making the colours more saturated and some lighter.
Don’t be afraid to experiment! One thing I would advise, make sure you clean your brush between colours, otherwise you will end up with muddy colours. This happens to me all the time. If you created your card base from a watercolour card stock, then you are finished. I adhered the watercolour panel on top of a black card base using a tape adhesive. I hope you enjoyed this card and will recreate it as well. If you have any questions, do not hesitate to drop me a line. VIDEO
Watch video below or over on YouTube.
SUPPLIES
I’m currently not using any affiliate links. These links are just to help you find the products. If I don’t find the exact product, I will provide an alternative.
Color Copy, White A4 300gsm card stock | AmazonDE | AmazonUK
Crafter's Companion Card Stock, Pack of 40, Matt Black | AmazonDE | AmazonUK Canson, Cold Press A5 300gsm watercolour card stock | AmazonDE | AmazonUK Papermania, Blank Card and Envelope A6 Pack of 50 White | AmazonDE | AmazonUK Faber-Castell Waterproof 0.3 Fine Liner | AmazonDE Winsor & Newton, Cotman Watercolor Palette | AmazonDE | AmazonUK Daler Rowney Watercolour Brushes | AmazonDE | AmazonUK Other Supplies: Pencil, Eraser, Ruler, Jar of water, Paper towel PIN ME
Did you like the card? I would love, if you pinned it to your board on Pinterest!
0 Comments
Leave a Reply. |
FOLLOW ME
SEE MORE


CATEGORIES
All
Stamping Die Cutting Using Stencil Heat Embossing Embossing or Texture Paste Distress Inks Nuvo Products Stamping & Colouring Stamping With Solid Stamps Watercolouring Watercolour Pencils Waterbased Markers Pencil Colouring Alcohol Markers Altenew Markers Zig Brush Markers Easy Backgrounds Stamped Backgrounds Small Stamp Ideas Simple Cards Complex Cards Cardmaking For Beginners All
Painting With Acrylics Painting With Gouache Painting With Watercolours Drawing With Fineliner Minimal Supplies Cards Christmas & Holiday
Love & Valentine Mother's Day Father's Day Halloween Spring Cards Summer Cards Autumn/Fall Cards Winter Cards Cards For Children Cards For Women Cards For Men Thank You Cards Sympathy Cards Get Well Soon Cards Floral & Leav Cards Rainbow Colours Messy Watercolouring Modern Art Inspirations Geometric Patterns Landscape Painting Acrylics
Gouache Watercolours Watercolour Pencils Waterbased Markers Distress Inks Alcohol Markers Colouring Pencils No Stamps No Dies Cards
Cardmaking On A Budget Let’s Colour Quick Cards Fun Masculine Cards Background Ideas Distress Ink Combinations |
 RSS Feed
