

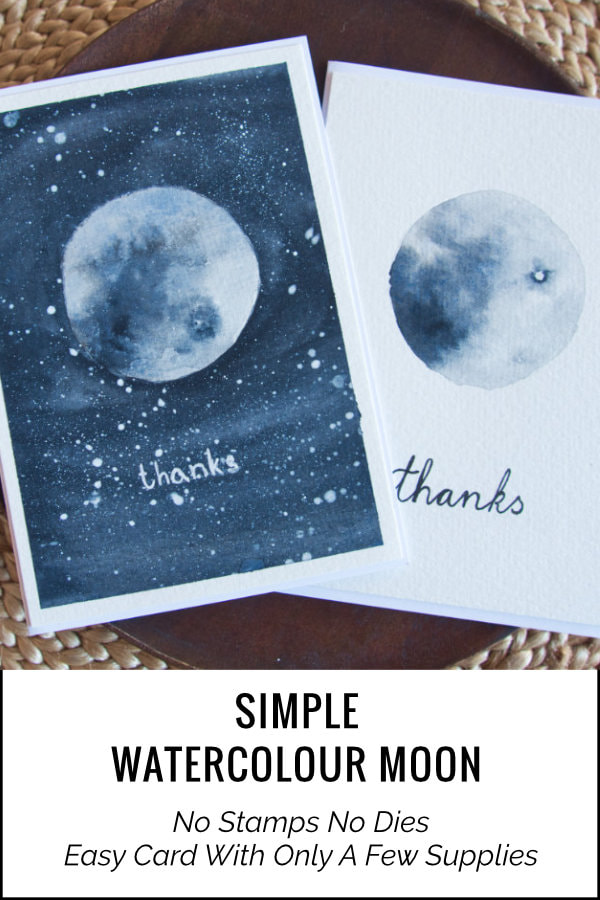
I’m continuing my series of cards where you don’t need any stamps or dies. And in this blog post I’m painting a moon. This is a very simple card, even if you never painted a moon before, you will be able to do it. Just like me.
Before I go into details. I want to start with two things. The first one is my mistake. The mistake is, I didn’t practice enough. I tried it three or four times, including my trial cards and then I made my video. If this is the first time you are going to be painting a moon, make sure you practice. Just take a sheet of the watercolour card stock, draw few circles and practice. Because once I painted my last card, which is the first card I show you in the video, I started getting better feel of it. Another thing I would recommend, is to google an image of the moon an have it as a reference while painting. The image I used as a reference you can see here. I found it really helpful! 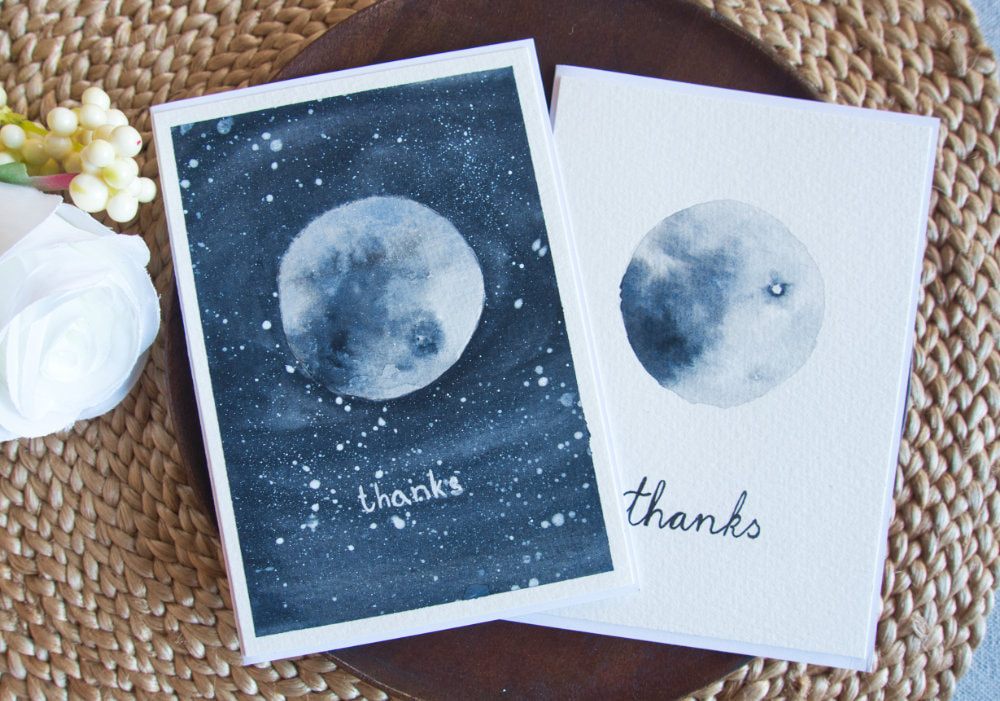
Also since I’m talking about helpful things, I searched YouTube videos that show you how to paint the moon and the best one I found is this one.
Let’s talk now about the supplies. I’m making two cards and the first one need little bit less supplies then for the second one. Because I will be watercolouring, I’m using here a watercolour card stock and a watercolour palette. All I’m going to be using is black and white paint. Then I have watercolour brushes, for the moon a smaller brush size six or seven are good and if you decide to do the background, as on my second card, you will need a bigger brush. Size ten or bigger will be great. Some might find a flat brush also good. And because I will be creating a black sky on the second card, I will be creating stars and for that I’m using a white paint (gouache or acrylic paint) and a tooth brush. To secure the watercolour card stock I’m using a hard board and a washi tape. To outline the circle shape of the moon you can use the washi, but my washi was too small, so I used a post-it tape, but you can use what ever you have at hand, compass, glass, etc. 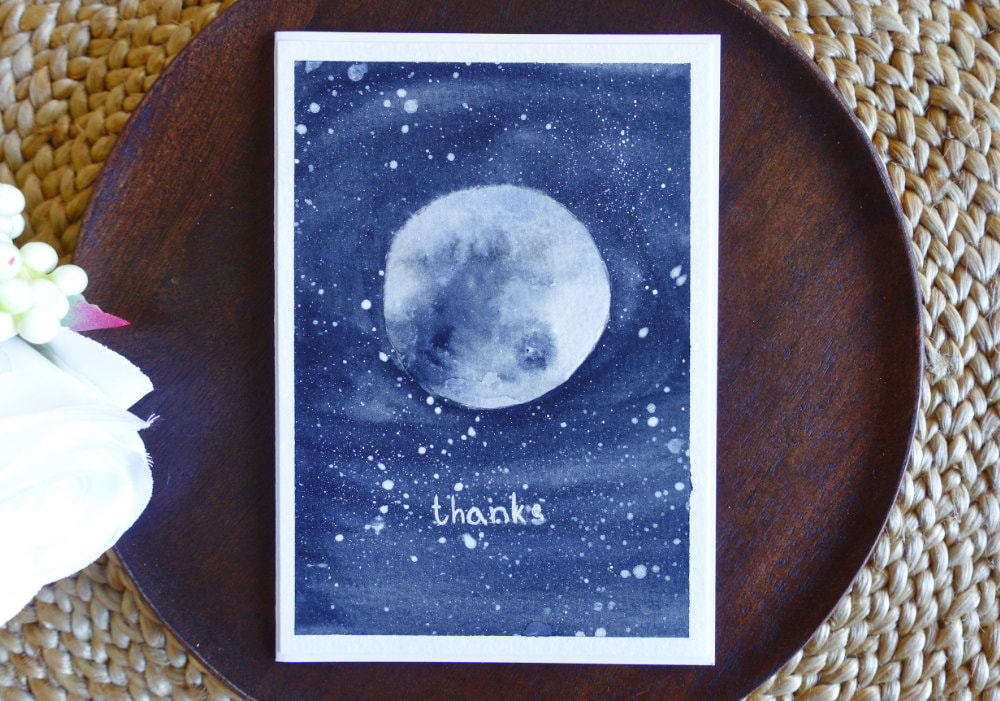
Of course I have a pencil and a eraser. Not only to outline the circle, but also the sentiment. At least on the first card.
For the sentiment I’m using a black fine liner on the first card and withe gel pen on the second. After I secured the watercolour card stock on to the board, I took the post-it tape and outlined the circle. I mixed my colours with water, I was mainly using grey and then spots of black. I was trying to follow the image of the moon that I found online. The black I was adding to the wet grey paint and let it do a thing. I even tried to create a crater by drying a little spot on the moon and then slightly outlining with the darker colour. And because the little spot was dry and around it created more organic outline, but I still used my brush to help it spread around. As I mentioned earlier, if you practice few times, then you will start getting the feeling of how the paint works and what else it needs. You can create multiple layers also use different colours, red, blue or purple would work nice in my opinion. I let the panel air dry and then I wrote the sentiment. I decided to do a thank you card and wrote the word “thanks” first on a scrap paper to make sure it’s entered and then I wrote it on the card, with pencil first and then I outlined. Of course if you have stamps for the sentiment, you can use those. 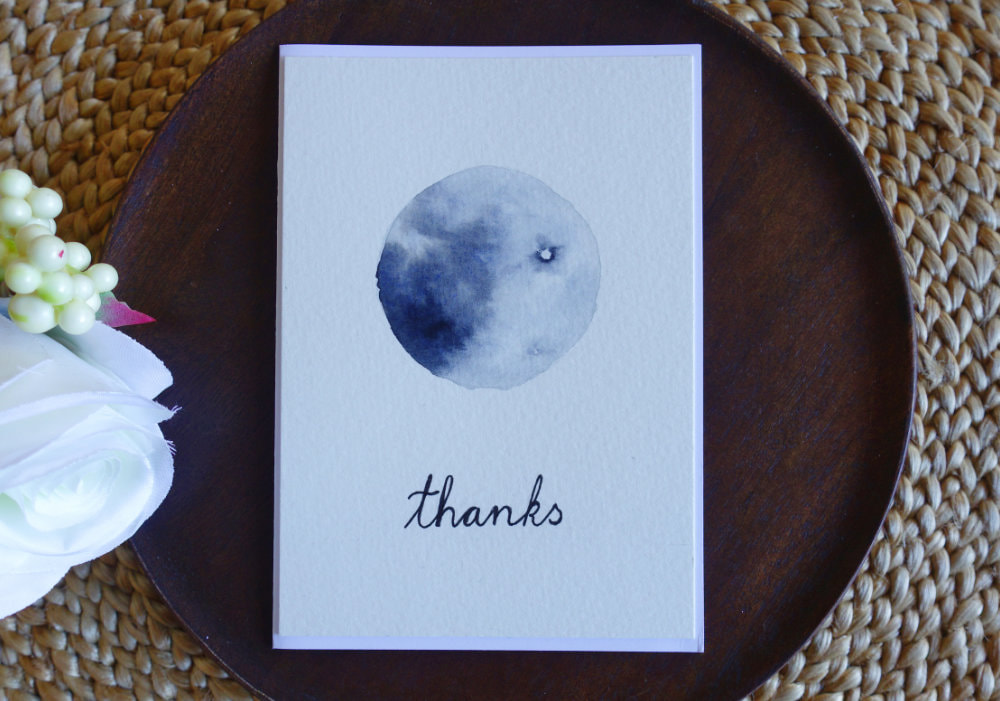
For the second card I painted the moon the same way as on the first card and then I worked on the background. I was going to do the wet on wet technique, but it was way too light, even after few layers. I would recommend, if you don’t have rich black watercolour, using less water or if you are going to get gouache for the white, get also black for the background. Gouache is more opaque than watercolours.
I didn’t enjoy the black paint. When it dried it was more like dark blue than black also I didn’t like the brush streaks, which you will not see after I add the stars. However, let’s face it, I’m not using here expensive supplies and this of course has an affect on the results. For the stars I used the Copic opaque white and I tried using a tooth brush to splatter the paint and my toothbrush was one of those wavy shaped bristles and I think that was the problem why it didn’t work. In the past I was used a cheap toothbrush with straight, even bristles and that worked. I ended up using another paint brush that had more stiffer bristles and that worked-ish. Definitely it was better then the toothbrush. You can also use the brush you painted the moon with, and just dip it in the paint and the tap it on your finger to get the colour off. 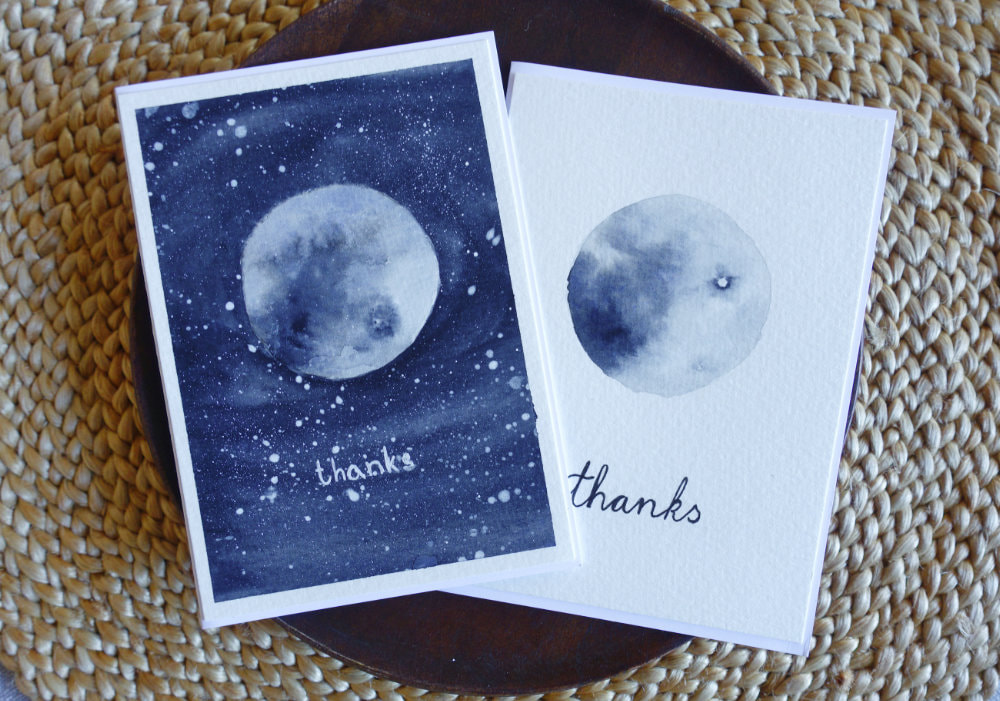
Also I cannot forget. Before you start spattering the white paint and don’t want to get any splatter on the moon, make sure you cover it with either a scrap of paper or a post-it. I had the post-it out on my desk, but I forgot to use it. Luckily I was able to suck out the paint using a kitchen paper.
For the sentiment I also wrote “thanks”, but this time with a white gel pen. Both panels with the moon I adhered on top of a white card base using a double sided tape. I prefer the first card over the second card. Not only I don’t like that the sky has hints of blue and also the moon is not a perfect circle, but there was something missing, it was little bit too flat and not like a ball, and I think there should be at least slight a hint of a glow. I guess I need to practice more. Who knows, maybe I do this card again sometime in the future and see how I developed. I hope you enjoyed this project idea and will try it yourself. If you have any questions do not hesitate to drop me a line. VIDEO
Watch video below or over on YouTube.
SUPPLIES
I’m currently not using any affiliate links. These links are just to help you find the products. If I don’t find the exact product, I will provide an alternative.
Color Copy, White A4 300gsm card stock | AmazonDE | AmazonUK
Papermania, Blank Card and Envelope A6 Pack of 50 White | AmazonDE| AmazonUK (If you don’t want to make a card base) Canson, Cold Press A5 300gsm watercolour card stock |AmazonDE | AmazonUK Winsor & Newton, Cotman Watercolor Palette | AmazonDE | AmazonUK Daler Rowney Watercolour Brushes | AmazonDE | AmazonUK Faber-Castell Waterproof 0.3 Fine Liner | AmazonDE | AmazonUK Sakura, Gelly Roll Pen | AmazonDE | AmazonUK Other supplies: Pencil, Eraser, Ruler, Jar of water, Hard board, Papertowel PIN ME
Did you like the card? I would love, if you pinned it to your board on Pinterest!
0 Comments
Leave a Reply. |
FOLLOW ME
SEE MORE


CATEGORIES
All
Stamping Die Cutting Using Stencil Heat Embossing Embossing or Texture Paste Distress Inks Nuvo Products Stamping & Colouring Stamping With Solid Stamps Watercolouring Watercolour Pencils Waterbased Markers Pencil Colouring Alcohol Markers Altenew Markers Zig Brush Markers Easy Backgrounds Stamped Backgrounds Small Stamp Ideas Simple Cards Complex Cards Cardmaking For Beginners All
Painting With Acrylics Painting With Gouache Painting With Watercolours Drawing With Fineliner Minimal Supplies Cards Christmas & Holiday
Love & Valentine Mother's Day Father's Day Halloween Spring Cards Summer Cards Autumn/Fall Cards Winter Cards Cards For Children Cards For Women Cards For Men Thank You Cards Sympathy Cards Get Well Soon Cards Floral & Leav Cards Rainbow Colours Messy Watercolouring Modern Art Inspirations Geometric Patterns Landscape Painting Acrylics
Gouache Watercolours Watercolour Pencils Waterbased Markers Distress Inks Alcohol Markers Colouring Pencils No Stamps No Dies Cards
Cardmaking On A Budget Let’s Colour Quick Cards Fun Masculine Cards Background Ideas Distress Ink Combinations |
 RSS Feed
