
 I made a few Christmas cards specifically for vertical videos and these do not take too much time or are very straight forward and therefore do not require lengthy blog posts with me explaining too much how I made these cards. So I decided to put them all together into one bonus article. STAMPING AND COLOURING A SIMPLE BACKGROUND USING SMALL STAMPS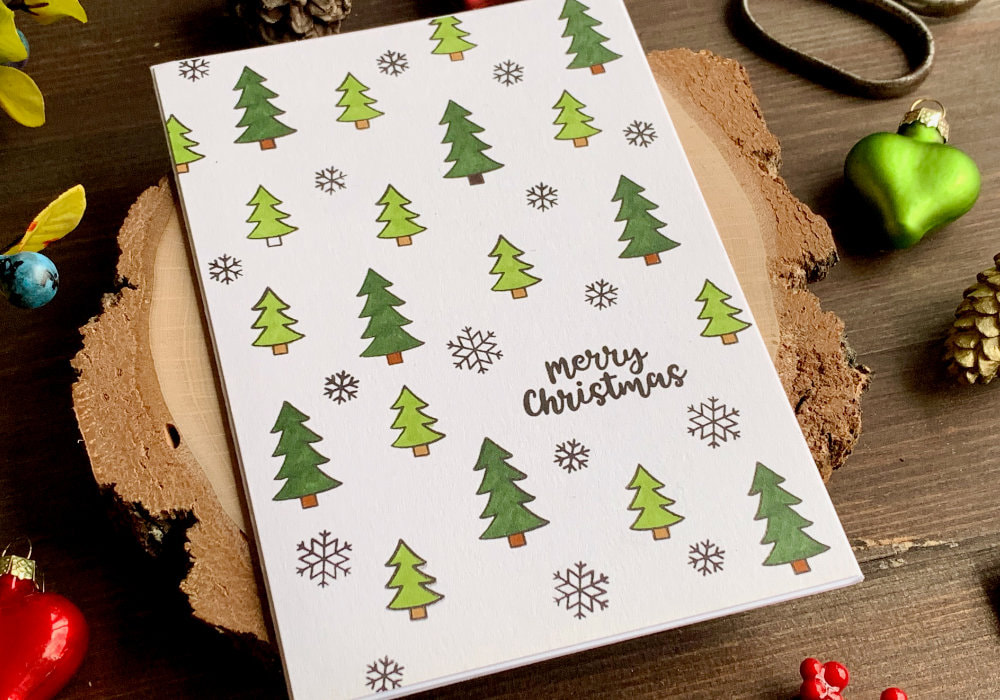 For my first card in this year's Christmas card series I used the stamp set Snow Globe Scenes from Newton's Nook Designs and while this stamp set contains multiple images, I only used one with the houses for the snow globe. Shaker cards are time consuming thus I wasn't planing to make more, but as I liked the other stamps as well, I decided to use them for other projects. The Santa I used on my second card and for this card I used two trees, snowflakes and the greeting. I started with stamping the greeting and then I stamped the other images around it. First the big trees, then the smaller trees and lastly the snowflakes in between. Except of the greeting, I used acrylic blocks for the stamping. Stamping tool would slow the process down. The ink I used is the Versafine ink in Onyx black. The card stock for the stamping is either the Neenah, Solar white or Plain white from Paper Mill Direct. I really cannot remember. 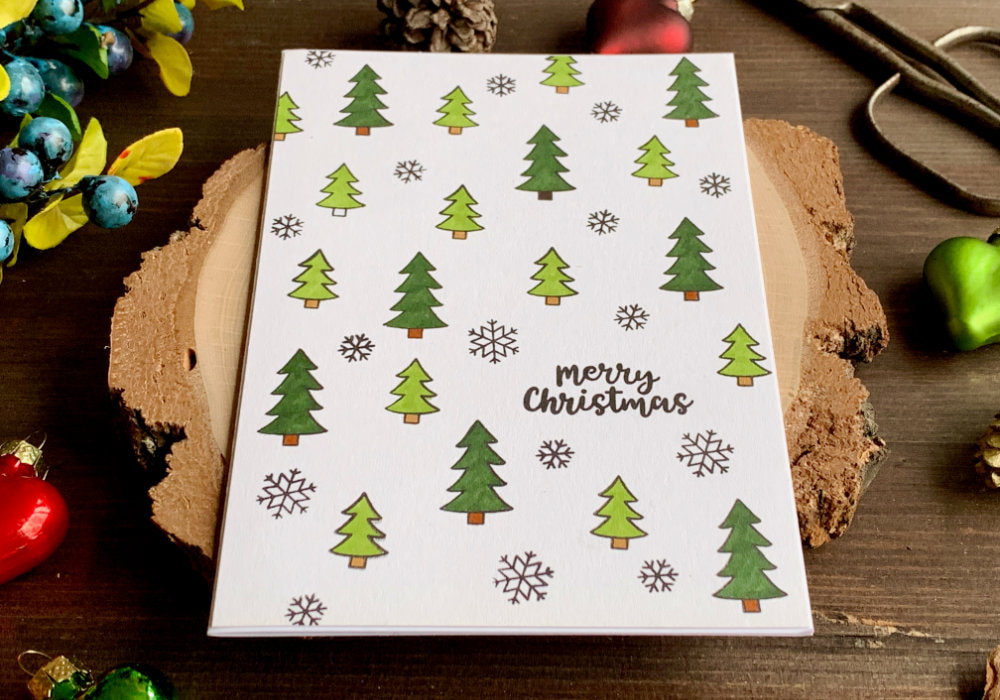 There was one snowflake that didn't stamp well, for that I used a black fine-liner and corrected the mistake. Next I coloured the trees using two green shades of alcohol markers from Altenew. I didn't do anything special, I applied a flat colour. The bigger tree I coloured with the darker green marker and the smaller tree with the lighter one. As I was stamping on a separate card stock, not directly onto the card base, I adhered the panel on top of a white card base using a simple double-sided tape. 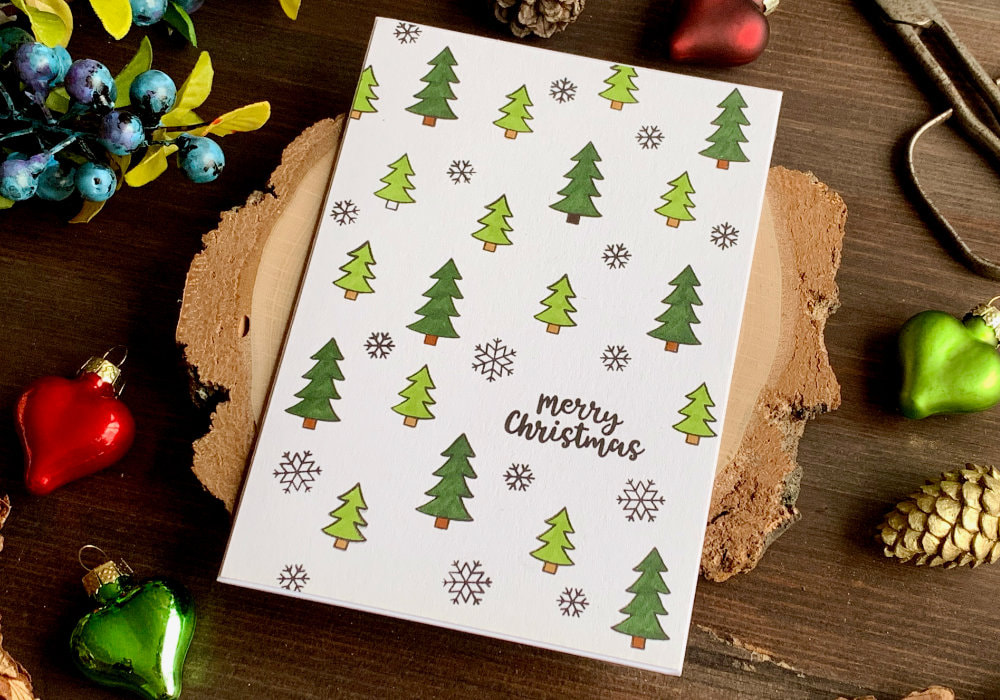 I hope you like this card and will try making something similar, you do not need the exact stamps or colouring products I used. You can see a quick video of me making this card on my YouTube channel or Instagram and make sure you subscribe/follow. SHORT VIDEOWatch the video below or directly on my YouTube channel or Instagram. ONE SROKE GOLDEN WATERCOLOUR CHRISTMAS TREE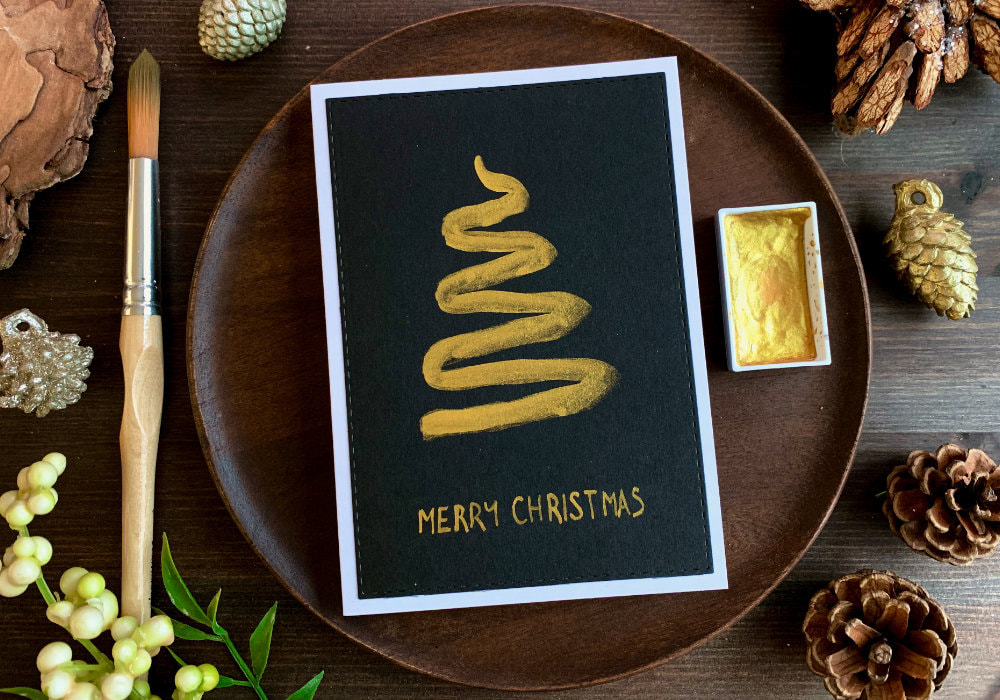 For my second bonus Christmas card I wanted to keep the Christmas tree theme and I also wanted to keep it simple. And kept it extremely simple, this card is very quick and easy to make. I took my golden watercolours from Kuretake and painted a tree with just one stroke. As you see I used a black card stock, which helps the golden colour to stand out. This is not a watercolour card stock (which actually exists), I wasn't going to use too much of water, therefore a watercolour card stock wasn't needed. And this is quite thick paper anyway, about 250gsm. Not as thick as watercolour card stock, but thick enough. 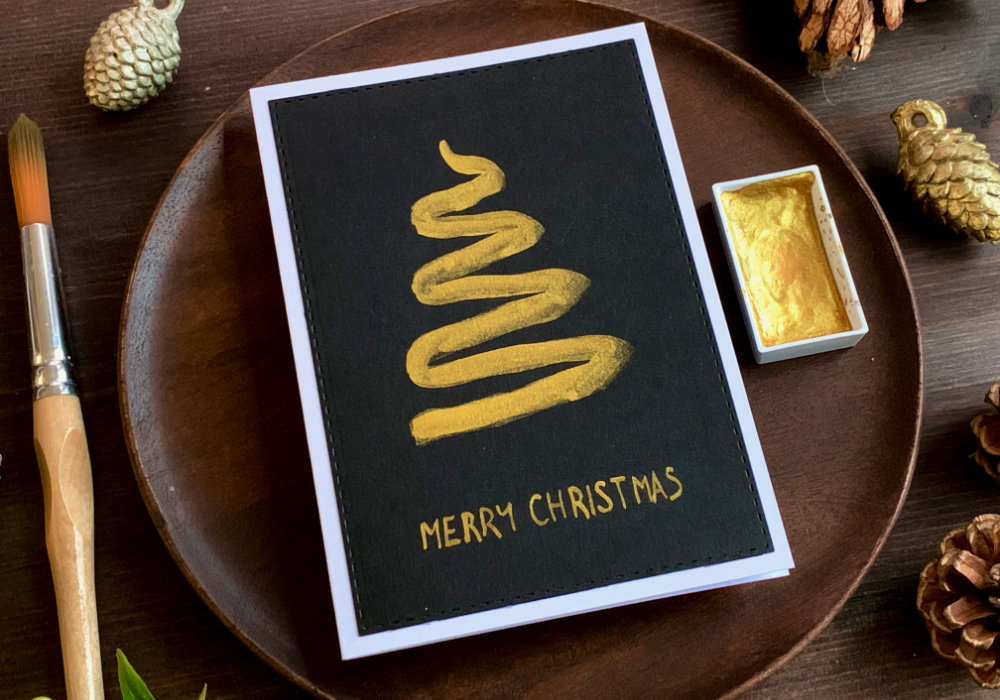 I began at the top and in a zig zag, wavy motion, in a one stroke I painted the tree. At the top I started with a thinner line and after the second turn, I made it as thick as the rest of the tree. I was also painting the tree wider as I was moving downward, creating an A-shape. I also went back to make the colour more saturated, but if I had the right ration of water and paint on my brush, I would need only one stroke. 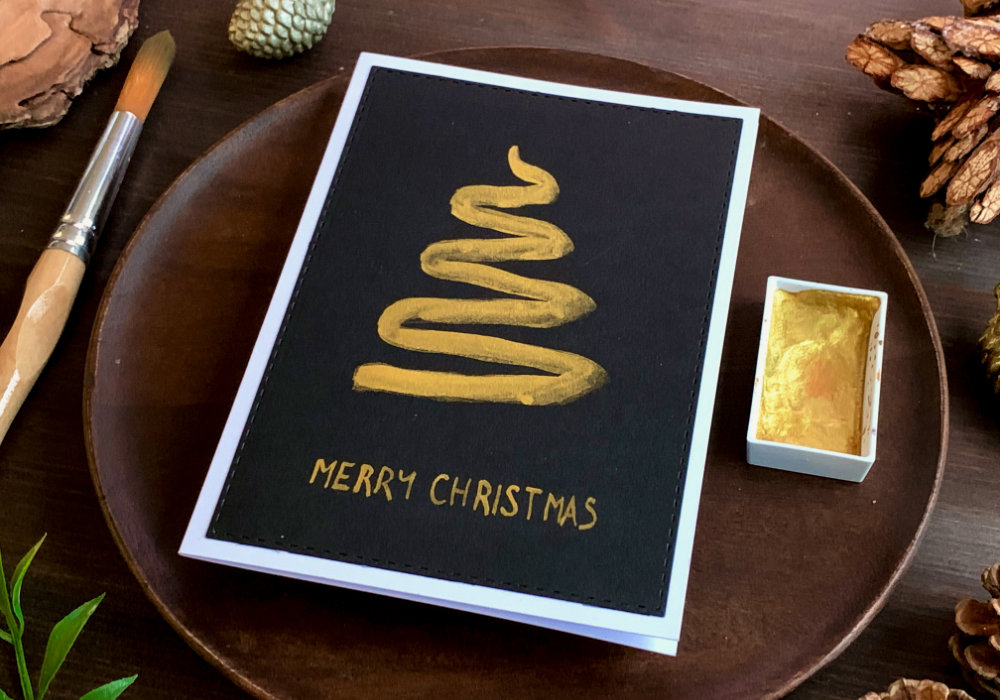 After I painted the tree I wrote the greeting. I was playing with the idea of using a stamp and heat embossing, but I don't have an embossing powder in the same shade of gold as the paint, I ended up writing it myself. I first wrote the greeting with a pencil, which I didn't show in the video as it wasn't visible on the camera. I first used a ruler and drew a line to make sure the greeting is straight and then I wrote the words Merry Christmas in capital letters. I erased the lines just slightly, so I can still see it, but they will be hidden behind the paint. Then I picked a size 0 brush and wrote over the lines using the same golden paint. I let it dry and then I used a stitched rectangular die and run it through my die cutting machine. And lastly I adhered the panel on top of a white card base using a double sided tape. 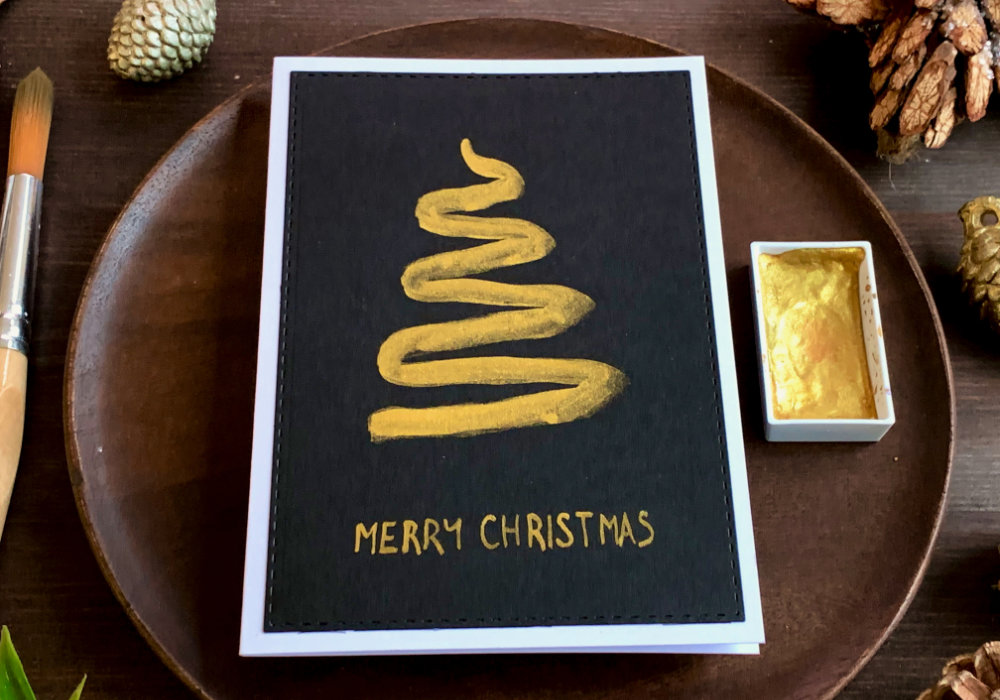 This card is really very easy to make, perfect if you need a last minute Christmas card and you can create many variations. You can use a card stock in different colours or use a white card stock and colourful paint. You can also watch a quick video of me making this card on my YouTube channel or Instagram and if you have any questions, ask them below in the comment section. SHORT VIDEOWatch the video below or directly on my YouTube channel or Instagram. DIE-CUT AND HEAT EMBOSSED GLITTERY CHRISTMAS TREE For my last bonus Christmas card I made a card with a die-cut Christmas tree that I heat embossed with a golden embossing powder. I started with die-cutting the Christmas tree, the die is the Twirl Tree by Penny Black. I wanted to create a dimension, so I die-cut the tree four times. One I die cut using a white card stock and three I die-cut out of a grey card stock. The reason I used a grey card stock for the bottom layers, is because I had a lot of left overs and wanted to use them, otherwise I would use white. I glued all the trees together, which was a tedious work as I do not have a glue bottle with a precision tip. 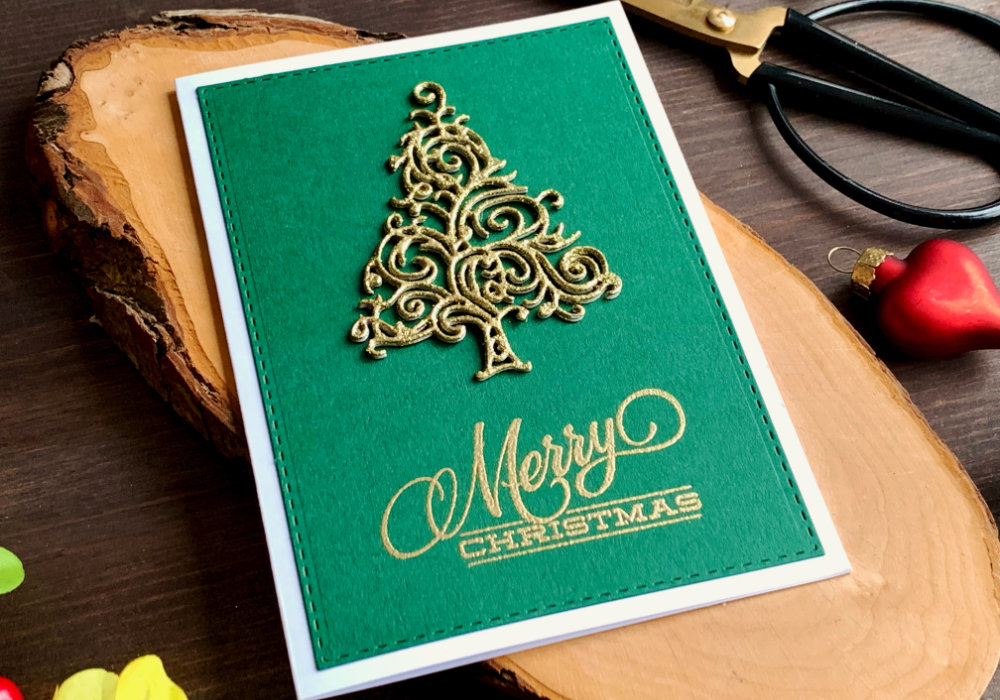 After the glue was dry, I took the Versamark ink and I squished the front of the tree in it. In the video my ink pad is quite dirty, sorry for that, I will be cleaning it soon. Next I sprinkled a golden embossing powder over the tree, covering it fully and then I melted the powder with my heat tool. The embossing powder is from Ranger, it's called Embossing Tinsel and it has a lot of glitter in it. I wanted the colours match the other bonus cards, especially the first one, therefore I used a green card stock and using a stitched rectangular die, I die-cut a panel. Then I stamped and heat embossed the greeting that says Merry Christmas. This sentiment stamp is from an older stamp set by Clearly Besotted. Here I used other golden embossing powder, this one is the Metallic Gold from Wow. For a greeting the glitter powder would not work as it was too thick.  Next I glued the tree above the greeting and lastly I glued the panel on top of a white card stock using a simple double-sided tape. You can see a quick video of me making this card on my YouTube channel or Instagram and make sure you subscribe/follow. SHORT VIDEOWatch the video below or directly on my YouTube channel or Instagram. YOU MIGHT ALSO LIKEPIN MEDid you like the card? I would love, if you pinned it to your board on Pinterest! 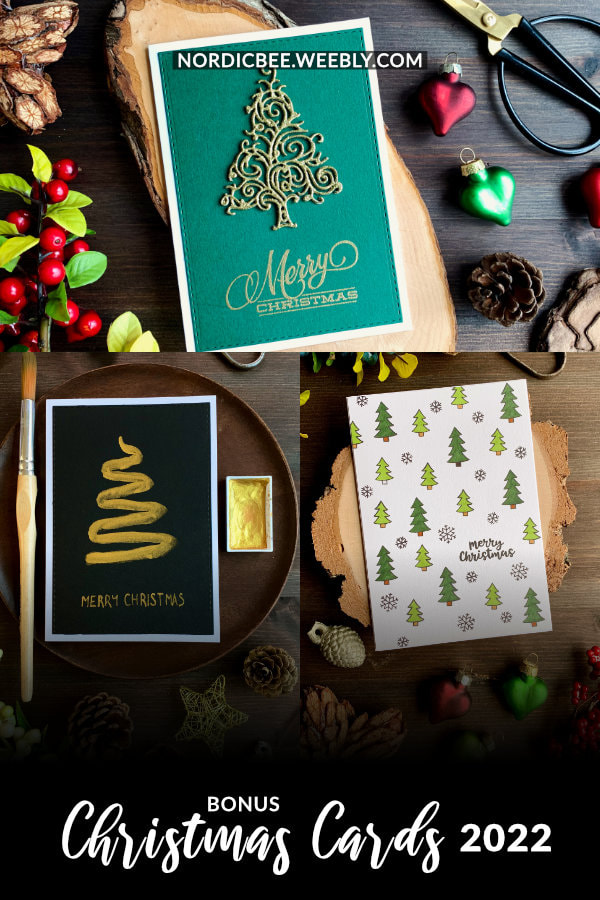
0 Comments
Leave a Reply. |
FOLLOW ME
SEE MORE


CATEGORIES
All
Stamping Die Cutting Using Stencil Heat Embossing Embossing or Texture Paste Distress Inks Nuvo Products Stamping & Colouring Stamping With Solid Stamps Watercolouring Watercolour Pencils Waterbased Markers Pencil Colouring Alcohol Markers Altenew Markers Zig Brush Markers Easy Backgrounds Stamped Backgrounds Small Stamp Ideas Simple Cards Complex Cards Cardmaking For Beginners All
Painting With Acrylics Painting With Gouache Painting With Watercolours Drawing With Fineliner Minimal Supplies Cards Christmas & Holiday
Love & Valentine Mother's Day Father's Day Halloween Spring Cards Summer Cards Autumn/Fall Cards Winter Cards Cards For Children Cards For Women Cards For Men Thank You Cards Sympathy Cards Get Well Soon Cards Floral & Leav Cards Rainbow Colours Messy Watercolouring Modern Art Inspirations Geometric Patterns Landscape Painting Acrylics
Gouache Watercolours Watercolour Pencils Waterbased Markers Distress Inks Alcohol Markers Colouring Pencils No Stamps No Dies Cards
Cardmaking On A Budget Let’s Colour Quick Cards Fun Masculine Cards Background Ideas Distress Ink Combinations |
 RSS Feed
