
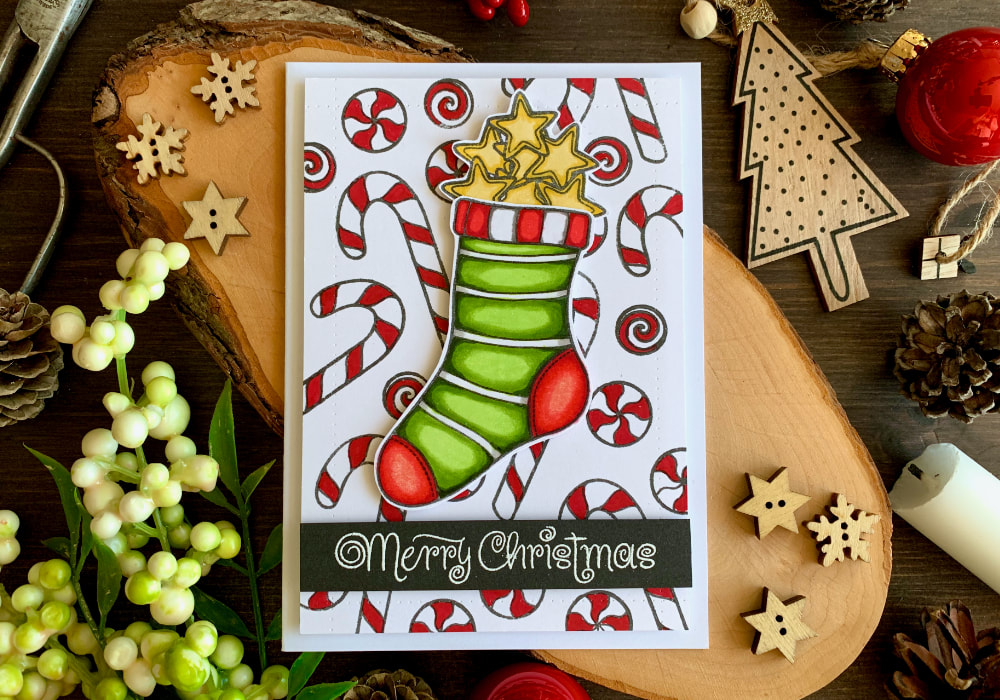
 For my fourth Christmas card I decided to re-create a card that I made few years ago for my old blog. You can watch the video below. I use here the stamp set Sweets & Treats by Create A Smile with Christmas stockings and to colour it I used watercolours. I really love this stamp set and the card I created, therefore I decided to make it again for this blog. To change it up a little bit, however, instead of watercolours, used the alcohol markers from Altenew. I started by stamping the stocking and the filler image for the stocking. For my original card I used the stamp with the presents, but to make the colouring easier, I decided to use he stars. The ink I used for the stamping is the Gina K. Amalgam Ink, which works well with alcohol markers. If you are like me and you like to use the Versafine ink for all your black stamping, then you will be disappointed as it will not work. The ink smudged once I went over it with the markers. You need an ink that is specific for alcohol markers. The card stock is the Bristol paper from Canson. 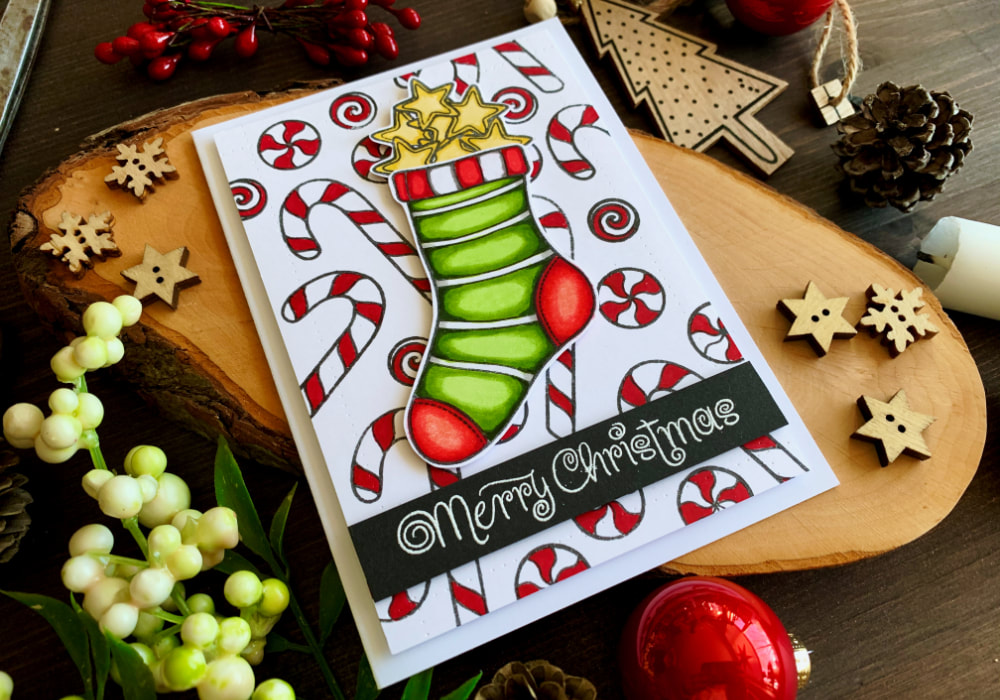 Next I started colouring. I'm not the best when it comes to shading and picking a light source. There are few instances where I know, there would be a shade or highlight, but normally what I do is to colour outer edges of an image darker going lighter towards the middle. This is exactly what I did here. For the stars that I used yellows. The stockings are split into stripes and then the top of the sock, the heel and the front part. The big stripes I coloured green and the thin stripes I coloured grey going into white. The front of the sock and the heal I coloured red. And the top part with the horizontal stripes I coloured red and white-grey. On the left I accidentally coloured the first two vertical stripes red and for the greyI used incorrect shade of grey, it was suppose to be T602 blended with a colourless blender. That's what happens when you are not paying attention. The exact colours I used, going from the darkest to the lightest, are:
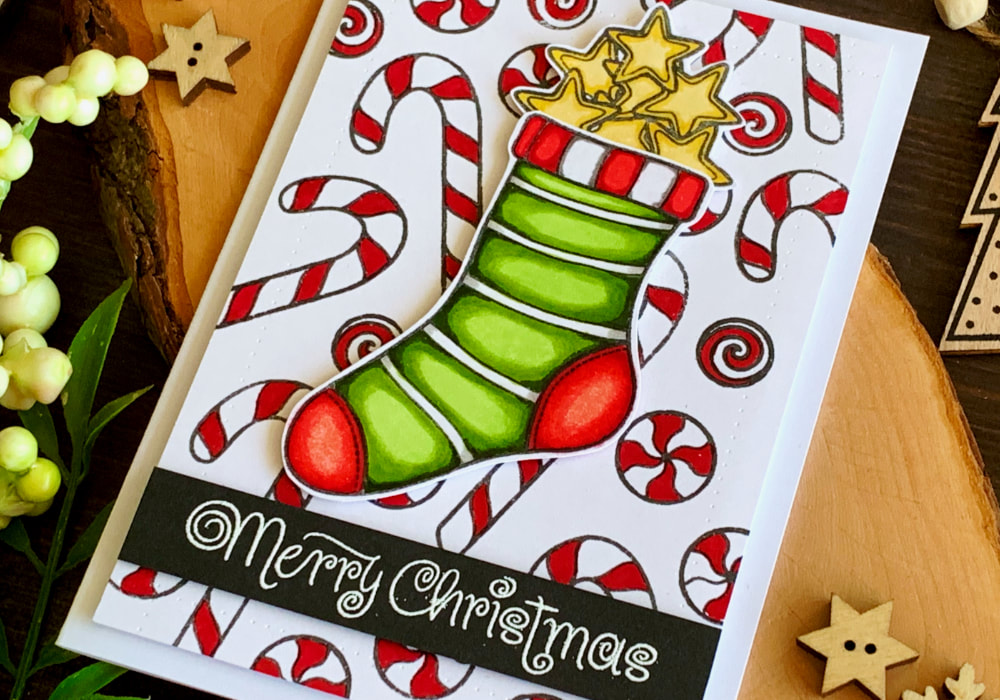 Once I was done colouring, I fussy cut the two images and then I worked on the background. The stamp set comes with few images of sweets, a candy cane and two round candies. I stamped those across the background of a panel that I made using the Bristol card stock. I'm making an A6 card and the panel is about half a centimetre shorter on each side. I wanted the sweets to be red and white. I didn't do anything special here, I only used the G554 for the red parts. Something I did't show in my video, on my original card I used a stitched-rectangular die to cut the panel with the sweets. I mentioned it before, but I do not have a die cutting machine at the moment, so I could not use those dies. However, before I actually had those dies, I bought a tracing wheel that you use in sewing, which can be used to create a foe stitching look. To create the foe stitching, except of this tool, you will need a self-healing matt and a ruler, preferably a ruler with a cork backing, this prevents the ruler from moving too much. Then you place the ruler where you want to have the stitching and roll along the edge of the ruler. I found a quite good video where this is explained, you can watch it here. 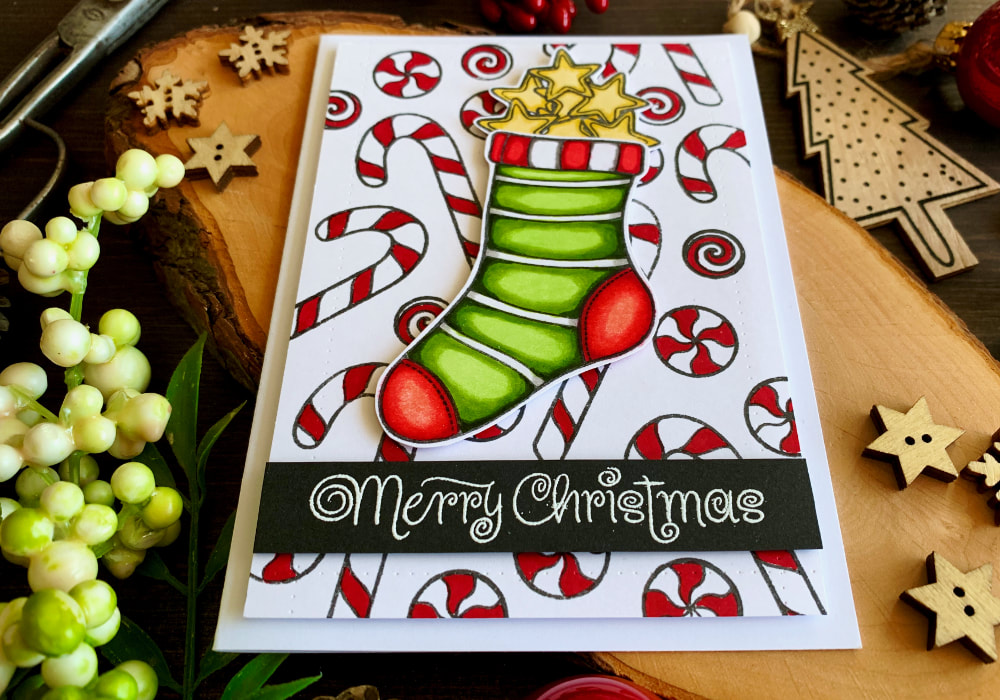 Next I stamped the sentiment. As this stamp set doesn't contain any sentiments, I used a greeting from a sentiment stamp set by Clearly Besotted that I stamped and heat embossed in white on a black card stock that I cut into a banner. To assemble the card, I used a double-sided foam tape for the stocking, the panel with the sweets and the greeting. The panel I adhered on top of a white card base and then I attached the stocking with the stars and below it I adhered the greeting. You can see a quick video of me making this card on my YouTube channel or Instagram and make sure you subscribe/follow. QUICK TUTORIALWatch the video below or directly on my YouTube channel or Instagram. ORIGINAL VIDEO TUTORIALWatch below or directly on my YouTube Channel. YOU MIGHT ALSO LIKE  PIN MEDid you like the card? I would love, if you pinned it to your board on Pinterest! 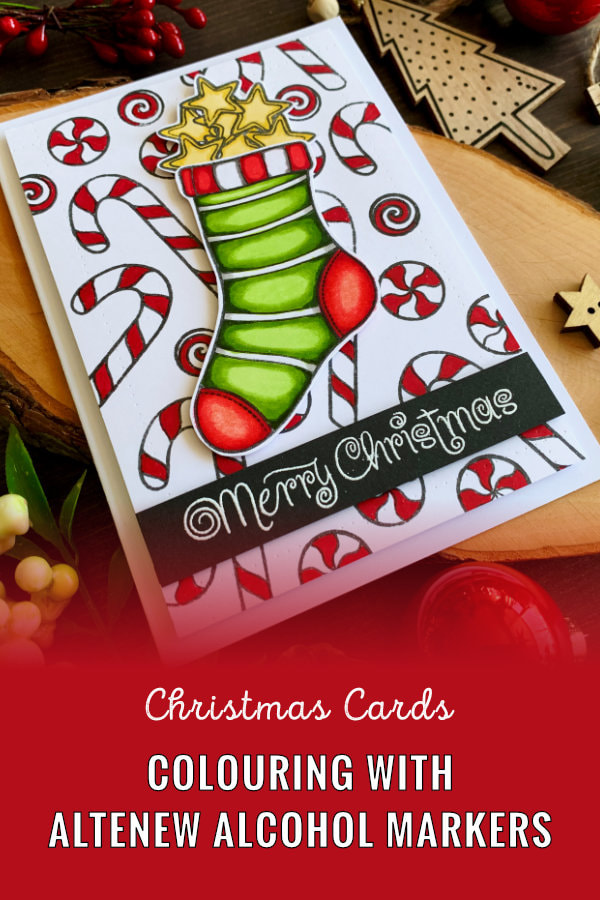
0 Comments
Leave a Reply. |
FOLLOW ME
SEE MORE


CATEGORIES
All
Stamping Die Cutting Using Stencil Heat Embossing Embossing or Texture Paste Distress Inks Nuvo Products Stamping & Colouring Stamping With Solid Stamps Watercolouring Watercolour Pencils Waterbased Markers Pencil Colouring Alcohol Markers Altenew Markers Zig Brush Markers Easy Backgrounds Stamped Backgrounds Small Stamp Ideas Simple Cards Complex Cards Cardmaking For Beginners All
Painting With Acrylics Painting With Gouache Painting With Watercolours Drawing With Fineliner Minimal Supplies Cards Christmas & Holiday
Love & Valentine Mother's Day Father's Day Halloween Spring Cards Summer Cards Autumn/Fall Cards Winter Cards Cards For Children Cards For Women Cards For Men Thank You Cards Sympathy Cards Get Well Soon Cards Floral & Leav Cards Rainbow Colours Messy Watercolouring Modern Art Inspirations Geometric Patterns Landscape Painting Acrylics
Gouache Watercolours Watercolour Pencils Waterbased Markers Distress Inks Alcohol Markers Colouring Pencils No Stamps No Dies Cards
Cardmaking On A Budget Let’s Colour Quick Cards Fun Masculine Cards Background Ideas Distress Ink Combinations |
 RSS Feed
