
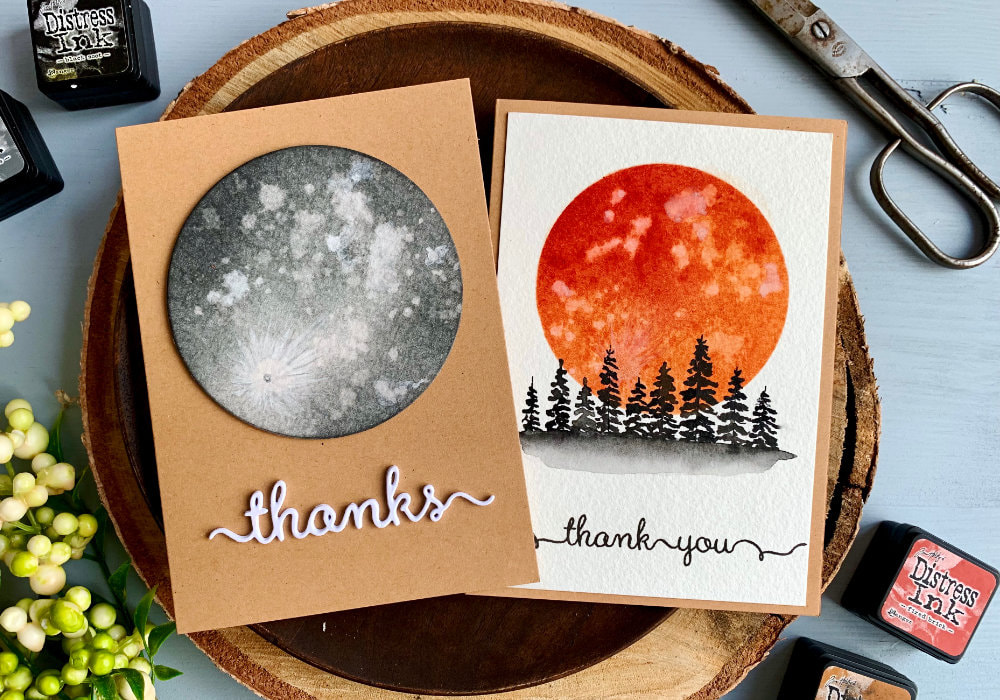
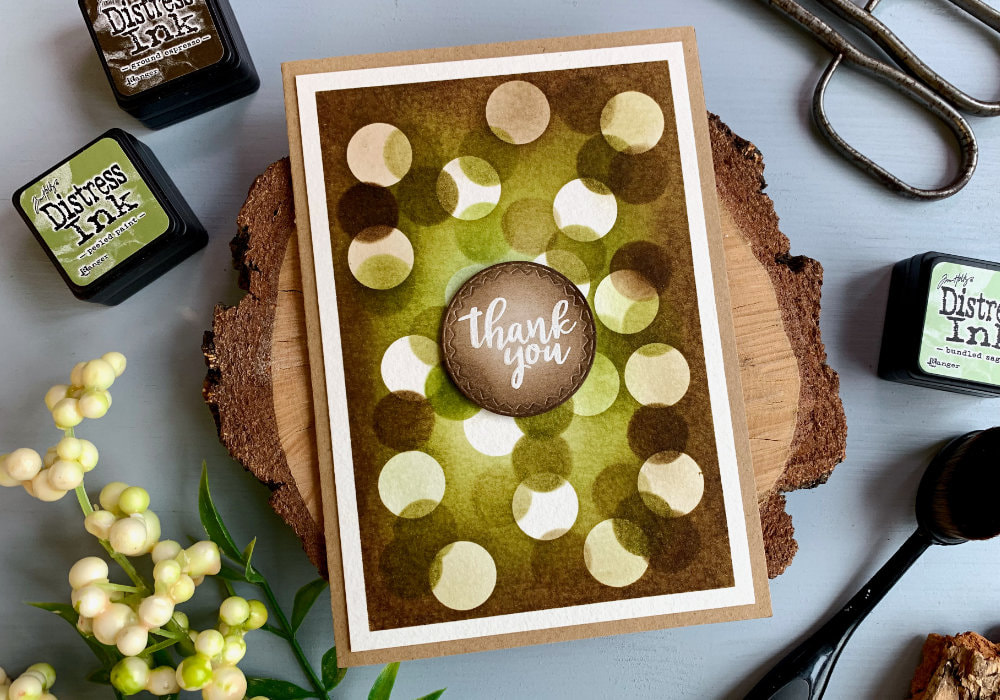
 I made cards with moon before. In those cards the moon I painted with watercolours and I was straggling with creating the craters and the light and dark areas. I found it rather intimidating. But back in October when I was editing an old video for YouTube Shorts, I noticed something that lead me to the technique in this blog post. In that video I made a mistake. I was creating a Distress ink background and after I sprinkled water over it, the droplets were too big, so I reapplied the ink. This didn't solve the issue, but when I was looking at this as I was editing. I thought it looked like a moon and I had to try it out. This is the simplest way to create moon and it's hard to mess it up. Actually the hardest part of this technique is to know when to stop. While I used Distress inks for this technique, any other inks that can be blended and lifted, meaning they can be soaked up with a paper towel after you add clean water, will work. This will create those craters (not sure it's the correct term) and the light and dark areas. And this all without hardly any effort. 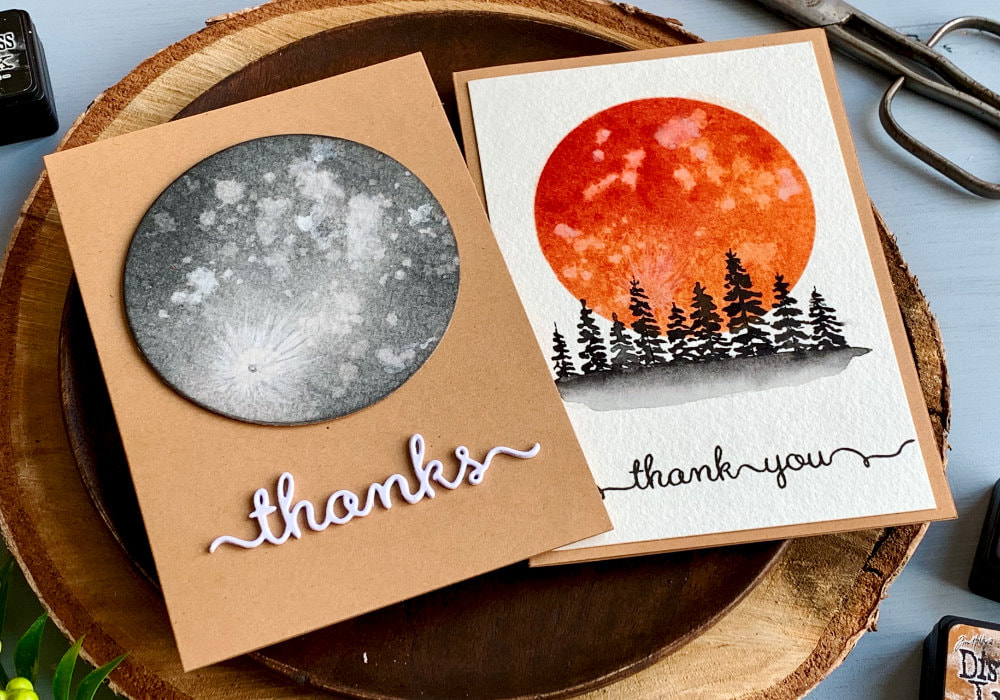 This technique is so quick that my first moon was finished within five minutes and with additional steps within fifteen minutes. That's why I made two cards. One with a die-cut circle and one as a background using a stencil, but the technique of creating the moon is the same for both. THE TECHNIQUE Start with the ink application. The colour is up to you. You can use one shade or two. I did try both, but in the video I used two shades and I find that a little bit better as it adds extra shade variation. You can start either with the lighter shade or the darker. I am undecided, if is better to start with the light or dark ink. I like both results. On the grey moon I started with the lighter ink and on the red moon I started with the darker ink. It is better not to apply the ink evenly. Blend some parts darker and some parts lighter. 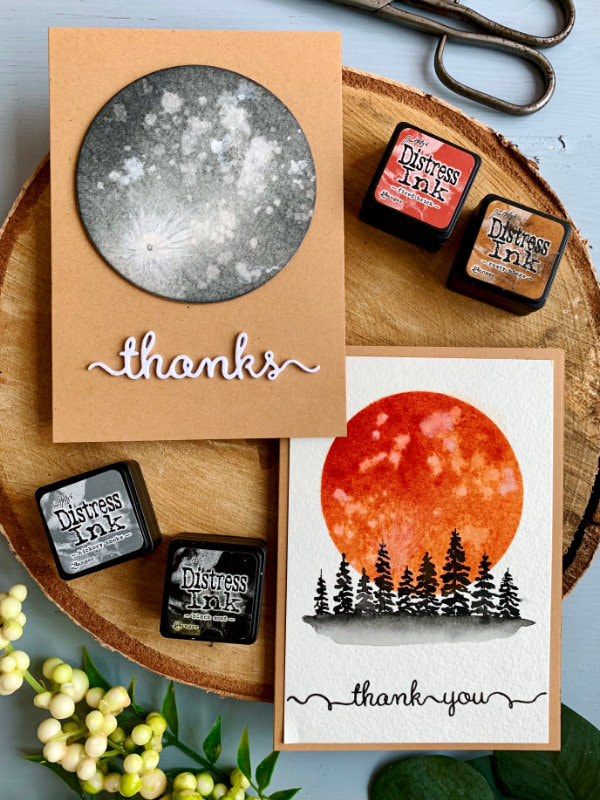 NOTE: If you need you can use a photo of a moon (earth moon or other) as a reference. I did that too, not to copy as I wasn't interested doing that, but just to have some kind of idea of the proper look. After you are happy with the ink application, pick up a brush and a jar with a clean water and sprinkle a few droplets across the circle. The amount of droplets you add is up to you. You can always add additional droplets later. I also used the brush and clean water and directly added droplets onto the surface and I also moved the water around to make a bigger pattern. Once you are happy with the droplets, take a paper towel and soak up the water. If you like the result, you can finish here or you can add additional ink layers. 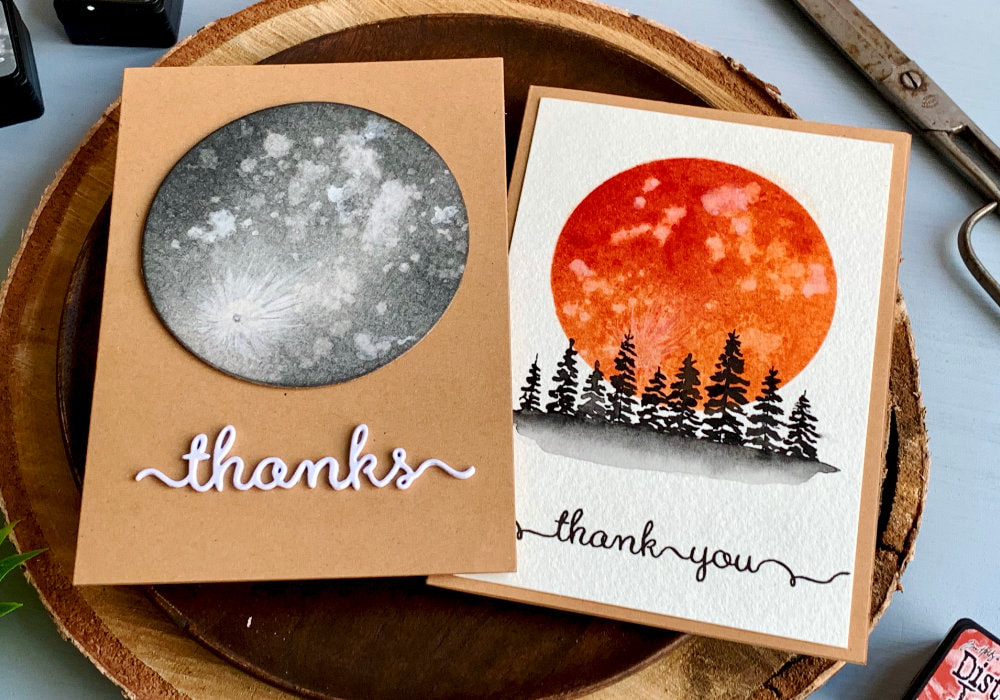 I used the second ink shade as well as the shade I used on the first layer and I blended the inks over the circle, keeping some areas light. Keep in mind that if you apply ink over the splattered area, it might be that you cover it up. It depends on the ink and how dry the surface is. The lighter areas won't be covered completely, you will be able to see, but they will be much darker. To finish up the process add the splatter using clean water and soak it up with clean water. How many layers of the ink and splatter you add is up to you. As I mentioned at the beginning the most difficult part is to know when to stop. And the good think is, you cannot really mess it up. 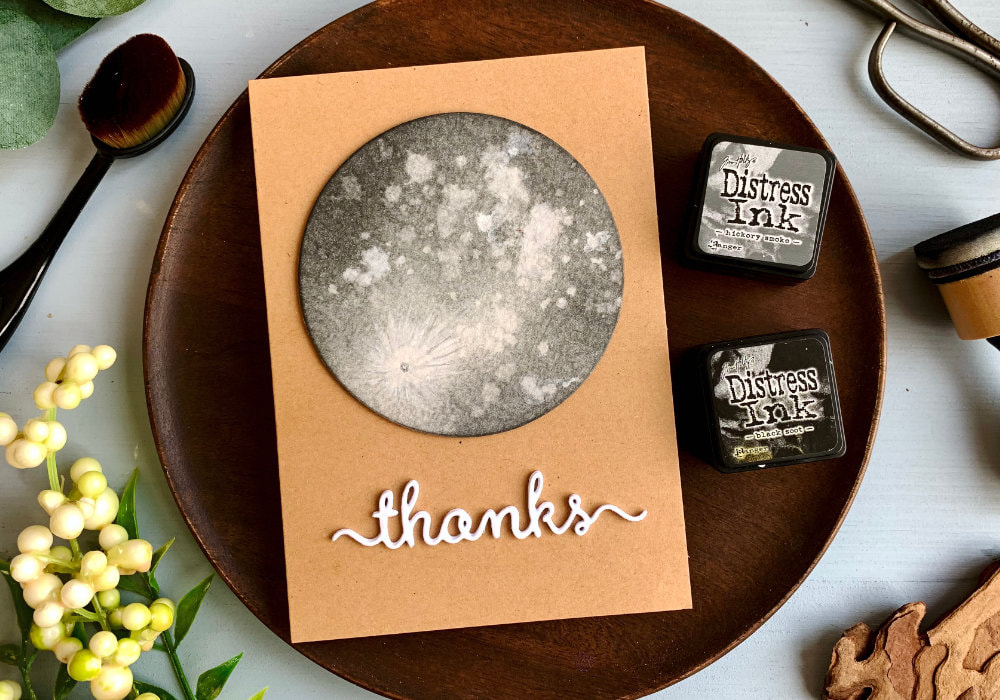 THE CARDS I MADE For the card with the grey moon. I die-cut a circle shape and I blended the inks as described above. The inks I used are Hickory Smoke and Black Soot. Here I started with the Hickory Smoke and for the another layers I also added the Black Soot. As I was using a reference photo I wanted to try this specific carter. It has circle shape, with a few lines spreading out from it. I used the Hickory Smoke for the circle and some of the lines and a white gouache, which I used for the highlight around the circle and at other places, as well as the lines. 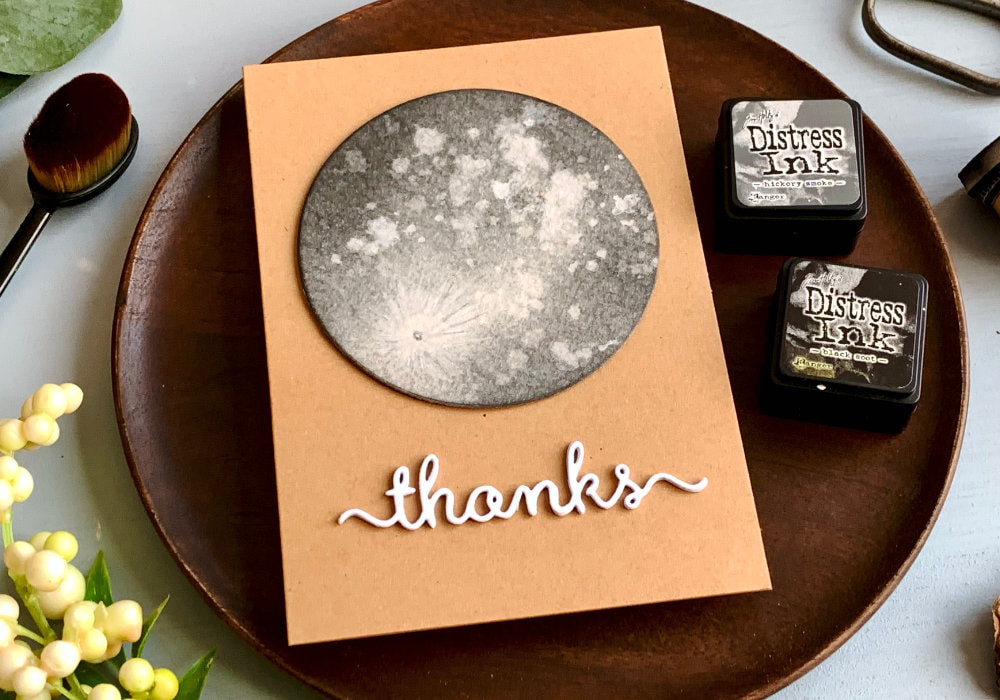 It didn't turn out as I would have liked. I had trouble with the lines. Even though I was using a long bristle brush, the lines were still quite thick. However, to try to fix it, I used a paper towel hoping to lift the colour and while it didn't work, it soften the colour. Disaster was avoided. In the worst case, I could have used the Distress ink and cover it that way. The finished moon I adhered on top of a card base using a foam tape. For the greeting I used a thanks die and I die-cut it four times and adhered the pieces on top of each other and then on top of the card base, below the moon. For the card with the red moon I used the inks Rusty Hinge and Fired Brick. I used a self-made stencil - I die-cut a circle using an acetate. I used acetate so I can see where I'm placing the circle. You can also use a card stock. 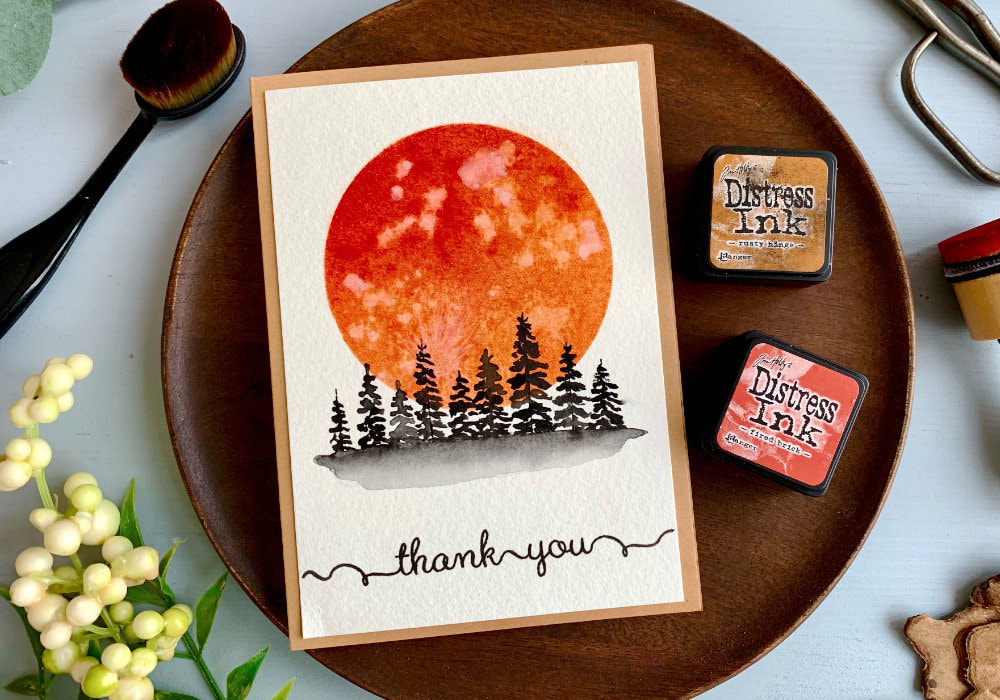 I applied the ink as described. Here I started with the darker ink - Fired Brick and after I created the splatter and soaked it up with a paper towel, I applied the Rusty Hinge together with the Fired Brick. I was also trying to create the crater, but then I decided to scrap it as I realized I will be covering it anyway. So I blended a lighter layer of the Rusty Hinge over it and moved on to the next step, which is painting fir tree silhouettes. To paint the fir trees I used a black watercolour paint and I painted the trees in various size beneath the moon. I also painted the ground using the watercolour right below the trees.  Lastly I stamped the greeting. Here I used a stamp that says thank you. You can use any other greeting, depending on the occasion. And the panel I adhered on top of a card base. I hope you will try making this card yourself. Make sure you check out my video on YouTube and give it a Like as well. The list of product is down below, where you can also find a few blog posts that I think you might enjoy. And if you have any questions, just drop me a line. VIDEO TUTORIALWatch the video below or on my YouTube Channel. PRODUCTS USEDCLICK HERE TO SEE TO THE LIST OF PRODUCTS
Tim Holtz Distress Mini Ink, Kit 14 (Hickory Smoke)
danipeussDE | CraftStashUK Tim Holtz Distress Mini Ink, Kit 3 (Black Soot) danipeussDE | CraftStashUK Tim Holtz Distress Mini Ink, Kit 6 (Rusty Hinge) DaniPeussDE | CraftStashUK Tim Holtz Distress Mini Ink, Kit 2 (Fired Brick,) danipeussDE | CraftStashUK Kuretake, Gansai Tambi, Watercolour Paints 36 Set AmazonDE | AmazonUK Canson XL, Watercolour Cardstock , 300gsm/140lb AmazonDE | AmazonUK Blue Squid Brush Set AmazonDE | AmazonUK Daler Rowney Watercolour Brushes 4, 6, 10 AmazonDE | AmazonUK Absofine, A4 Recycled Kraft Paper 320gsm (card base) AmazonDE | AmazonUK Stick It!, Double Sided Foam Tape AmazonDE | AmazonUK UHU, Liquid Glue AmazonDE | AmazonUK Fiscars, Guillotine A5 AmazonDE | AmazonUK Tonic Studios, Guillotine A4 AmazonDE | AmazonUK EK Success, Scissors AmazonDE | AmazonUK My Sweet Petunia, Mini MISTI Stamping Tool StempelmühleDE | BumbleberrysUK Papermania, Stamp Block AmazonDE | AmazonUK Crafting Mat, Black AmazonDE | AmazonUK Blending brushes of your choice. I was using the ones from Ranger. Disclaimer: Here you can find the products I used to make this card. Please note that the products are just a guide, you don't need the exact products or brands. If available I include links to the stores where you can find the products. As I live in Europe, I provide links to UK and German stores. These are not affiliate links and every product I used for this card, I purchased myself. YOU MIGHT ALSO LIKEPIN MEDid you like the card? I would love, if you pinned it to your board on Pinterest! 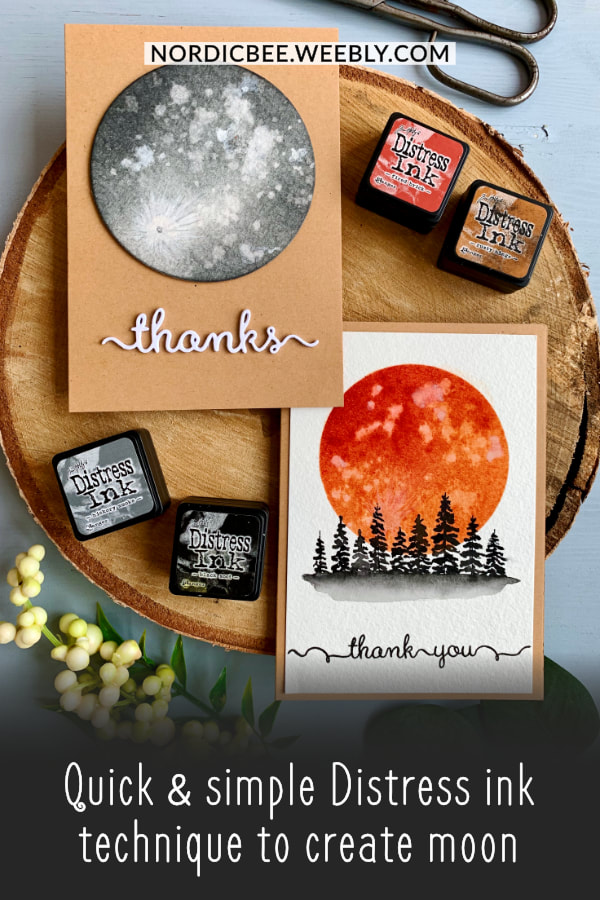
0 Comments
Leave a Reply. |
FOLLOW ME
SEE MORE


CATEGORIES
All
Stamping Die Cutting Using Stencil Heat Embossing Embossing or Texture Paste Distress Inks Nuvo Products Stamping & Colouring Stamping With Solid Stamps Watercolouring Watercolour Pencils Waterbased Markers Pencil Colouring Alcohol Markers Altenew Markers Zig Brush Markers Easy Backgrounds Stamped Backgrounds Small Stamp Ideas Simple Cards Complex Cards Cardmaking For Beginners All
Painting With Acrylics Painting With Gouache Painting With Watercolours Drawing With Fineliner Minimal Supplies Cards Christmas & Holiday
Love & Valentine Mother's Day Father's Day Halloween Spring Cards Summer Cards Autumn/Fall Cards Winter Cards Cards For Children Cards For Women Cards For Men Thank You Cards Sympathy Cards Get Well Soon Cards Floral & Leav Cards Rainbow Colours Messy Watercolouring Modern Art Inspirations Geometric Patterns Landscape Painting Acrylics
Gouache Watercolours Watercolour Pencils Waterbased Markers Distress Inks Alcohol Markers Colouring Pencils No Stamps No Dies Cards
Cardmaking On A Budget Let’s Colour Quick Cards Fun Masculine Cards Background Ideas Distress Ink Combinations |

 RSS Feed
