
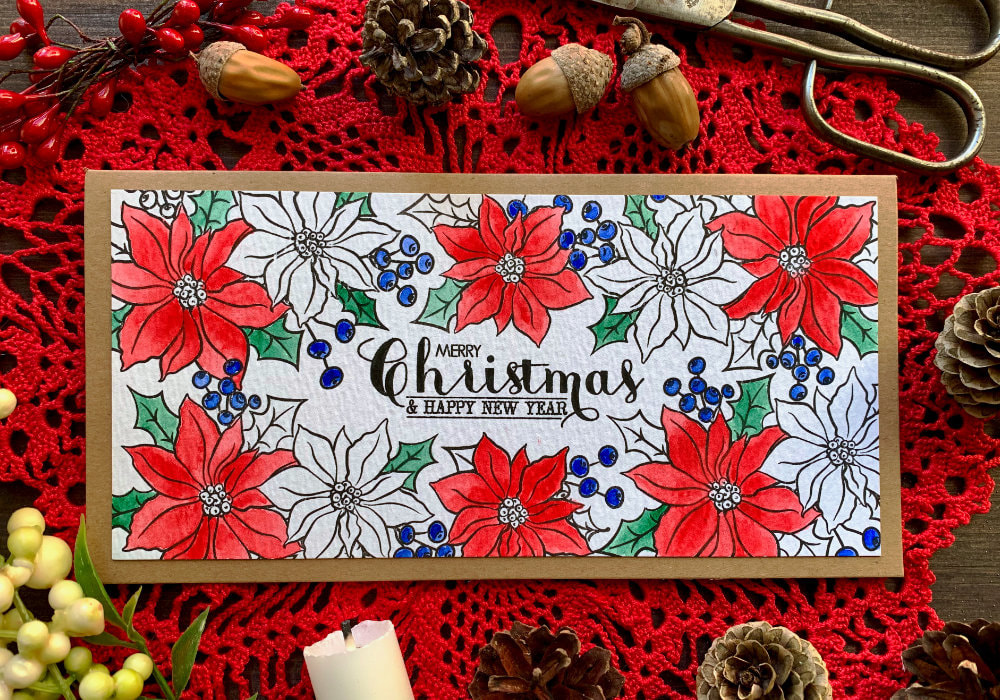
 In my last post I made a card, where I created a frame using a stamp with pine needles that I heat embossed. Here I was inspired by a card by Kristina Werner, where she used a frame die. Therefore I didn’t realized that for my next card (today’s card), I will be using the same technique of stamping and creating a frame. Nevertheless, I really like this technique, using individual stamps to create a frame along the edges of the card stock. It gives you another option of using your stamps. However, today’s card requires few more steps. I will be masking and colouring, but I’m not going to be any heat embossing. In my video I skipped through the products I used, so let me share it here. I used two older stamp sets. The main stamp set is the Holiday Bouquet by Avery Elle, which contains very beautiful images of the poinsettia flower. And for the greeting I used a stamp set from Clearly Besotted. NOTE: Since I’m using older stamp set that might not be available anymore. This technique works with many stamp sets, just use what you have in your stash. 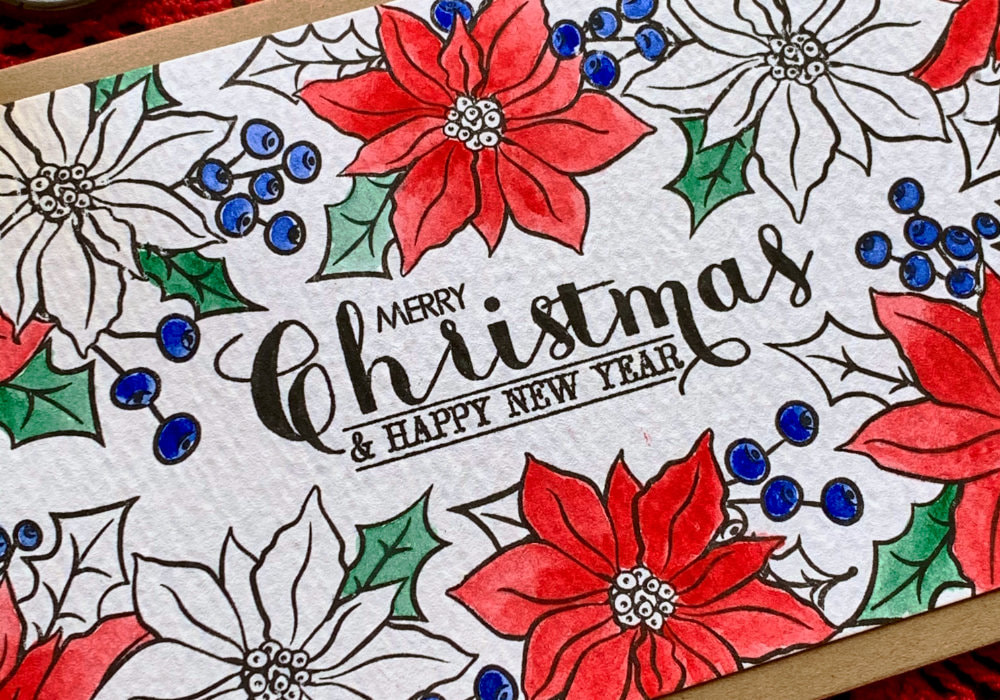 To stamp the images I used the Versafine ink in Onyx black and I also used the Mini Misty stamping tool. As I’m going to be watercolouring, the card stock I picked is the Distress Watercolor Cardstock from Tim Holtz. The reason why I chose this card stock is because it’s bright white. Normally a watercolour paper is off-white or beige and I wanted something different. To paint the flowers I used a watercolours from Winsor & Newton and a round brush in the size 4. Since I was stamping with stand alone stamps and the images would be overlapping, I needed to mask some parts and for that I used Post-It notes with full adhesive on the back. The notes are a little bit small for the stamp with the two poinsettias, but I made it work. Of course if you have a masking paper you can use that. As you see in the photos, I didn’t create a traditional A6 (A2 in the US) card, I decided to make a long or slim line card. The type of a card base is completely up to you. I like to use these long card bases time to time, it just depends on the project. 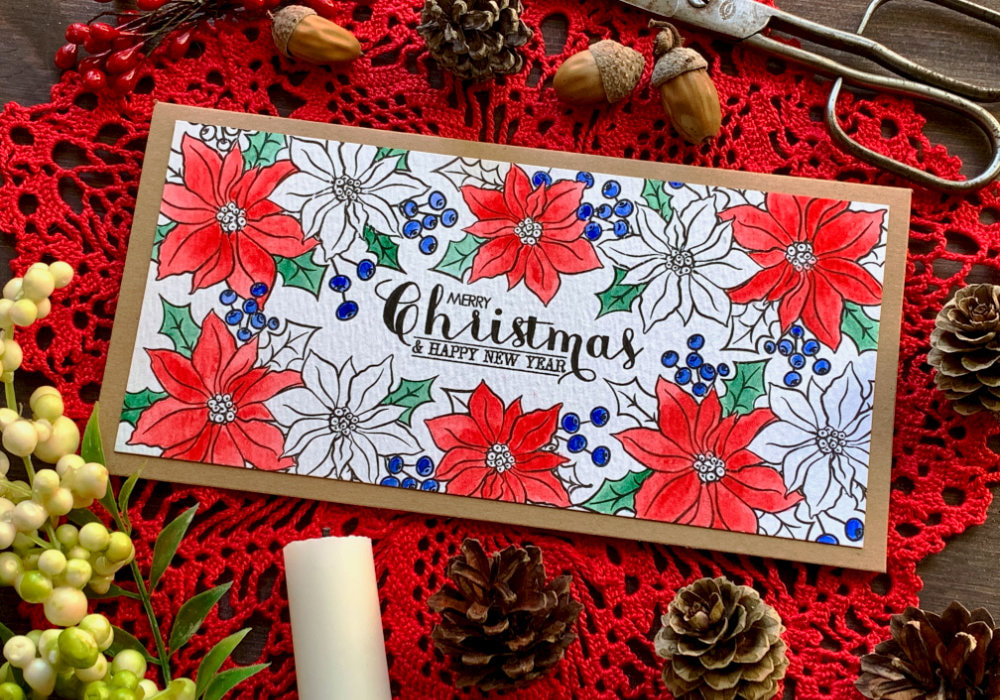 To make the card, I started by stamping the greeting. This particular watercolour card stock has a lot of texture, therefore using a stamping tool was a must. This way I could re-stamp multiple times and get a crisp image. Well, that worked with the flowers, not so much with the sentiment. Even after stamping a few times, there were still gaps in the stamped image. In such cases I just use a marker and fill up those gaps. Talking about the stamping tool. If you watch the video, you see me using the Mini Misty, despite using a card stock in a size that doesn’t really fit. I do have a bigger stamping tool, the one from Tim Holtz, but I use it only if there is no other option. Luckily in this case the Mini Misty worked just fine. After I stamped the sentiment, I stamped the bigger poinsettias and I stamped them in each corner of the panel. And then I stamped the smaller flower and the additional berries and leaves. Where the images were overlapping I also used the masks I created using Post-It notes. 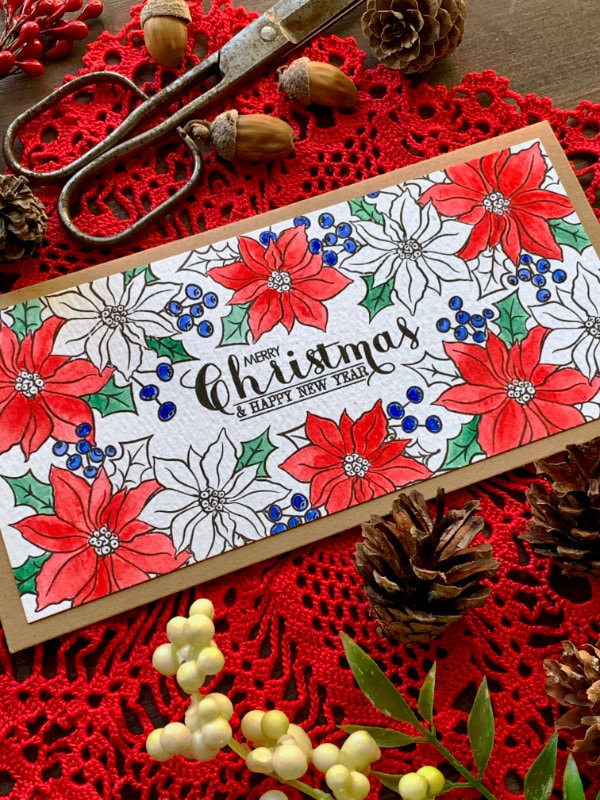 This stamping required a lot of re-positioning of the stamps. This means you have to clean the stamp every time you move it, which might not only be annoying, there is always a chance that the stamp is not perfectly clean and you will stain the card stock. Something like that happened to me, when I was stamping. I cleaned the stamp, then I dried it and while I thought it was fully dry, it wasn’t. There were few smudges of ink mixed with water on my card stock, luckily in the end you didn’t really see them. To avoid staining the card stock, the best is to use an acetate and put it below your stamp while you re-position it. Doing so you can move your stamp around without cleaning it. Kristina Werner shared this tip in one of her recent videos and I thought it was a very good idea. I completed the stamping, I really liked the black and white look. I was actually contemplating leaving it like that. However, since I used a watercolour card stock, I had to add some colour, otherwise it would be a waste. Originally I thought I will do a messy watercolouring and cover the whole panel with colour. I’m sure it would look nice, but I really liked the bright white card stock and the black and white stamping. So I decided to do a simple watercolouring and not only that, I thought it would be a great idea to leave some of the flowers without any colour. 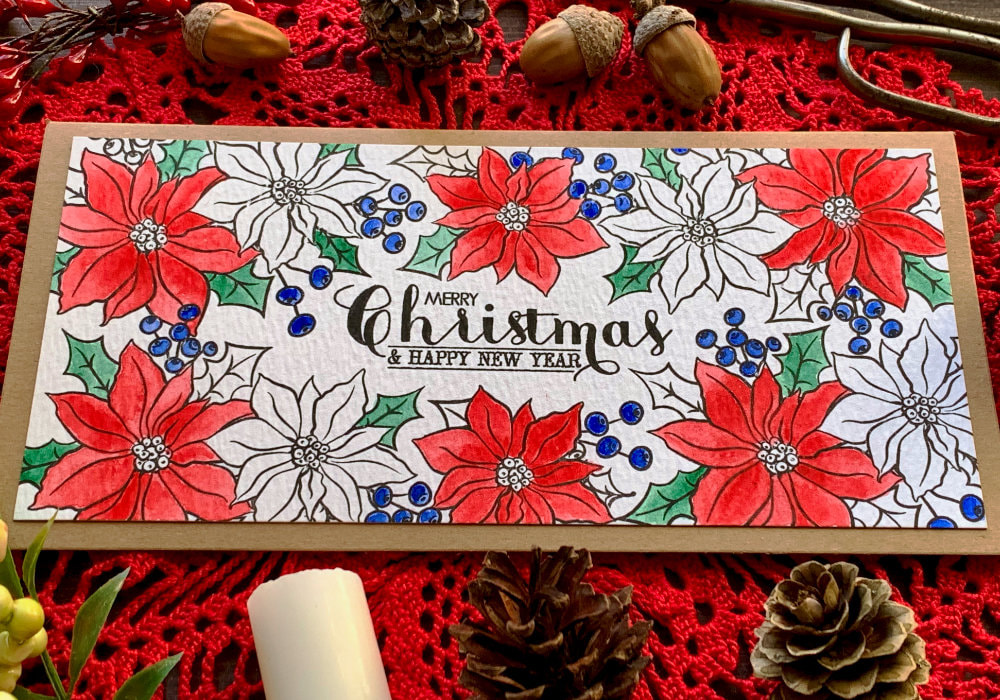 For the flowers, I used the red from the Winsor & Newton palette. It is a really nice red for Christmas cards. The berries I painted blue and for the leaves I used the Hooker’s Green which is a paint I bought separately, it wasn’t included in the palette. I let the panel dry and lastly I adhered it to the card base using a double sided tape. I was thinking adding some embellishments, like sequins or enamel dots, but then I decided to keep it clean and simple. That’s all for the card today. Make sure you check out my video on YouTube and give it a Like as well. The list of product is down below, where you can also find a few blog posts that I think you might enjoy. And if you have any questions, just drop me a line. VIDEO TUTORIALWatch the video below or on my YouTube Channel. PRODUCTS USEDDisclaimer: I’m currently not using any affiliate links. These links are just to help you find the products. The list includes alternatives to what I was using and while I haven't used some of them, I only recommend brands I trust. Avery Elle, Holiday Bouquet SevenHillsCraftsUK Clearly Besotted, Most Wonderful Ranger Tim Holtz Watercolour Cardstock AmazonDE | AmazonUK Winsor & Newton, Cotman Watercolour Palette AmazonDE | AmazonUK Winsor & Newton Cotman Watercolour Paint, Hookers Green Dark AmazonDE | AmazonUK Daler Rowney Watercolour Brushes 4, 6, 10 AmazonDE | AmazonUK Søstrene Grene, Round Brush Size 4 SøstreneGrene Post-It, Full Adhesive Notes AmazonDE | AmazonUK Tsukineko, Versafine Ink pad, Onyx Black AmazonDE | AmazonUK My Sweet Petunia, Mini MISTI Stamping Tool StempelmühleDE | BumbleberrysUK Papermania, Tall/Slim Card Base + Envelopes AmazonDE | AmazonUK Sellotape Double Sided Tape AmazonDE | AmazonUK Crafting Mat, Black AmazonDE | AmazonUK YOU MIGHT ALSO LIKEPIN MEDid you like the card? I would love, if you pinned it to your board on Pinterest! 
0 Comments
Leave a Reply. |
FOLLOW ME
SEE MORE


CATEGORIES
All
Stamping Die Cutting Using Stencil Heat Embossing Embossing or Texture Paste Distress Inks Nuvo Products Stamping & Colouring Stamping With Solid Stamps Watercolouring Watercolour Pencils Waterbased Markers Pencil Colouring Alcohol Markers Altenew Markers Zig Brush Markers Easy Backgrounds Stamped Backgrounds Small Stamp Ideas Simple Cards Complex Cards Cardmaking For Beginners All
Painting With Acrylics Painting With Gouache Painting With Watercolours Drawing With Fineliner Minimal Supplies Cards Christmas & Holiday
Love & Valentine Mother's Day Father's Day Halloween Spring Cards Summer Cards Autumn/Fall Cards Winter Cards Cards For Children Cards For Women Cards For Men Thank You Cards Sympathy Cards Get Well Soon Cards Floral & Leav Cards Rainbow Colours Messy Watercolouring Modern Art Inspirations Geometric Patterns Landscape Painting Acrylics
Gouache Watercolours Watercolour Pencils Waterbased Markers Distress Inks Alcohol Markers Colouring Pencils No Stamps No Dies Cards
Cardmaking On A Budget Let’s Colour Quick Cards Fun Masculine Cards Background Ideas Distress Ink Combinations |

 RSS Feed
