
Fun Stencil Techniques & Distress Ink Background Combo | CHRISTMAS CARDS 2021 | Card 11 + VIDEO18/12/2021 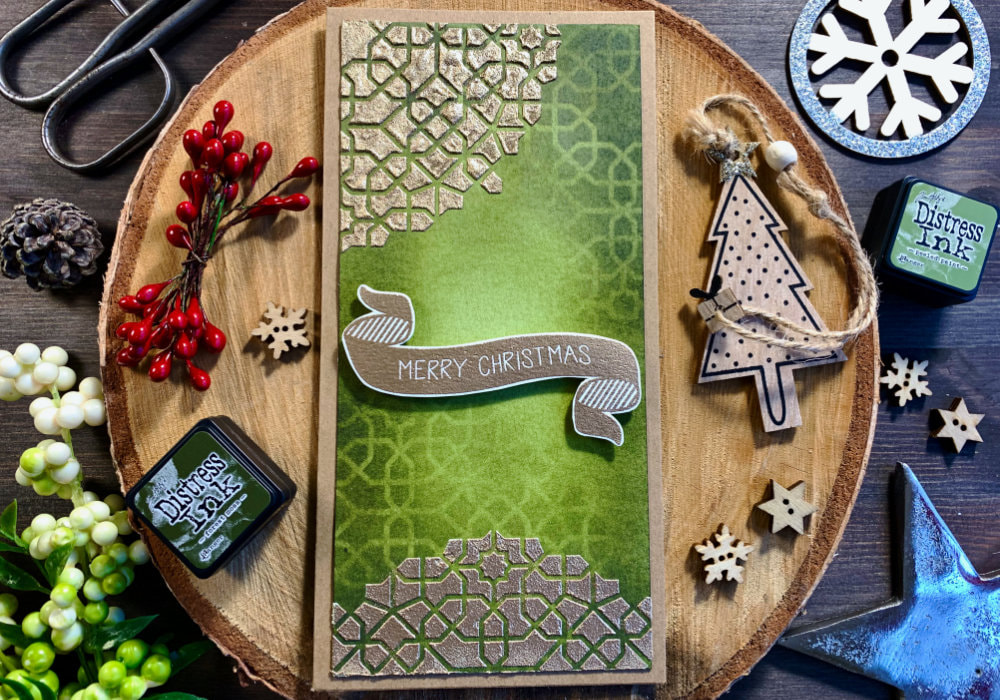 I already shared that I love to create different backgrounds using Distress inks. Another thing I enjoy is using a stencil. Not just with Distress inks, but also with embossing paste and especially for Christmas I like to also add embossing powder. This is not the first time I made such a card, you can see one here and the other here. That means I should be quite experienced about using all the products, right? Well, yes and no. I managed to make a mistake, however it didn’t ruined the card and I learned something new at the same time. But let’s not get ahead of ourselves. I decided to make a long or slim line card and I cut my card stock accordingly. For the blending I like to use the Canson XL watercolour paper, but you can use any card stock that you like to use for ink blending. The negative of the Canson XL is that it’s not bright white and I always need to apply multiple layers of inks. The Distress inks I used are Forest Moss and Peeled Paint, which are the main inks, but I also used Chipped Sapphire and Bundled Sage. The stencil is from MFT, it has a mandala pattern, the embossing paste is from Altenew and the embossing powder is the Metallic Brass from Wow.  I wanted to create a tone on tone blending, that’s why I started with the blending of my first layer. I used only the Forest Moss and Peeled Paint and I was blending the inks from outside in, along the edges, creating sort of an oval shape as I wanted the middle of the panel to be lighter. Next I put the stencil on top of the panel, at the bottom corner and brought in the Chipped Sapphire, which is a blue ink. Originally I only used the green shades, but then I watched a video by Kristina Werner and she used a blue ink when blending green inks. I thought I will try it out, but you can leave it out if you don’t have this ink. Then I applied the Forest Moss and Peeled Paint. The Bundled Sage I will use at the end, this is just for the middle part. Once I was happy with the application I flipped the panel and put the stencil on the opposite corner and blended the same way. For this layer, I was applying the ink only inside of the stencil. 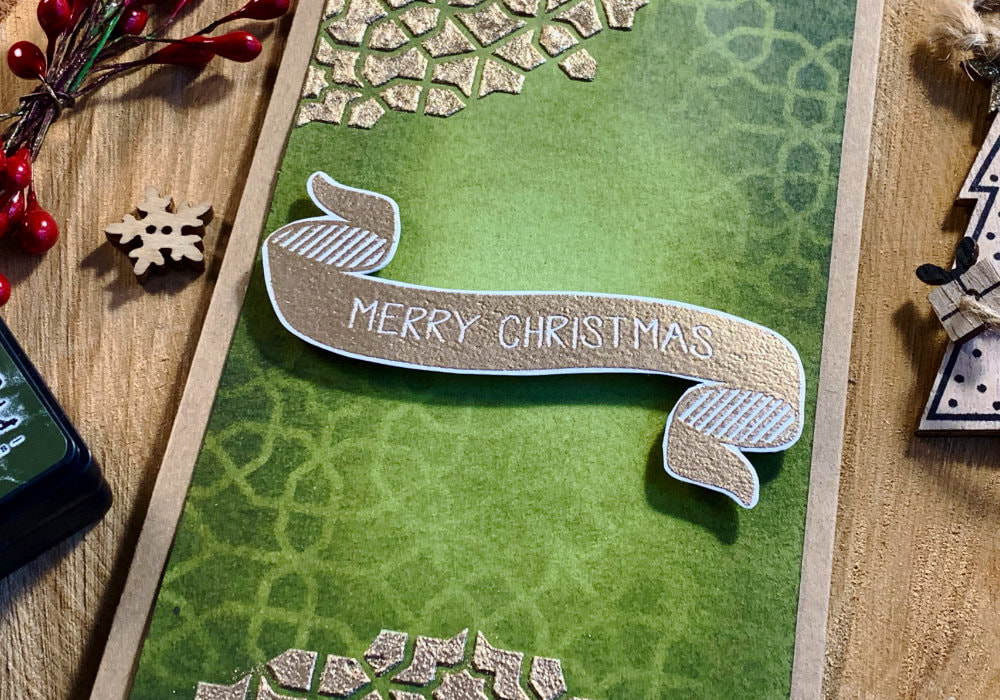 Next I removed the stencil, the stencil created a very nice tone on tone look. You can leave as it is and just add a sentiment, but I wanted the stencil pattern to blend in a little bit more, looking more faded. Therefore I applied another layer of inks going over the stencil pattern. I repeated the same process, I started with the blue and then the darkest, middle and finishing with the lightest green. Once I was happy with the blending, it was time to use the stencil again, this time with the embossing paste. I placed the stencil at the top of the green panel, secured it with a tape and using my palette knife, I applied the embossing paste. I removed the stencil and sprinkled the embossing powder over it. And… here I made a mistake! I didn’t wait for the Distress ink to fully dry and the embossing powder was sticking everywhere. What a rookie mistake! However instead of throwing the panel to the bin, I let it dry overnight. 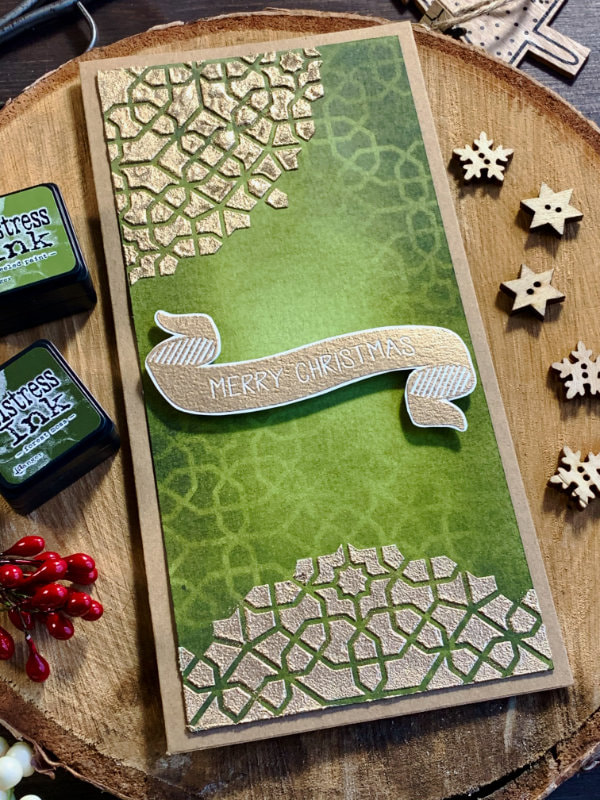 I came back next morning and was able to sweep away the powder that was in the gaps of the patter using a brush. The powder that was on the embossing paste stayed attached. Next I used my heat gun and melted the powder and my project was saved! I wanted the stencil pattern with the embossing paste and powder to be at the top corner of the green panel as well, so I repeated the process. Since the background was fully dry, the embossing powder was only sticking to the paste and I didn’t need to wait for the paste to dry. I was able to melt the powder right away. What I discovered here is that the texture of the embossing is different depending on whether you heat emboss right away or you wait for the paste to dry and then heat emboss. 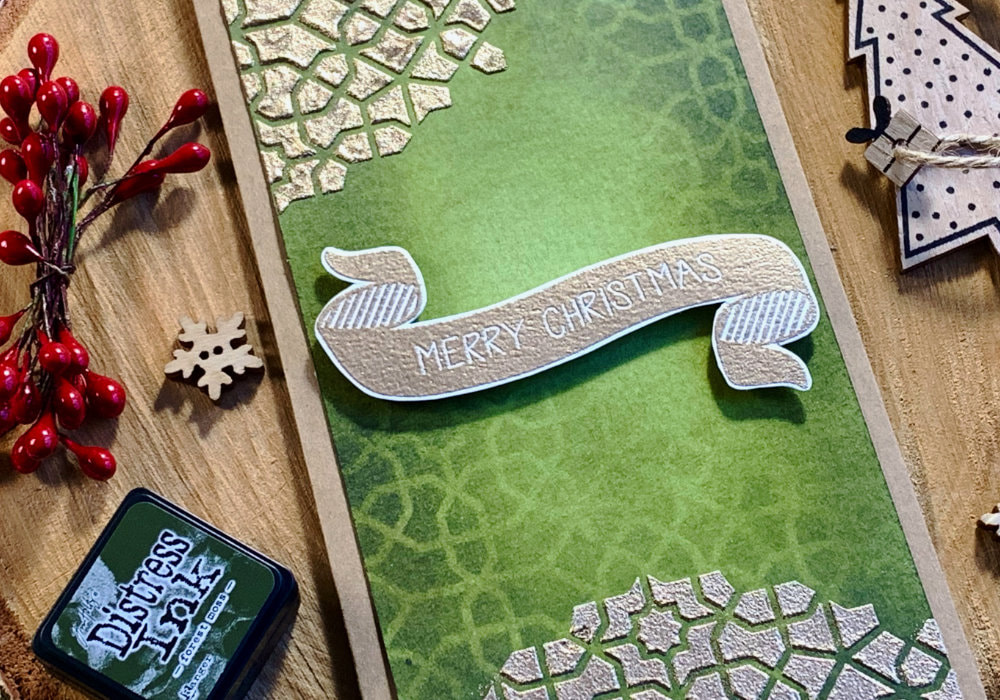 When you wait the texture is smooth, but when you heat emboss immediately, the texture is - not really rough - but uneven. This is because, if the embossing paste is not dry and you heat emboss it, it starts bubbling and keeps that texture. This is something I didn’t know, I’m not really sure which method is the correct one, I always heat embossed right away and I prefer the uneven texture. That’s all for the background, now all it needed is a greeting. I would have loved to use a die-cut sentiment, but I still don’t have my die-cutting machine with me, so I used a stamp. Originally I was going to stamp and heat emboss directly onto the panel, but even thought I liked it, it looked too dark. Luckily I fished out a stamp set that has banners and I stamped and heat embossed a greeting that says Merry Christmas. I used the same embossing powder for all the heat embossing. 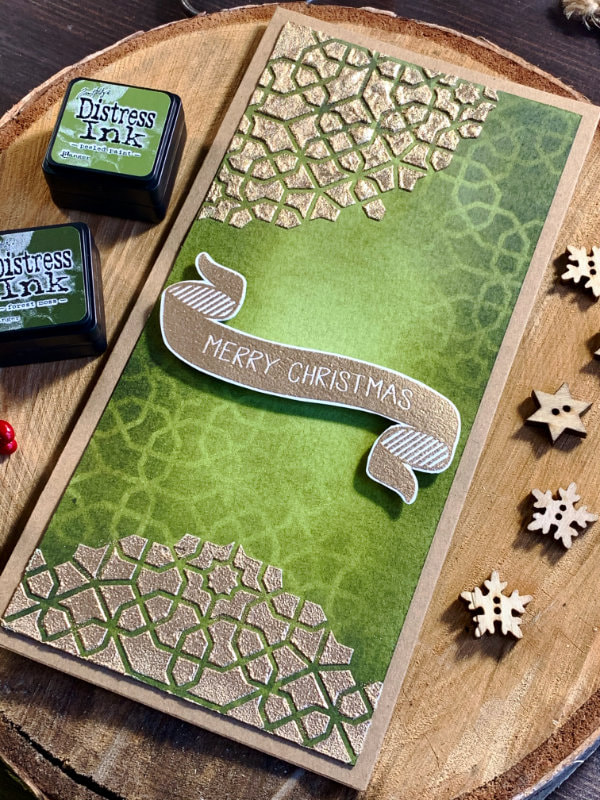 After I cut the banner using scissors, I adhered it on top of the panel using a double-sided foam tape and then I adhered the whole piece on top of a card base. I hope you will try making this card yourself. Make sure you check out my video on YouTube and give it a Like as well. The list of product is down below, where you can also find a few blog posts that I think you might enjoy. And if you have any questions, just drop me a line. VIDEO TUTORIALWatch the video below or on my YouTube Channel. PRODUCTS USEDDisclaimer: I’m currently not using any affiliate links. These links are just to help you find the products. The list includes alternatives to what I was using and while I haven't used some of them, I only recommend brands I trust. Canson XL, Watercolour Cardstock , 300gsm/140lb AmazonDE | AmazonUK Tim Holtz Distress Mini Ink, Kit 12 (Chipped Sapphire) danipeussDE | CraftStashUK Tim Holtz Distress Mini Ink, Kit 9 (Forest Moss) danipeussDE | CraftStashUK Tim Holtz Distress Mini Ink, Kit 5 (Peeled Paint) DaniPeussDE | CraftStashUK Tim Holtz Distress Mini Ink, Kit 10 (Bundled Sage) danipeussDE | CraftStashUK Blending Tool (My one is a make up brush from a discount store) Palette Knife (I bought my in a craft store) Tape (Post-It, Washi or Painters tape) Moroccan Mosaic Stencil SevenHillsCraftsUK Altenew, Embossing Paste SevenHillsCraftsUK Papermania, Tall/Slim Card Base + Envelopes AmazonDE | AmazonUK Sellotape Double Sided Tape AmazonDE | AmazonUK Dovecraft, Foam Squares AmazonDE | AmazonUK Fiscars, Guillotine A5 AmazonDE | AmazonUK Crafting Mat, Black AmazonDE | AmazonUK YOU MIGHT ALSO LIKE  PIN MEDid you like the card? I would love, if you pinned it to your board on Pinterest! 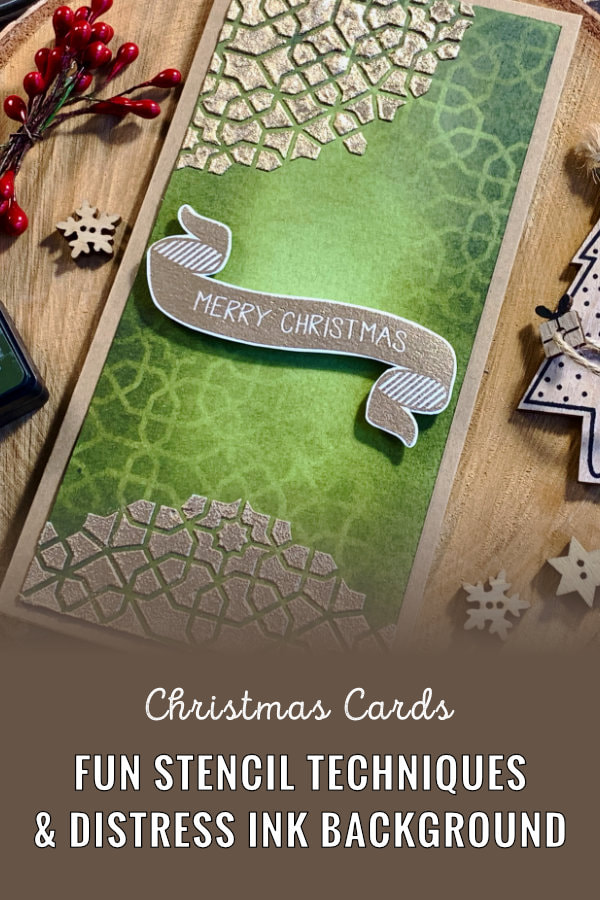
0 Comments
Leave a Reply. |
FOLLOW ME
SEE MORE


CATEGORIES
All
Stamping Die Cutting Using Stencil Heat Embossing Embossing or Texture Paste Distress Inks Nuvo Products Stamping & Colouring Stamping With Solid Stamps Watercolouring Watercolour Pencils Waterbased Markers Pencil Colouring Alcohol Markers Altenew Markers Zig Brush Markers Easy Backgrounds Stamped Backgrounds Small Stamp Ideas Simple Cards Complex Cards Cardmaking For Beginners All
Painting With Acrylics Painting With Gouache Painting With Watercolours Drawing With Fineliner Minimal Supplies Cards Christmas & Holiday
Love & Valentine Mother's Day Father's Day Halloween Spring Cards Summer Cards Autumn/Fall Cards Winter Cards Cards For Children Cards For Women Cards For Men Thank You Cards Sympathy Cards Get Well Soon Cards Floral & Leav Cards Rainbow Colours Messy Watercolouring Modern Art Inspirations Geometric Patterns Landscape Painting Acrylics
Gouache Watercolours Watercolour Pencils Waterbased Markers Distress Inks Alcohol Markers Colouring Pencils No Stamps No Dies Cards
Cardmaking On A Budget Let’s Colour Quick Cards Fun Masculine Cards Background Ideas Distress Ink Combinations |
 RSS Feed
