
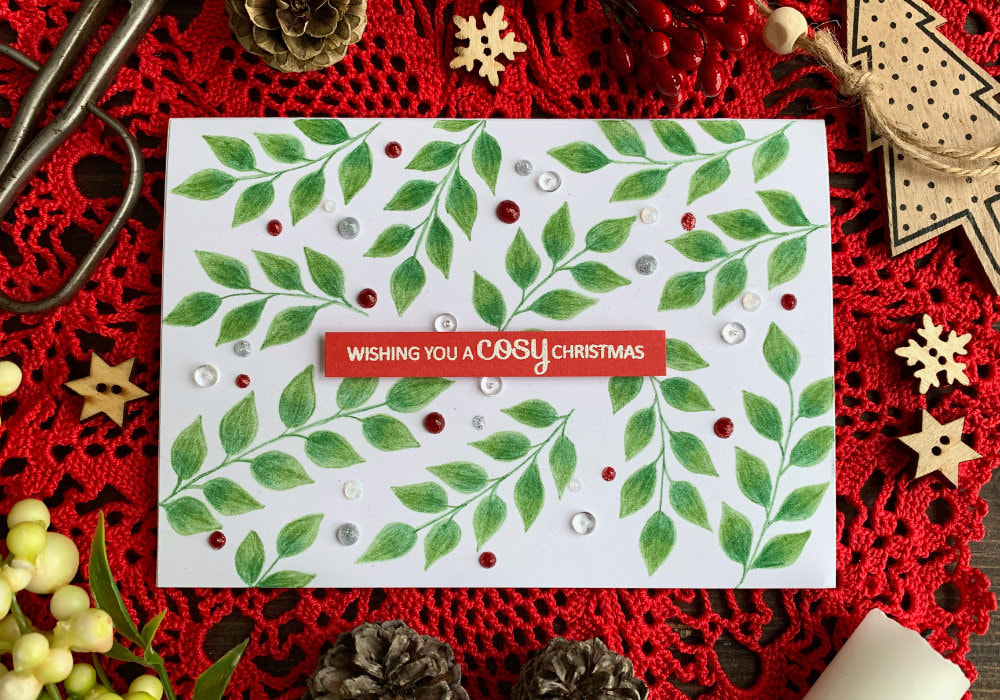
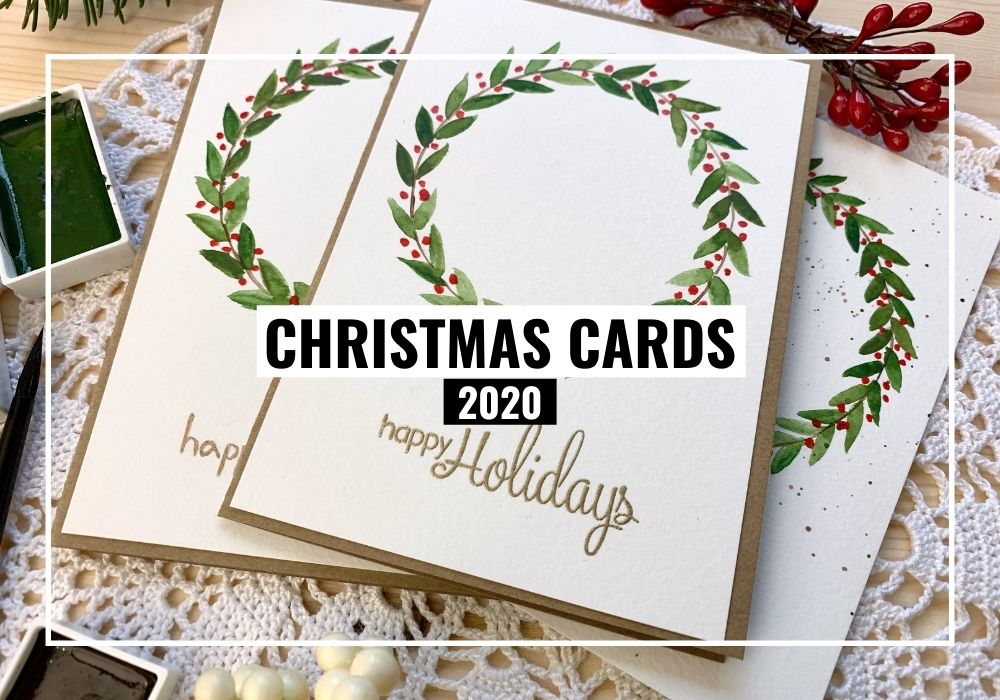
 When I was planning what I could make for my Christmas cards, I knew that I didn’t want to do a wreath. I made one last year, you can see it here and recently I made a card with a wreath for my autumnal, this card you can see here. However, I really wanted to make something with leaves and I decided to create a simple leaf background. Normally I would use watercolours, but I wanted to use colouring pencils for a while and I thought this is a great time to do so. Even though this background is very simple, if you are in a need of a quick card, this is not such a card. It took me a while to draw all the images, but at the same time I had a lot of fun. 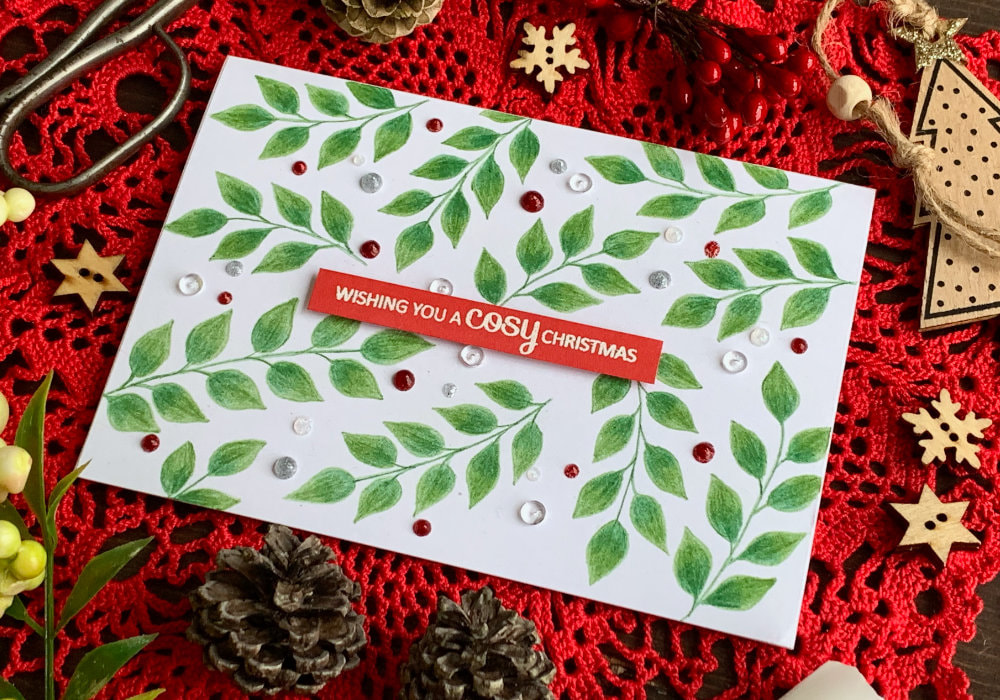 The pencils I’m using are the Prismas from Premier, but you can use whatever pencils you have. Actually the main reason why I used these pencils is because originally I wanted to use golden colour on a black background and this set has a golden pencil, you can see a photo of the card below. I thought that it would be quite difficult to film, therefore I used simple, traditional colours and coloured the leafs in green. I used two shades of green PC908 and PC911, but you can use only one shade as well. As the card is very simple, I thought using two shades would make it little bit more interesting. For the drawing I used the Canson Bristol card stock, I really like to use it when pencil colouring. This time I didn’t trim it, I wanted the panel to be exactly the same size as the card base. Normally I use panels that are smaller than the card base. You can draw directly onto the card base, or use the Birstol card stock as your card base. There are a few reasons why I don’t like doing that, for example when you mess up, you have to throw away the whole card base and that would be a waste of paper. 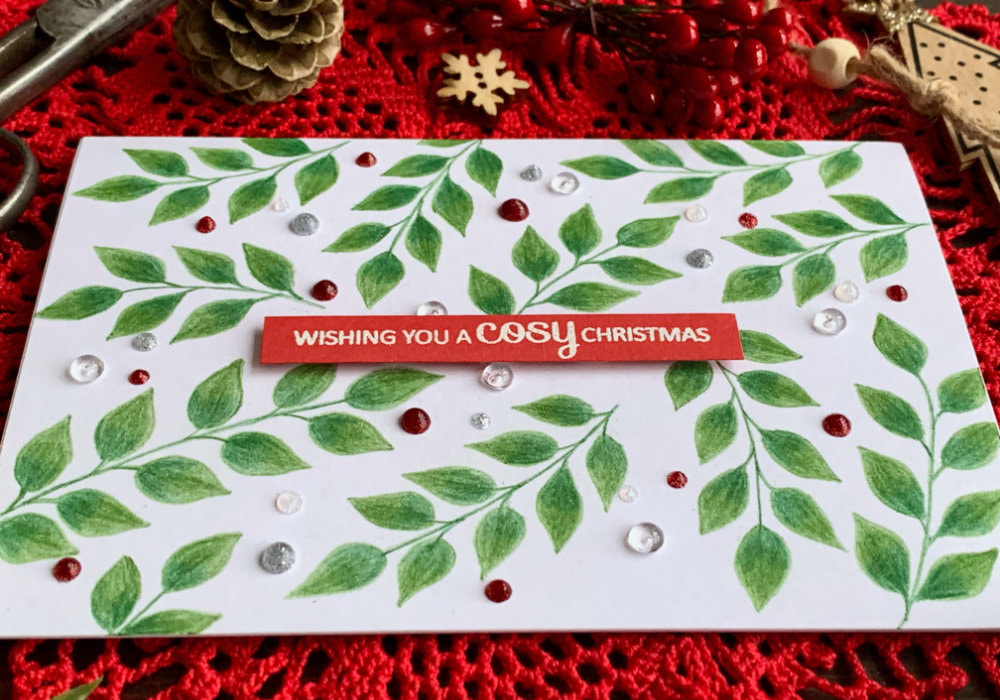 To decorate the card I used Nuvo Glitter Drops in red, silver and clear. I also used some clear drops that I adhered onto the panel. And for the sentiment I heat embossed a greeting in white on a red card stock and I cut it into a banner. Drawing the leaves is very simple. I started with a slightly curved line to draw the stem. I used the darker pencil for that and I also used it for the short stems connected to the leaves. After I drew the line I drew the top leaf. I started with the outline using the lighter pencil and then I coloured it in. The darker pencil I used at the bottom of the leaf and the lighter one at the top. I also use the lighter shade to blend the colours together. Next I drew the leafs on the sides. I began with the stem, I started on the main stem and then I drew a curve. Next I switched the pencil and created the outline of the leaf. I put the leaves slightly above each other. What I mean, the left leaf was slightly higher than the right one or the other way. Also when drawing the stems and the outlines, it’s good to have a sharp pencil. This is why for some of the brunches I drew first all the outlines of the leaves and then I coloured them in. Just to make it easier. 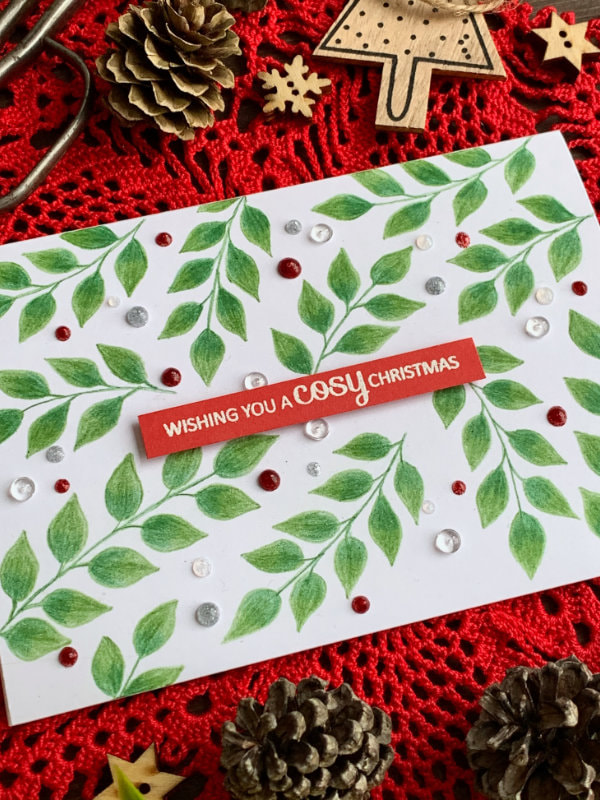 The shape of the leaf is sort of a rain drop, pointy at the top and round at the bottom. You could also create a shape that is round at the top and pointy at the bottom. As for the size of the leaf, I was trying not to draw them too small, which is something that usually happens to me. This was for a very simple reason, I didn’t want it to take forever. However, if you are unsure about the drawing and the size of the leaf. It’s good idea to start drawing the leaf smaller and then fill it with the colour and adjust it to your likings. I was placing the brunches randomly. I didn’t have any kind of a template. I also spaced the brushes little bit further apart, which is another thing I often do, I cramp everything together. Here I wanted to have some white space and I also will be filling it up with the embellishments. After I finished drawing all the leafs, I adhered the red banner with the greeting. I attached it in the middle of the panel using double-sided foam squares. 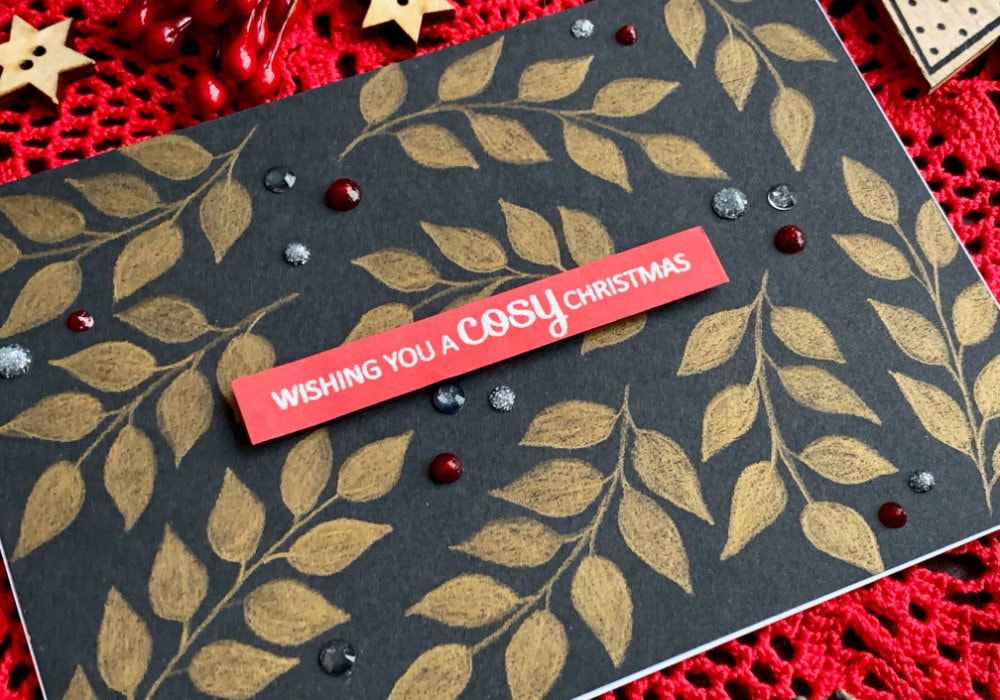 It would not be leaf Christmas card if there would not be red berries. You could draw them with a red pencil, but I have Nuvo Drops and that’s what I used. I applied them in clusters of mostly threes, in different sizes and colours. The colours I picked are red, silver and clear. These are the glitter drops, those have glitter in them. I also adhered a few clear drops, for which I used a liquid glue. I let it dry and the card is finished! I hope you will try making this card yourself. Make sure you check out my video on YouTube and give it a Like as well. The list of product is down below, where you can also find a few blog posts that I think you might enjoy. And if you have any questions, just drop me a line. VIDEO TUTORIALWatch the video below or on my YouTube Channel. PRODUCTS USEDDisclaimer: I’m currently not using any affiliate links. These links are just to help you find the products. The list includes alternatives to what I was using and while I haven't used some of them, I only recommend brands I trust. Sanford Prismacolor Premier Colored Pencils, Pack of 72 AmazonDE | AmazonUK papermilldirect, Red Plain Card 290gsm papermilldirectUK Stampendous, Embossing Powder, White AmazonDE | AmazonUK Stamp with a greeting Pretty Pink Posh, Clear Droplets 4mm Ranger, Multi Medium Matte Adhesive AmazonDE | AmazonUK Tonic Studios, Nuvo Glitter Drops - Ruby Slippers StempelmeerDE | CraftStashUK Tonic Studios, Nuvo Glitter Drops - Silver Moondust StempelmeerDE | CraftStashUK Tonic Studios, Nuvo Glitter Drops - White Blizzard StempelmeerDE | CraftStashUK Color Copy , White Paper, A4 300gsm/140lb (card base) AmazonDE | AmazonUK Papermania, A6 Card Bases + Envelopes, White AmazonDE | AmazonUK Dovecraft, Foam Squares AmazonDE | AmazonUK Sellotape Double Sided Tape AmazonDE | AmazonUK Fiscars, Guillotine A5 AmazonDE | AmazonUK Crafting Mat, Black AmazonDE | AmazonUK MORE CHRISTMAS CARDSPIN MEDid you like the card? I would love, if you pinned it to your board on Pinterest! 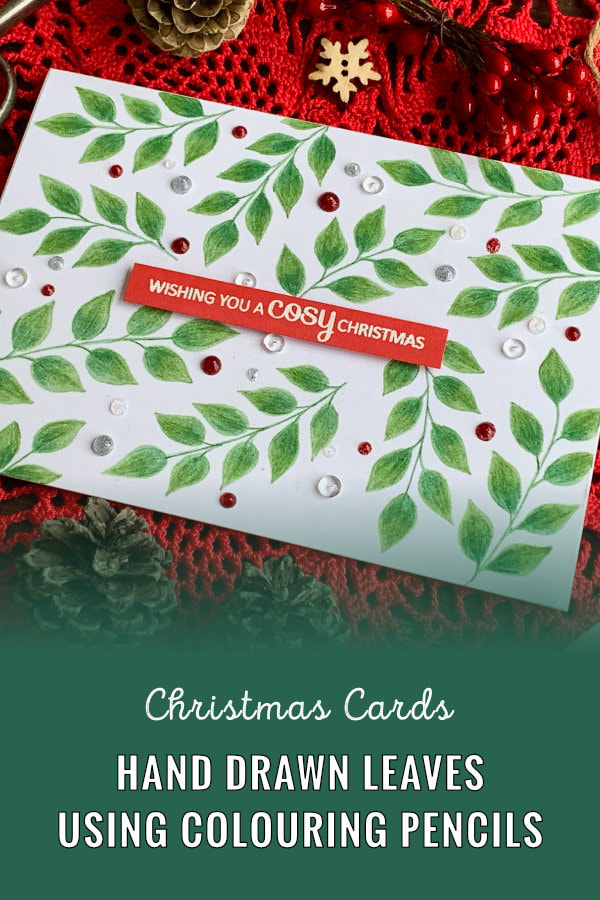
0 Comments
Leave a Reply. |
FOLLOW ME
SEE MORE


CATEGORIES
All
Stamping Die Cutting Using Stencil Heat Embossing Embossing or Texture Paste Distress Inks Nuvo Products Stamping & Colouring Stamping With Solid Stamps Watercolouring Watercolour Pencils Waterbased Markers Pencil Colouring Alcohol Markers Altenew Markers Zig Brush Markers Easy Backgrounds Stamped Backgrounds Small Stamp Ideas Simple Cards Complex Cards Cardmaking For Beginners All
Painting With Acrylics Painting With Gouache Painting With Watercolours Drawing With Fineliner Minimal Supplies Cards Christmas & Holiday
Love & Valentine Mother's Day Father's Day Halloween Spring Cards Summer Cards Autumn/Fall Cards Winter Cards Cards For Children Cards For Women Cards For Men Thank You Cards Sympathy Cards Get Well Soon Cards Floral & Leav Cards Rainbow Colours Messy Watercolouring Modern Art Inspirations Geometric Patterns Landscape Painting Acrylics
Gouache Watercolours Watercolour Pencils Waterbased Markers Distress Inks Alcohol Markers Colouring Pencils No Stamps No Dies Cards
Cardmaking On A Budget Let’s Colour Quick Cards Fun Masculine Cards Background Ideas Distress Ink Combinations |

 RSS Feed
