
Paint Simple Loose Poinsettias With Metallic Watercolours | CHRISTMAS CARDS 2023 - #5 + VIDEO1/12/2023  One evening when I finished filming and started tiding up I noticed my metallic watercolours. When I bought these paints I planned to use them for Christmas cards, but then I forgot about them and didn't have any plans using them, as I had all my Christmas cards planned out. However I still wanted to try them out, especially the red and the green and I wanted to see how they look like on a white card stock. I decided to paint a background with very loose, simple poinsettias and I liked the end card so much, that I decided to change up my plans and film this card. You don't need metallic watercolours to paint the background. I also used normal watercolours and cannot decide which background I like more. The metallic watercolours were just my initial idea. 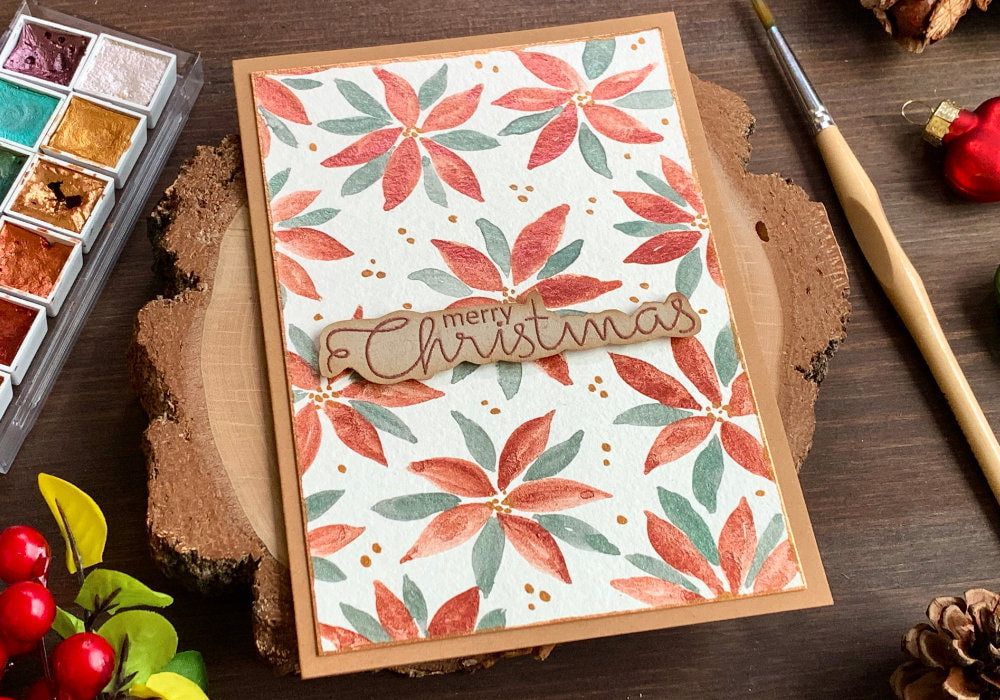 And to be honest, what I actually liked the most is how I painted the poinsettias and the overall look. Just simple leaves, nothing detailed. The metallic watercolours I used were very cheap and are nothing special, but they did the job. I would have liked if the red and the green were more vibrant, but I still like the look. Nothing to complain about. I used here a normal white watercolour card stock, but these paints look great on a black card stock, I would even say they are more vibrant on a black card stock. So if you can, try using a black watercolour paper. 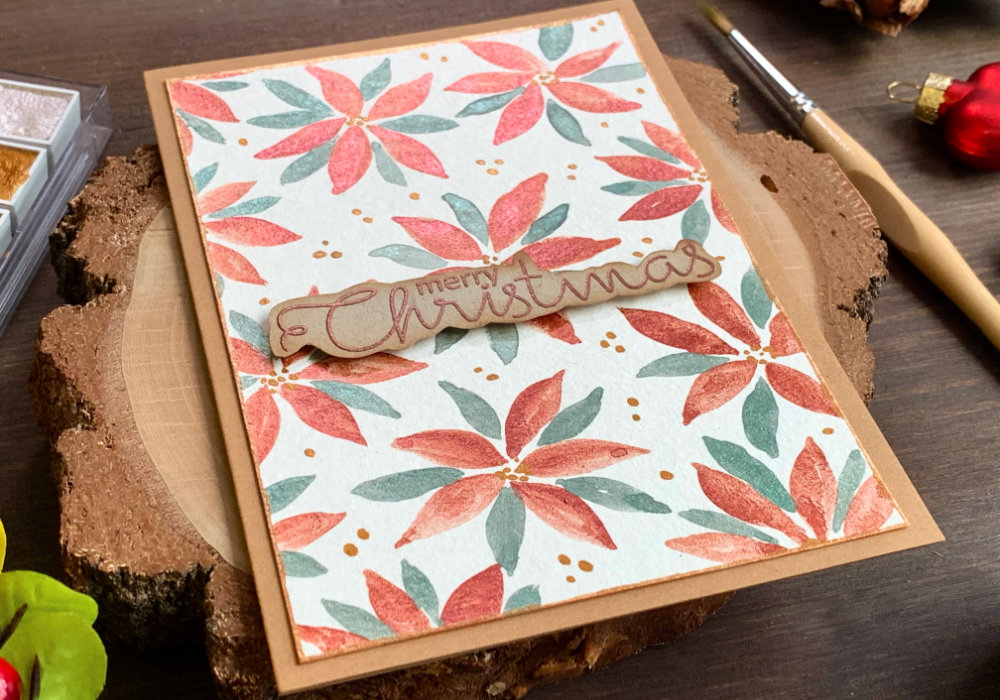 The idea for the poinsettias was to paint very simple leaves. You should be able to paint those with one or two strokes. For me it doesn't work every time, so I had to use multiple strokes. However the good thing is that once you paint a few of the leaves it gets match quicker, even if it takes you a little while to get the shape of the leaf. Therefore this card would be great to recreate in bulk. If you would like to make more than one card, perhaps painting on a bigger sheet of paper and cutting it down would be a better option. As I was painting the leaves, I found it very helpful to move the card stock. This way I was able to create a nice shape, which looked like a star, although I noticed that as I was editing the video. It wasn't my plan to create a star. And I was also keeping the center unpainted and symmetric, which was really hard. 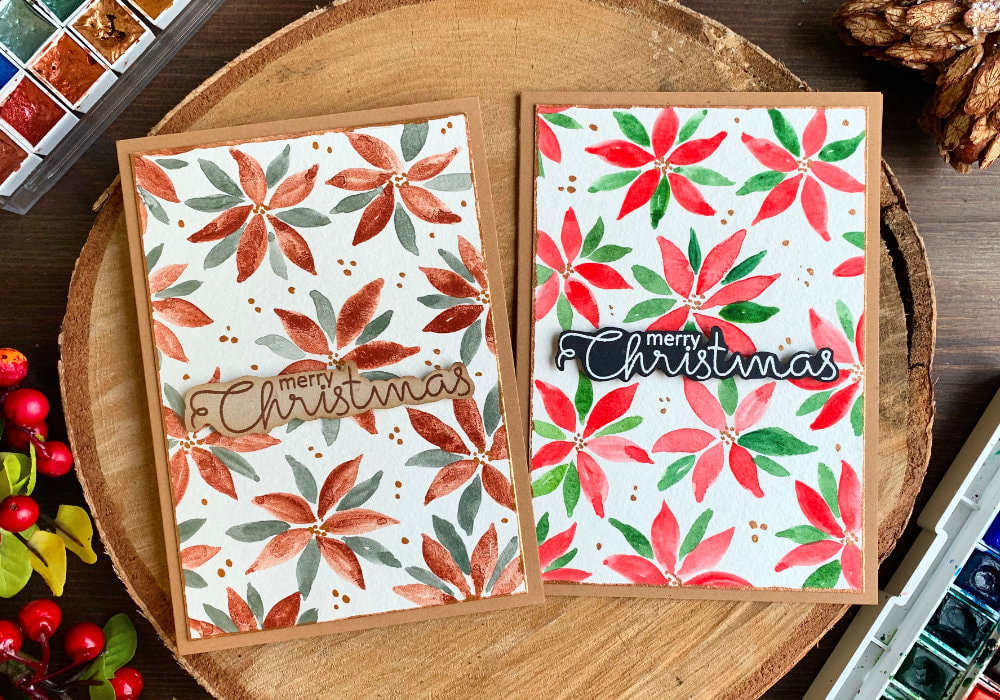 I filled the background with the red leaves first. Even though most of the leaves were dry already, I let it sit for a few minutes to make sure everything is dry. And then I painted the green leaves in between. I mostly painted the green leaves between each of the red leaves, but at some places I painted fewer leaves and at some places I was able to squeeze two leaves next to each other. The green leaves were more like filler pieces and I was able to paint them even quicker. Next I used the gold paint and the tip of a smaller brush I painted dots in the middle of each flower. After I finished with the background with the flowers I used the gold paint again and I painted clusters of dots between the flowers. This step is completely optional, I just wanted to fill the spaces between the flowers. Especially if you manage to space out the flowers in a way there are weird white spaces between them, this step is quite helpful. 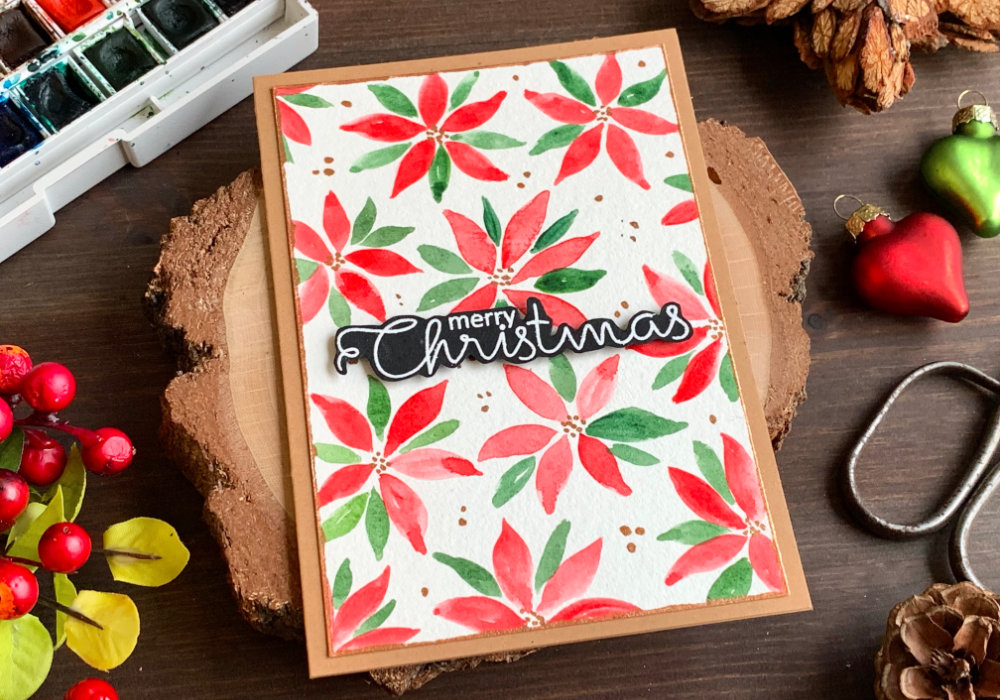 I used the gold paint one more time and painted the edges of the watercolour panel to crate a frame. This is also optional. For the greeting I used a stamp. If you don't have stamps you can write it yourself. You could create a banner or write it directly on top of the watercolour card stock, but in that case I would recommend doing it before you start painting, so the greeting is visible and fits. I used a stamp that says Merry Christmas and I stamped it on a craft card stock. I decided to heat emboss it using a metallic copper embossing powder, which I thought matches the background perfectly. For the card where I used normal watercolour paints I used a black card stock and a white embossing powder. 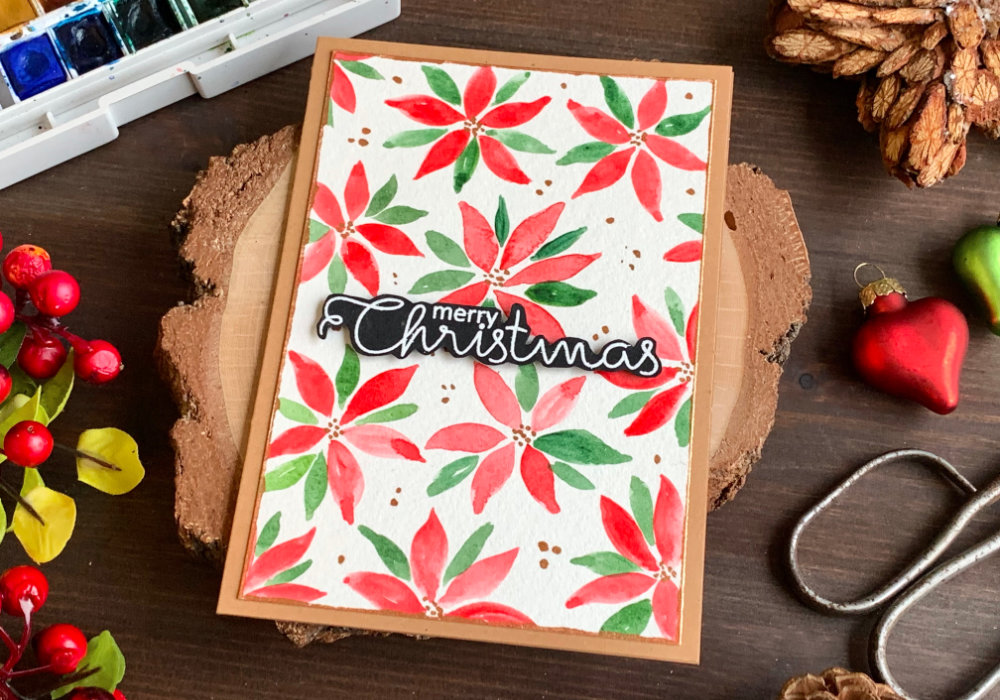 The greeting is quite big and cutting it into a banner would take too much space on the card, therefore I fussy-cut the greeting with my scissors. I also used the Vintage Photo Distress ink and blended the ink along the edges of the greeting. I think this just makes it more interesting, but you can skip this step with the ink. Lastly I adhered the panel on top of a card base made out of a craft card stock. I used a liquid glue to adhere it. And the greeting I attached in the middle of the panel using a foam tape. I hope you will try making this card yourself, as I said you can also use normal watercolours, both versions of this card are very pretty. Not to mention that you can use other colours, not just red. Make sure you check out my video on YouTube and give it a Like as well. The list of product is down below, where you can also find a few blog posts that I think you might enjoy. And if you have any questions, just drop me a line. VIDEO TUTORIALWatch the video below or on my YouTube Channel. PRODUCTS USEDCLICK HERE TO SEE TO THE LIST OF PRODUCTS
Urstory1 (Dededepraise), Metallic/Pearlescent Watercolor Paint Set 12
AmazonDE | AmazonUK | AmazonSE Winsor & Newton, Cotman Watercolor Palette AmazonDE | AmazonUK Winsor & Newton Cotman Watercolour Paint, Hookers Green Dark AmazonDE | AmazonUK Canson XL, Watercolour Cardstock , 300gsm/140lb AmazonDE | AmazonUK Blue Squid Brush Set AmazonDE | AmazonUK Tsukineko Versamark Watermark Ink Pad AmazonDE | AmazonUK WOW! Embossing Powder, Metallic Copper AmazonDE | AmazonUK Tim Holtz Distress Mini Ink, Kit 3 (Vintage Photo) danipeussDE | CraftStashUK Joy Crafts, Kraft Paper,A4 300gsm/140lb (card base) KreativbuntDE | AmazonUK Absofine, A4 Recycled Kraft Paper 320gsm (card base) AmazonDE | AmazonUK UHU, Liquid Glue AmazonDE | AmazonUK Ranger, Multi Medium Matte Adhesive AmazonDE | AmazonUK Fiscars, Guillotine A5 AmazonDE | AmazonUK Tonic Studios, Guillotine A4 AmazonDE | AmazonUK EK Success, Scissors AmazonDE | AmazonUK My Sweet Petunia, Mini MISTI Stamping Tool StempelmühleDE | BumbleberrysUK Papermania, Stamp Block AmazonDE | AmazonUK Crafting Mat, Black AmazonDE | AmazonUK Disclaimer: I do not work with any company. All products in this blog post were purchased by me. While I use many products that help me to create my cards, my cards in this blog post are meant to be inspiration for you. I do not promote any company. You can use any other products that you have or can afford. YOU MIGHT ALSO LIKEPIN MEDid you like the card? I would love, if you pinned it to your board on Pinterest! 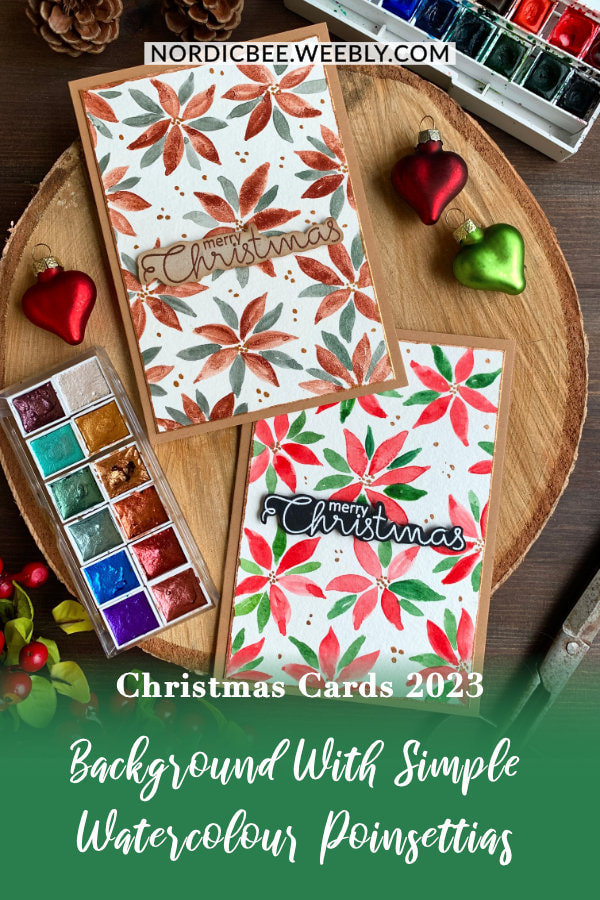
0 Comments
Leave a Reply. |
FOLLOW ME
SEE MORE


CATEGORIES
All
Stamping Die Cutting Using Stencil Heat Embossing Embossing or Texture Paste Distress Inks Nuvo Products Stamping & Colouring Stamping With Solid Stamps Watercolouring Watercolour Pencils Waterbased Markers Pencil Colouring Alcohol Markers Altenew Markers Zig Brush Markers Easy Backgrounds Stamped Backgrounds Small Stamp Ideas Simple Cards Complex Cards Cardmaking For Beginners All
Painting With Acrylics Painting With Gouache Painting With Watercolours Drawing With Fineliner Minimal Supplies Cards Christmas & Holiday
Love & Valentine Mother's Day Father's Day Halloween Spring Cards Summer Cards Autumn/Fall Cards Winter Cards Cards For Children Cards For Women Cards For Men Thank You Cards Sympathy Cards Get Well Soon Cards Floral & Leav Cards Rainbow Colours Messy Watercolouring Modern Art Inspirations Geometric Patterns Landscape Painting Acrylics
Gouache Watercolours Watercolour Pencils Waterbased Markers Distress Inks Alcohol Markers Colouring Pencils No Stamps No Dies Cards
Cardmaking On A Budget Let’s Colour Quick Cards Fun Masculine Cards Background Ideas Distress Ink Combinations |
 RSS Feed
