
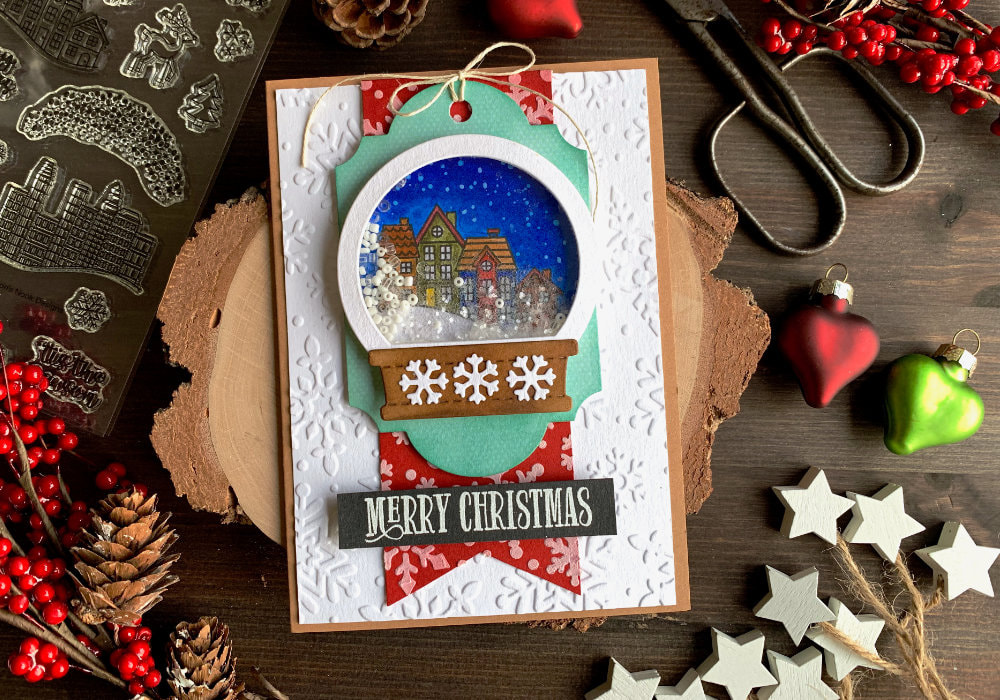
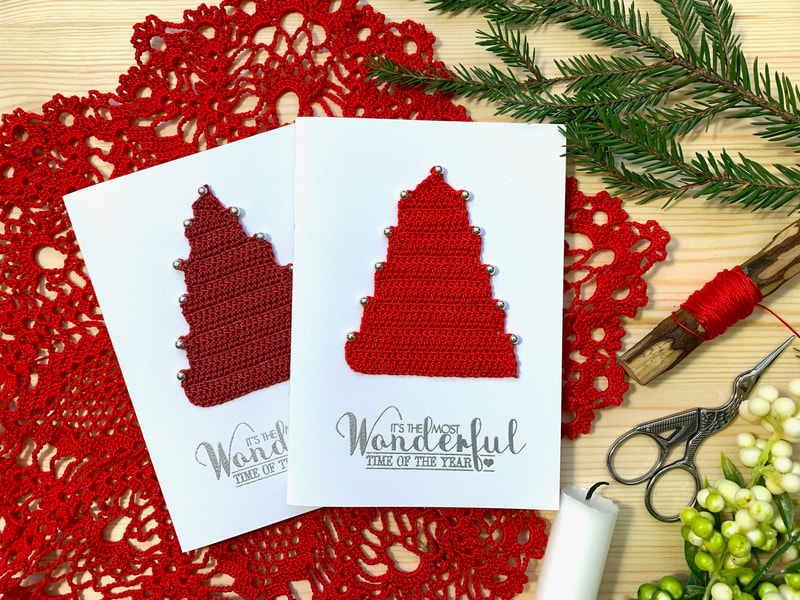
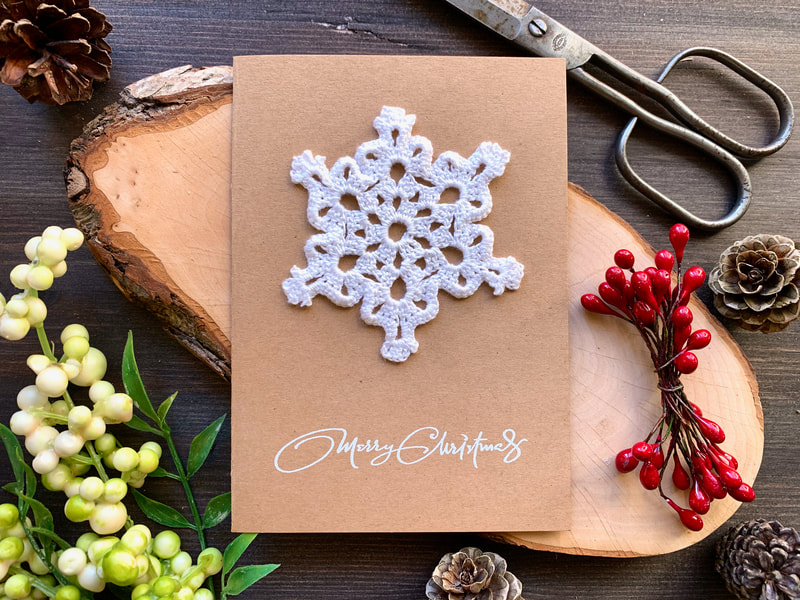
 The time to make Christmas cards is finally here! In the past two years, for my first card I've been making cards that are a little bit more time consuming. For those cards I crochet a Christmas tree and a snow flake, which I adhered onto the card base. I was thinking about doing crochet again this year, but it's the same idea and I'm not sure how many are really interested in such cards. Therefore, I decided to create a shaker card that has many components and requires more time to make. This card is based on a card that I made a few years ago on my old blog, way before I had a YouTube channel and you can see that card here. I really liked the card and I thought it would be a great card idea to start with. I'm not re-creating the exact card, some of the products I don't have anymore and I'm using a different stamp set.  As I mentioned this card has a lot of components, which are (from top till card base, not in order as I made it):
 SHAKER ELEMENT Here I started by stamping the image. The stamp set is from Newton’s Nook Designs called Snow Globe Scenes and I also have the coordinating dies. The stamp set has multiple images and I used the row of houses, which is my favourite. I stamped it onto a Bristol card stock using a black ink and then I coloured it. For the colouring I used waterbased markers, a mix of Zig Brush and Sakura Koi markers. First I coloured the houses, which was the most difficult part of this card. It is so small and the spaces between the houses are so tiny, I felt really blind. I had to put my glasses on just not to go outside of the lines, which happened on my trial card. And I managed to save it, but covering it with white liquid pearls from Ranger. 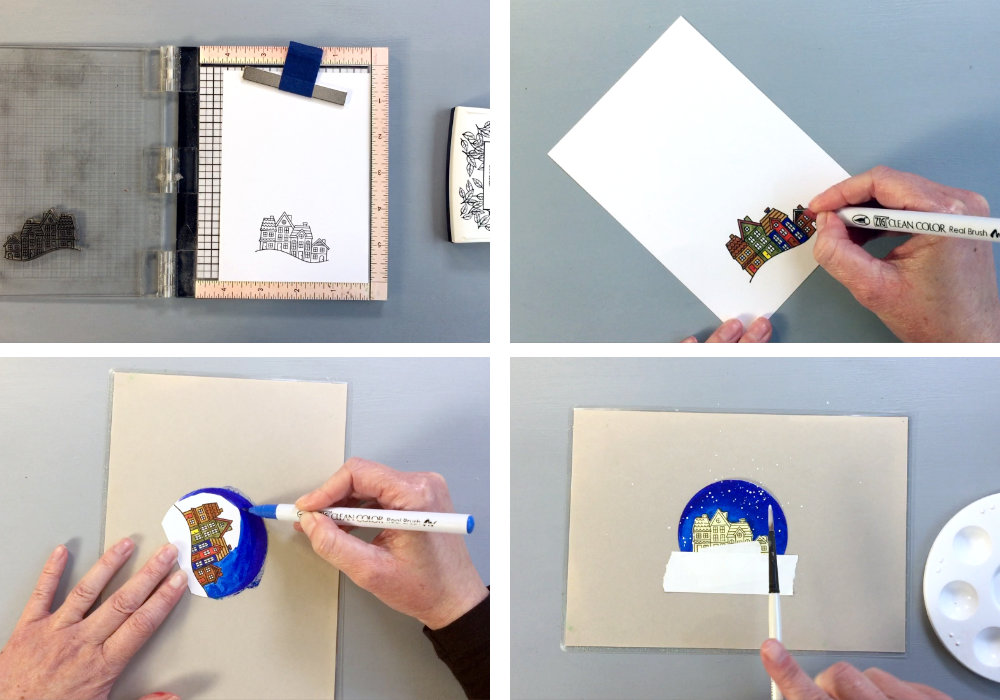 Next I coloured the sky using two mid-tone blue markers. I was hoping they will be light enough so I can stamp the silhouette of the Santa, but it was still too dark. Plus I realized the Santa would not fit there anyway, as the biggest house of the stamped image is on the same side as the Santa sleigh. The Santa would have to go downwards if I were to stamp it. After the sky was dry I used a white gouache mixed with water and I splattered the sky to create snow or stars (it can be either or). Not to get any paint on the houses I stamped the image on a scrap paper, cut it out and put it over the coloured image. Once the piece was dry I used the coordinating die to die cut the back of the snow globe and I also die-cut the frame and the stand of the snow globe as well as the acetate to keep the shaker pieces inside. 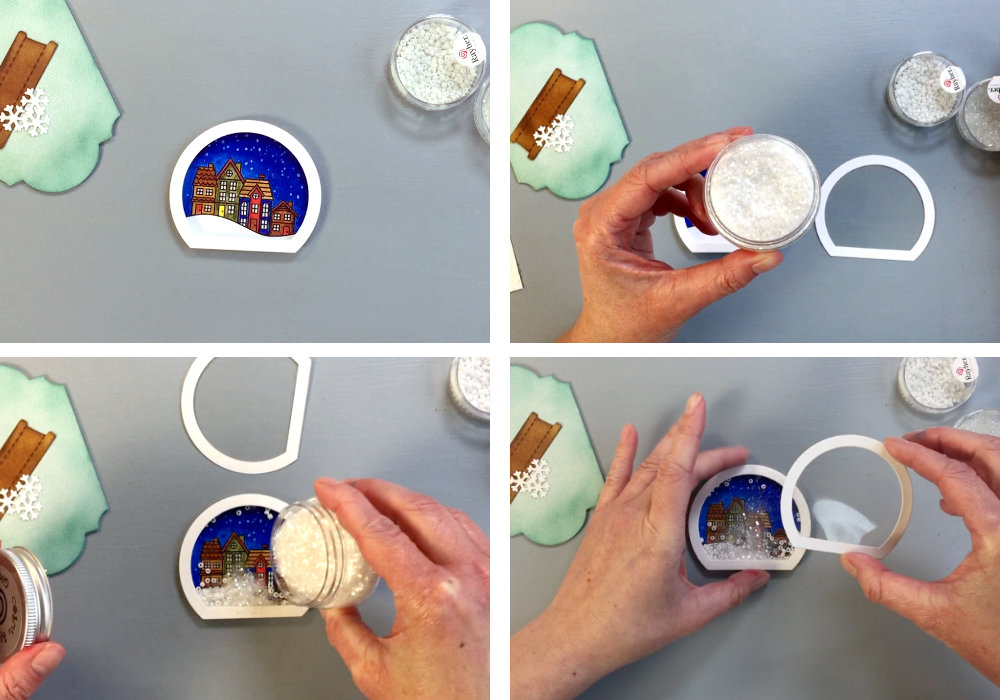 Tip adhering the shaker: While adhering the parts of the saker I accidentally found a less messy way to do this. I began by adhering two rows of a double sided foam tape on the back of the frame and then I adhered the frame on the background piece with the houses. Here was the mistake, I should have adhered the acetate first, however this was very helpful. I die-cut a second frame onto which I adhered the acetate. I filled the background piece with the shaker pieces - here I used Cosmic Shimmer (Iced Snow) and white and clear beads. And as I already had the foam tape attached, it prevented the beads and the shimmer rolling off the panel. After I filled the shaker I adhered the frame with the acetate. All without creating a mess! Next below the snow globe I adhered what would be the wooden stand. As I didn't have a brown card stock I used brown Distress inks to add colour to the piece. Also on top of it I adhered three snowflakes that I die cut using one of the dies that are part of the coordinating die-set. 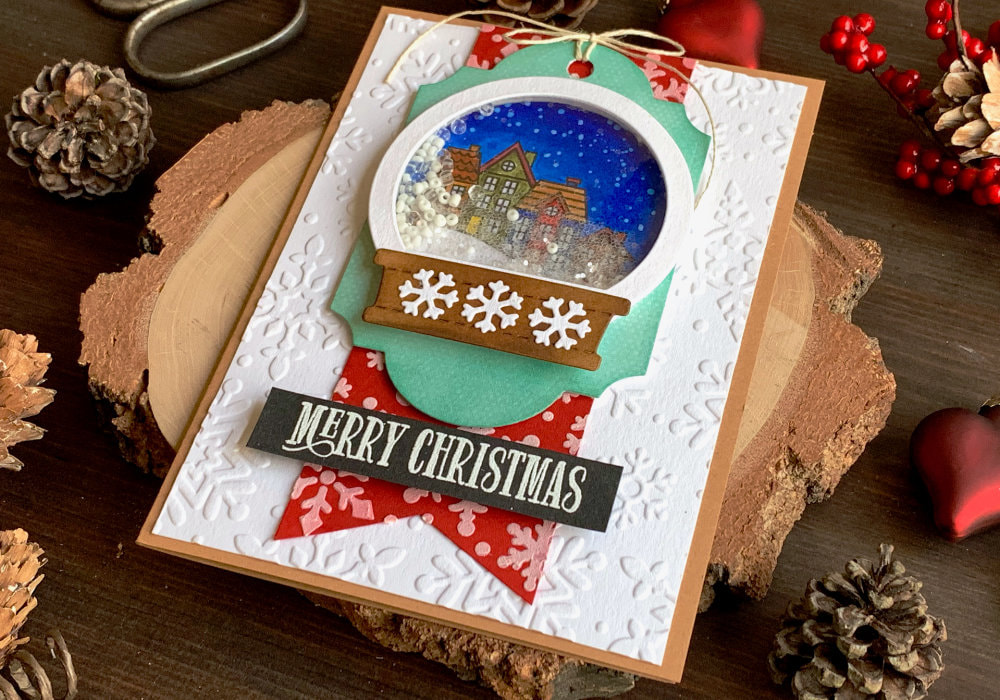 GREETING For the greeting I used the words Merry Christmas from another stamp set. I wanted the sentiment to be in one row and this greeting fit the best. I stamped it and heat embossed in white onto a black card stock and cut it into a banner. GREEN DIE-CUT PANEL This panel I die cut using the Nestabilities Label dies from Spellbinders, you can completely skip this step, or use different die. To be honest, I don't really know why I bought this die. The card stock I used is a green or mint pattern paper with tiny dots from an old pattern paper pad. After I die-cut the panel I used a green Distress ink (Evergreen Bough) and with my blending brush I applied the ink along the edges. You can skip it, this is something I like to do as it makes the card stock more interesting. 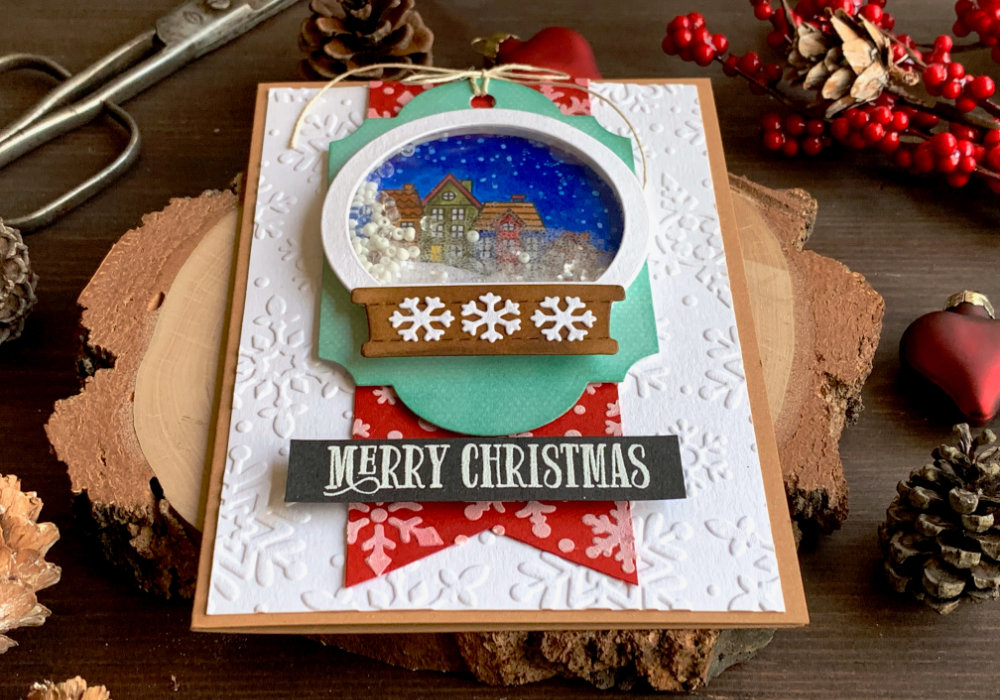 Next I used a hole punch and punched a hole at the top of the panel. Here I attached a bakers twine and tied a bow. The way I normally attach the twine and make the bow is: I fold the twine in half, I put it through the hole and then I put the two loose ends of the twine through the loop on the other side and tighten it up. I finish it up with tying a bow and trim the ends if they are too long. RED BANNER WITH SNOWFLAKES I started with a red banner. On my original card I used a red pattern paper with white snowflakes, which you can use, if you have it. Unfortunately I don't have that pattern paper anymore and I don't even have anything similar. What I decided to do is to use a red card stock, a stencil with snowflakes and an embossing paste. First I cut a strip of red card stock five centimetre wide and I cut a fish tale at the bottom. The banner was as high as the card base, I could have just shorten it using a paper trimmer, I decided to create a fold which I will then tack behind a panel. 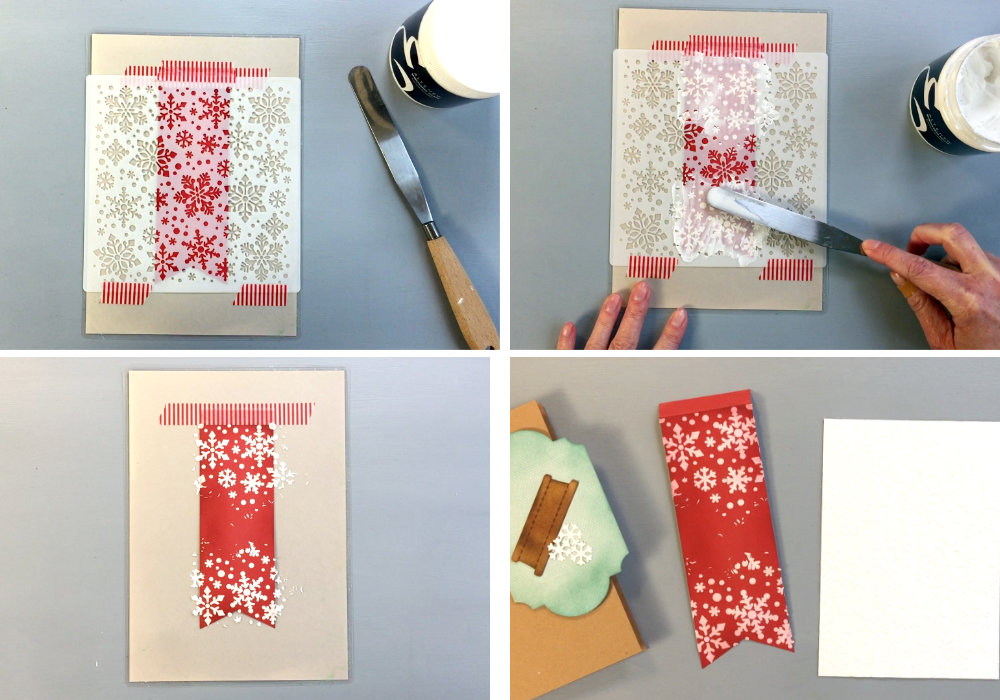 Next I use the Fired Brick Distress ink and just like on the green panel I apply the colour along the edges. If you use Distress inks as well, make sure you wait for the ink to dry, before you apply the paste as they can mix. After that I placed a stencil with snowflakes over the red banner and secured it with a washi tape. Then I took the embossing paste and spread the paste across the top and bottom of the banner using a palette knife. As the middle will be covered up I didn't need to apply the paste over the whole banner. I put it aside and let it dry. WHTE EMBOSSED PANEL For the last part of the card I embossed a white piece of card stock. I used a different card stock then I used for the colouring. That card stock I used also for the other shaker elements. I just didn't want to waste the Bristol card stock, if I could use something different. I picked an embossing folder with snowflakes and run it through my die-cutting machine. I also trimmed the panel a little bit, so it's a few millimetre shorter than the card base. 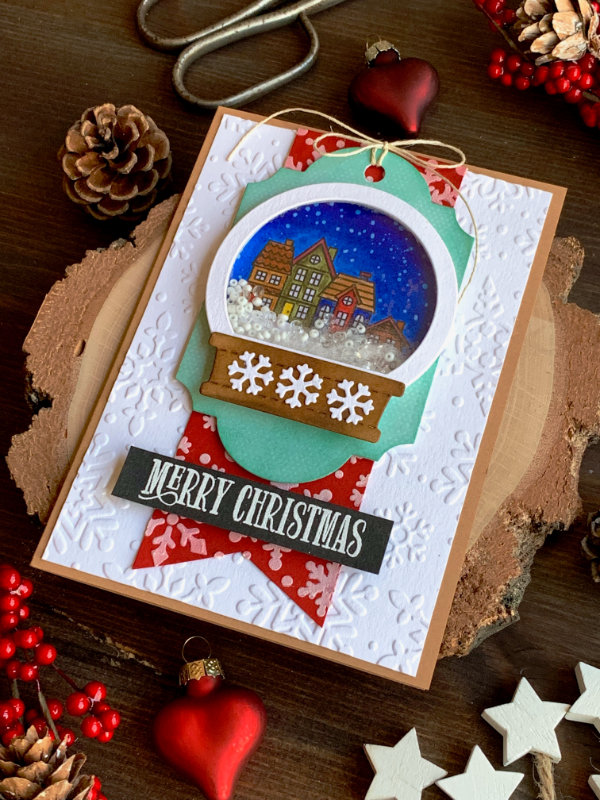 ASSEMBLING THE CARD Finally I arrived at the point when I assemble the card. I first adhered the red banner on top of the white embossed panel, where I tacked the top of the banner behind the panel. For both I used a normal double-sided tape. Then I adhered the panel on top of the card base, witch I made out of a craft card stock. The green panel I adhered on top of the red banner using a foam tape and on top of that I attached the snow globe. For the top of the snow globe I used double-sided tape and for the stand I used two layers of a foam tape to even out the hight. Lastly below the snow globe I adhered the greeting, for which I used foam squares. I hope you will try making this card yourself. Make sure you check out my video on YouTube and give it a Like as well. The list of product is down below, where you can also find a few blog posts that I think you might enjoy. And if you have any questions, just drop me a line. VIDEO TUTORIALWatch the video below or on my YouTube Channel. PRODUCTS USEDCLICK HERE TO SEE TO THE LIST OF PRODUCTS
Newton's Nook Designs, Snow Globe Scenes
NewtonsNookDesigns Newton's Nook Designs, Snow Globe Shaker Die Set NewtonsNookDesigns Spellbinders, Nestabilities Die - Labels 28 Taylored Expressions, Winter Flurry Canson Bristol Card Stock 250gsm AmazonDE | AmazonUK papermilldirect, White Card Plain 250gsm papermilldirectUK papermilldirect, Red Plain Card 290gsm papermilldirectUK papermilldirect, Black Card Plain 240gsm papermilldirectUK Kuretake, ZIG Clean Color Real Brush Markers AmazonDE | AmazonUK Sakura, Koi Water Based Brush Markers IdeeDE | GreatartUK Altenew, Embossing Paste StempeloaseDE | SevenHillsCrafts Tsukineko, Versafine Ink pad, Onyx Black AmazonDE | AmazonUK Tsukineko Versamark Watermark Ink Pad AmazonDE | AmazonUK Stampendous, Embossing Powder, White AmazonDE | AmazonUK Docrafts Papermania, Heat Tool AmazonDE | AmazonUK EK Susccess, Anti-Static Powder Tool AmazonDE | AmazonUK Tim Holtz Distress Mini Ink, Kit 2 (Fired Brick) danipeussDE | CraftStashUK Tim Holtz Distress Mini Ink, Kit 3 (Walnut Stain) danipeussDE | CraftStashUK Tim Holtz Distress Mini Ink, Kit 4 (Evergreen Bough) danipeussDE | CraftStashUK Tim Holtz Distress Mini Ink, Kit 6 (Gathered Twigs) DaniPeussDE | CraftStashUK Cosmic Shimmer Glitter Jewels, Iced Snow Rico Design, Beads 2mm, Opaque White IdeeDE Rico Design, Beads 2mm, Clear IdeeDE Hemptique, Hemp Cord Twine, Natural HemptiqueUS Joy Crafts, Kraft Paper,A4 300gsm/140lb (card base) KreativbuntDE | AmazonUK Absofine, A4 Recycled Kraft Paper 320gsm (card base) AmazonDE | AmazonUK Papermania, A6 Card Bases + Envelopes, Craft AmazonDE | AmazonUK Sellotape Double Sided Tape AmazonDE | AmazonUK Dovecraft, Foam Squares AmazonDE | AmazonUK Stick It!, Double Sided Foam Tape AmazonDE | AmazonUK UHU, Liquid Glue AmazonDE | AmazonUK Fiscars, Guillotine A5 AmazonDE | AmazonUK Tonic Studios, Guillotine A4 AmazonDE | AmazonUK EK Success, Scissors AmazonDE | AmazonUK My Sweet Petunia, Mini MISTI Stamping Tool StempelmühleDE | BumbleberrysUK Papermania, Stamp Block AmazonDE | AmazonUK Crafting Mat, Black AmazonDE | AmazonUK Sizzix Big Shot Die Cutting Machine AmazonDE | AmazonUK Disclaimer: Here you can find the products I used to make this card. Please note that the products are just a guide, you don't need the exact products or brands. For most of the products I include links to the shops where you can purchase these items if available. As I live in Europe, I provide links to UK and German stores. These are not affiliate links and every products I used for this card I purchased myself. YOU MIGHT ALSO LIKEPIN MEDid you like the card? I would love, if you pinned it to your board on Pinterest! 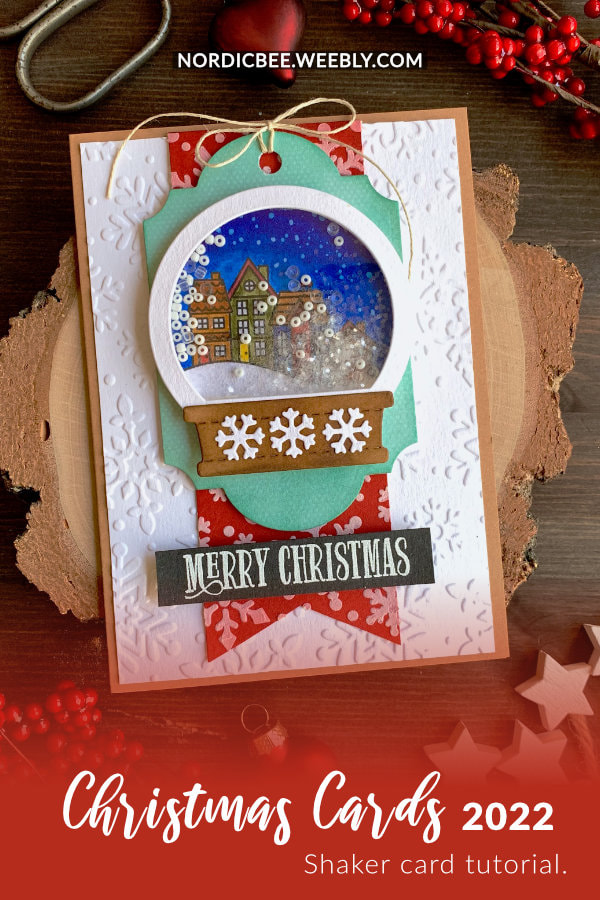
0 Comments
Leave a Reply. |
FOLLOW ME
SEE MORE


CATEGORIES
All
Stamping Die Cutting Using Stencil Heat Embossing Embossing or Texture Paste Distress Inks Nuvo Products Stamping & Colouring Stamping With Solid Stamps Watercolouring Watercolour Pencils Waterbased Markers Pencil Colouring Alcohol Markers Altenew Markers Zig Brush Markers Easy Backgrounds Stamped Backgrounds Small Stamp Ideas Simple Cards Complex Cards Cardmaking For Beginners All
Painting With Acrylics Painting With Gouache Painting With Watercolours Drawing With Fineliner Minimal Supplies Cards Christmas & Holiday
Love & Valentine Mother's Day Father's Day Halloween Spring Cards Summer Cards Autumn/Fall Cards Winter Cards Cards For Children Cards For Women Cards For Men Thank You Cards Sympathy Cards Get Well Soon Cards Floral & Leav Cards Rainbow Colours Messy Watercolouring Modern Art Inspirations Geometric Patterns Landscape Painting Acrylics
Gouache Watercolours Watercolour Pencils Waterbased Markers Distress Inks Alcohol Markers Colouring Pencils No Stamps No Dies Cards
Cardmaking On A Budget Let’s Colour Quick Cards Fun Masculine Cards Background Ideas Distress Ink Combinations |
 RSS Feed
