
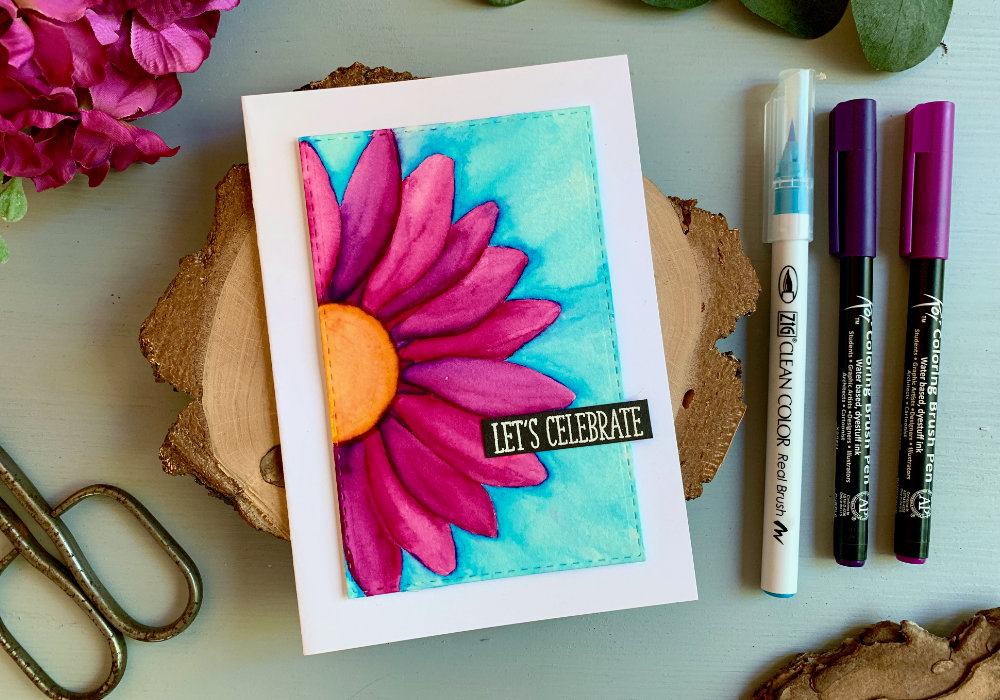
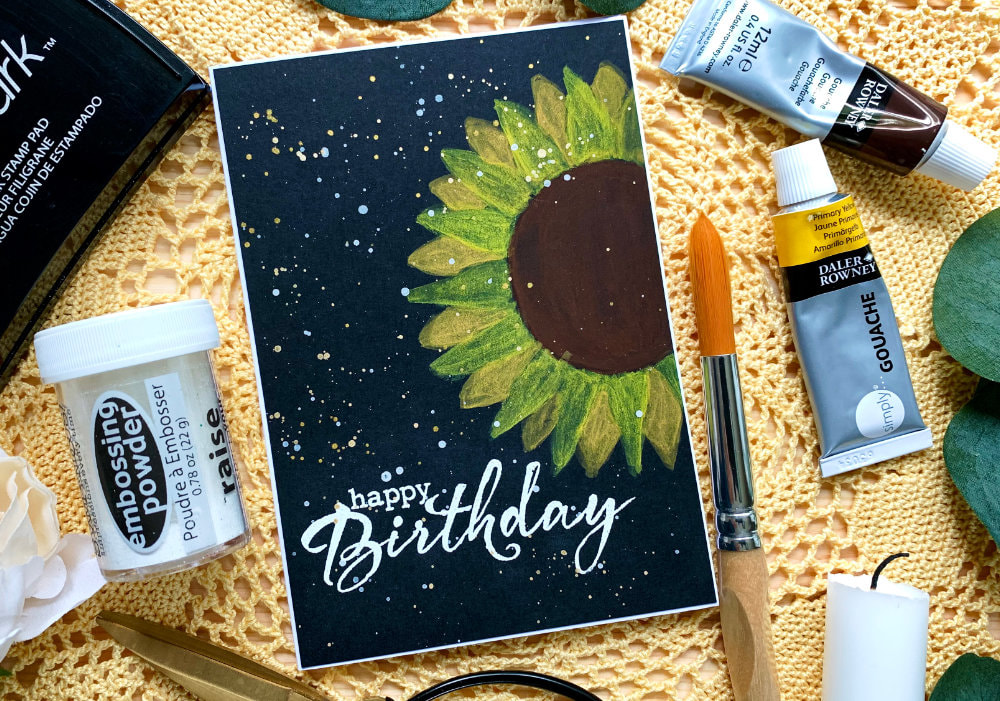
 I had a completely different post planned for today - a chatty video. However, yesterday I decided to postpone it, I just wasn't really happy with it. I'm not natural in front of camera and the video still needs a lot of work. So I needed a card and quickly! I came up with colouring a big bold daisy flower. I was inspired by a photo that I saw on Pinterest, I believe it's a wallpaper for mobile phones. It's just a photo of half of a flower. What I did not show in my video, is how I made the sketch. I found an outline image online, printed so it fits the size of my panel, scribbled the led of my pencil on the back, placed the paper with the image on top of my card stock and traced it onto it. I would have been able to draw it myself, but for that I would need more time. And I only needed a sketch, because I wanted to use waterbased markers. If I used normal watercolours I would do loose watercolouring. There are quite a few options that I have for the future. 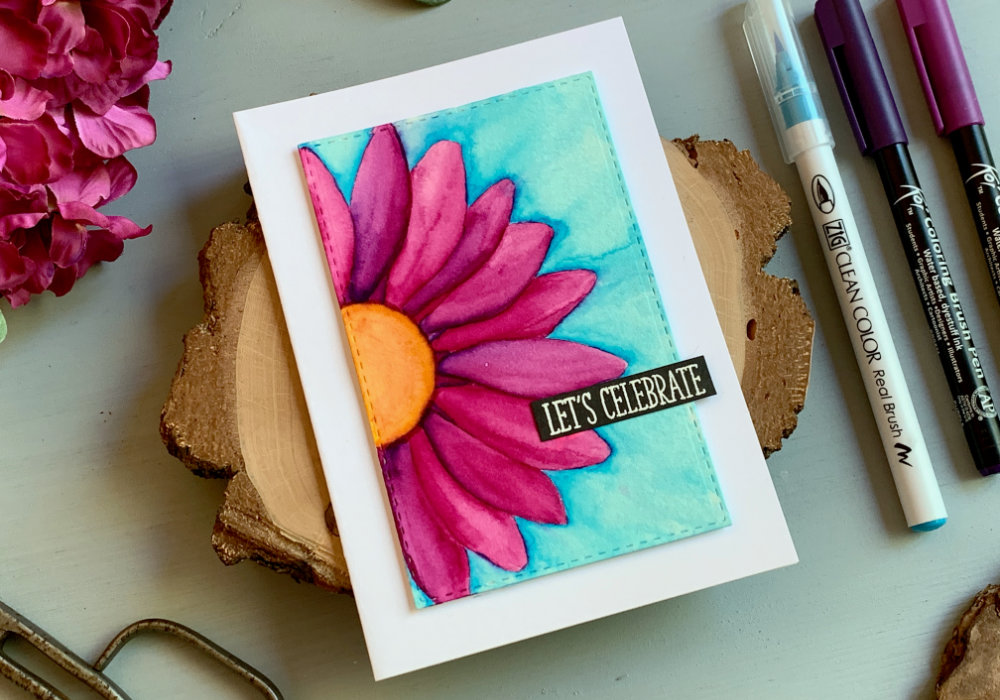 Before I transferred the flower onto the card stock I die-cut a panel using the stitched rectangular dies from Create A Smile, I used the second biggest die. I could have made it as big as the card base, but I wanted to do something different. The card stock I used is the Canson XL watercolour paper. At this stage I was ready to colour. I used two different brands of waterbased markers - Sakura Koi and Zigs. The reason I mixed brands is because I liked the colours. For the middle of the flower I used Koi - Deep Yellow and Zig - Deep Red. With the red I was attempting to create dots, but it didn't work, so I blended it together with the yellow and I think it looks good.  For the petals I used Koi - Bordeaux and Koi - Purple. I started with the Bordeaux and I applied the colour until about middle (lower middle) of each petal and then using my water-brush pen I brought the colour up. To avoid the ink mixing between petals, I first applied the marker on every other petal. Once I finished the half circle, the first petals were dry and I could apply the marker onto the other petals. I also wanted to make this a little bit more interesting, therefore I took the Purple marker and I applied just a bit, only to the bottom or sides of every other petal and using my water-brush pen I spread the colour across the whole petal. It created a very nice colour mixture. There were gabs between the petals, I decided to fill them up, even though there are no petals behind it. This is because I was going to colour the background and I didn't want to have blue in those spaces. And I actually mixed the Bordeaux and Purple together. 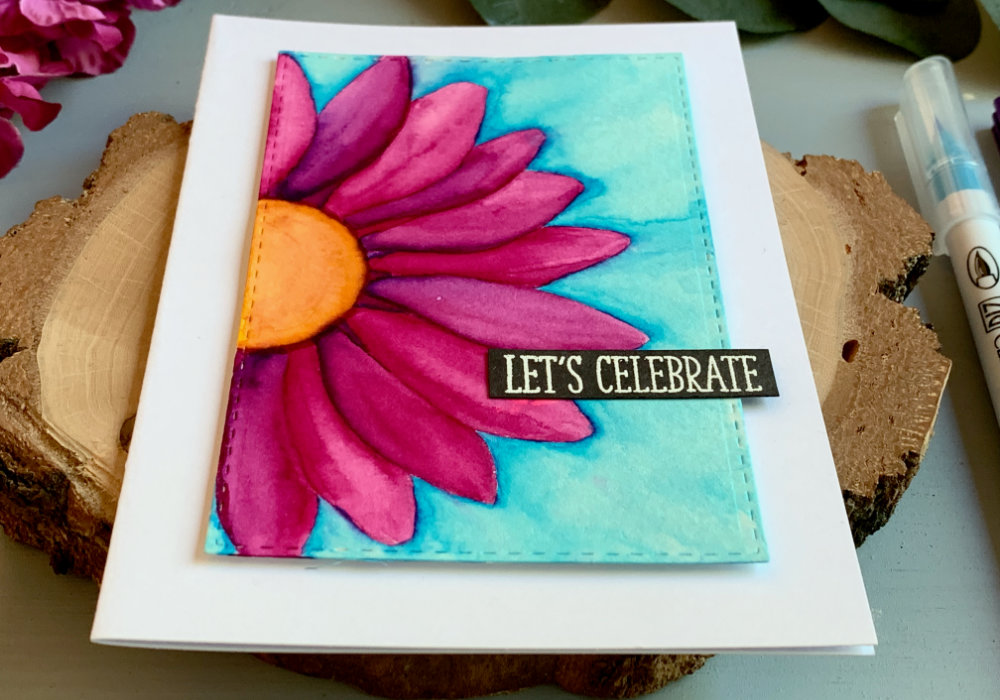 For the background I used Zig - Cobalt Blue. You do not have to do this. The image that I was inspired by, one of them had blue background and I really liked it. After trying out all the blues I have, this one really popped out. I applied the marker around the petals and then using the water-brush pen I spread the colour across the panel. After everything was dry I adhered the panel on top of a white card base, using a double-sided foam tape. For the greeting I used one of sentiments that I pre-made. It's a Let's Celebrate greeting that I heat embossed onto a black card stock and cut into a banner. I adhered the banner directly onto the pane using a liquid glue. I hope you will try making this card yourself. Make sure you check out my video on YouTube and give it a Like as well. The list of product is down below, where you can also find a few blog posts that I think you might enjoy. And if you have any questions, just drop me a line. VIDEO TUTORIALWatch the video below or on my YouTube Channel. YOU MIGHT ALSO LIKEPIN MEDid you like the card? I would love, if you pinned it to your board on Pinterest! 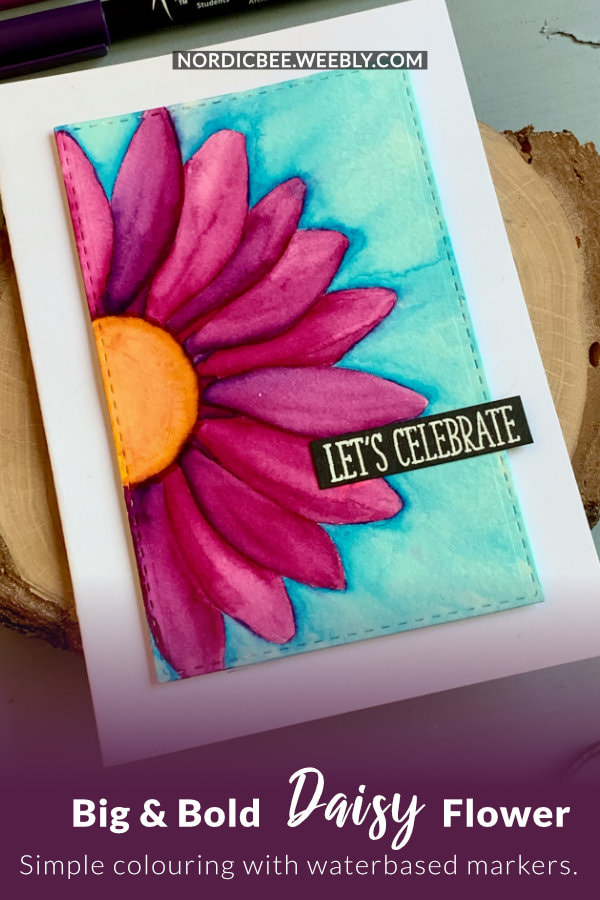
0 Comments
Leave a Reply. |
FOLLOW ME
SEE MORE


CATEGORIES
All
Stamping Die Cutting Using Stencil Heat Embossing Embossing or Texture Paste Distress Inks Nuvo Products Stamping & Colouring Stamping With Solid Stamps Watercolouring Watercolour Pencils Waterbased Markers Pencil Colouring Alcohol Markers Altenew Markers Zig Brush Markers Easy Backgrounds Stamped Backgrounds Small Stamp Ideas Simple Cards Complex Cards Cardmaking For Beginners All
Painting With Acrylics Painting With Gouache Painting With Watercolours Drawing With Fineliner Minimal Supplies Cards Christmas & Holiday
Love & Valentine Mother's Day Father's Day Halloween Spring Cards Summer Cards Autumn/Fall Cards Winter Cards Cards For Children Cards For Women Cards For Men Thank You Cards Sympathy Cards Get Well Soon Cards Floral & Leav Cards Rainbow Colours Messy Watercolouring Modern Art Inspirations Geometric Patterns Landscape Painting Acrylics
Gouache Watercolours Watercolour Pencils Waterbased Markers Distress Inks Alcohol Markers Colouring Pencils No Stamps No Dies Cards
Cardmaking On A Budget Let’s Colour Quick Cards Fun Masculine Cards Background Ideas Distress Ink Combinations |
 RSS Feed
