
Draw A Heart Shaped Wreath With Watercolour Pencils | DIY VALENTINE'S DAY & ANNIVERSARY CARD + VIDEO27/1/2023 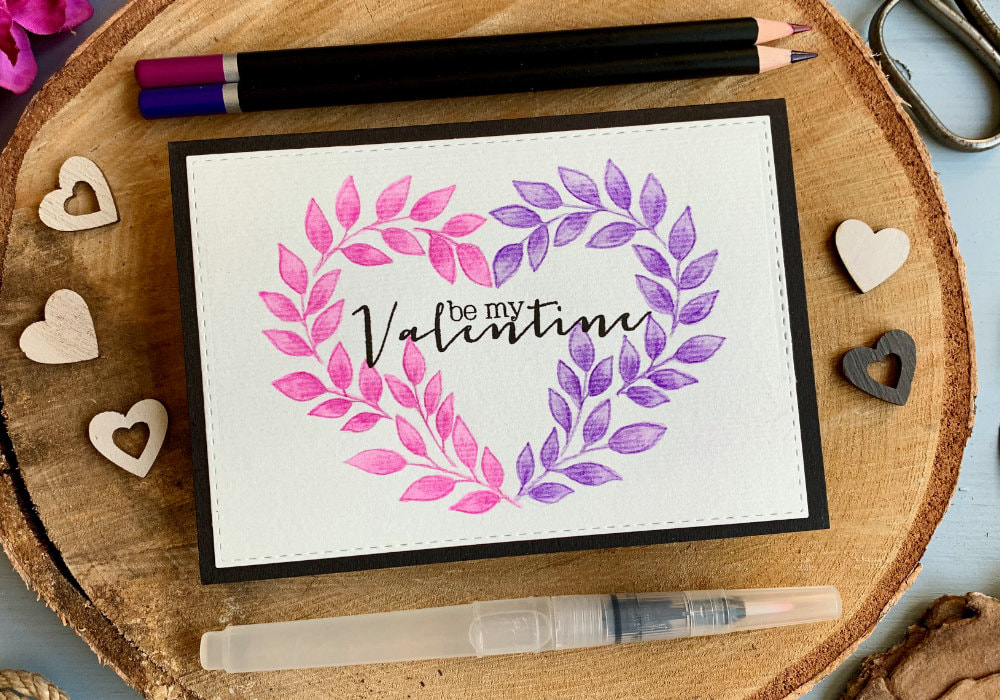 For my second Valentine's day card I wanted to paint a loose watercolour wreath in the shape of a heart. Unfortunately, I had difficulties painting it, my brush didn't want to do what I had in my head, so I decided to use watercolour pencils as they are easier to manage and it worked very well. I used pink and purple, but you can make it more masculine buy using blues or greens or what ever colour your partner likes. These pencils as well as the watercolour card stock are very budget friendly. I purchased them in Lidl, which is similar to Aldi. These are not the best products, the card stock is 190gsm (less then 80lb), I don't even use this weight for pencil colouring, let alone for watercolouring. If you are a beginner, it's recommended to use 300gsm/140lb heavy card stock specific for watercolouring. However, I am using watercolour pencils, for which I need only a little bit of water and for that this card stock is okay. 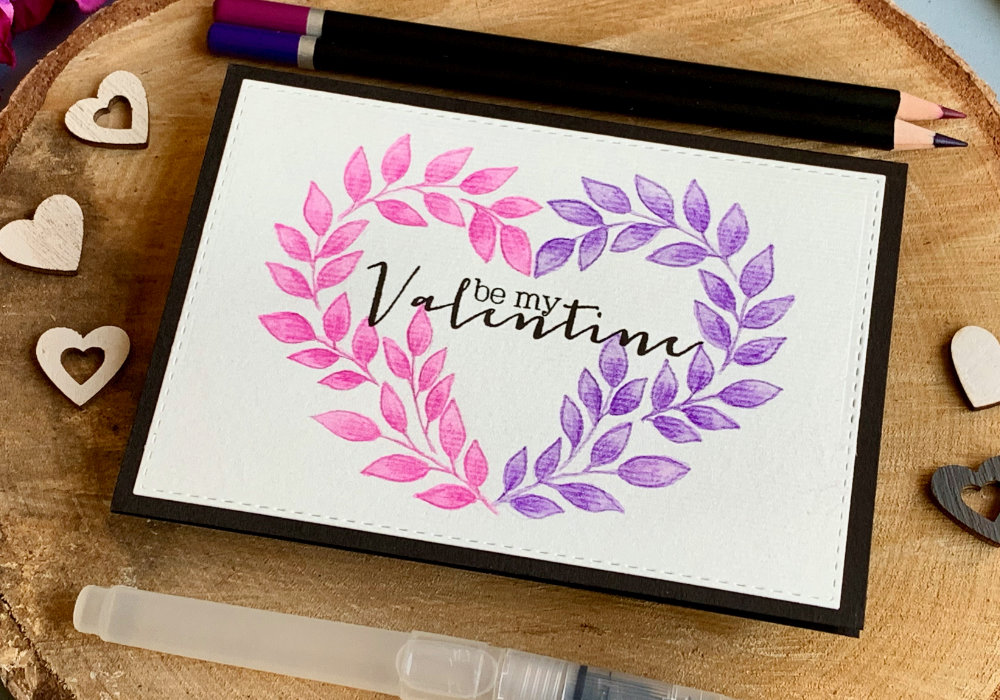 I started with a sketch. I wanted to know beforehand where I'm going to be placing the leaves. You can have the sketch on a side, just as a reference, or you can transfer it onto the watercolour card stock. Actually, what I did, I drew the wreath on my iPad in the Procreate app. I wanted both halves of the heart to be symmetrical, so I only drew one half, copied it and flipped it onto the other side to create the second half of the heart. After that I printed it onto a printer paper and then I transferred it onto the watercolour card stock. If the lines are too dark after transferring, I would recommend erasing them a bit, as you won't be able to erase them once you put colour over them. Next I started colouring, I used pink and purple. Originally I wanted to use blue and green, to make it more masculine, but I forgot and used the colours that I used on my trial card. 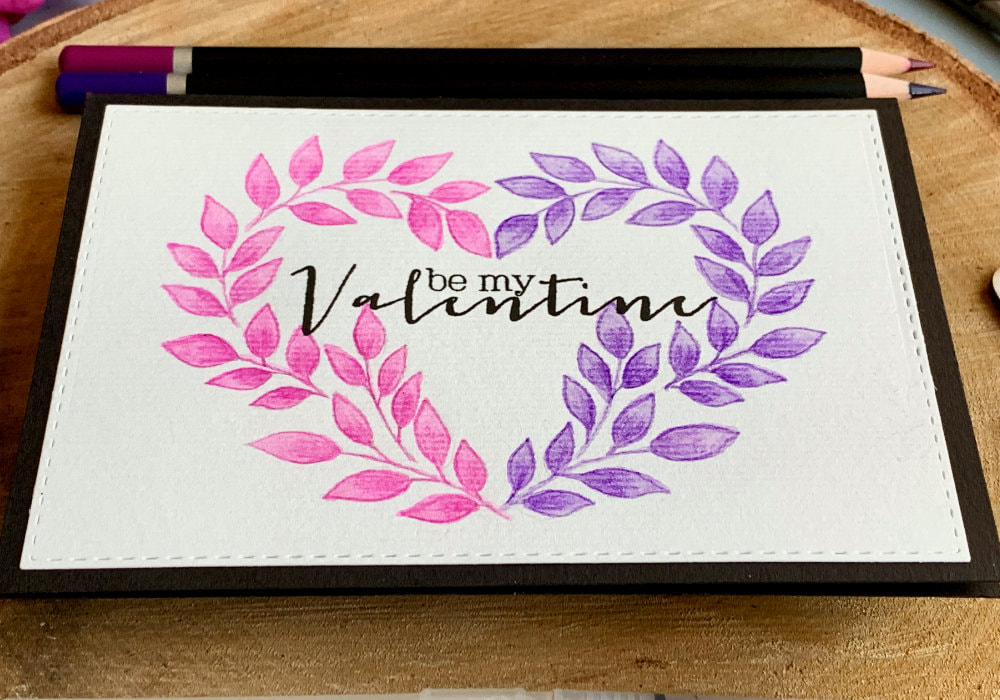 I began drawing a line for the stem and for the leaves I drew the outlines first and then I scribbled the colour at the bottom of the leaf and with my water brush pen I pulled the colour upwards filling up the whole leaf. If you do not have a water brush pen, you can use a normal brush and water in a jar. I painted the whole wreath the same way, switching the colours for the second half of the wreath. After I finished colouring, I let the panel dry and then I used a stitched rectangular die to die-cut a panel. This is completely optional, you can leave it as it is, or if you would like to have the watercolour panel slightly smaller, you can use a paper trimmer. 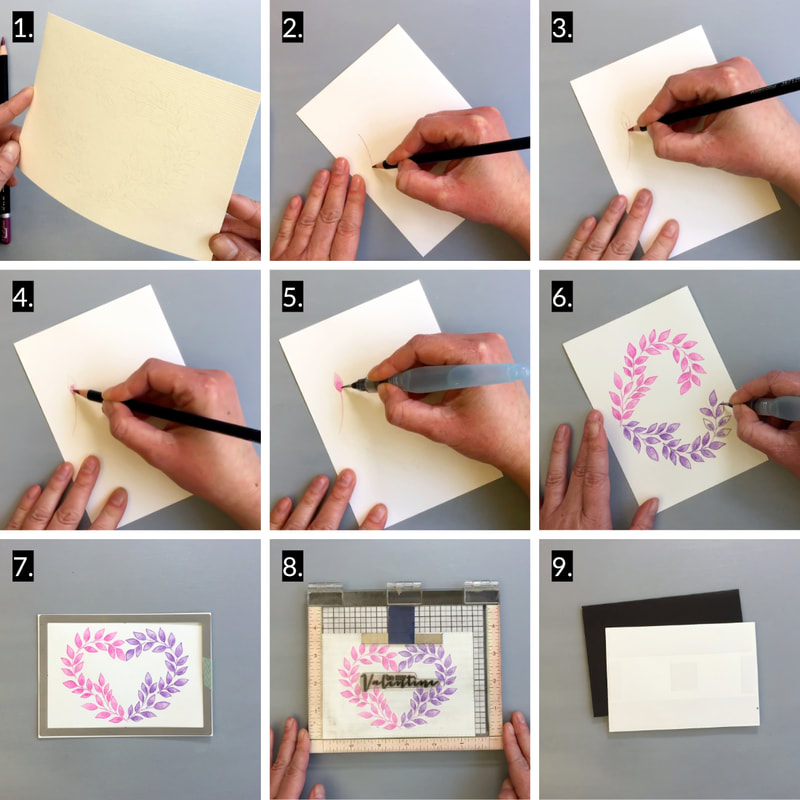 Next I stamped the greeting. You can write your own greeting using a black pen, but I prefer to use stamps. I used a greeting that says Be My Valentine, which I used many times before, since I don't have many products for Valentine cards. Lastly I adhered the panel on top of a black card base. I think black compliments the greeting. And I used a simple double-sided tape to adhere it. If you do not have a separate card base, since the watercolour card stock is quite thin, there should not be a problem folding it in half. Also Lidl sells heavier card stock that you can use for a card base, it usually comes in a pack with multiple colours. All I would suggest is getting a paper trimmer, to cut down your card stock. 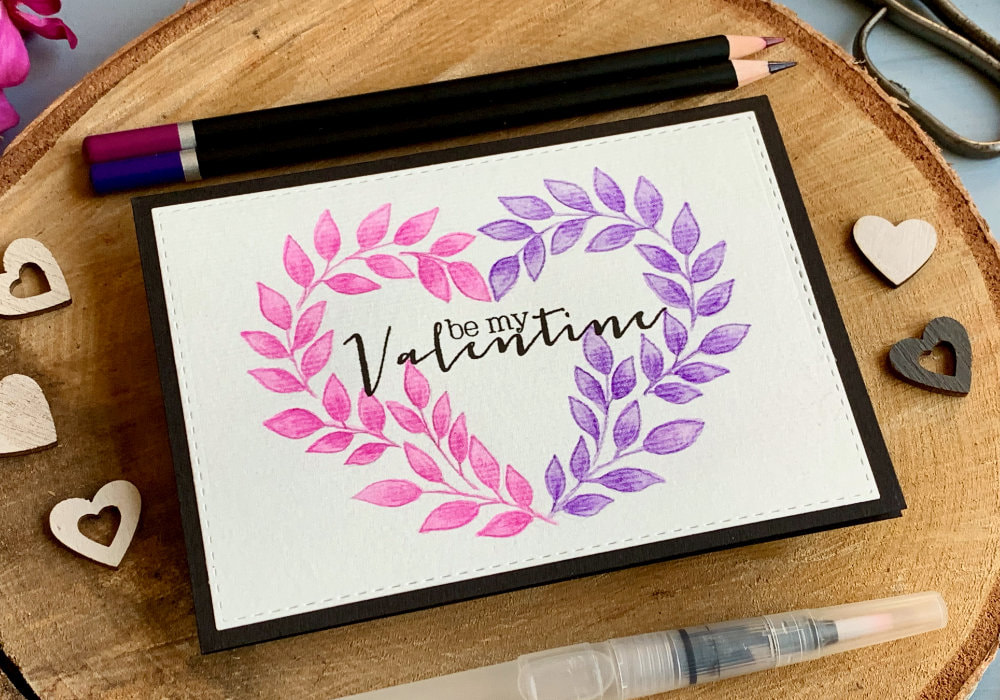 I really like the result and while I would not recommend this watercolour card stock or the pencil, if that's all you can afford, go for it. Just because these products are not great, doesn't mean you won't be able to create something nice with them. And I will be using them again in the future. You can see a quick video of me making this card on my YouTube channel or Instagram and make sure you subscribe/follow. WATCH A QUICK VIDEOWatch the video below or on my YouTube Channel. YOU MIGHT ALSO LIKEPIN MEDid you like the card? I would love, if you pinned it to your board on Pinterest! 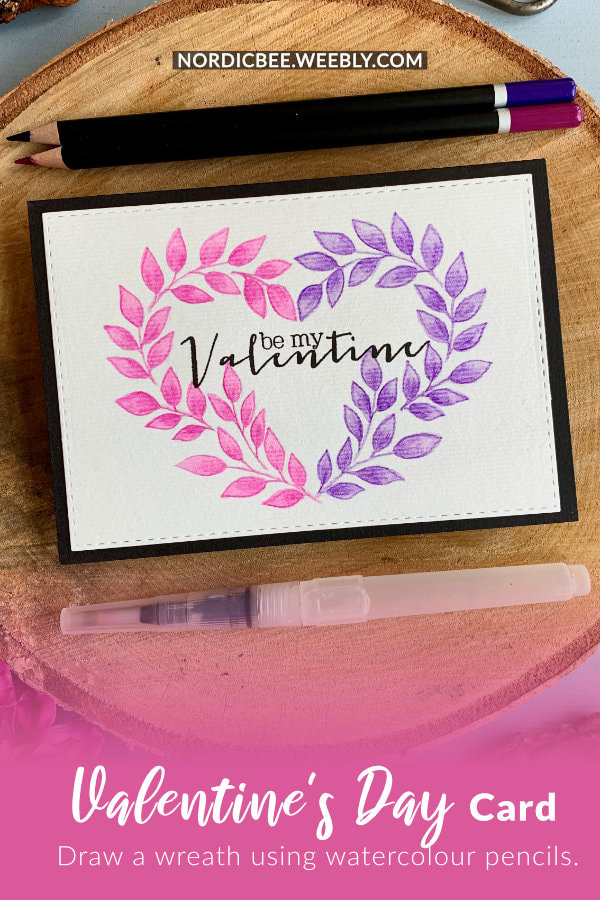
0 Comments
Leave a Reply. |
FOLLOW ME
SEE MORE


CATEGORIES
All
Stamping Die Cutting Using Stencil Heat Embossing Embossing or Texture Paste Distress Inks Nuvo Products Stamping & Colouring Stamping With Solid Stamps Watercolouring Watercolour Pencils Waterbased Markers Pencil Colouring Alcohol Markers Altenew Markers Zig Brush Markers Easy Backgrounds Stamped Backgrounds Small Stamp Ideas Simple Cards Complex Cards Cardmaking For Beginners All
Painting With Acrylics Painting With Gouache Painting With Watercolours Drawing With Fineliner Minimal Supplies Cards Christmas & Holiday
Love & Valentine Mother's Day Father's Day Halloween Spring Cards Summer Cards Autumn/Fall Cards Winter Cards Cards For Children Cards For Women Cards For Men Thank You Cards Sympathy Cards Get Well Soon Cards Floral & Leav Cards Rainbow Colours Messy Watercolouring Modern Art Inspirations Geometric Patterns Landscape Painting Acrylics
Gouache Watercolours Watercolour Pencils Waterbased Markers Distress Inks Alcohol Markers Colouring Pencils No Stamps No Dies Cards
Cardmaking On A Budget Let’s Colour Quick Cards Fun Masculine Cards Background Ideas Distress Ink Combinations |
 RSS Feed
