

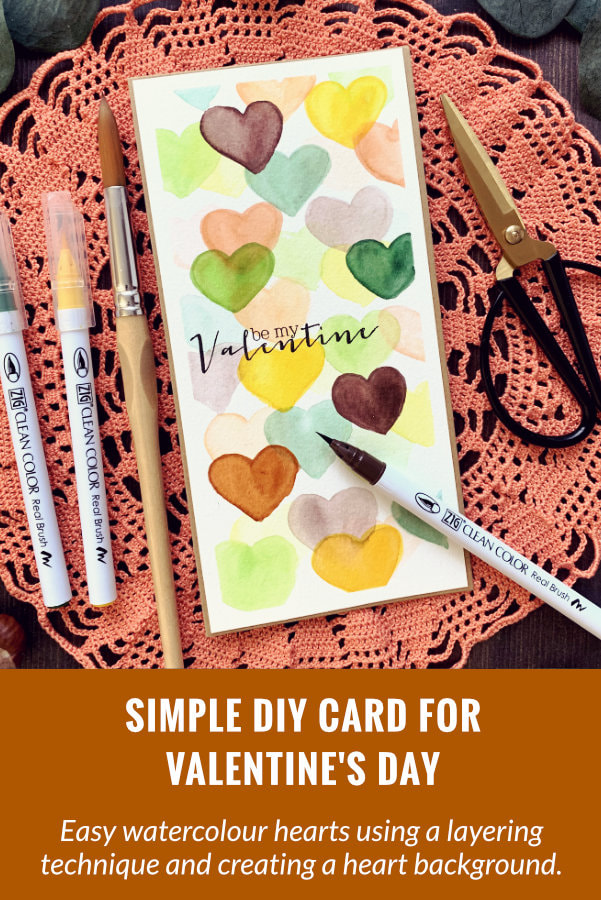
Valentine’s Day is here in less then a month, so let’s make some cards. I have for you two cards that you can make completely from scratch, without any stamps or dies. So if you make cards on regular bases or you just decided that you want to make a card, this cards are for you as they are very simple, perfect for beginners.
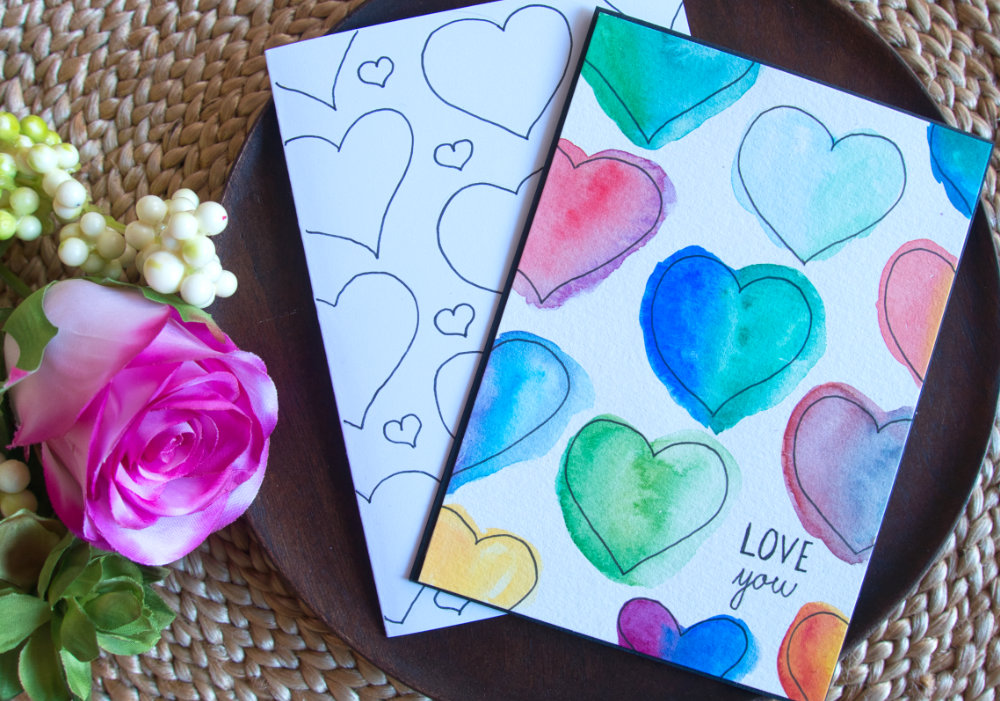
While I try to explain as much as possible in my videos, I haven’t done any beginner watercolour series, where I could refer you. I’m beginner myself. If you would like to have some basics about watercolouring, I would recommend this YouTube Channel by Emma Lefebvre. My first card for Valentine’s Day is a fun and colourful card, where I’m doing a layering technique using watercolours. I got the idea for this card from a watercolour learning book, where they did something similar, but with circles. I decided to use the Zig brush markers, which are water-based markers. Something like watercolours in a pen. If you don’t have such markers, you can use the typical watercolours in pans. Also it doesn’t have to be the Zig markers, there are other companies that make such markers, e.g. Sakura Koi or Tombow markers. The reason I decided to go with the markers, is because I have been using normal watercolours ever since I started making these DIY cards and I thought it’s time to change it up, but I will be back to normal watercolours in my next video. 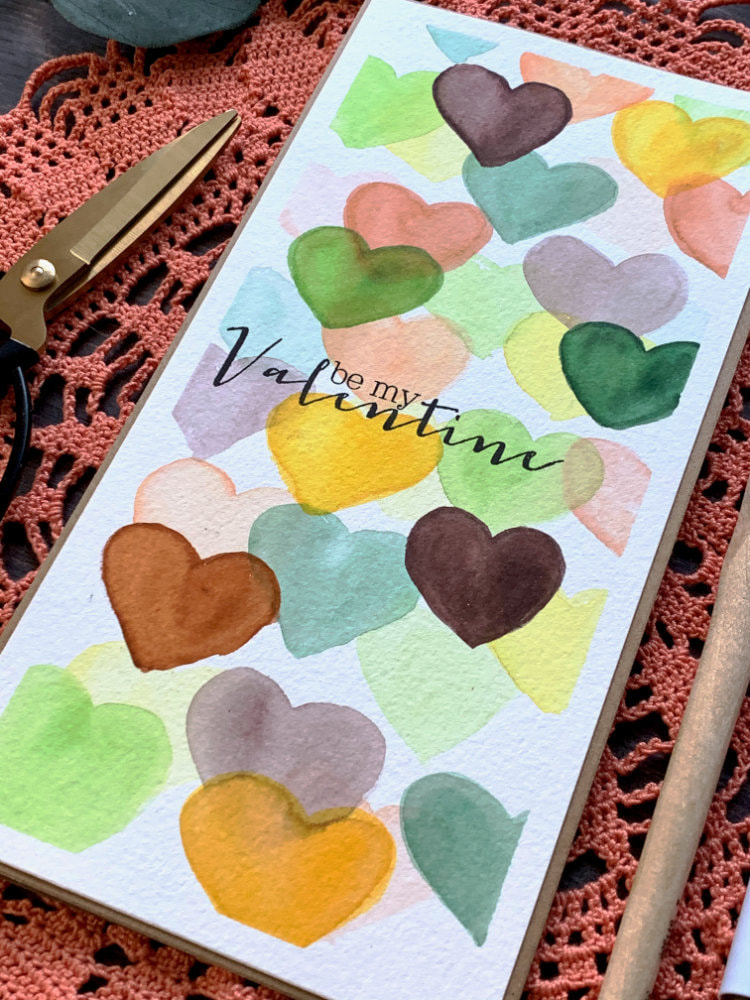
Other products you will need is a round watercolour brush, the size is up to you, what ever feels right. I’m using the size 4 brush. And you will need a watercolour card stock. I also have a paper towel, two jars with water and a palette. If you are using watercolours in pans, you might already have the palette. I’m using a white card stock that I laminated, but you can buy a separate palette or just use a plate.
The size of my card is another thing I changed. Normally I would use the standard A6 size for the cards, but recently I bought a set of long card bases and was waiting to finally use it. The size of the card is completely up to you. If I didn’t have those card bases, I would be making a card in the typical size. I secured the card stock onto a board using a painters tape, you can use washi as well. This is however optional, I didn’t use too much water therefore the paper didn’t warp. I did it to have a nice boarder and it was somehow easier to paint the hearts along the boarder as well. To paint the hearts, I started with the lightest shade. I scribbled the marker onto my palette and used water to dilute it down. For the second layer I used the palette again but with less water. And on the last layer, with the most opaque colour, I used the marker directly on the paper to paint the heart and then I came in with a slightly damp brush to spread the colour around. 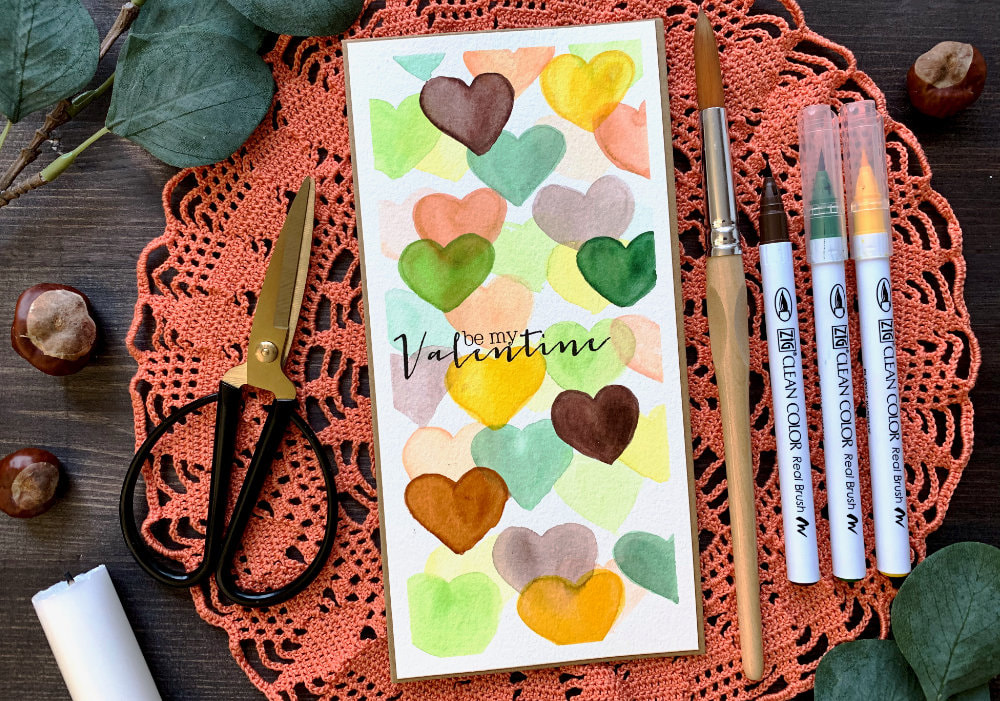
One important thing, is to wait between each layers for the hearts to dry, so when you paint the next layer the colours don’t mix.
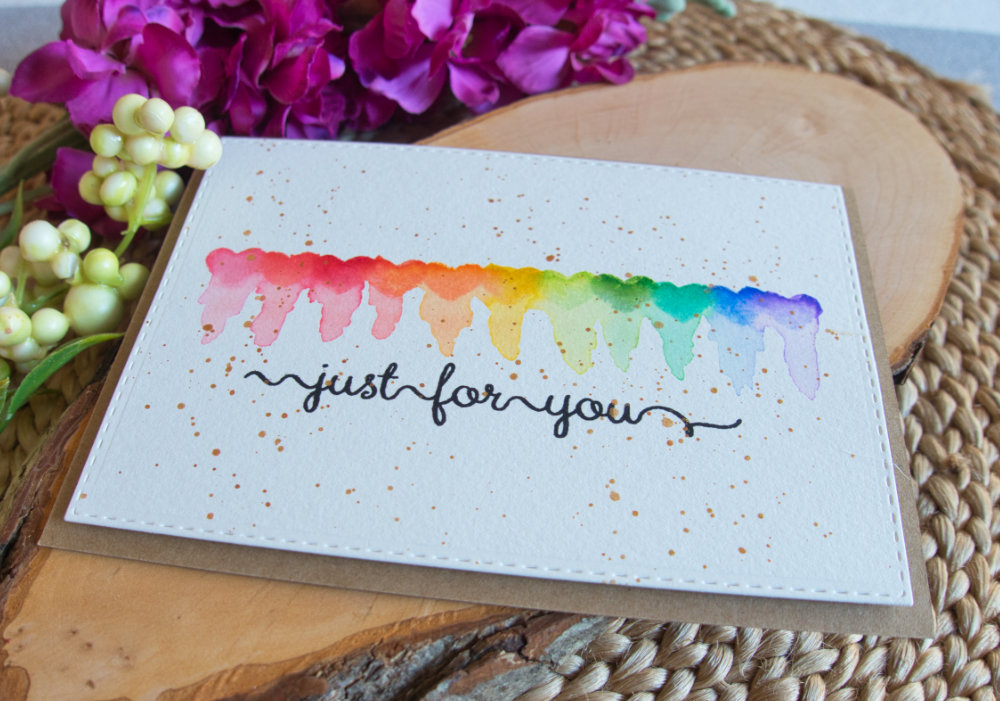
The painting process is very simple. The only difficulties you might have is how many hearts to paint, how many for each colour and when to stop. And not to forget the most difficult part, which colours to use. I didn’t want to do the typical pink or purple, first of all I’m going to use these colours for the card in the next blog post and I’m not the biggest fan of these colours either. I wanted use colours that are not typical for Valentines Day. So I choose greens, browns, some orange and yellow, and I really like this colour combination. After I was done painting, I let the piece to dry and then I worked on the sentiment. I really don’t want to use any stamps for these cards. I don’t want to discourage anyone, who would like to make this card, but doesn’t have stamps. However, my handwriting is very inconsistent and all over the place, therefore I use stamps for the sentiments. Especially because I would like to sell my cards sometime in the future and want them to look neater. I don’t mind writing my own sentiment if I’m giving the card to someone. If you don’t have stamps, you can write the sentiment yourself, using a black marker. You can also leave the card without a sentiment, just like I did on my previous card and I almost did that on this card, as I was struggling to find a good sentiment for Valentine’s Day. There are not many in my stash. 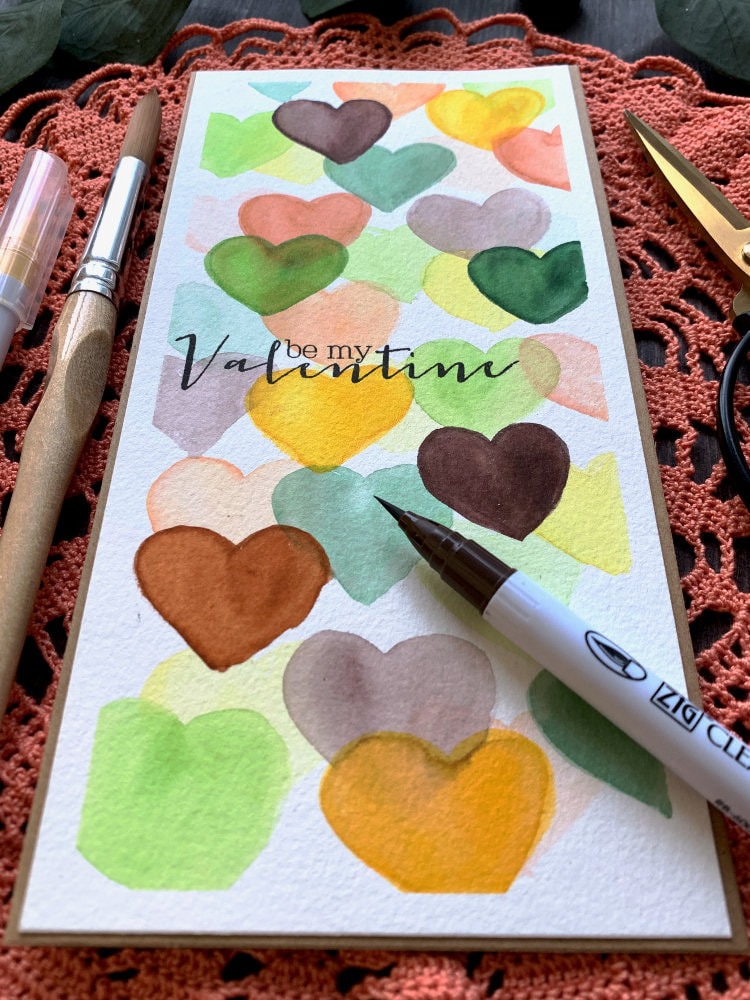
The sentiment I used is from an old stamp set by Clearly Besotted and it says “Be My Valentine” and I stamped in the middle, left side of the card. I used the Mini Misti stamping tool to stamp the sentiment, which is quite small for the long or tall cards, but I was able to stamp the sentiment without any problems. If you don’t have such tool, you can use an acrylic block.
Lastly I adhered the panel on top of a card base using a double sided tape. As I mentioned earlier, I bought these card bases pre-cut and pre-scored, with envelopes. Normally I make my own card bases, but that’s only when I make A6 cards, since I can make two card bases from one sheet of A4 card stock. For long cards I would need the full sheet and I would also have left overs that I would not have any use for. As you can see this is a very simple card and I believe anyone can make it. Do not worry if you don’t have the exact supplies, I’m just using what I have, it’s not about the products. Thank you for stopping by, if you have any questions or suggestions and ideas that you would like to see me to create, let me know in the comments. Sending hugs from Sweden! VIDEO TUTORIAL
Watch the video below or on my YouTube Channel.
PRODUCTS USED
Disclaimer: I’m currently not using any affiliate links. These links are just to help you find the products. The list includes alternatives to what I was using and while I haven't used some of them, I only recommend brands I trust.
Kuretake, ZIG Clean Color Real Brush Markers | AmazonDE | AmazonUK
Canson XL, Watercolour Cardstock , 300gsm/140lb | AmazonDE | AmazonUK Daler Rowney Watercolour Brushes | AmazonDE | AmazonUK Papermania, Tall/Slim Card Base + Envelopes | AmazonDE | AmazonUK Sellotape Double Sided Tape | AmazonDE | AmazonUK Tsukineko, Versafine Ink pad, Onyx Black | AmazonDE | AmazonUK My Sweet Petunia, Mini MISTI Stamping Tool | StempelmühleDE | BumbleberrysUK Papermania, Stamp Block | AmazonDE | AmazonUK Crafting Mat, Black | AmazonDE | AmazonUK YOU MIGHT ALSO LIKE
PIN ME
Did you like the card? I would love, if you pinned it to your board on Pinterest!
0 Comments
Leave a Reply. |
FOLLOW ME
SEE MORE


CATEGORIES
All
Stamping Die Cutting Using Stencil Heat Embossing Embossing or Texture Paste Distress Inks Nuvo Products Stamping & Colouring Stamping With Solid Stamps Watercolouring Watercolour Pencils Waterbased Markers Pencil Colouring Alcohol Markers Altenew Markers Zig Brush Markers Easy Backgrounds Stamped Backgrounds Small Stamp Ideas Simple Cards Complex Cards Cardmaking For Beginners All
Painting With Acrylics Painting With Gouache Painting With Watercolours Drawing With Fineliner Minimal Supplies Cards Christmas & Holiday
Love & Valentine Mother's Day Father's Day Halloween Spring Cards Summer Cards Autumn/Fall Cards Winter Cards Cards For Children Cards For Women Cards For Men Thank You Cards Sympathy Cards Get Well Soon Cards Floral & Leav Cards Rainbow Colours Messy Watercolouring Modern Art Inspirations Geometric Patterns Landscape Painting Acrylics
Gouache Watercolours Watercolour Pencils Waterbased Markers Distress Inks Alcohol Markers Colouring Pencils No Stamps No Dies Cards
Cardmaking On A Budget Let’s Colour Quick Cards Fun Masculine Cards Background Ideas Distress Ink Combinations |
 RSS Feed
