
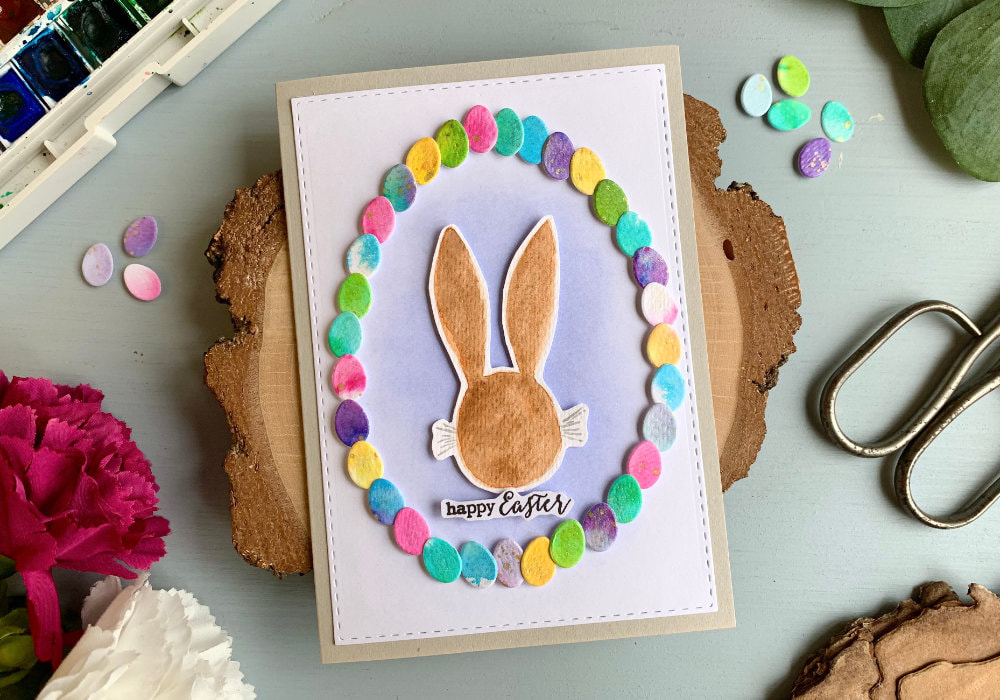
 When I was playing with the egg dies that I used for my two previous cards, I thought about making wreath. I love wreaths in all kinds of forms, using all kinds of shapes and images. And that's what I did here. I actually created two cards with wreaths and in this blog post I am sharing the simpler one. For the wreath all you need is a small egg die and something for your focal point. I chose a bunny. While I do have a stamp with a bunny, for this card I decided to draw my own bunny. It's quite simple, I used a notebook and did my drawing. Then i transferred it onto a watercolour card stock and painted it with watercolours. 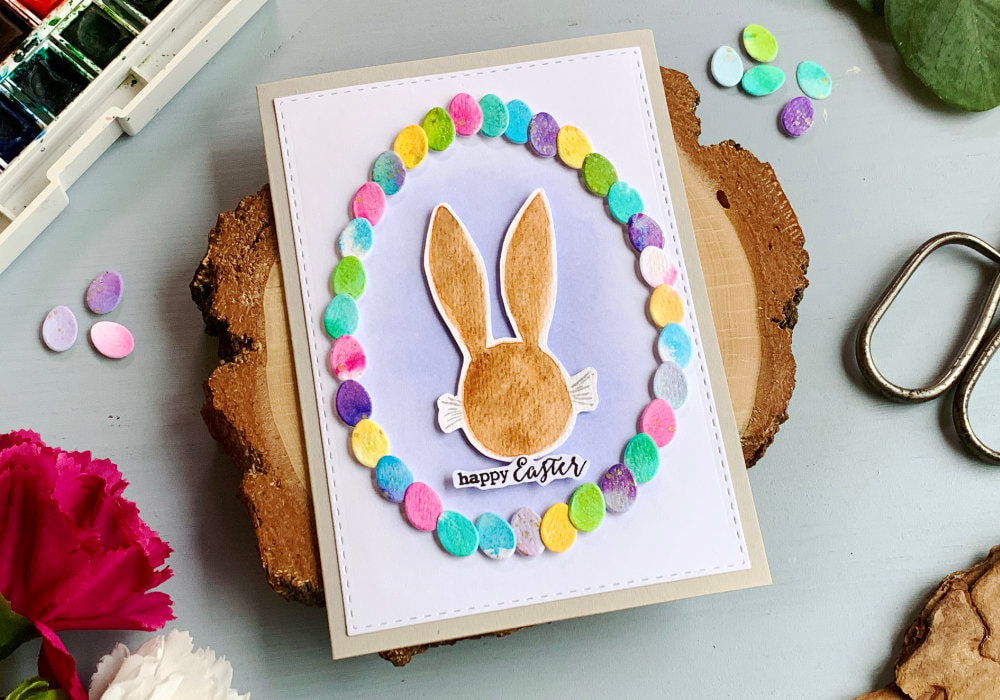 The eggs I die-cut using backgrounds in different colours that I created with powder watercolours - Nuvo and Brusho. I had a few backgrounds left over, so I was using leftovers. You can use coloured card stock, pattern papers and so on. I die cut more eggs then I needed, altogether I needed thirty two. Originally I was going to adhere everything on top of a white card base, but then I remembered I had a background panel that I created for another card and never used. I blended the Shaded Lilac Distress Ink in the middle of the card stock and die-cut it with a stitched rectangular die. 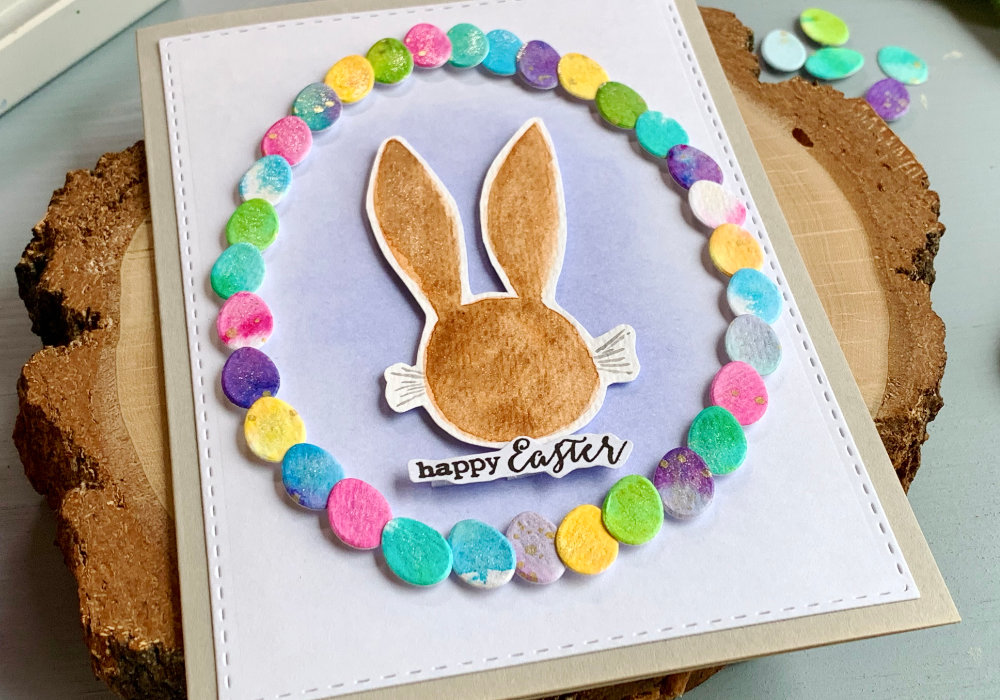 Before I started adhering the images on top of the panel, I used one of the bigger egg dies in the set to outline the shape onto the panel. Having the shape pre-drawn helped me to get the shape right when adhering the images. Last year I made an autumnal card with a circle wreath and it was a little bit off as I was eyeballing it. I didn't want to do the same mistake here. NOTE: Make sure you do not forget about placement of the greeting before you start attaching the images. I forgot, but luckily I had a small sentiment stamp and was able to squeeze it in. I first adhered the bunny in the middle of the pre-drawn egg using a double-sided tape. Then I adhered the eggs. I used small double-sided foam squares and I was placing the eggs so they are slightly overlapping each other. After all the eggs were adhered I attached the greeting bellow the bunny. This was a banner that says Happy Easter. 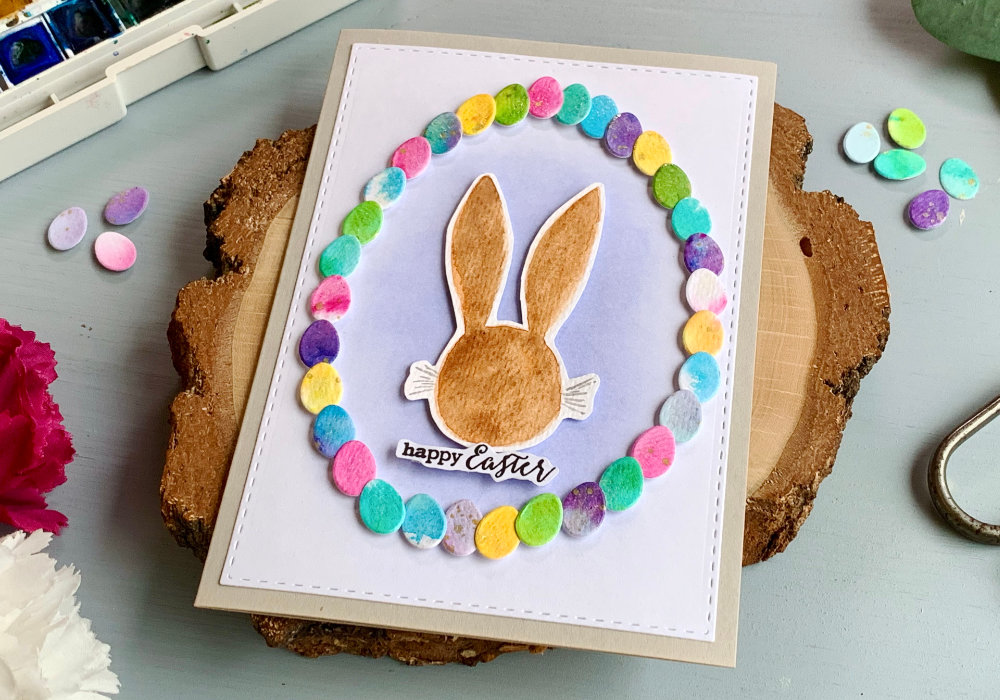 To finish up the look, I took out a glitter pen and went over all the images. I just wanted to add a little bit of sparkle to the card. Lastly I adhered the panel on top of a white card base using a liquid glue. I hope you will try making this card yourself. Make sure you check out my video on YouTube and give it a Like as well. The list of product is down below, where you can also find a few blog posts that I think you might enjoy. And if you have any questions, just drop me a line. VIDEO TUTORIALWatch the video below or on my YouTube Channel. YOU MIGHT ALSO LIKEPIN MEDid you like the card? I would love, if you pinned it to your board on Pinterest! 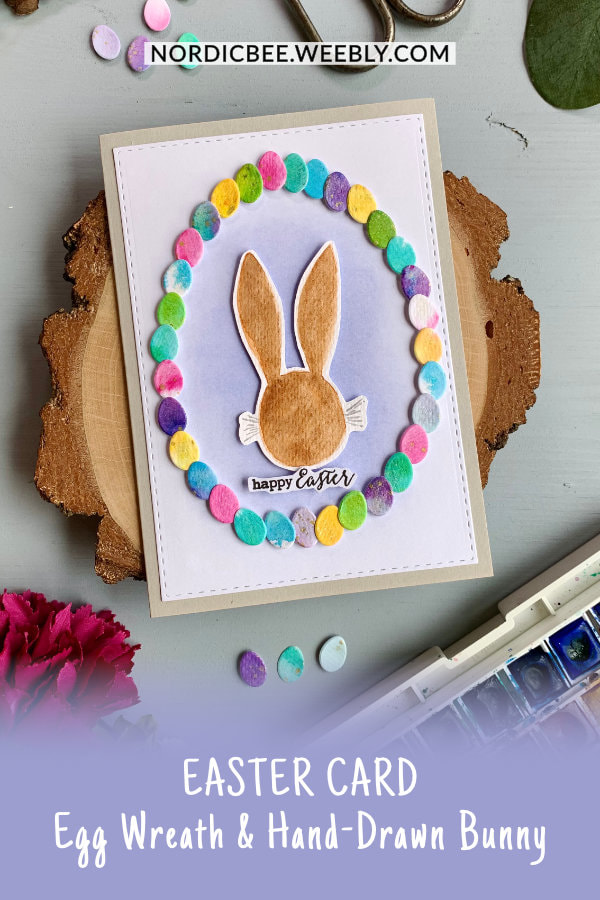
0 Comments
Leave a Reply. |
FOLLOW ME
SEE MORE


CATEGORIES
All
Stamping Die Cutting Using Stencil Heat Embossing Embossing or Texture Paste Distress Inks Nuvo Products Stamping & Colouring Stamping With Solid Stamps Watercolouring Watercolour Pencils Waterbased Markers Pencil Colouring Alcohol Markers Altenew Markers Zig Brush Markers Easy Backgrounds Stamped Backgrounds Small Stamp Ideas Simple Cards Complex Cards Cardmaking For Beginners All
Painting With Acrylics Painting With Gouache Painting With Watercolours Drawing With Fineliner Minimal Supplies Cards Christmas & Holiday
Love & Valentine Mother's Day Father's Day Halloween Spring Cards Summer Cards Autumn/Fall Cards Winter Cards Cards For Children Cards For Women Cards For Men Thank You Cards Sympathy Cards Get Well Soon Cards Floral & Leav Cards Rainbow Colours Messy Watercolouring Modern Art Inspirations Geometric Patterns Landscape Painting Acrylics
Gouache Watercolours Watercolour Pencils Waterbased Markers Distress Inks Alcohol Markers Colouring Pencils No Stamps No Dies Cards
Cardmaking On A Budget Let’s Colour Quick Cards Fun Masculine Cards Background Ideas Distress Ink Combinations |
 RSS Feed
