
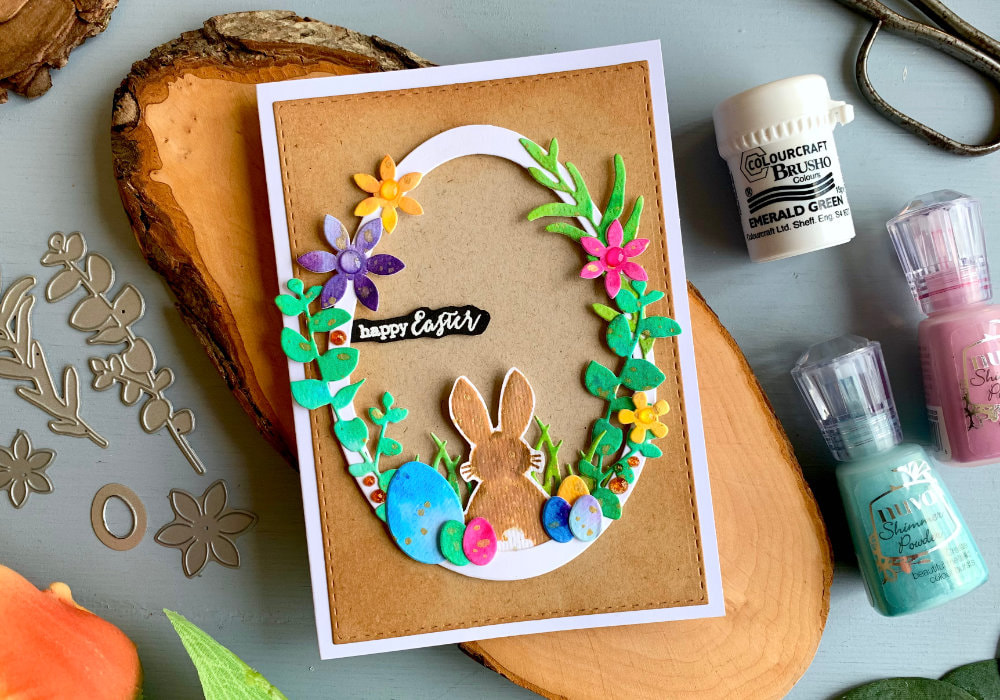
 Easter is next week and I have for you one more Easter card. Another wreath with a bunny. When I came up with the idea of making a card with an Easter wreath, I first thought of eggs together with a stamped bunny and maybe adding my only two leaf dies - which would look just fine. However, I wanted to add some flowers. Spring is here and I thought the wreath needs some flowers. I went through my stash and found a few flower stamps that would fit, I also thought adding a tiny stamp with a butterfly. But later I looked at my dies again, if there is anything I could use. Since most of the items for the wreath were die-cut, I wanted everything to match. And I did find flower dies from the same set. I cannot say I forgot about them, but I knew they were partial dies that do not cut through, they stay attached to the paper. That's why at first I passed through them, but then I realized, I can just cut them out.  The reason why I'm telling you all of this is to encourage you to go through your stash and see what you have. I didn't go and buy anything specifically for the wreath. I went through my stash and saw what I have. That's why this blog post is called - Mix & Match. There are so many stamp sets that include all these tiny stamps, which can be used to add to a wreath, so if you do not have dies, maybe try those. I die-cut all the images out of watercolour backgrounds that I created using powder watercolours. I had the pink background left over from the easter egg background card, which you can see here. Therefore I decided to stick with it and I created additional background using not only the Nuvo Shimmer Powders but also the powders from Brusho. This part is completely up to you, you can use coloured card stock, blend inks or colour with alcohol markers.  For the bunny I had a stamp. Very old stamp from Clearly Besotted. If you don't have such stamp, you could use the bunny from my previous card, where I drew it myself. You can find the card in the blog post here. Or you could use other images, such as a bigger egg, a flower or even a butterfly. At first I was going to draw the shape of the wreath and adhere the die-cut images along the line. But then I thought it would be much easier if I used a die-cut frame. If I were adhering directly onto the card base, I would use a foam tape, which would be too finicky for the tiny images. So I used two of the bigger egg dies from the Sizzix set and die-cut a frame out of a white cards tock. Oval or circle frame and even a rectangle would be great as well. Next I began adhering all the images along the frame. I started with the bunny, which I glued behind the frame.  Then I picked two die-cuts of grass. I first glued them together. And because I wanted to have a bit of separation between the bunny and the grass I used a double sided tape. If you don't have. a grass die and want to have the grass detail in your wreath, you cold use a stencil for example. After those elements were adhered I attached the branches with leaves and the eggs. I first worked on one side and then on the other. For the leaves and the big egg I used a liquid glue and for the tiny eggs I used mix of glue and double-sided foam tape. I wanted the leaves to be adhered below the eggs, so I had to fiddle with it a bit, to figure out the placement. Lastly I adhered the flowers using a glue. On the right side I adhered two flowers on top of the leaves and on the left side I adhered them above the branch with leaves. 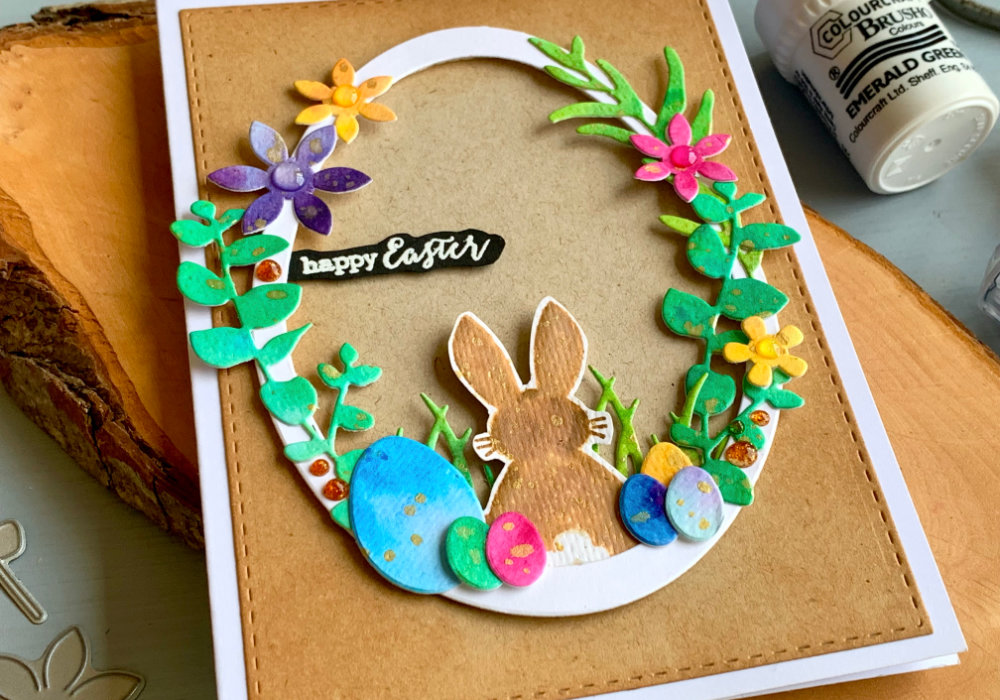 I let the glue dry and in the mean time I created a background panel. I used the Neenah Desert Storm card stock and die-cut it using a stitched rectangular die and then I used the Tie Dye ink and blended it along the edges of the panel. Next I used a long piece of a double sided tape and attached it along the wreath. I already had double-sided tape on top of the bunny and for the grass I used a liquid glue. This made sure everything holds. I attached the wreath on top of the craft panel and then using a l liquid glue I adhered the panel on top of a white card base. 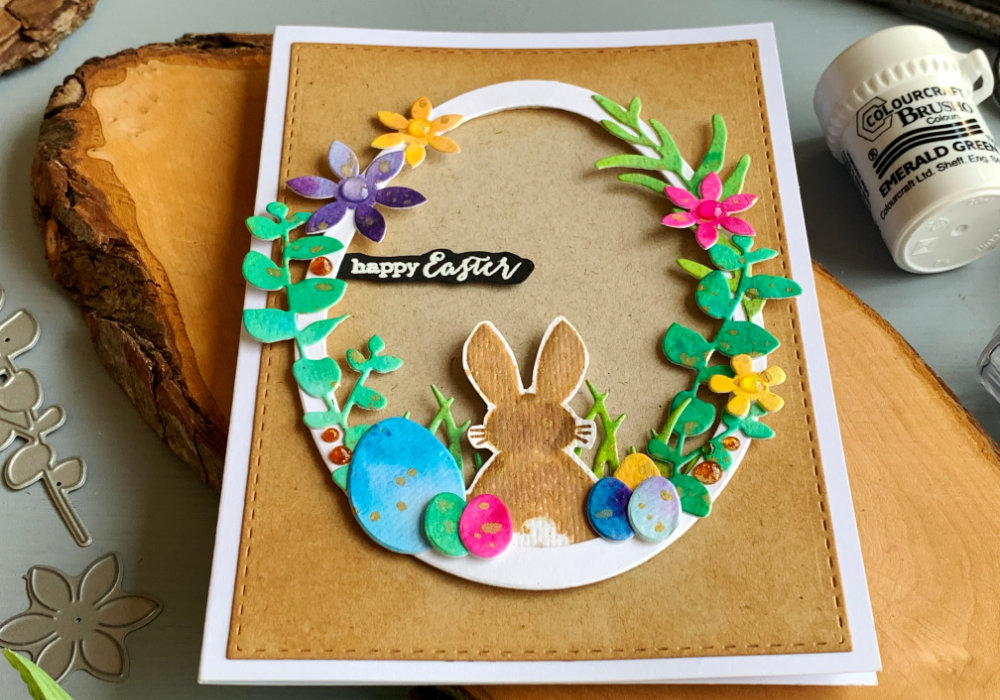 Lastly, I used the clear Nuvo drops and added dots in the center of the flowers and golden Nuvo drops I added in a few places along the wreath. I hope you will have a great Easter and will try making this card yourself. You do not need to make an Easter card. Make sure you check out my video on YouTube and give it a Like as well. The list of product is down below, where you can also find a few blog posts that I think you might enjoy. And if you have any questions, just drop me a line. VIDEO TUTORIALWatch the video below or on my YouTube Channel. YOU MIGHT ALSO LIKE  PIN MEDid you like the card? I would love, if you pinned it to your board on Pinterest! 
0 Comments
Leave a Reply. |
FOLLOW ME
SEE MORE


CATEGORIES
All
Stamping Die Cutting Using Stencil Heat Embossing Embossing or Texture Paste Distress Inks Nuvo Products Stamping & Colouring Stamping With Solid Stamps Watercolouring Watercolour Pencils Waterbased Markers Pencil Colouring Alcohol Markers Altenew Markers Zig Brush Markers Easy Backgrounds Stamped Backgrounds Small Stamp Ideas Simple Cards Complex Cards Cardmaking For Beginners All
Painting With Acrylics Painting With Gouache Painting With Watercolours Drawing With Fineliner Minimal Supplies Cards Christmas & Holiday
Love & Valentine Mother's Day Father's Day Halloween Spring Cards Summer Cards Autumn/Fall Cards Winter Cards Cards For Children Cards For Women Cards For Men Thank You Cards Sympathy Cards Get Well Soon Cards Floral & Leav Cards Rainbow Colours Messy Watercolouring Modern Art Inspirations Geometric Patterns Landscape Painting Acrylics
Gouache Watercolours Watercolour Pencils Waterbased Markers Distress Inks Alcohol Markers Colouring Pencils No Stamps No Dies Cards
Cardmaking On A Budget Let’s Colour Quick Cards Fun Masculine Cards Background Ideas Distress Ink Combinations |
 RSS Feed
