
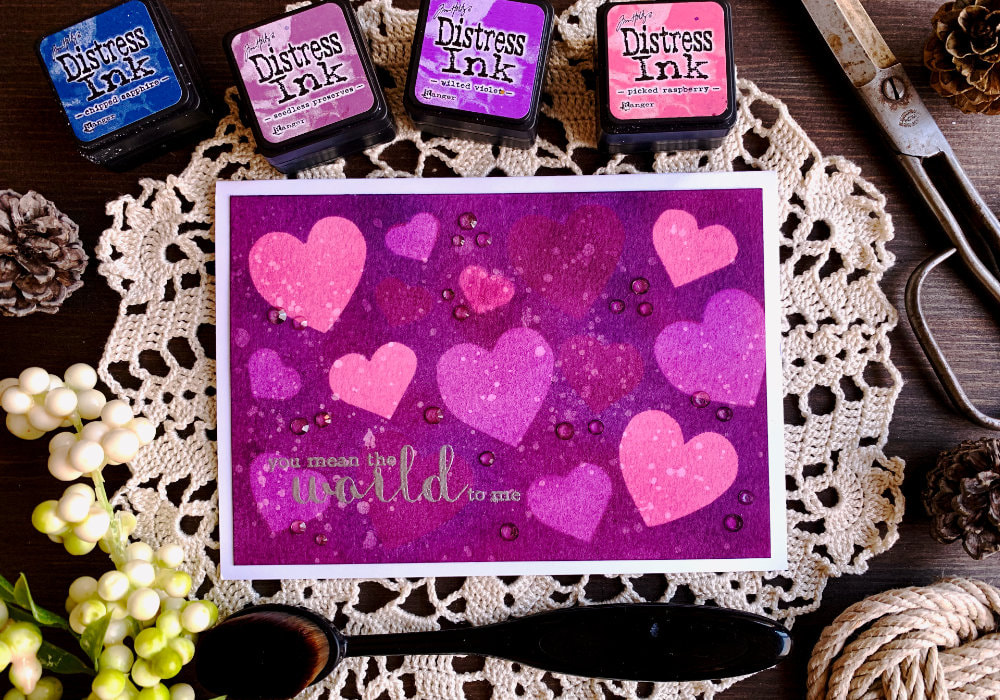
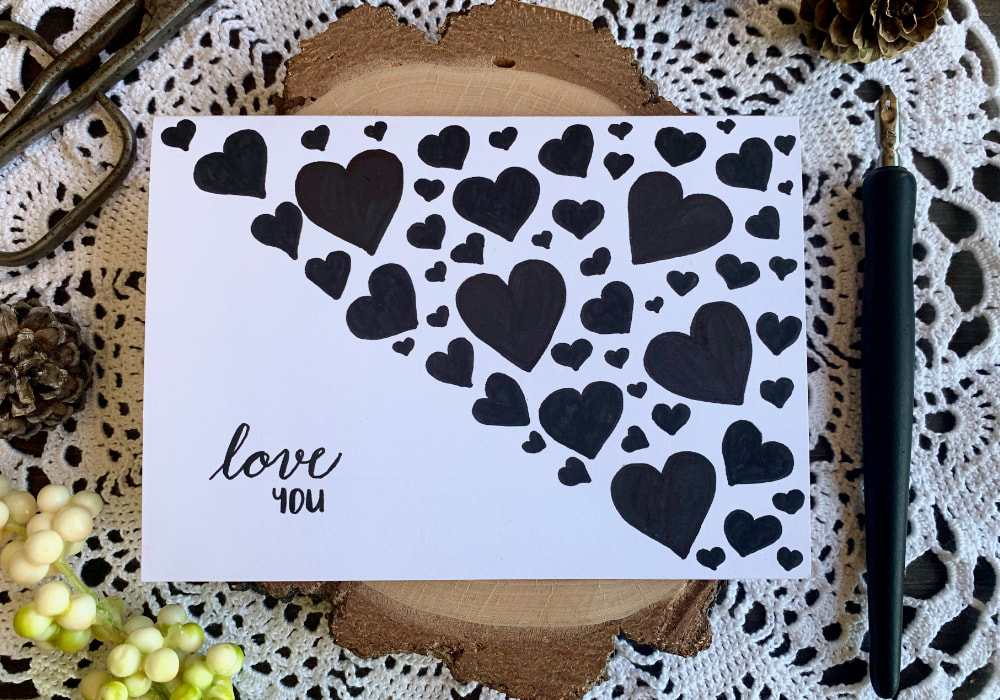
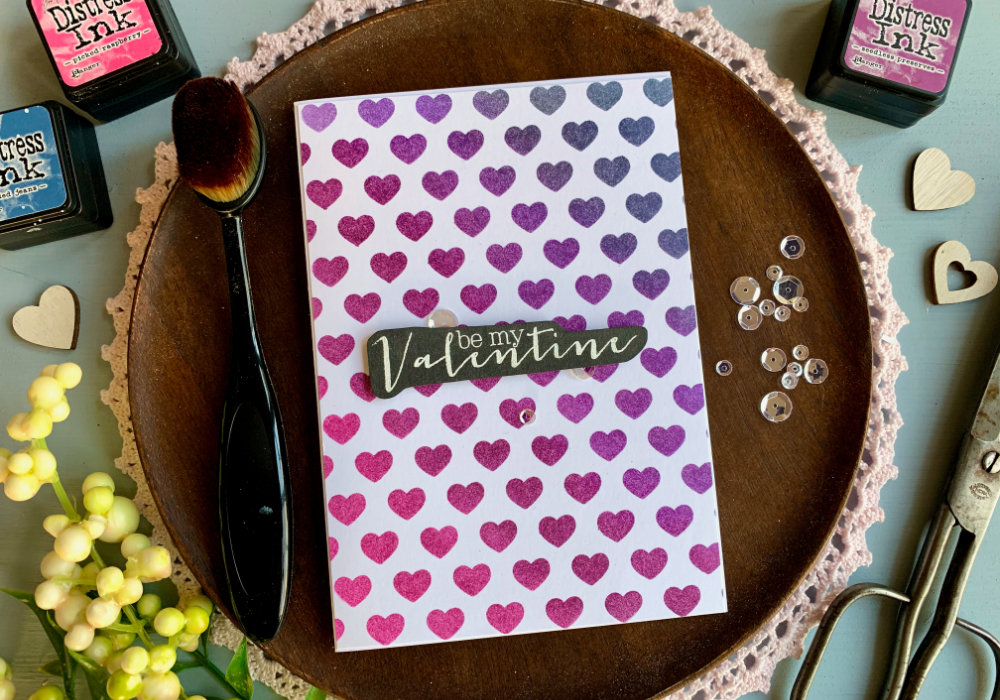
 Last year I made a Valentine's day card using watercolours and I was trying out a technique called negative space watercolouring and you can see the card here. This technique is easy to do, but not as easy to explain. To do this technique you outline your shapes, in this case hearts and paint around them. You are building the colour from lightest to darkest and as you are going around the object with the paint, you each time reveal the positive space, the hearts. Every time you use new layer of paint, you go around the images you already painted as well as new objects that you want to reveal. While this technique is very simple, if you are like me and don't have a steady hand, it can be little bit tricky and also time consuming for what is it. Don't get me wrong, I to like the card and the technique, I just need more practice. However, when I was planning what to do for this years Valentine's day cards, I wanted to try to do this technique with Distress inks.  To do this technique with inks, you need inks that blend well. And not only that, you need inks that compliment each other and can be layered on top of each other, from the lightest to the darkest. In this case I used Distress inks - Picked Raspberry, Wilted Violet, Seedless Preserves and Faded Jeans. You can always use Black Soot as your last layer, I was OK with these four inks. Another thing is needed for this technique is masking paper. I don't have a masking paper, for some reason it's very difficult to get where I live. As an alternative, I used post-it notes with full adhesive. For the blending I used a blending tool and the card stock is the watercolour paper from Canson. I started by creating the masks for the hearts. I drew few hearts in different sizes and then I cut them out. You need a mask for each heart that you put on the card. The good thing with the post-it notes, you can cut out two or three layers at once. I had troubles with the masks, I will tell you more about in a bit. I started blending and I covered the whole panel with the first ink colour, the Picked Raspberry. You could already used the masks, before you apply the first layer and after removing them they will be the same colour as your card stock. I wanted each heart to be colourful, therefore I used the masks after I applied the first layer.  TIP: When I'm blending with Distress inks, I like to cover the whole panel because I like the look of the edges. And I like to have a slick surface beneath the card stock as it makes the blending easier, here I'm using a laminated card stock. However, this causes the paper to move, which is annoying. Normally I would use a washi along the edges of the panel and tape the card stock onto the laminated card stock. But because I wanted the ink to be from edge to edge and I also used the Canson XL card stock, which is shorter than A4, so my panel is quite small, I didn't want to make the background even smaller. As an alternative, I put the washi on the back of the panel. I folded the washi in half, sticky side up and placed it onto the back of the watercolour paper and then I attached it onto the laminated card stock. I placed the hearts where I wanted the shade of Picked Raspberry to be and then I covered the background with the second ink colour, the Wilted Violet. I repeated the process with the third layer, the Seedless Preserves and fourth layer, the Faded Jeans. The last ink is blue, but when it is applied over the other inks it creates a really pretty dark purple shade.  As I mentioned, I had troubles with the post-it notes, they just would not stick to the card stock. It might be the post-it notes and that they are not good, or it might be that I didn’t wait for the ink to fully dry on each layer and the background was still rather slick. I was a little bit in a hurry, normally I would let it air dry, but there was no time. The reason, why I think it's the ink not being dry, is because I had to use a tape runner to attach the hearts. This is a proper adhesive, I use it adhere die-cuts or even the whole panels onto a card base. However, they still would not stick! Please note, while the tape runner wasn’t holding either, it is important to be cautious here as it can tear up the card stock. Another thing I did to keep the masks in place, is to use a post-it tape on my fingers, just to keep my fingers clean and I was holding the hearts in place, when I went over them with the blending brush. After I was done with the last layer I removed the hearts. Since I was using a proper adhesive on the backs of the masks, one small heart tor up a small piece of the paper. The heart was in the shade Picked Raspberry, luckily I was able to go over it with my blending brush and cover it up.  I let the panel fully dry and then I stamped the greeting. I used a sentiment from an older stamp set by Clearly Besotted, it says "You Mean The World To Me". I heat embossed it with the Metallic Silver embossing powder form Wow. I adhered the panel on top of a white card base and lastly, to add some sparkle to the card I adhered a few clear jewels across the panel. I hope you will try making this card yourself. Make sure you check out my video on YouTube and give it a Like as well. The list of product is down below, where you can also find a few blog posts that I think you might enjoy. And if you have any questions, just drop me a line. VIDEO TUTORIALWatch the video below or on my YouTube Channel. PRODUCTS USEDTim Holtz Distress Mini Ink, Kit 1 (Picked Raspberry) AmazonDE | AmazonUK Tim Holtz Distress Mini Ink, Kit 2 (Seedless Preserves) danipeussDE | CraftStashUK Tim Holtz Distress Mini Ink, Kit 5 (Faded Jeans) DaniPeussDE | CraftStashUK Tim Holtz Distress Mini Ink, Kit 15 (Wilted Violet) danipeussDE | CraftStashUK Canson XL, Watercolour Cardstock , 300gsm/140lb AmazonDE | AmazonUK Post-It, Full Adhesive Notes AmazonDE | AmazonUK Tsukineko Versamark Watermark Ink Pad AmazonDE | AmazonUK WOW! Embossing Powder, Metallic Silver AmazonDE | AmazonUK EK Susccess, Anti-Static Powder Tool AmazonDE | AmazonUK Lucy’s Cards, Ice Cube Mix Jewels LucysCardsUK UHU, Liquid Glue AmazonDE | AmazonUK Color Copy , White Paper, A4 300gsm/140lb (card base) AmazonDE | AmazonUK Sellotape Double Sided Tape AmazonDE | AmazonUK Faber Castell, HB Graphite Pencil AmazonDE | AmazonUK Staedtler, Eraser AmazonDE | AmazonUK Fiscars, Guillotine A5 AmazonDE | AmazonUK Tonic Studios, Guillotine A4 AmazonDE | AmazonUK EK Success, Scissors AmazonDE | AmazonUK My Sweet Petunia, Mini MISTI Stamping Tool StempelmühleDE | BumbleberrysUK Crafting Mat, Black AmazonDE | AmazonUK Disclaimer: Here you can find the products I used to make this card. Please note that the products are just a guide, you don't need the exact products or brands. For most of the products I include links to the shops where you can purchase them if available. As I live in Europe, I provide links to UK and German stores. These are not affiliate links and every product I purchased myself. YOU MIGHT ALSO LIKEPIN MEDid you like the card? I would love, if you pinned it to your board on Pinterest! 
0 Comments
Leave a Reply. |
FOLLOW ME
SEE MORE


CATEGORIES
All
Stamping Die Cutting Using Stencil Heat Embossing Embossing or Texture Paste Distress Inks Nuvo Products Stamping & Colouring Stamping With Solid Stamps Watercolouring Watercolour Pencils Waterbased Markers Pencil Colouring Alcohol Markers Altenew Markers Zig Brush Markers Easy Backgrounds Stamped Backgrounds Small Stamp Ideas Simple Cards Complex Cards Cardmaking For Beginners All
Painting With Acrylics Painting With Gouache Painting With Watercolours Drawing With Fineliner Minimal Supplies Cards Christmas & Holiday
Love & Valentine Mother's Day Father's Day Halloween Spring Cards Summer Cards Autumn/Fall Cards Winter Cards Cards For Children Cards For Women Cards For Men Thank You Cards Sympathy Cards Get Well Soon Cards Floral & Leav Cards Rainbow Colours Messy Watercolouring Modern Art Inspirations Geometric Patterns Landscape Painting Acrylics
Gouache Watercolours Watercolour Pencils Waterbased Markers Distress Inks Alcohol Markers Colouring Pencils No Stamps No Dies Cards
Cardmaking On A Budget Let’s Colour Quick Cards Fun Masculine Cards Background Ideas Distress Ink Combinations |
 RSS Feed
