
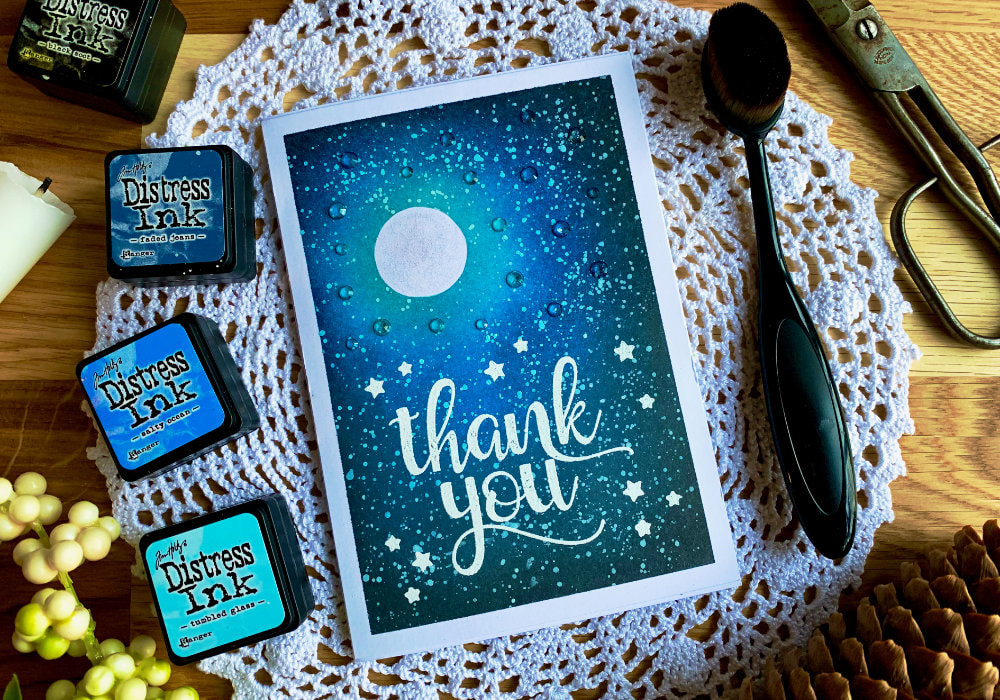
 Happy New Year everybody! I hope you had a lovely Christmas and that you will have a great year and your wishes and plans will come true. For the first card of the year I am doing a new Distress ink blending combination. I created a simple night sky, with stars and a moon. I'm using the Distress inks, but you could also use the Distress Oxides. Normally I use the Canson XL watercolour card stock, but this time I decided to change it up a bit and try the Bristol card stock from Canson and I like it. I know many crafters use the Neenah Solar White paper, I tried it and to be honest, I do not like it for ink blending, with some inks it just feels dry. The inks I used are: - Black Soot - Faded Jeans - Salty Ocean - Tumbled Glass 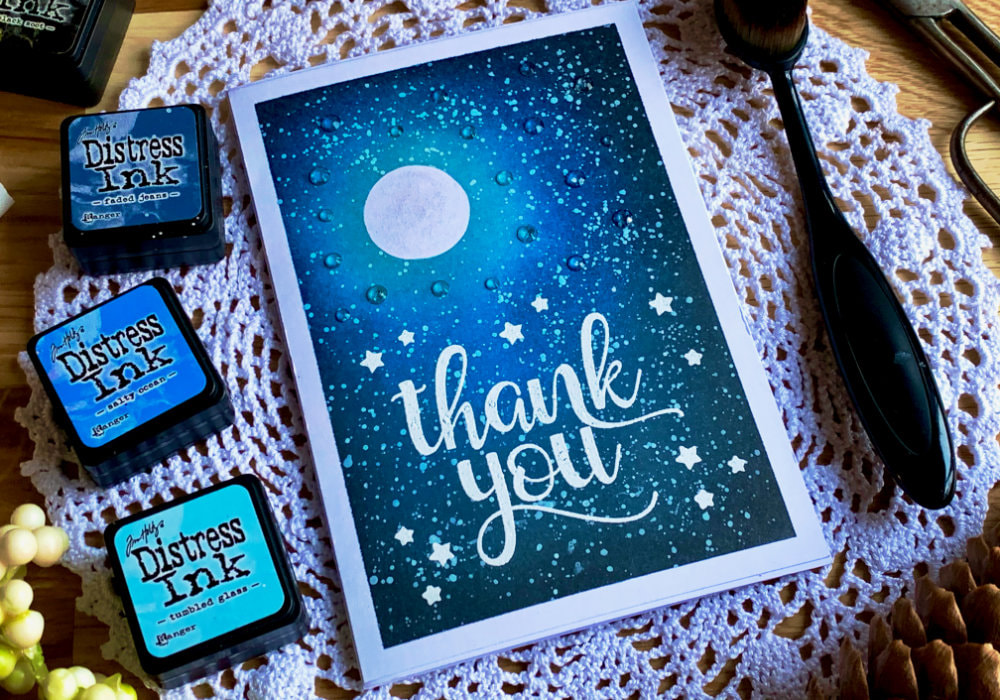 I started by creating a mask for the moon. I cut a circle about 3 cm in diameter, using the full-adhesive Post-It note and I cut it out with my scissors. I attached the circle onto the card stock that I cut down into an A6 panel. The panel I attached to a board using a masking tape. Next I began blending. I started from the moon going from the lightest ink (Tumbled Glass) to the darkest (Black Soot) and I applied the inks creating circles around the moon. Especially with the lightest inks I wanted it to look like glow from the moon. I applied two layers of the inks and then some more here and there just to blend the inks together. I didn't remove the masks, I first let the piece dry and then I applied a white splatter to create the stars. For this I used a white gouache mixed with water. You want to add enough water for the droplets go off the brush easily, but not too much so the splatter is bright white after it dries. To create the splatter I dipped the brush in the paint and holding it above the panel I tapped it with my finger, which released the droplets. 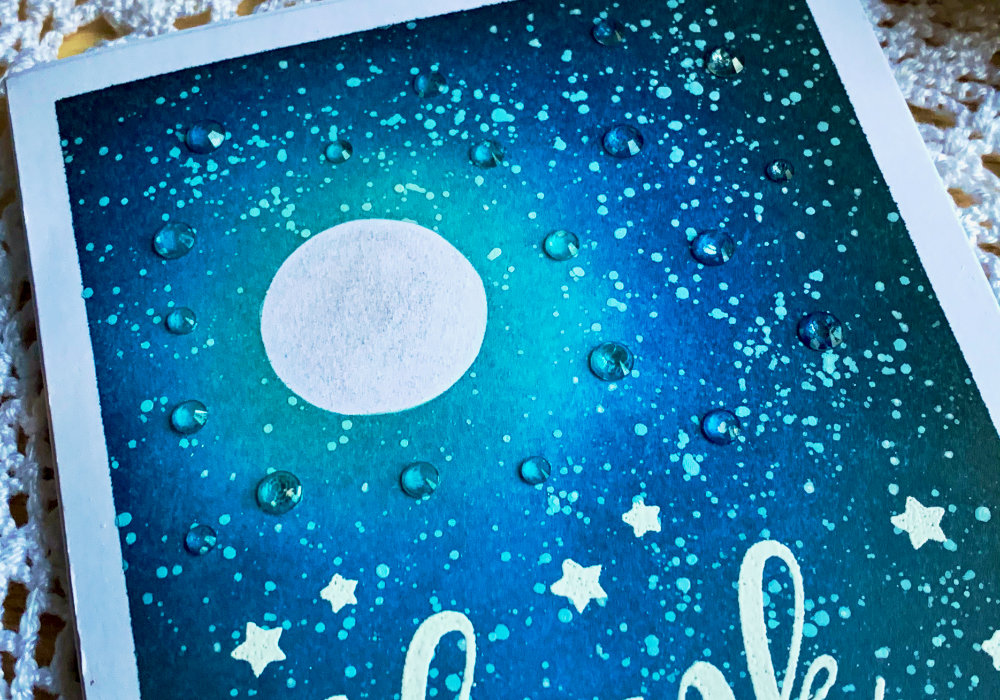 As you might know, Distress inks react with water. You can just use a clear water instead of the gouache, if you want your result to be subtle. Also my splatter was mixing with the colour of the inks, but on my trial card the stars stayed white. While it might be because I used too much water with my gouache, it can be that I didn't wait long enough for the ink fully dry. Therefore, if you would like your stars to be bright white, make sure your background is completely dry and your you don't add too much water to your gouache. After the splatter was dry I added the greeting that I heat embossed. Here you definitely need to make sure the background is fully dry, so the embossing powder doesn't stick everywhere. There were a few sentiments that I was thinking of using, but in the end, as many like to send Thank You cards after Christmas, I decided to use the Big Greetings stamp set by Avery Elle and stamp the large Thank You sentiment. I first treated the card stock with an antistatic powder and then I stamped it with the Versamark ink. I sprinkled it with a white embossing powder and heat set it with my heat tool. Additionally around the sentiment, I stamped a few stars that are part of the same stamp set. 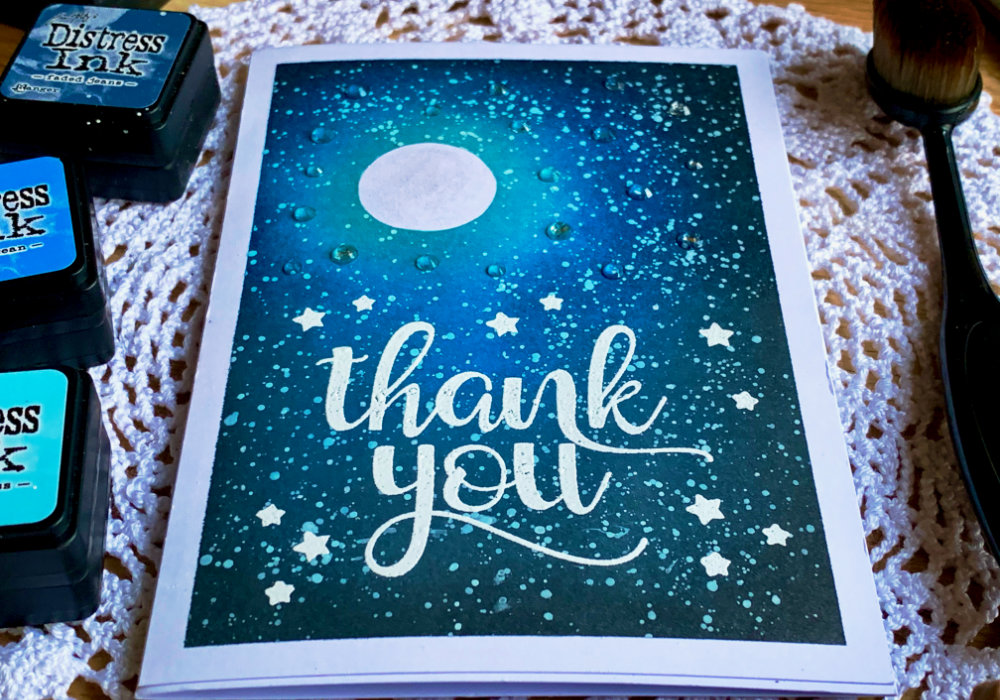 Next I adhered the panel on top of a white card base using a simple double sided tape, but I wasn't finished here. I usually don't add any embellishments, mainly because I forget. This time however, I did not forget and I used the Wink Of Stella clear glitter pen and applied the glitter over the moon, which gives the moon a nice shimmer. And not only that, I decided to add a few jewels on the top of the card, around the moon. These are the Lucy’s Cards, Ice Cube Mix jewels and I adhered them with a liquid glue. You can leave these out, but I think it adds a nice sparkle to the card. You can see a quick video of me making this card on my YouTube channel or Instagram and make sure you subscribe/follow. QUICK VIDEOWatch the video below or directly on my YouTube channel or Instagram. YOU MIGHT ALSO LIKEPIN MEDid you like the card? I would love, if you pinned it to your board on Pinterest! 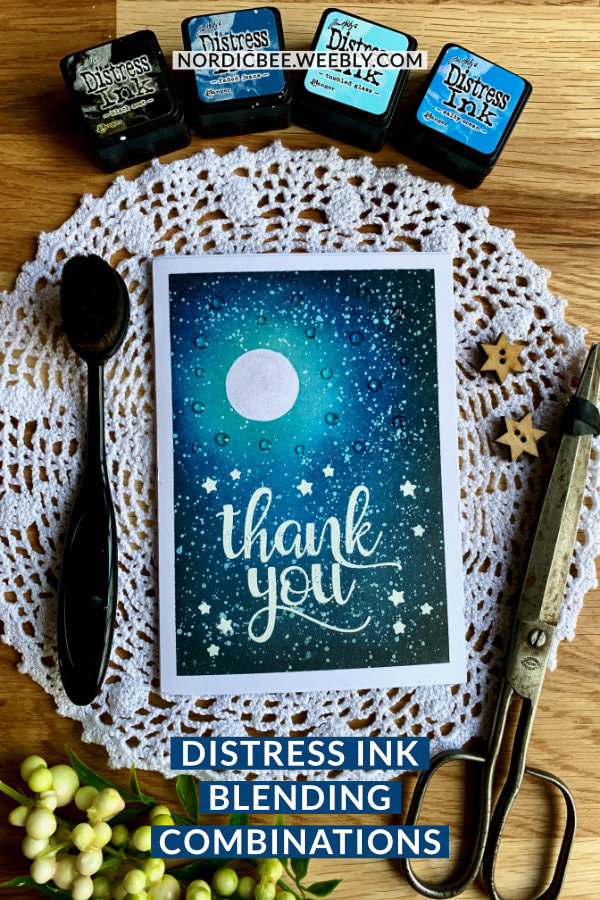
1 Comment
Lise Laplante
7/5/2023 02:04:36
I wonder if you can help me. Loved your work and videos. I have many distress ink pads and same brush. However the amount of ink that speeds out on your video is a lot more than I. I have to go over many, many times to get full coverage? Don't know why? Thanks Leave a Reply. |
FOLLOW ME
SEE MORE


CATEGORIES
All
Stamping Die Cutting Using Stencil Heat Embossing Embossing or Texture Paste Distress Inks Nuvo Products Stamping & Colouring Stamping With Solid Stamps Watercolouring Watercolour Pencils Waterbased Markers Pencil Colouring Alcohol Markers Altenew Markers Zig Brush Markers Easy Backgrounds Stamped Backgrounds Small Stamp Ideas Simple Cards Complex Cards Cardmaking For Beginners All
Painting With Acrylics Painting With Gouache Painting With Watercolours Drawing With Fineliner Minimal Supplies Cards Christmas & Holiday
Love & Valentine Mother's Day Father's Day Halloween Spring Cards Summer Cards Autumn/Fall Cards Winter Cards Cards For Children Cards For Women Cards For Men Thank You Cards Sympathy Cards Get Well Soon Cards Floral & Leav Cards Rainbow Colours Messy Watercolouring Modern Art Inspirations Geometric Patterns Landscape Painting Acrylics
Gouache Watercolours Watercolour Pencils Waterbased Markers Distress Inks Alcohol Markers Colouring Pencils No Stamps No Dies Cards
Cardmaking On A Budget Let’s Colour Quick Cards Fun Masculine Cards Background Ideas Distress Ink Combinations |
 RSS Feed
