
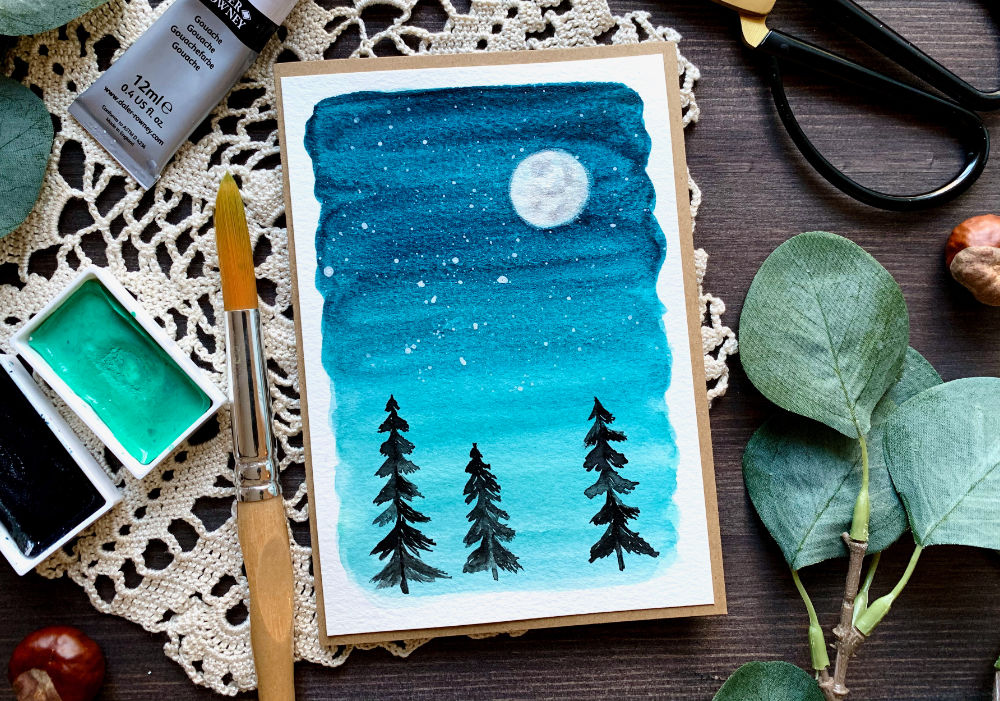
I’ve been seeing a lot of videos on Instagram, where people are painting a night starry sky with a moon and silhouette of trees and I really wanted to try it out. And having it as my first card of the year is quite good idea, before moving on to Valentine cards.
All you need for this card is watercolours, few brushes, watercolour card stock and gouache or acrylic paint for the stars. You will also need one or two jars with water and a paper towel. Just use what you have at home, or what you can afford. Most of my supplies are relatively cheap, maybe the watercolour palette is quite pricey, but it does have a lot of colours and the pans are big. I used few additional things like a masking tape and a cork board to secure my card stock, a compass and masking fluid for the moon. These are really optional things. To make a card, you will need a card base and double sided adhesive, but if you don’t have a separate card base, just use A5 watercolour card stock and fold it in half. I taped the card stock on to a cork board using a blue painters tape, you can also use washi. You don’t have to do this, but it does help with the warping of the paper. 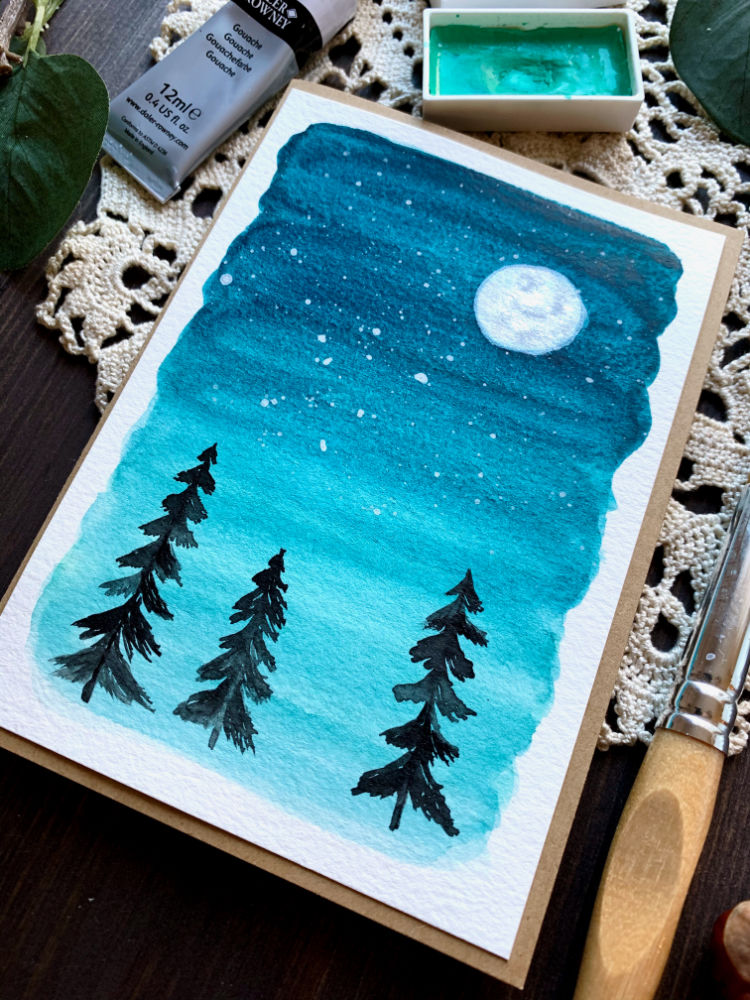
First I drew a circle for the moon using a compass, but use any round object to draw the circle, if you don’t have a compass. Then I used a masking fluid to cover the circle to protect it from getting wet. If you don’t have a masking fluid just carefully paint around the circle or if you have an acrylic paint or good quality gouache, paint the sky first and once it’s dry, paint the moon.
I started with the sky, I did the wet on dry technique, meaning only the brush was wet, the card stock was dry. You can do the wet on wet technique, but I’m using an inexpensive card stock that doesn’t handle water very well. Originally I wanted to use dark blue for the sky, but since I reached bottom of the pan I decided to use dark turquoise, which is very nice colour for the sky. I started with the darkest shade, moving down using clear water making it lighter. At the bottom part I used another paint, a mint colour, but this is not necessary, you can use only one shade if you want. I waited for it to dry a bit and then I applied second coat, just to make the colours more darker. This step is optional. Next I painted the stars, by doing a splatter. In the video I didn’t mention, I started using a box when doing the splatter, otherwise I get the paint all over the desk. I covered the bottom part of the panel where the trees will be with a piece of paper. I wanted the stars to be only at the top part of the panel. 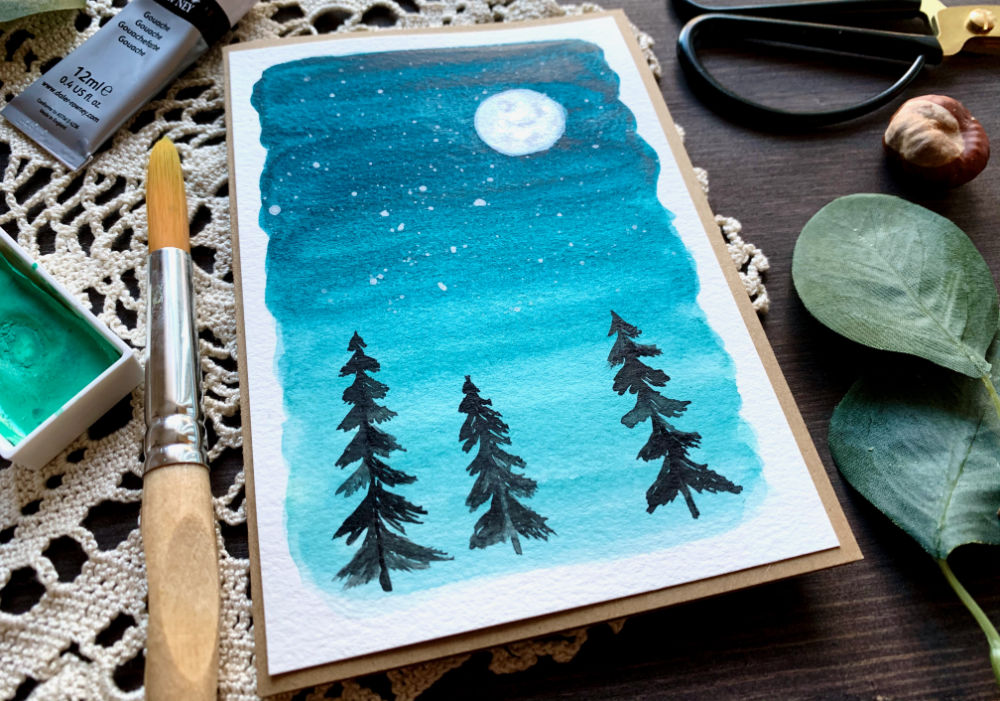
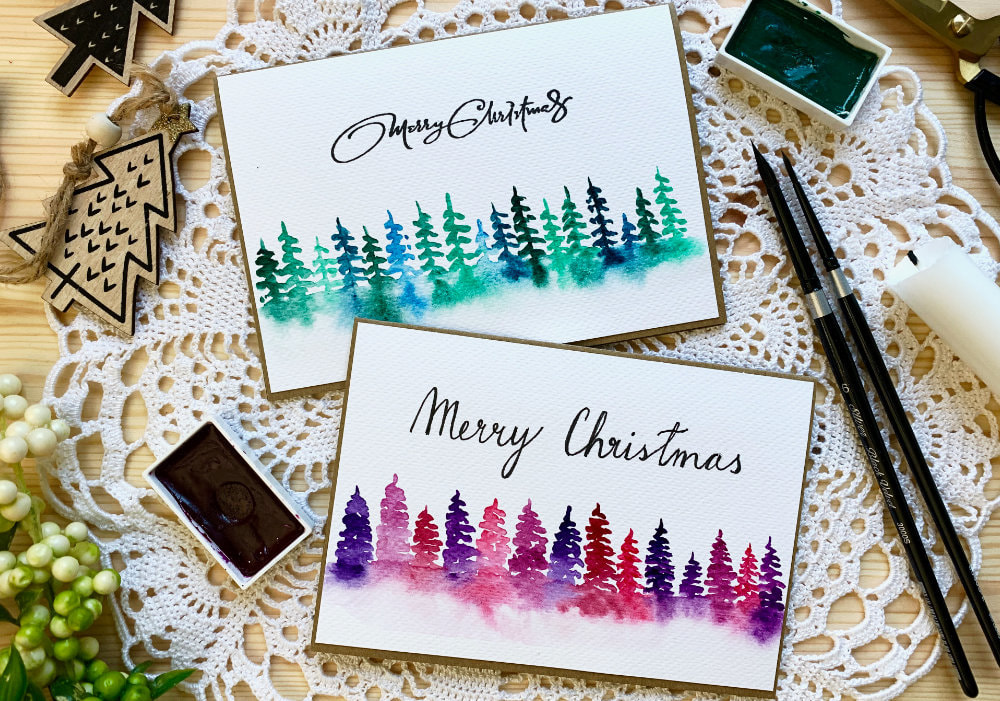
When it comes to doing the stars, I always have problems. I simply cannot find the right method or right products for it. I used a white gouache mixed with little bit of water. I tried the method where you flick the colour of an acrylic block, which didn’t work well. I also tried tapping the brush. I also tried tooth brush and long bristle brush, nothing worked. I wanted the splatter to be smaller, otherwise it would look more like snow than stars. It might be that the paint I was using, it is a very cheap gouache and it didn’t mix well with water. In the end I went in with the brush directly and just painted few dots across the sky. I hope I will find a good paint and technique in the future. I really don’t know what I’m doing wrong. I let the piece dry for a bit and then I worked on the trees. If you followed my last year's Christmas Card Series, you might remember that I made cards with misty pine trees and I showed there two methods of painting the trees. One where I painted the stem and then the brunches and the other where I just painted the brunches zig-zag from top to bottom without the painting the stem. Well… the inspiration for this card came from Instagram. I saw many people painting this kind of scenery and the trees always had the stem. And I really wanted to paint it like that. The only problem is, I’m not good at painting those trees. I could not find a good tutorial on how to paint those trees. When I painted the Christmas cards, I preferred the second method. 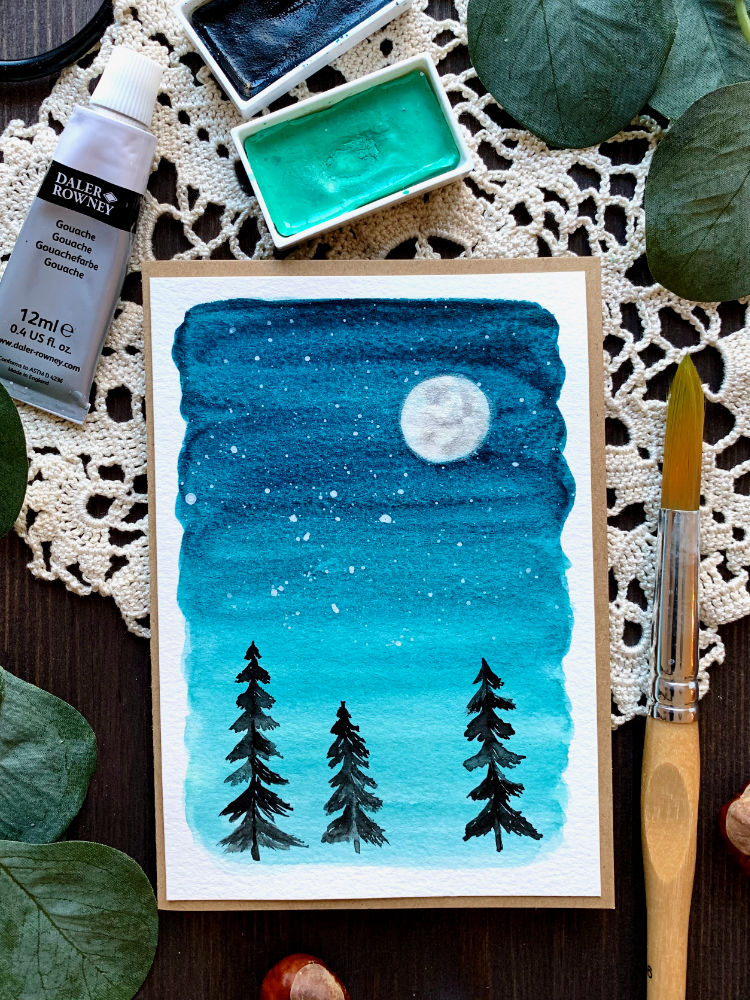
So I practised without any help and found my own way to paint the trees and while it is not the look or method I would like to do, I still like it a lot and it resembles pine trees, which all that matters. To paint the trees, I started with the stem and and then doing tiny strokes I painted the branches or needles, I’m not sure what the correct term is. I also found it helpful when I first painted a curved line coming from the stem and then I did the small strokes. Although at the top of the first tree it looks more like triangles, so make sure you give it little bit of a curve, when painting. And as I was going down I tried making it more bushy and wider.
I tried painting the tree without the stem, but it ended up painting it slightly tilted. The stem is great as a guide. When I was practising, I tried multiple brushes and the one I used for the trees is not the best for the trees, but out of all the brushes I tried, this was the best. I will try other brushes, when I paint this again and will see, maybe I find a better brush. This is actually a very good tip, if you are having troubles with painting, try a different brush! 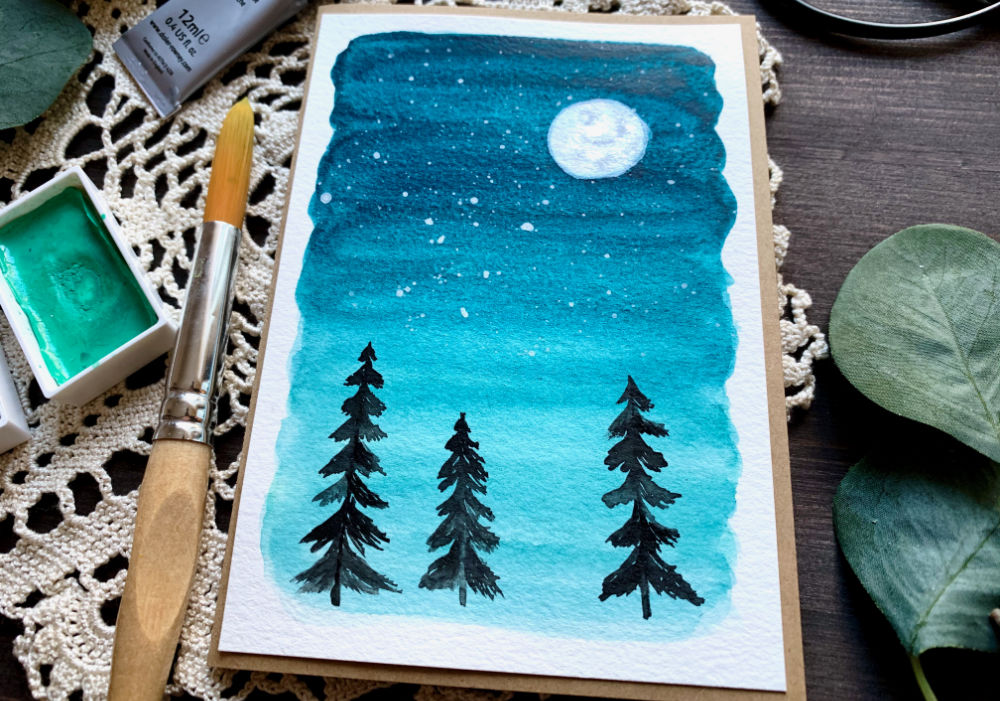
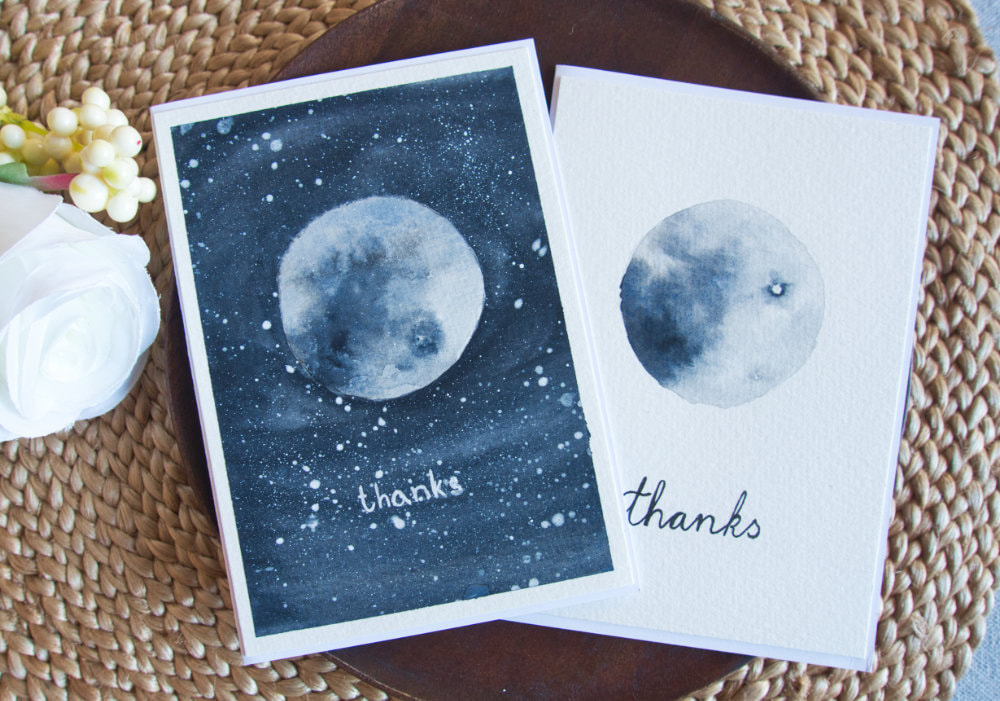
Lastly I worked on the moon, you don’t really need to do anything here, but I wanted to add few details to the moon, by doing the wet on wet technique and adding little bit of black here and there. Something like I did on a card last year, where I painted a moon. Instead of just applying clear water over the moon, I decided to use a shimmery white paint that is part of the watercolour set I’m using. If you have a shimmer pen, you can use that once the moon is dry. And I added the black spots and let it react with the water. I thought the black is little bit too intense, so I came back with clear water and lighten it up.
If you don’t have masking fluid or you are like me and realized after painting the sky that you forgot to draw the circle for the moon, you can paint the moon over the painted sky. After the piece was dry I adhered it on top of a card base that I made using a kraft card stock. I didn’t add sentiment in this case, but you can do that if you want. You can also add some embellishments or paint the sky in different colour. This was actually very basic version of this kind of scenery. You could add mountains or auroras, which would look amazing as well. That’s all for my projects today. Thanks so much for stopping by today, and have a great day! VIDEO TUTORIAL
Watch the video below or on my YouTube Channel.
PRODUCTS USED
Disclaimer: I’m currently not using any affiliate links. These links are just to help you find the products. The list includes alternatives to what I was using and while I haven't used some of them, I only recommend brands I trust.
Kuretake, Gansai Tambi, Watercolour Paints 36 Set
AmazonDE | AmazonUK Blue Squid Brush Set AmazonDE Daler Rowney Watercolour Brushes AmazonDE | AmazonUK Canson XL, Watercolour Cardstock , 300gsm/140lb AmazonDE | AmazonUK Daler Rowney, Gouache Set (Pack of 12) AmazonDE | AmazonUK Joy Crafts, Kraft Paper,A4 300gsm/140lb (card base) KreativbuntDE | AmazonUK Papermania, A6 Card Bases + Envelopes, Craft AmazonDE | AmazonUK Sellotape Double Sided Tape AmazonDE | AmazonUK YOU MIGHT ALSO LIKEPIN ME
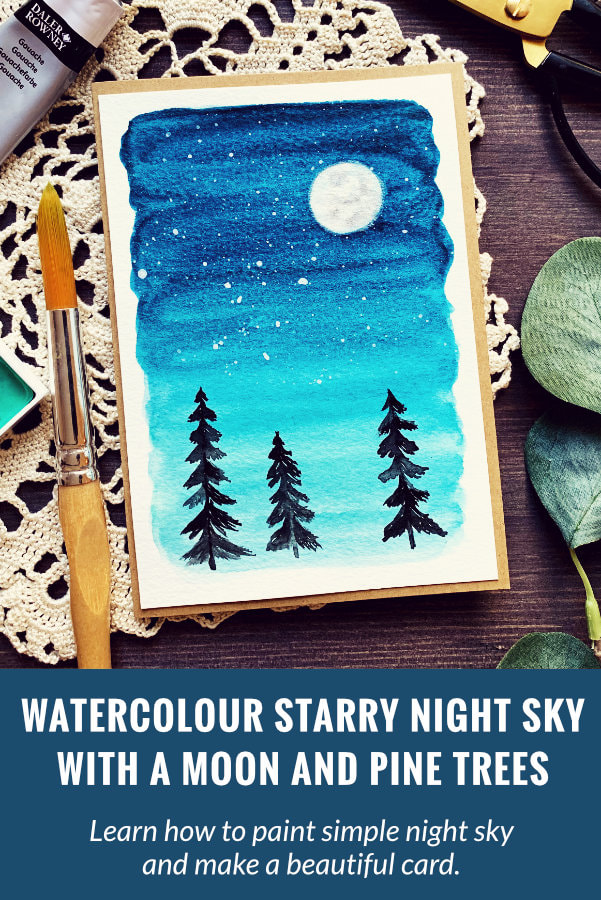
Did you like the card? I would love, if you pinned it to your board on Pinterest!
0 Comments
Leave a Reply. |
FOLLOW ME
SEE MORE


CATEGORIES
All
Stamping Die Cutting Using Stencil Heat Embossing Embossing or Texture Paste Distress Inks Nuvo Products Stamping & Colouring Stamping With Solid Stamps Watercolouring Watercolour Pencils Waterbased Markers Pencil Colouring Alcohol Markers Altenew Markers Zig Brush Markers Easy Backgrounds Stamped Backgrounds Small Stamp Ideas Simple Cards Complex Cards Cardmaking For Beginners All
Painting With Acrylics Painting With Gouache Painting With Watercolours Drawing With Fineliner Minimal Supplies Cards Christmas & Holiday
Love & Valentine Mother's Day Father's Day Halloween Spring Cards Summer Cards Autumn/Fall Cards Winter Cards Cards For Children Cards For Women Cards For Men Thank You Cards Sympathy Cards Get Well Soon Cards Floral & Leav Cards Rainbow Colours Messy Watercolouring Modern Art Inspirations Geometric Patterns Landscape Painting Acrylics
Gouache Watercolours Watercolour Pencils Waterbased Markers Distress Inks Alcohol Markers Colouring Pencils No Stamps No Dies Cards
Cardmaking On A Budget Let’s Colour Quick Cards Fun Masculine Cards Background Ideas Distress Ink Combinations |
 RSS Feed
