
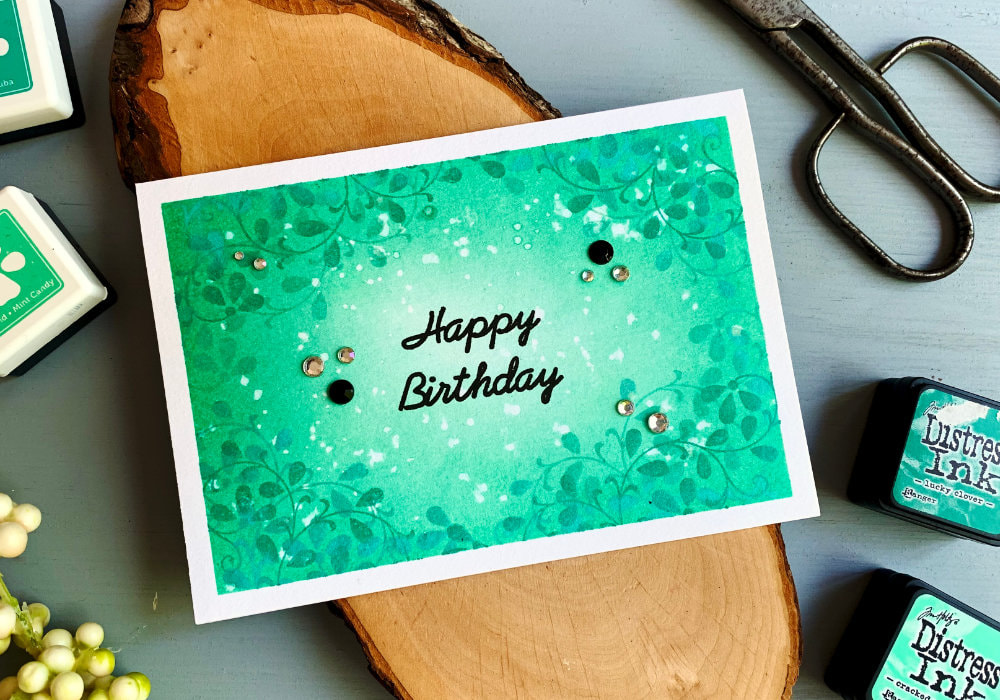
 Do you have inks that you can blend and stamp that are in the same shade of one colour, as well as a solid leaf stamp? If the answer is yes than the card in this blog post is definitely for you. I first chose the inks I used for stamping. This is because I do not have too many coloured inks, especially not in two shades of one colour, so I was a little bit restricted with my colour palette. I had two turquoise inks. They are the Hybrid inks from Simon Says Stamp, Mint Candy and Scuba. I bought these years ago when I started card making.  Then I picked matching inks for the blending. I used the Distress inks Lucky Clover and Cracked Pistachio. You can use any brands and any colours you have, as long as you can blend and create a background. For the stamping I used an older stamp set from Clearly Besotted. It's the only solid stamp with leaves that I have. I started with blending the Distress inks. The darker shade I blended over the edges and the lighter shade I sued for the inner part. The absolute middle I left very light. I also had to go over it multiple times to build up the colour.  Next I stamped the leaves. When I was blending I used a washi to hold the card stock in place and I kept the washi in for the stamping as well. My card stock had a little bit texture, therefore I had to use a stamping platform, so I can re-stamp. And I had to re-stamp three times. I used the same stamp for all the stamping and I stamped the cluster of leaves in each corner, first using the lighter ink shade and then using a darker shade I stamped over the lighter shade, just slightly moving the stamp into different position. So you can see the lighter leaves. I removed the washi and then I stamped the greeting. I picked a simple Happy Birthday sentiment that I stamped in the middle of the panel with the Onyx black Versafine ink.  Then I adhered the panel on top of a white card base using a liquid glue. You can stop here and leave the card it as it is, but I decided to use a few jewels to add a little bit of sparkle to the card. If you would like to see a quick video of me making this card, you can watch the video below or on my YouTube channel as well as on my other social media. Don't forget to subscribe or follow. WATCH A QUICK VIDEOWatch the video below or directly on my YouTube channel or Instagram. YOU MIGHT ALSO LIKEPIN MEDid you like the card? I would love, if you pinned it to your board on Pinterest! 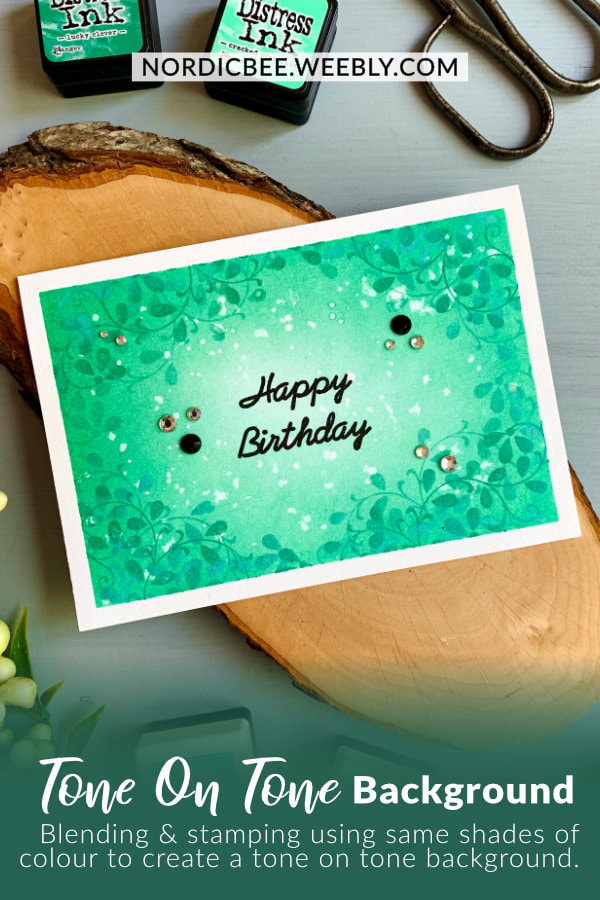
0 Comments
Leave a Reply. |
FOLLOW ME
SEE MORE


CATEGORIES
All
Stamping Die Cutting Using Stencil Heat Embossing Embossing or Texture Paste Distress Inks Nuvo Products Stamping & Colouring Stamping With Solid Stamps Watercolouring Watercolour Pencils Waterbased Markers Pencil Colouring Alcohol Markers Altenew Markers Zig Brush Markers Easy Backgrounds Stamped Backgrounds Small Stamp Ideas Simple Cards Complex Cards Cardmaking For Beginners All
Painting With Acrylics Painting With Gouache Painting With Watercolours Drawing With Fineliner Minimal Supplies Cards Christmas & Holiday
Love & Valentine Mother's Day Father's Day Halloween Spring Cards Summer Cards Autumn/Fall Cards Winter Cards Cards For Children Cards For Women Cards For Men Thank You Cards Sympathy Cards Get Well Soon Cards Floral & Leav Cards Rainbow Colours Messy Watercolouring Modern Art Inspirations Geometric Patterns Landscape Painting Acrylics
Gouache Watercolours Watercolour Pencils Waterbased Markers Distress Inks Alcohol Markers Colouring Pencils No Stamps No Dies Cards
Cardmaking On A Budget Let’s Colour Quick Cards Fun Masculine Cards Background Ideas Distress Ink Combinations |
 RSS Feed
