
Valentine's Day Card With Colourful Watercolour Heart Background | DIY CARDS FOR BEGINNERS + VIDEO4/2/2022 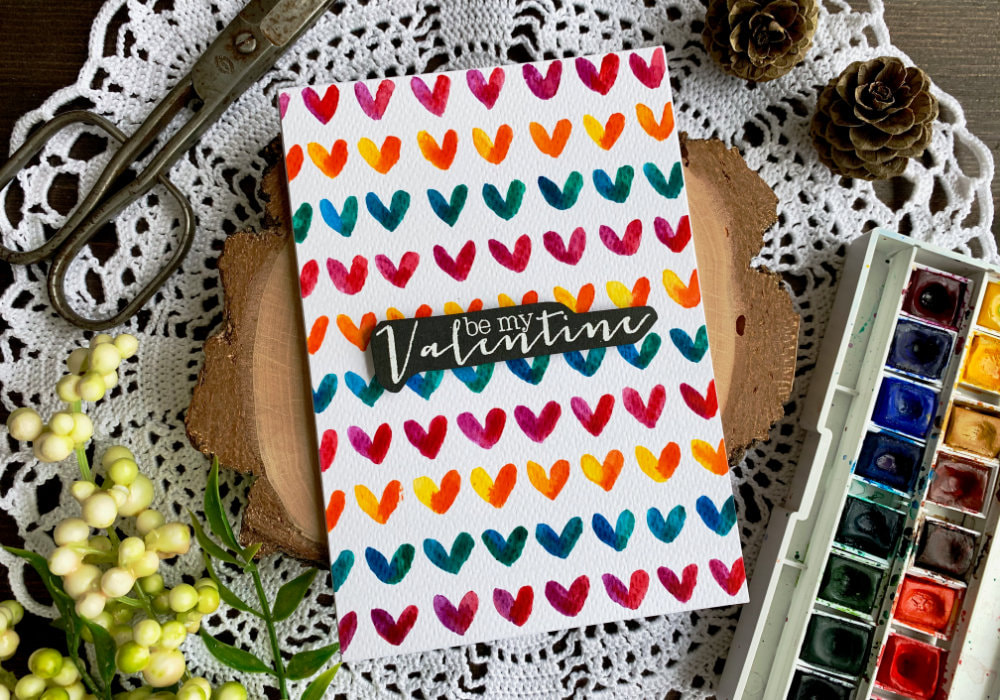 I made already four Valentine's day cards, yet I haven't used watercolours, let's correct that shall we? The idea for this card I found on Pinterest, the photo of the card is from the website Redbubble and you can see it here. This is a digital card and I just love the pattern, I'm not sure if it was actually painted or made on a computer. It doesn't matter I wanted to give it a try, because I love the shape of the hearts. All you need to paint this background are watercolours, watercolour card stock and a brush. You also need a card base, adhesive and something for the greeting. I used a stamp, but you can write your own sentiment. I also used a pencil and a ruler to draw lines across the watercolour panel, as I wanted to make sure I am painting the hearts in a straight line. I painted the lines 1.5 cm apart. 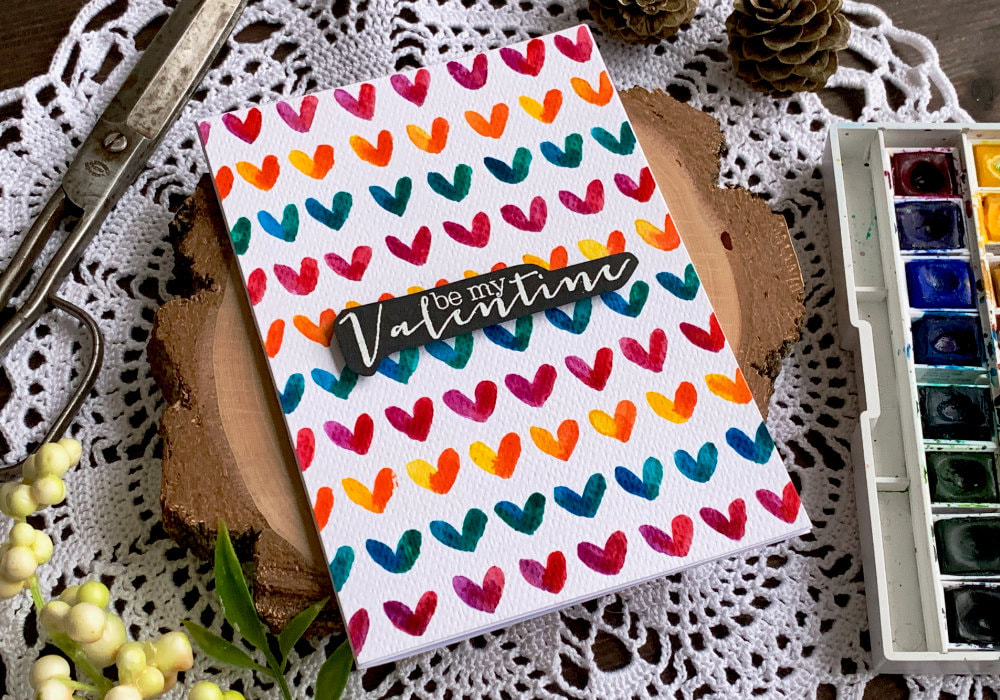 To paint the first row, I measured the middle of the card stock and I started with the middle heart and then I painted the additional hearts on each side. This row was sort of a template, just to figure out the placement. The watercolour panel I used is bigger than A6 and I will be cutting it down at the end, therefore it wasn’t really important if the first row looked look. The hearts below I painted from left to right, following the pattern above. Each heart I painted with two strokes and for each stroke I used different colours. I used three colour combination and I changed them in each row. You don’t have to do that, you can use only one colour for each row or even for the whole background. That is all up to you. The colour combinations I used were blue and green, purple and red and yellow and orange. 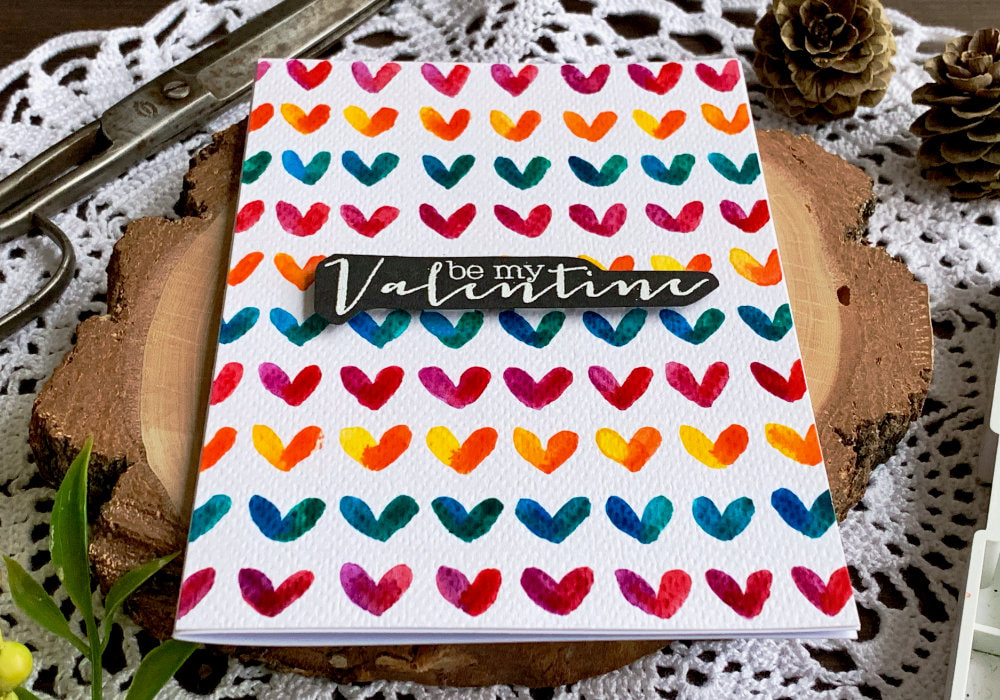 This is very simple background to paint, however, if you do not feel like painting this yourself, you can check out my page with Downloadables, where you can download the background or digital card for free. I will be adding new items to this page, not just cards that I paint, but also digital pattern papers. If you have any requests or ideas I could make, let me know in the comments. While the painting was drying, I worked on the greeting. I would have preferred to write my own sentiment, but I really liked the background and didn't want to ruin it. Therefore I decided to stamp the sentiment on a black card stock and heat emboss it with a white embossing powder. 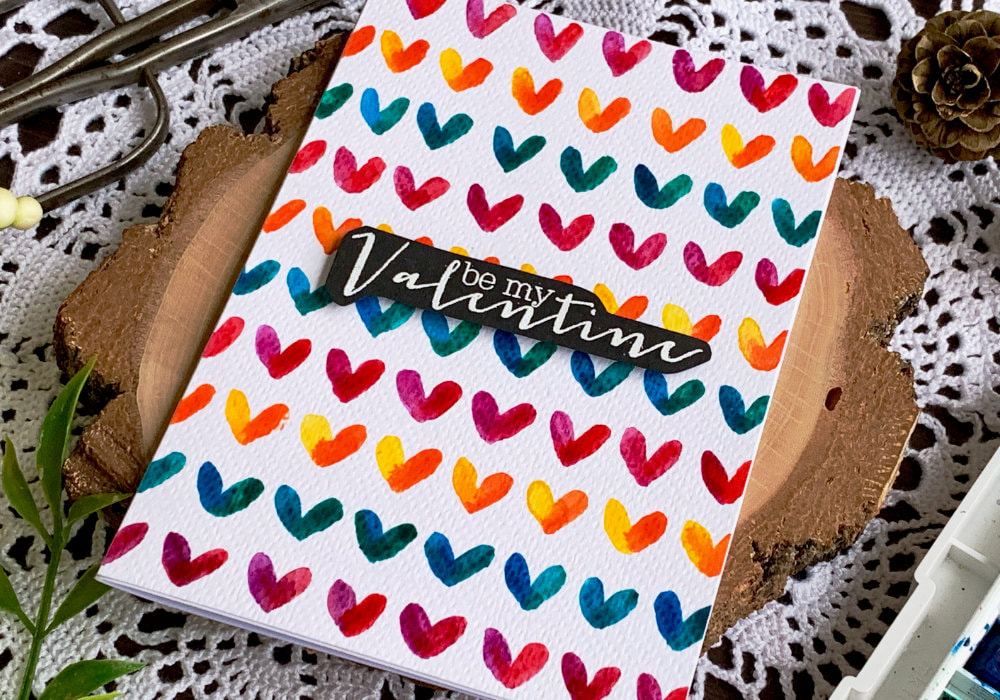 If you don't have stamps what you can do is leave one row free, without any hearts and write the greeting there, or you can use a black card stock (or paint a card stock with a black paint) and write the sentiment with a white gel pen. Before I assembled the card, I had to trim the watercolour panel to the size of my card base, which is A6. Normally I like to cut it slightly smaller than the card base as it's easier to adhere, but I wanted this background to cover the whole card. The panel I adhered using a simple double-sided tape and the greeting I attached in the middle of the panel, using a foam tape. 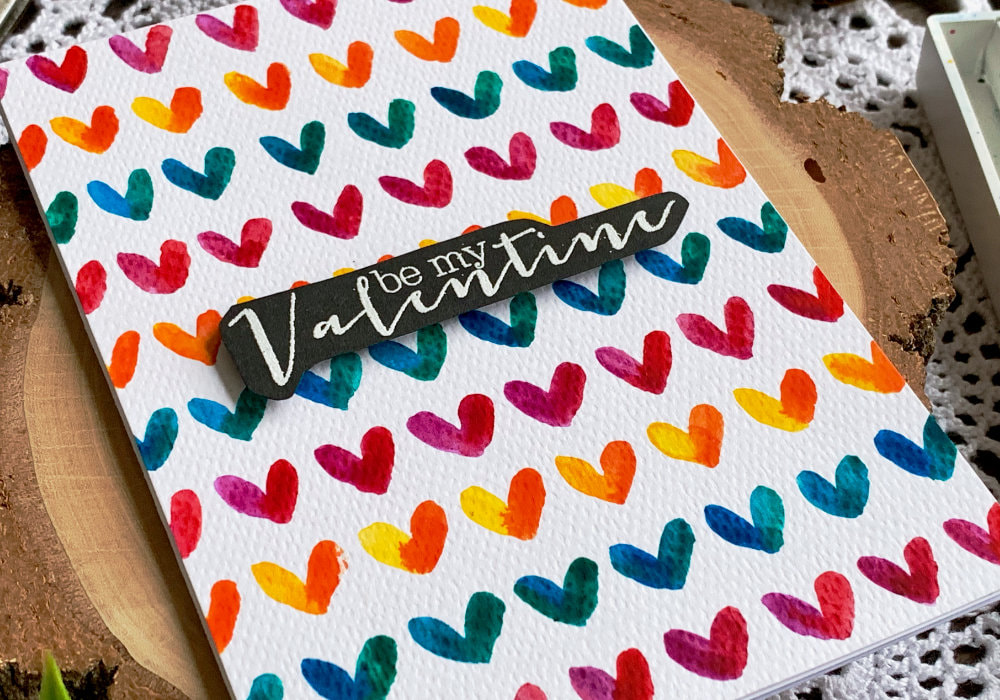 I was thinking adding some embellishments, but then I decided against it and kept the card clean and simple. I hope you will try making this card yourself. Make sure you check out my video on YouTube and give it a Like as well. The list of product is down below, where you can also find a few blog posts that I think you might enjoy. And if you have any questions, just drop me a line. VIDEO TUTORIALWatch the video below or on my YouTube Channel. PRODUCTS USEDWinsor & Newton, Cotman Watercolour Palette AmazonDE | AmazonUK Flying Tiger, Watercolour Card Stock 300 gsm FlyingTiger Søstrene Grene, Round Brush Size 7 SøstreneGrene Faber Castell, HB Graphite Pencil AmazonDE | AmazonUK Staedtler, Eraser AmazonDE | AmazonUK Tsukineko Versamark Watermark Ink Pad AmazonDE | AmazonUK EK Susccess, Anti-Static Powder Tool AmazonDE | AmazonUK Stampendous, Embossing Powder, White AmazonDE | AmazonUK Color Copy , White Paper, A4 300gsm/140lb (card base) AmazonDE | AmazonUK Papermania, A6 Card Bases + Envelopes, White AmazonDE | AmazonUK Sellotape Double Sided Tape AmazonDE | AmazonUK Dovecraft, Foam Squares AmazonDE | AmazonUK Fiscars, Guillotine A5 AmazonDE | AmazonUK Tonic Studios, Guillotine A4 AmazonDE | AmazonUK EK Success, Scissors AmazonDE | AmazonUK My Sweet Petunia, Mini MISTI Stamping Tool StempelmühleDE | BumbleberrysUK Papermania, Stamp Block AmazonDE | AmazonUK Crafting Mat, Black AmazonDE | AmazonUK Disclaimer: Here you can find the products I used to make this card. Please note that the products are just a guide, you don't need the exact products or brands. For most of the products I include links to the shops where you can purchase them if available. As I live in Europe, I provide links to UK and German stores. These are not affiliate links and every product I purchased myself. YOU MIGHT ALSO LIKEPIN MEDid you like the card? I would love, if you pinned it to your board on Pinterest! 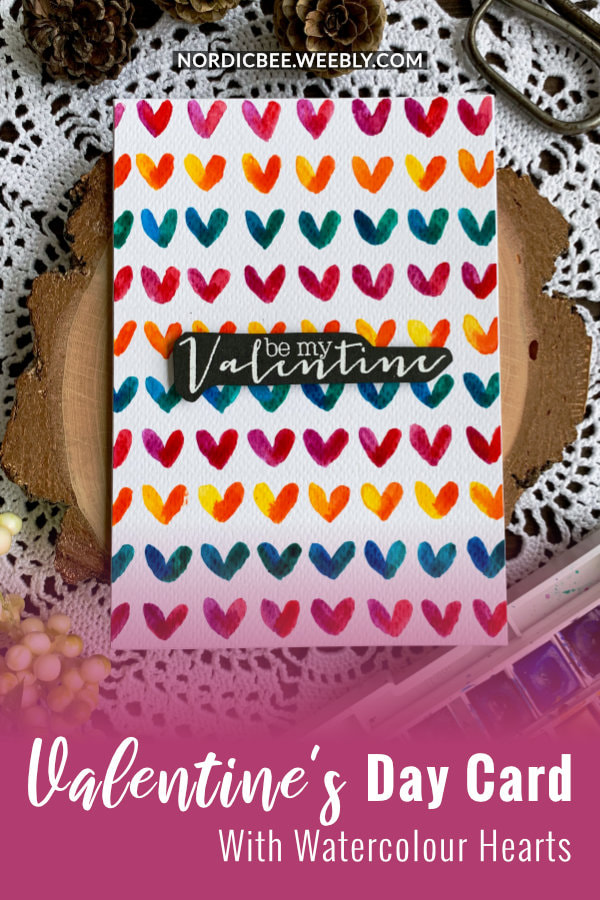
0 Comments
Leave a Reply. |
FOLLOW ME
SEE MORE


CATEGORIES
All
Stamping Die Cutting Using Stencil Heat Embossing Embossing or Texture Paste Distress Inks Nuvo Products Stamping & Colouring Stamping With Solid Stamps Watercolouring Watercolour Pencils Waterbased Markers Pencil Colouring Alcohol Markers Altenew Markers Zig Brush Markers Easy Backgrounds Stamped Backgrounds Small Stamp Ideas Simple Cards Complex Cards Cardmaking For Beginners All
Painting With Acrylics Painting With Gouache Painting With Watercolours Drawing With Fineliner Minimal Supplies Cards Christmas & Holiday
Love & Valentine Mother's Day Father's Day Halloween Spring Cards Summer Cards Autumn/Fall Cards Winter Cards Cards For Children Cards For Women Cards For Men Thank You Cards Sympathy Cards Get Well Soon Cards Floral & Leav Cards Rainbow Colours Messy Watercolouring Modern Art Inspirations Geometric Patterns Landscape Painting Acrylics
Gouache Watercolours Watercolour Pencils Waterbased Markers Distress Inks Alcohol Markers Colouring Pencils No Stamps No Dies Cards
Cardmaking On A Budget Let’s Colour Quick Cards Fun Masculine Cards Background Ideas Distress Ink Combinations |
 RSS Feed
