
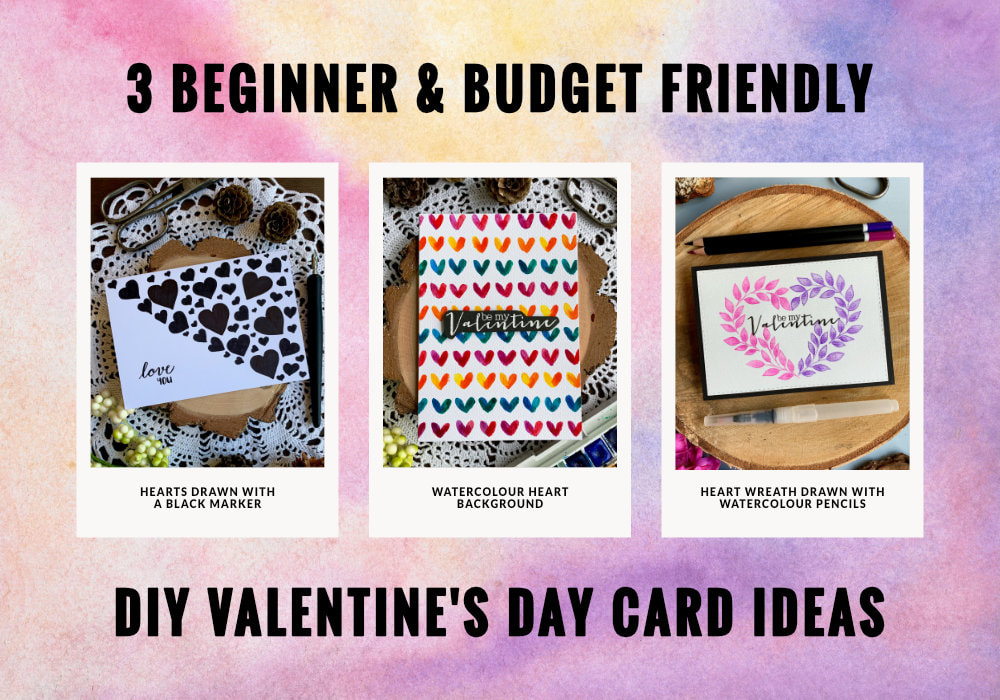
 Valentine's day is slowly approaching and if you would like to create something special yourself completely from scratch, I have for you three very simple DIY card ideas that are not only perfect for beginners, but are also budget friendly. The exact brands of products is up to you, it all depends what you can afford. Little tip before I start, the second and third card would require a paper trimmer, to cut your watercolour card stock to the size of your card base. If you do not have a paper trimmer, get a watercolour card stock that is smaller, e.g. A5, in the US 8.5 × 5.5 in or something similar. Unless you want to make a big card. You can then fold the card stock in half without needing a separate card base. In general, make sure you get a proper watercolour card stock that weighs 300gsm, in the US that is 140lb. I managed with a lighter card stock for the third cad, but if you would like to do more watercolouring, where you use more water, getting a heavier card stock is the best way to go. So, let's get started with my three examples. 1 DRAW HEARTS WITH A BLACK MARKER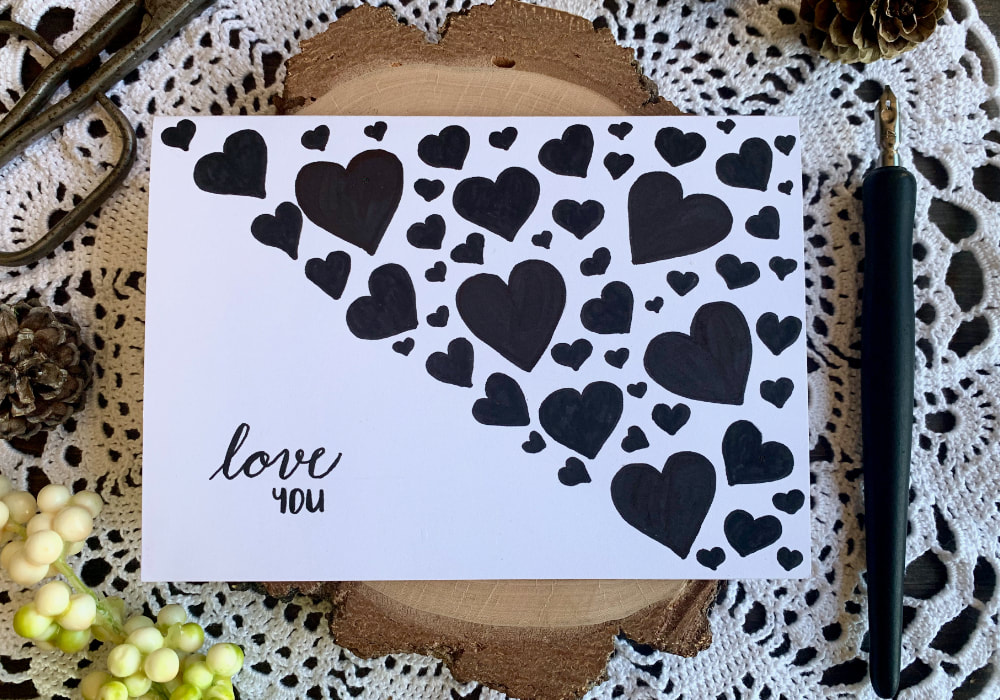 This card is the simplest of them all, it requires only two products. You will need a white card base, which is a blank card. These you can obtain in a craft store or Amazon already pre-made with envelopes. Some craft stores sell them individually, but mostly they are sold in a pack. The second product you need, is a black marker. And then you just start drawing hearts. I drew the hearts from right to left, placing them them diagonally on one side of the card. I started with the big hearts and then I drew smaller hearts around them. Lastly I wrote the greeting and the card is done. 2 BACKGROUND WITH COLOURFUL WATERCOLOUR HEARTS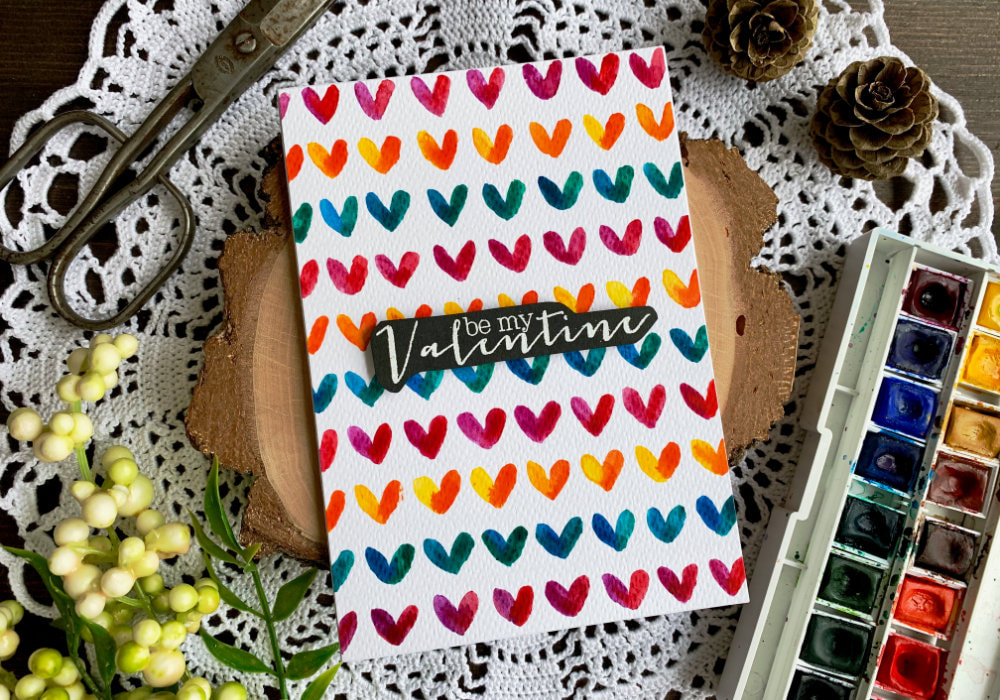 Another very simple card. I used watercolours to paint little hearts across the background. Here you will need a watercolour card stock, but you don't need to spend a fortune. I used here a watercolour paper that I bought in the store Flying Tiger. This card stock would be also great if you cannot cut it down to fit your card base, as it's not too thick to fold. I drew pencil lines for each row, to make sure I'm painting in a straight line and for the first row I measured the middle and started with that middle heart. For subsequent rows I was painting from left to right. The hearts consists of two strokes, a heart shape but in more lie a V-shape. I not only used different colours for each row of the hearts, but also different colours for each half of the heart. This is optional, you can paint all hearts with one colour. I used a stamp for the greeting and I stamped and heat embossed it on a black card stock that I cut into a banner. If you do not have stamps, you can write the greeting yourself. The easiest would be to write the greeting before you paint the hearts and paint around it. Make sure you use a waterproof ink. 3 HEART WREATH USING WATERCOLOUR PENCILS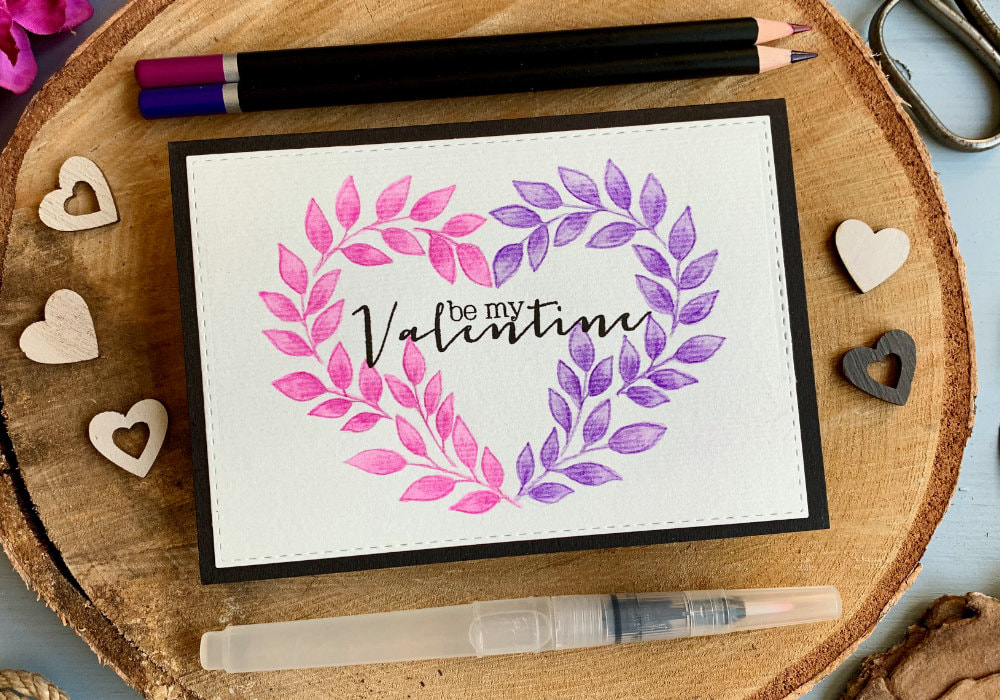 This is my latest card that I made for my blog, but it's perfect if you are looking for budget friendly card ideas. Here I used products that I bought at Lild, which is a discount store and the products are watercolour pencils and the paper. You don't have to get same products, but you do not need to spend too much money to create something similar. If you would like to go even cheaper, you could use a black marker and draw the wreath that way. The wreath consist of multiple leaf brunches and instead of going into a circle, you create a heart shape. The branches consists of curved lines and raindrop shapes, if you know how to draw those, you are good to go. Once you draw the brunches, then you add the pencil colour at the bottom of each leaf and with a damp brush you move the colour across the leaf. As these are watercolour pencils, they react with water. After you are done, write your greeting and adhere the watercolour panel onto a card base or paint it in a way so you can fold the card stock in a half. I hope you feel inspired by these tree examples, they are prefect if you are new to card making and either do not have that many supplies, or do not want to spend too much on new products. And if you would like to see more ideas for cards not only for Valentine's day, check out the full gallery, with all of my handmade cards. PIN MEDid you like the card? I would love, if you pinned it to your board on Pinterest! 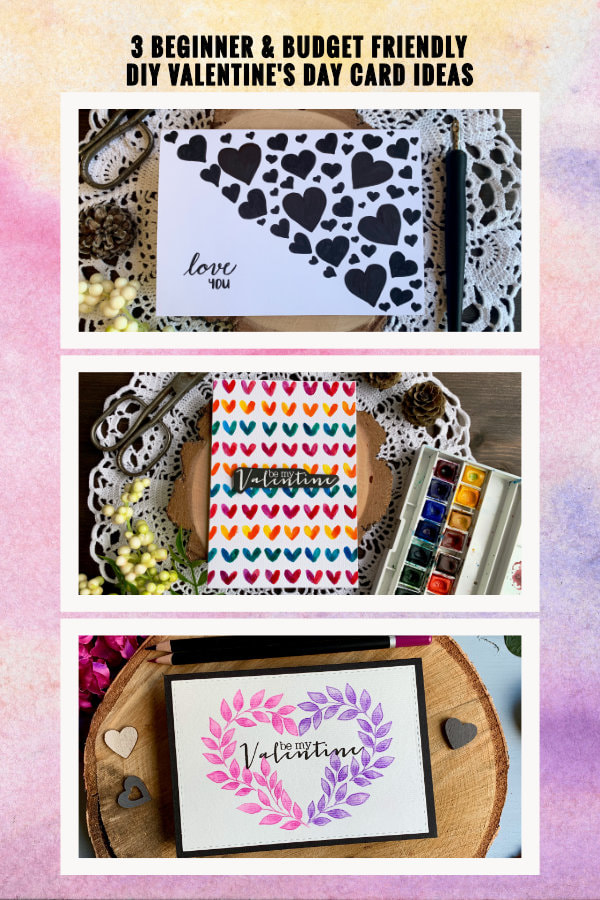
0 Comments
Leave a Reply. |
FOLLOW ME
SEE MORE


CATEGORIES
All
Stamping Die Cutting Using Stencil Heat Embossing Embossing or Texture Paste Distress Inks Nuvo Products Stamping & Colouring Stamping With Solid Stamps Watercolouring Watercolour Pencils Waterbased Markers Pencil Colouring Alcohol Markers Altenew Markers Zig Brush Markers Easy Backgrounds Stamped Backgrounds Small Stamp Ideas Simple Cards Complex Cards Cardmaking For Beginners All
Painting With Acrylics Painting With Gouache Painting With Watercolours Drawing With Fineliner Minimal Supplies Cards Christmas & Holiday
Love & Valentine Mother's Day Father's Day Halloween Spring Cards Summer Cards Autumn/Fall Cards Winter Cards Cards For Children Cards For Women Cards For Men Thank You Cards Sympathy Cards Get Well Soon Cards Floral & Leav Cards Rainbow Colours Messy Watercolouring Modern Art Inspirations Geometric Patterns Landscape Painting Acrylics
Gouache Watercolours Watercolour Pencils Waterbased Markers Distress Inks Alcohol Markers Colouring Pencils No Stamps No Dies Cards
Cardmaking On A Budget Let’s Colour Quick Cards Fun Masculine Cards Background Ideas Distress Ink Combinations |
 RSS Feed
