
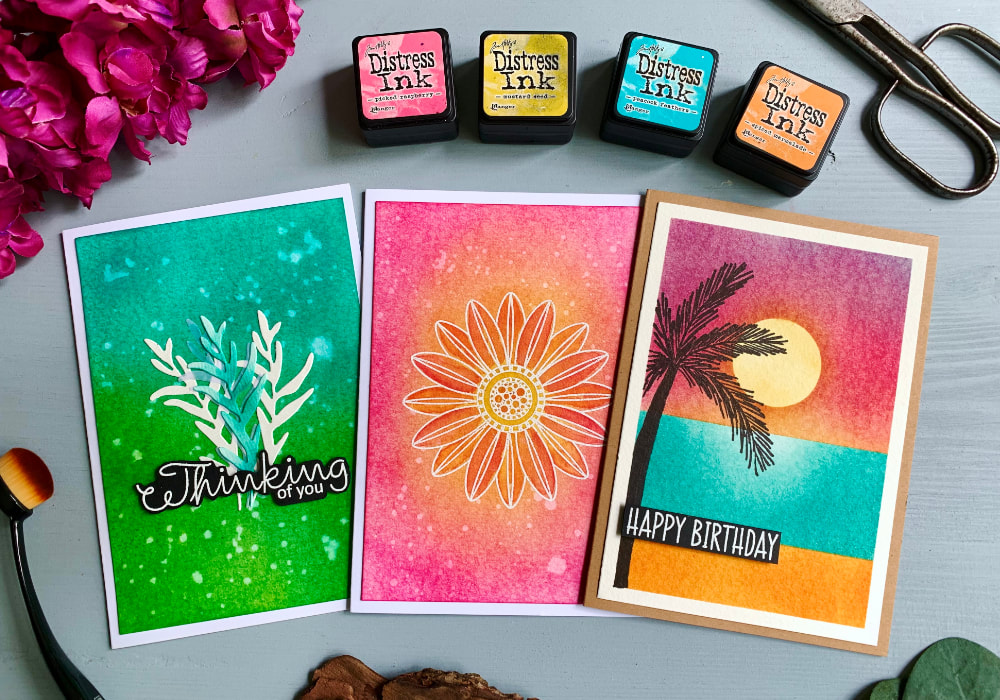
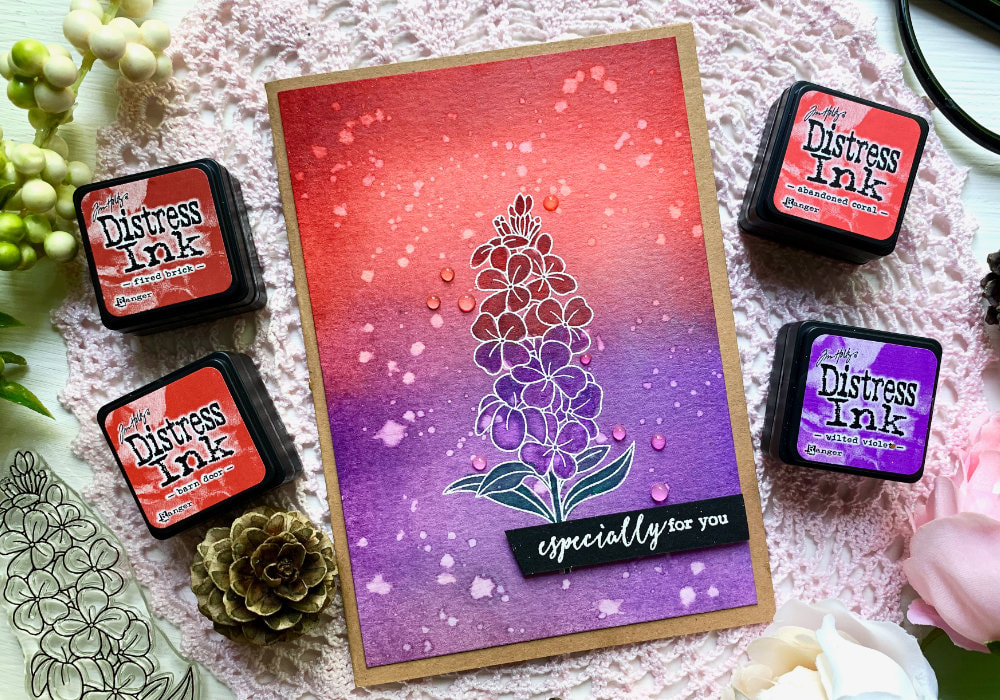
 I've been using the Distress Inks pretty much since I started card making and they became one of my favourite colouring products. I buy the mini ink cubes, because I simply do not have space in my craft room and I buy them in the sets of four or kits as they are called. And after I bought my last kit, I thought it would be fun and a great challenge, if I tried to create different colour combinations for each kit. And... that's what I'm doing. Welcome to my Distress Ink Colour Combination Kit Series, starting with the Kit #1. Here I created three colour combos, there are way more I could do, but especially because the video would have been too long and there are seventeen kits to go through, I decided to stick with three examples. However at the end of this blog post there are a few more colour combo tips that I haven't had the chance to make yet. Also you can use the normal sized Distress inks as well as Distress Oxides. 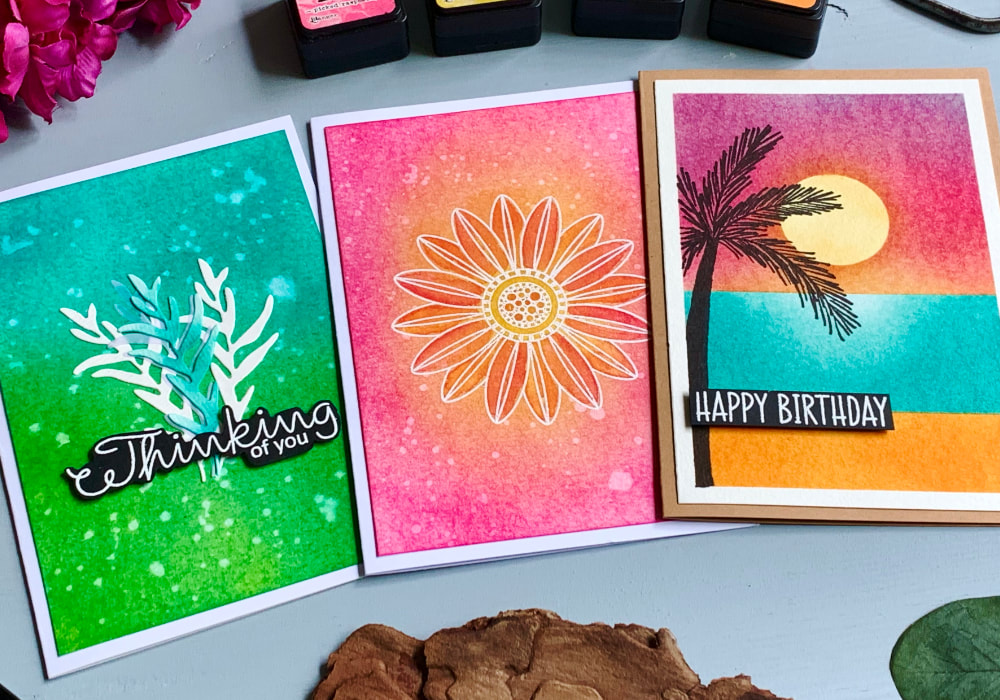 TECHNIQUE The way I create the backgrounds I apply a base layer, this is a lighter application and then I apply additional layers, building up the colours, switching between the inks and blending the inks together. Keep in mind, not every ink pad is the same, it depends how juicy the inks are, what kind of paper you are using and what blending tool you are using. For some inks two layers are enough, with some I need to apply multiple. The direction you decide to apply the inks is completely up to you. You can apply them diagonally, where the transition is diagonal, you can apply them from top to bottom, with horizontal transitions or creating an oval or circular shape in the middle and so on. When it comes to the card stock, I like to use the Canson XL watercolour paper, but use whatever you prefer. 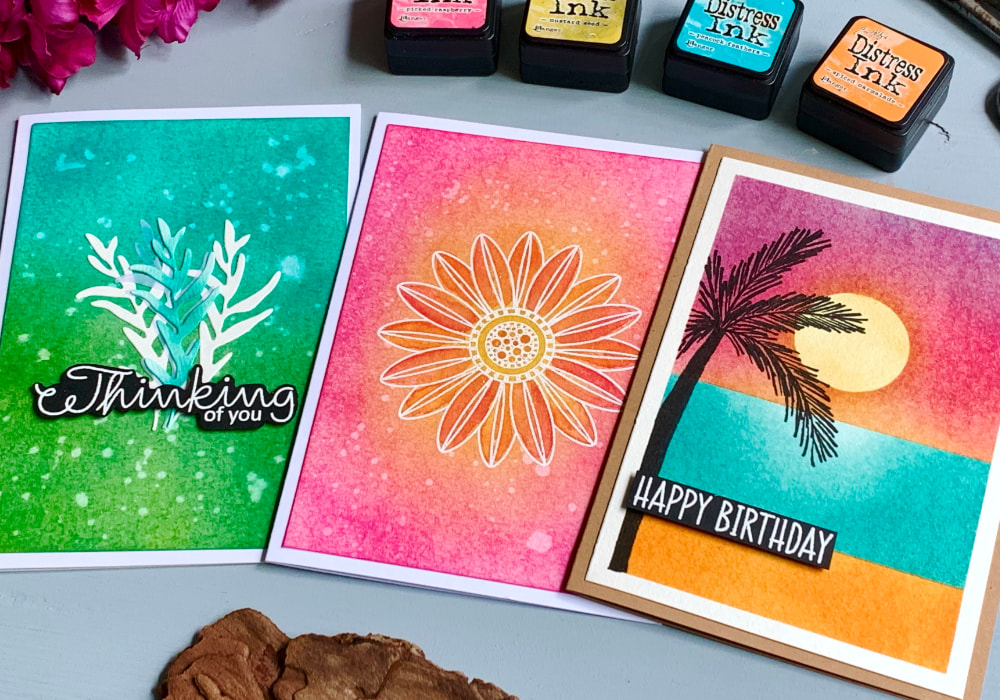 THE KIT #1 The kit consists of pink, yellow, blue and orange and the ink names are: - Picked Raspberry - Mustard Seed - Peacock Feathers - Spiced Marmalade COLOUR COMBO #1: Peacock Feathers & Mustard Seed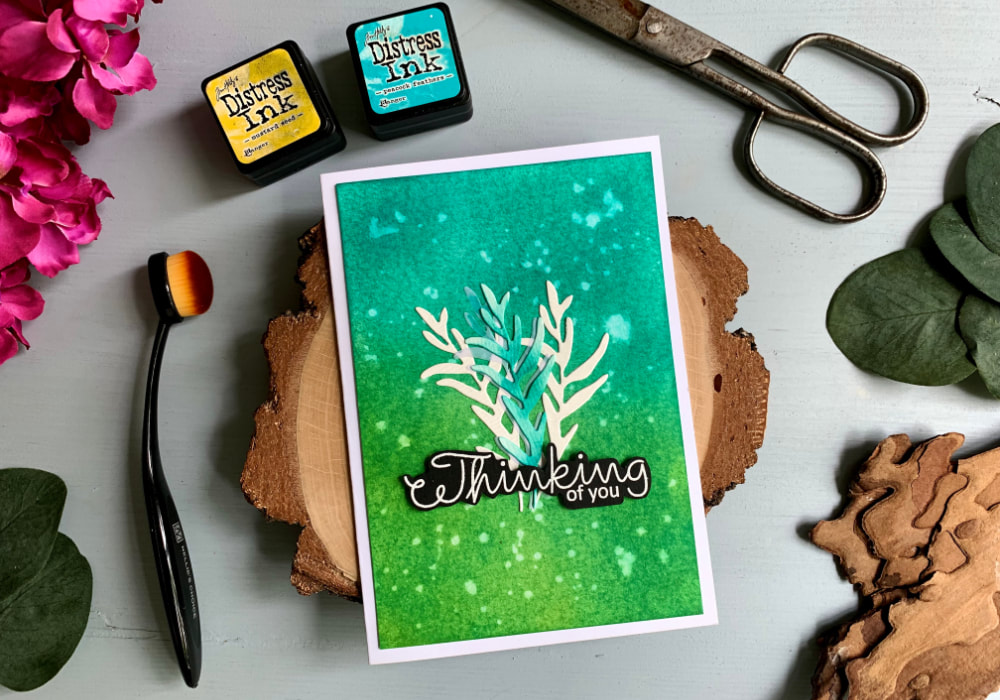 I'm starting with this colour combination, because I don't think many people would think of it. In the photo you see blue and green, yet I'm using the inks Peacock Feathers and Mustard Seed, which are blue and yellow. However, as you know these colours combined create green. This might be straight forward if you are using paints, but I don't think I have ever seen anyone using Distress inks to create a new colour. Mainly because if you enjoy Distress inks, you end up buying a bunch and you won't need to create new colours. I started applying the Peacock Feathers ink across the panel, creating a diagonal line, stopping in the middle of the card stock. In the end it wasn't diagonal, but that was my aim. Next I changed to Mustard Seed and lightly applied the ink. I didn't want to have a thick application. You can apply more later, if needed. Then I took the Peacock Feathers again and went over the Mustard Seed to create green. 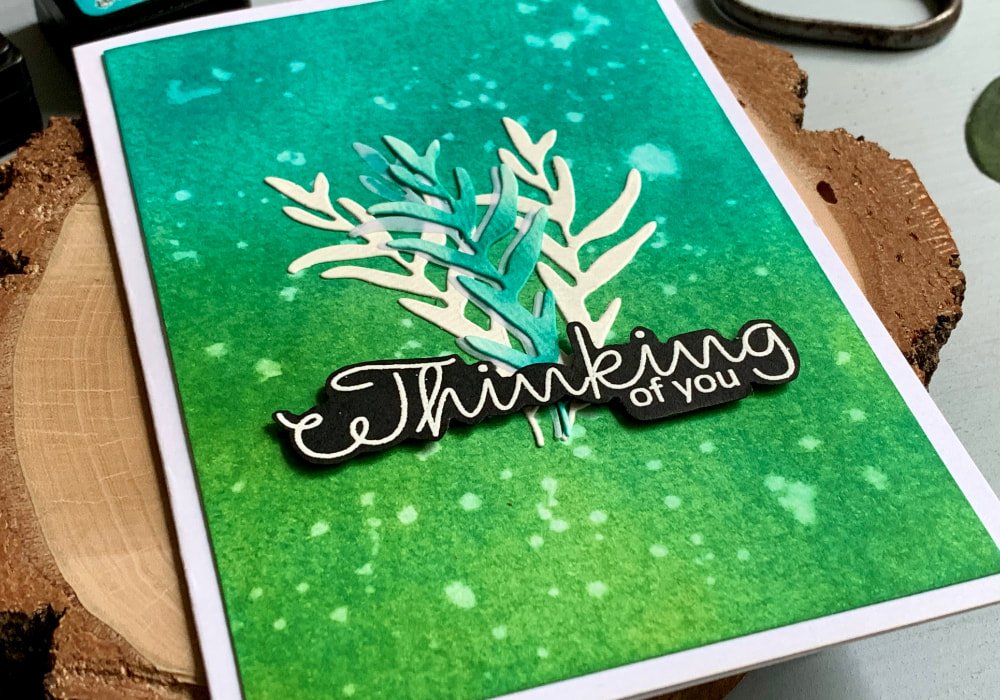 Here I needed about two to three layers and after I was happy with the look, I used clean water with clean brush and splattered a few droplets across the panel. Then I took a paper towel and soaked up the ink. Distress inks react with water and the paper towel soaks up the excess ink, which creates a really nice effect. To make the card I die cut a branch with leaves. Two out of a white card stock and one out of vellum. I adhered the branches in the middle of the panel using a glue. Because you could see the glue on the vellum die-cut after it dried, I die-cut one more brunch using the white card stock and I slightly blended the Peacock Feathers across it. I adhered this brunch over the one made out of vellum and problem was solved. Then picked a greeting that I pre-made. It says Thinking Of You. It is stamped and heat embossed in white on a black card stock and fussy-cut. I adhered the greeting over the branches and lastly I glued the whole panel on top of a white card base. COLOUR COMBO #2: Picked Raspberry & Mustard Seed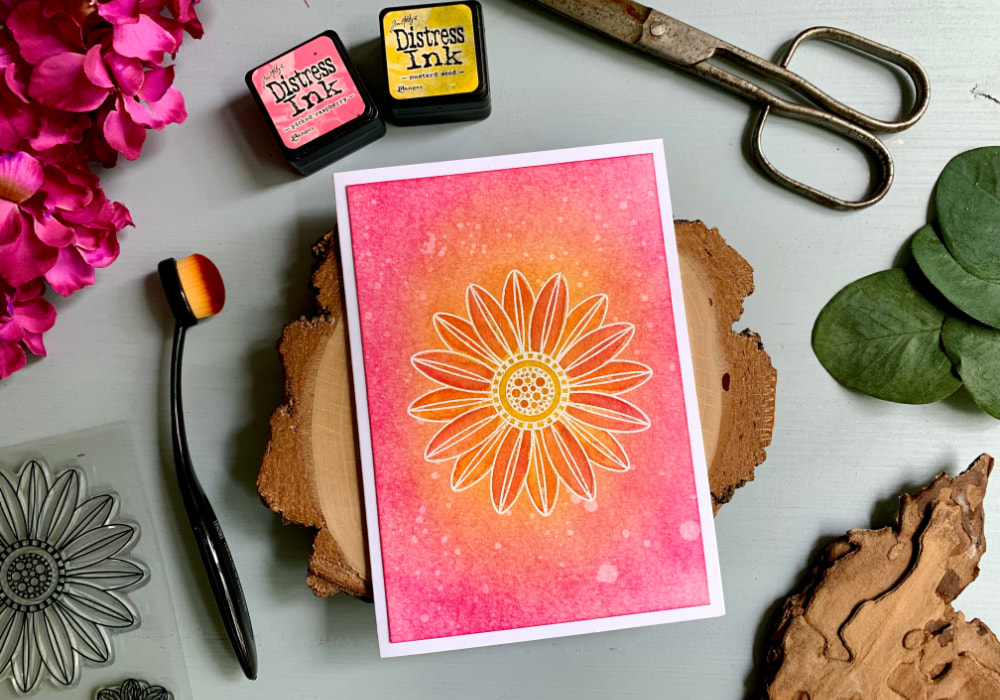 The next colour combo I already did in the past, I just didn't use the Mustard Seed. I think pink and yellow or orange go really well together. Here I created an oval shape in the middle using the yellow. When blending you can start in the middle or at the outer edges. I started outside using the Picked Raspberry and I applied my first layer, leaving an oval shape free in the middle. Then I blended in the empty oval space with the Mustard Seed. I applied few layers blending the inks together. And as the pink and yellow combined they created orange. Next I added splatter using clear water and then I soaked it up with a paper towel, same as on the previous panel, except I didn’t do it right away, I let it dry a bit first. This is just my observation, but if you add splatter right away, often the splotches are bigger, compared to adding water splatter to dryer backgrounds. Of course the amount of time you wait before you soak it up, as well as the size of the brush and the droplets also influences the size. 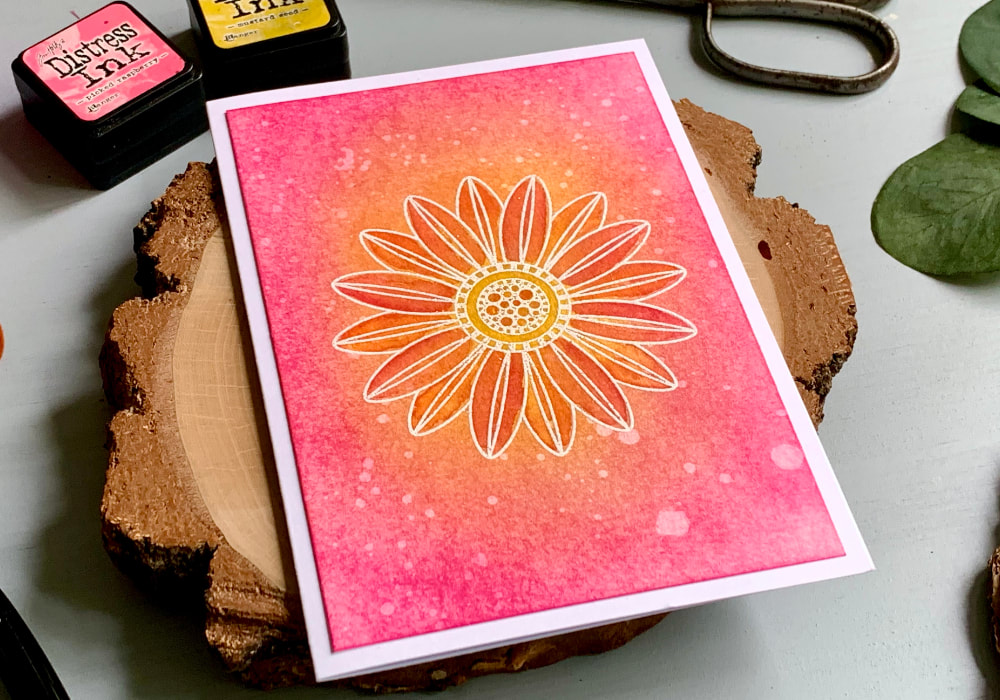 I let the piece fully dry, you could also use a heat tool, but I prefer air drying. It is important for the panel to be fully dry, because the next step is heat embossing. If not dry, the embossing powder will be sticking everywhere. I picked a big flower stamp from the Botanical Love stamp set by Create A Smile and I stamped and heat embossed it using a white embossing powder. 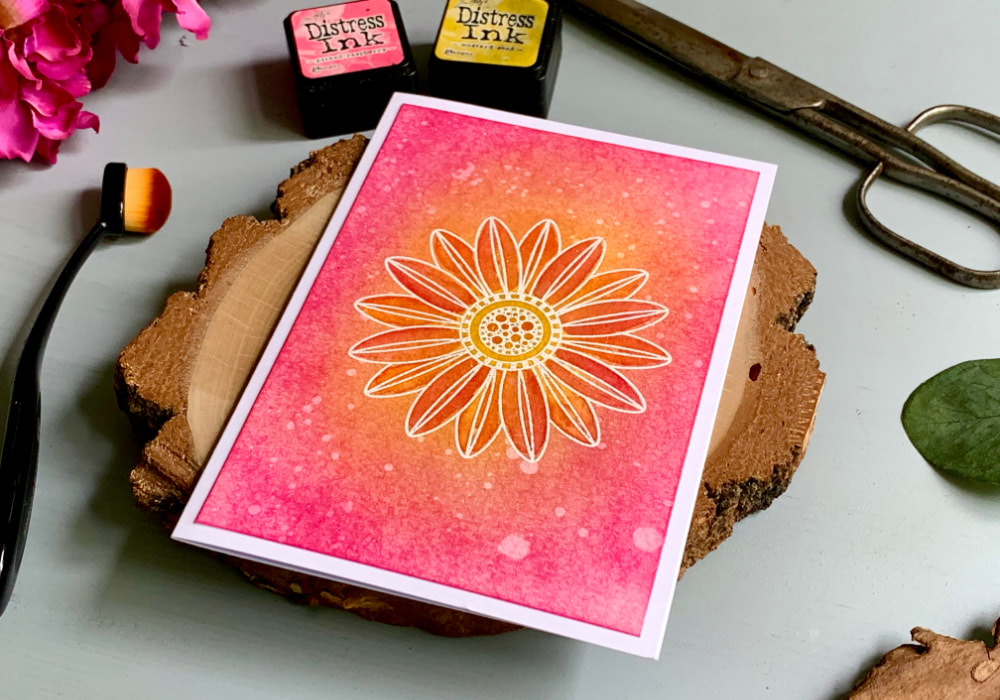 You can leave it as it is, but when I’m using flower stamp sets on these backgrounds, I like to colour them using the same Distress inks I used for the background as watercolours. Sometimes I add oder colour, mostly green. I think this helps the colour to pop. So I squished the inks onto an acrylic block, anything slick will do and using a water-brush pen I coloured the flower. I used the Mustard Seed for the middle and then the Spiced Marmalade and Picked Raspberry for the leaves, changing the inks between the petals. After the piece was dry I adhered it onto a white card base. I didn’t add any greeting as I thought the card doesn’t need it. COLOUR COMBO #3: All Inks In The Kit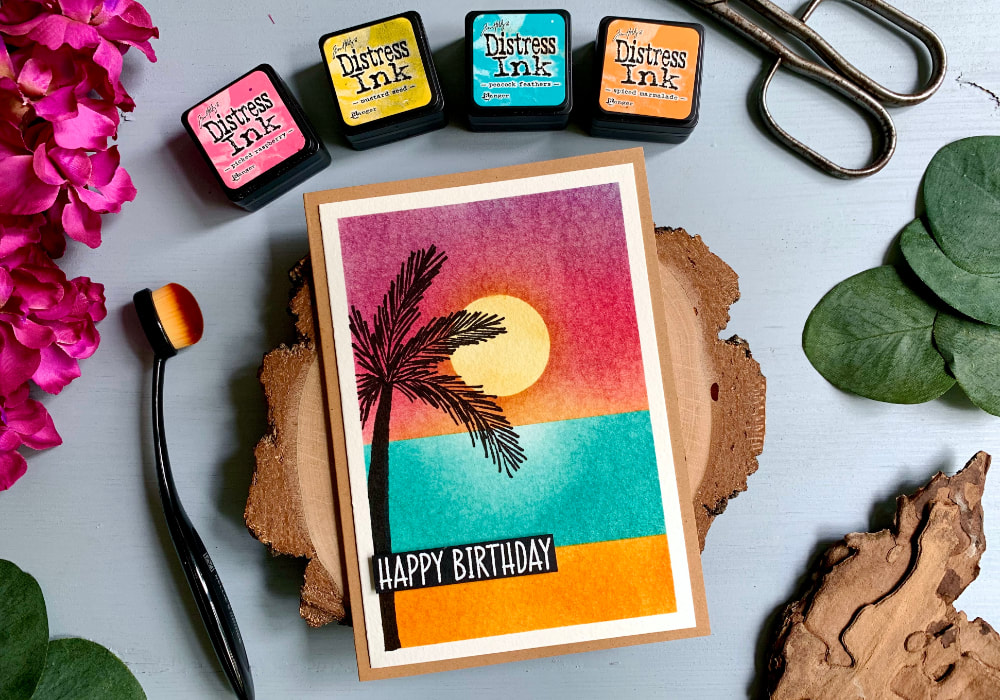 The last colour combo is not the typical one, meaning creating a simple background. With many Distress inks you can create landscapes, especially sunrise or sunset and that’s what I created for the last colour idea. I used a washi to attach the panel onto a board, which will also create a border across the panel. I also used the washi to separate the sky, sea and the land. This is optional, you should be able to blend the colours together from top to bottom, if you leave out the yellow between the sky and sea. Using the washi I also created a mask for the sun. I stuck multiple strips together and die cut them using a circle die. If you do not have a die, you can draw the circle and cut it with scissors. 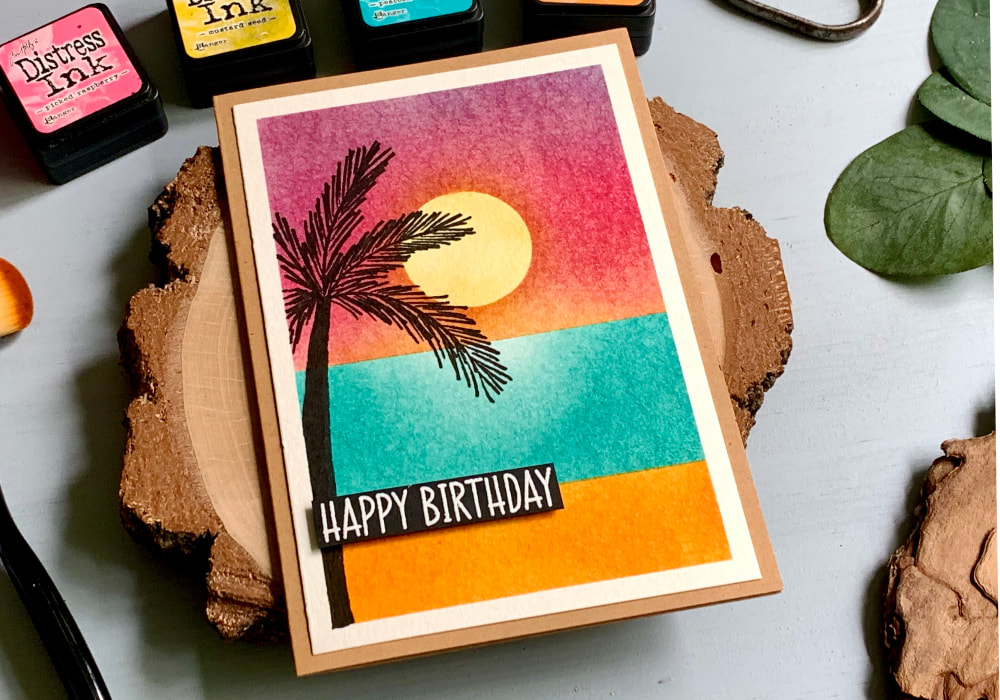 I placed the mask where I wanted the sun to be and then I started the ink blending. I began with the Mustard Seed, creating a glow over the sun and over the horizon in a flat a shape. Then I used the Picked Raspberry and applied it over the whole sky, also covering some of the yellow, which turned the colour orange. Then I took the Peacock Feathers and I applied it over the top part of the sky. When it mixed with the pink, it turned the colour into purple or lilac shade. So I was able to create a sky that goes from purple, to pink, orange and yellow. I switched a few times between the Picked Raspberry and Peacock Feathers to build up the colour and next I moved onto the sea. I first relocated the washi and then I started blending. For the sea I only used the Peacock Feathers. When I was applying it, below the sun I left it without any colour, creating a U-shape gradient. This is to give the illusion of the sun reflecting on the water. 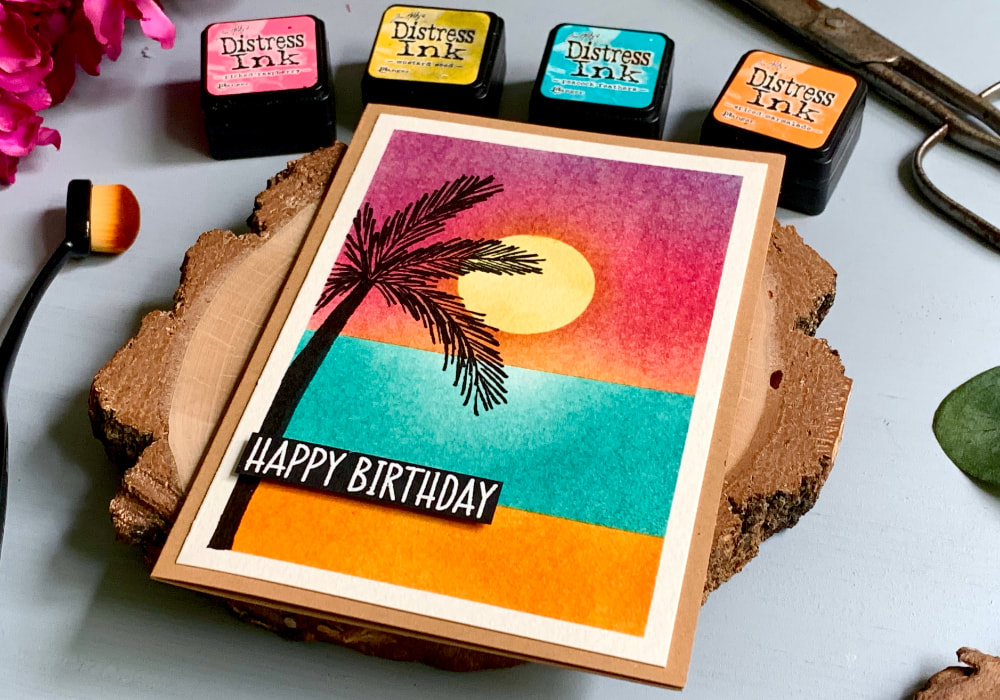 After I was happy with the look, I relocated the washi. Actually I had to use a new washi strip, because it would not hold over the freshly blended ink. And then I applied my last colour, the Spiced Marmalade. Here I didn’t do anything special, just applying a few layers to get a nice solid colour. You could leave it as it is, but I really wanted to add a silhouette of a palm tree. The only issue was, I don’t have a stamp or a die. So I had to draw it myself. Surprisingly it was very simple. I first practiced in a sketch book and then I drew the palm onto my card stock. I used the black alcohol marker from Altenew, this was the blackest pen I had. To draw the tree, I started with a slightly curved trunk that was getting narrower at the top and from the top of the trunk I drew the branch with the leaves. I started with a curved line and then in quick short strokes I drew the leaves. I drew them on each side of the branch but you can draw them only on the lower part. I removed the washi and then I added a greeting. A simple banner that says Happy Birthday. And lastly I attached the panel on top of a card base using a liquid glue. The card base I created out of a craft card stock. 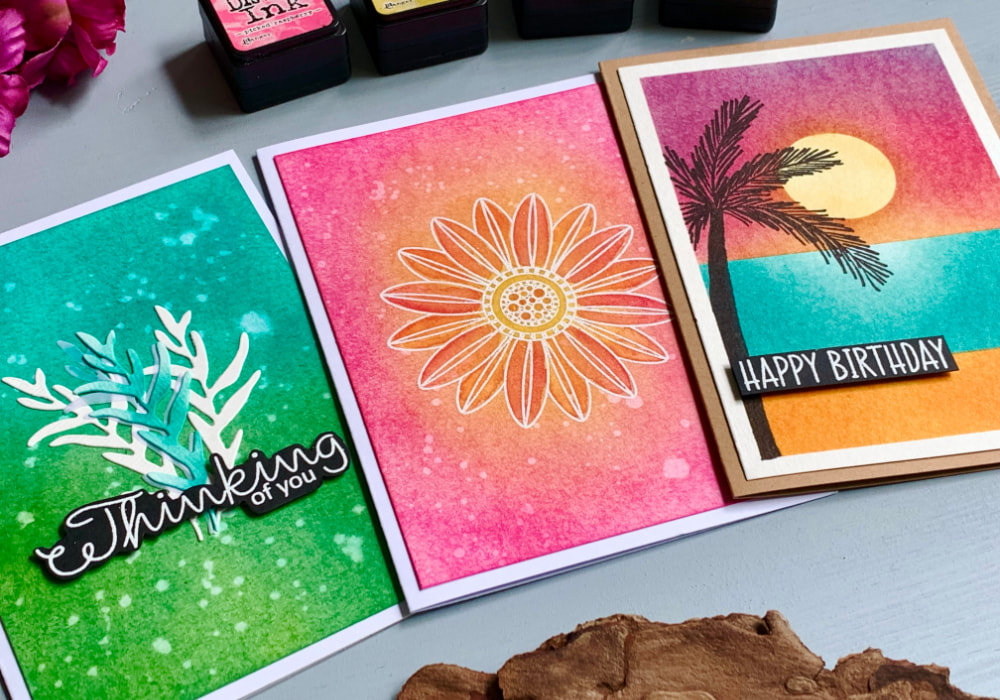 That’s it! These are all my Distress ink colour combinations for this blog post. You could create more. Even from my backgrounds there are a few that popped up. You could do the same as on the first card with Picked Raspberry and Peacock Feathers to create purple. Picked Raspberry and Spiced Marmalade would work together as well as Spiced Marmalade and Mustard Seed. And if you do not want beach in the land scape scene, you could create grass using the Peacock Feathers and Mustard Seed. I hope I inspired you and you will try making some of these yourself. Make sure you check out my video on YouTube and give it a Like as well. The list of product is down below, where you can also find a few blog posts that I think you might enjoy. And if you have any questions, just drop me a line. VIDEO TUTORIALWatch the video below or on my YouTube Channel. PRODUCTS USEDCLICK HERE TO SEE TO THE LIST OF PRODUCTS
Canson XL, Watercolour Cardstock , 300gsm/140lb
AmazonDE | AmazonUK Tim Holtz Distress Mini Ink, Kit 1 (Picked Raspberry, Mustard Seed, Peacock Feathers, Spiced Marmalade) AmazonDE | AmazonUK Gummiapan, Dragon Leaf Die SarisStampingStudioSE Create A Smile, Botanical Love Tsukineko Versamark Watermark Ink Pad AmazonDE | AmazonUK Stampendous, Embossing Powder, White AmazonDE | AmazonUK Docrafts Papermania, Heat Tool AmazonDE | AmazonUK EK Susccess, Anti-Static Powder Tool AmazonDE | AmazonUK Color Copy , White Paper, A4 300gsm/140lb (card base) AmazonDE | AmazonUK Papermania, A6 Card Bases + Envelopes, White AmazonDE | AmazonUK Joy Crafts, Kraft Paper,A4 300gsm/140lb (card base) KreativbuntDE | AmazonUK Absofine, A4 Recycled Kraft Paper 320gsm (card base) AmazonDE | AmazonUK Papermania, A6 Card Bases + Envelopes, Craft AmazonDE | AmazonUK Altenew, Alcohol Markers - Green Fields MennysShopDE | SevenHillsCraftsUK UHU, Liquid Glue AmazonDE | AmazonUK Ranger, Multi Medium Matte Adhesive AmazonDE | AmazonUK Fiscars, Guillotine A5 AmazonDE | AmazonUK Tonic Studios, Guillotine A4 AmazonDE | AmazonUK My Sweet Petunia, Mini MISTI Stamping Tool StempelmühleDE | BumbleberrysUK Papermania, Stamp Block AmazonDE | AmazonUK Crafting Mat, Black AmazonDE | AmazonUK Disclaimer: Here you can find the products I used to make this card. Please note that the products are just a guide, you don't need the exact products or brands. If available I include links to the stores where you can find the products. As I live in Europe, I provide links to UK and German stores. These are not affiliate links and every product I used for this card, I purchased myself. YOU MIGHT ALSO LIKEPIN MEDid you like the card? I would love, if you pinned it to your board on Pinterest! 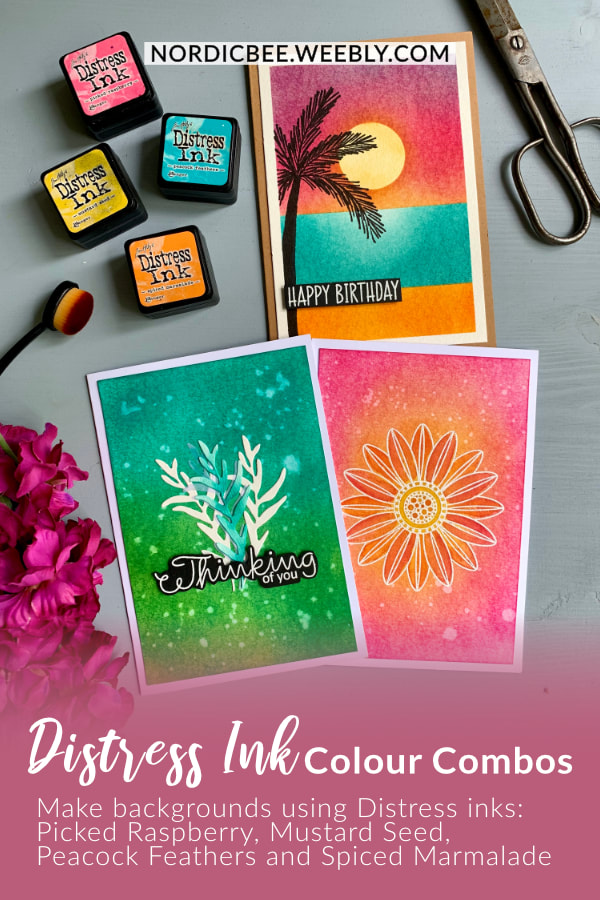
0 Comments
Leave a Reply. |
FOLLOW ME
SEE MORE


CATEGORIES
All
Stamping Die Cutting Using Stencil Heat Embossing Embossing or Texture Paste Distress Inks Nuvo Products Stamping & Colouring Stamping With Solid Stamps Watercolouring Watercolour Pencils Waterbased Markers Pencil Colouring Alcohol Markers Altenew Markers Zig Brush Markers Easy Backgrounds Stamped Backgrounds Small Stamp Ideas Simple Cards Complex Cards Cardmaking For Beginners All
Painting With Acrylics Painting With Gouache Painting With Watercolours Drawing With Fineliner Minimal Supplies Cards Christmas & Holiday
Love & Valentine Mother's Day Father's Day Halloween Spring Cards Summer Cards Autumn/Fall Cards Winter Cards Cards For Children Cards For Women Cards For Men Thank You Cards Sympathy Cards Get Well Soon Cards Floral & Leav Cards Rainbow Colours Messy Watercolouring Modern Art Inspirations Geometric Patterns Landscape Painting Acrylics
Gouache Watercolours Watercolour Pencils Waterbased Markers Distress Inks Alcohol Markers Colouring Pencils No Stamps No Dies Cards
Cardmaking On A Budget Let’s Colour Quick Cards Fun Masculine Cards Background Ideas Distress Ink Combinations |
 RSS Feed
