
 Two years ago I made a few cards where I drew simple Christmas images using only a white gel pen and a blank card, you can see it here. I really liked this idea, therefore last year I made a card with a hand-drawn wreath, which you can see here. So the keep up with the theme, which hopefully will turn into a tradition on this blog, I decided to make such cards again. This time I wanted to draw fir tree or pine tree branches and created three cards. I'm using a white gel pen and a card base made out of a craft card stock, but you could use other types of pens and colours of card stock. Gold or silver gel pens should work and for Christmas cards red, green, blue or even black card stock are perfect options. And if all you have or can get is a white blank card and black pen, that is an option too. 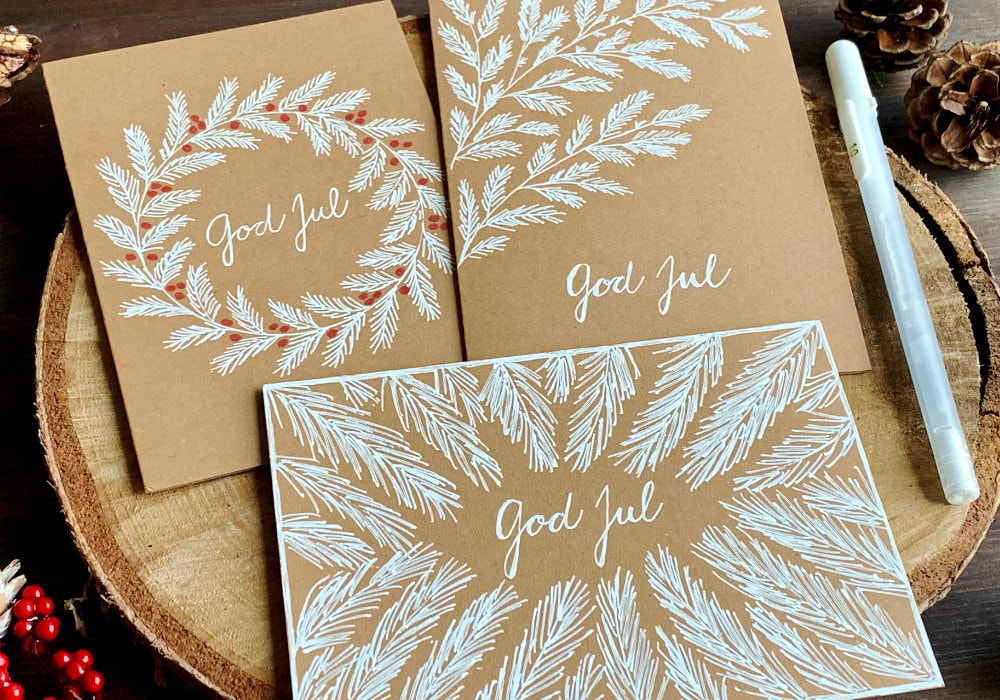 HOW TO DRAW A FIR/PINE TREE BRANCHPine trees or fir trees it doesn't really matter, I will call it fir tree branches. They are very easy to draw. All you need to do is to draw a line and then on both sides and the top draw short lines along the main line. You can make it very bushy or more sparse. It really depends on the size of the branch itself or the thickness of the pen you are using. TIPS FOR WRITING THE GREETINGBecause I decided to write my own greeting and I did same for all the cards, let me talk about that first. For all the cards I used the Swedish greeting for Merry Christmas, which is God Jul. I wanted to have a few cards with Swedish sentiments, since I live in Sweden. However, the main reason, why I decided to use this greeting, is because both words are very short. Less possibility to make mistakes. Plus my handwriting is inconsistent, so the shorter the word, the better it will look. So if you are like me and are not into pretty writing, or you just don't like your own handwriting. Short words are the way to go. In english you can use Merry & Bright or just the word Joy.  To make sure that the greeting is straight, I drew a line with my pencil. I also used the pencil to write the greeting. This way I can erase and re-write and adjust the words and letters to my likings. Then I can write the words over it and erase the pencil lines. The only issue here was that I wasn't sure if I will be able to erase the lines afterwards, since I was using a gel pen. I didn't test it, but I thought that the ink would smudge. The solution - I erased the pencil lines before I wrote the greeting. I didn't erase them fully, just so I barely see them and then I wrote the greeting using the white gel pen, following the almost invisible pencil line. CARD IDEA 1: Draw A Frame My first card idea is to draw the branches along the edges of the card, creating a frame. Before I drew the branches, I started with the greeting. It is not a must to start with the greeting, but I wanted to get a visual reference, to see where I need to stop when drawing the branches. After I wrote the sentiment, I started with the branches. Most of the branches I drew pretty long, but that is completely up to you. The way I found the easiest way to draw, is to start in each corner of the card base and the fill in the branches in between. First on the sided and the at the top and the bottom. The last thing I drew, which is completely optional is a thick line along the edges of the card. My pen wasn't thick enough to do it in one stroke, so I had to create the thick line with multiple strokes. And I think this brought all the images together. CARD IDEA 2: Draw Branches Coming From The Side I didn't know how to name the idea for this card, but I drew bunch of branches, two main ones and a few little ones. And I wanted them to come from the left side of the card, leaving the bottom empty for the greeting. I started with a long curved line, beginning in the middle, in the left corner of the card. I also drew a few smaller lines connected to the main line. This however you can do as you are drawing from one side of the line to the other side. Next I drew clusters of the fir tree branches, this time much smaller. All of them were connected to the big branch. There was really no logic to it, I drew in a way that made sense to me. I added brunches where I thought I need to add branches, just filling up the big branch.  There were a few places, where I could not fit a small fir tree branch, so I just drew a cluster of three small needles, joined together at the bottom, sort of in a v-shape. After I was happy with the look of the big branch, there was still enough space to add one more branch, just slightly shorter and simpler branch than the other one. I still needed to write the greeting, which I did once I was done drawing the branches. CARD IDEA 3: Draw A Wreath My last idea for drawing fir tree branches is a wreath. Very similar to the one from last year, except you don’t have to draw any leaves, which makes it much quicker and easier to draw. I started with a circle in the middle of the card. I used a glass to draw it. The line wasn’t perfect, but that didn't matter, because after the fir tree branches are drawn, any imperfections on the circle will be covered. Next I started drawing the fir branches. I drew simple brunches, I drew them one by one along the line, on both sides of the circle (inner and outer). For each I did one slightly curved line, with the needles on each side. Each brunch was about 2 cm long. I was also leaving a tiny space between the branches, because I knew I will be adding a few berries between them. So it's nice to have some space for them, then trying to squeeze them in. This is however completely optional, you can make it much fuller and without adding any berries.  As I was drawing the brunches, some were connected at the line, but most of them I drew slightly higher or lower then the one on the other side. By the other side I mean inner and outer circle. Here I was especially careful not to smudge the ink. Not to say that I didn't do that on the other cards, but for some reason on this card I was particularly aware of the possibility of smudging. Don't know why. And luckily I didn't smudge anything. After I finished the wreath, I wrote the greeting. You can stop here and be done, but as I said I wanted to add a few berries between the branches.  I decided to use a red gel pen, but you can use the same pen you used for the wreath. In this example, white for the berries would have been just fine. I drew small dots between the branches. Some in cluster of three or two and at some places I only added one. That's it! All the cards are finished. I hope you will try making at least one. Make sure you check out my video on YouTube and give it a Like as well. The list of product is down below, where you can also find a few blog posts that I think you might enjoy. And if you have any questions, just drop me a line. VIDEO TUTORIALWatch the video below or on my YouTube Channel. PRODUCTS USEDSakura Gelly Roll Pen, White AmazonDE | AmazonUK Absofine, A4 Recycled Kraft Paper 320gsm (card base) AmazonDE | AmazonUK Papermania, A6 Card Bases + Envelopes, Craft (alternative) AmazonDE | AmazonUK Red Gel Pen Lidl Disclaimer: I do not work with any company. All products in this blog post were purchased by me. While I use many products that help me to create my cards, my cards are meant to be inspiration for you, with this blog post I do not promote any company. You can use any other products that you have or can afford. YOU MIGHT ALSO LIKEPIN MEDid you like the card? I would love, if you pinned it to your board on Pinterest! 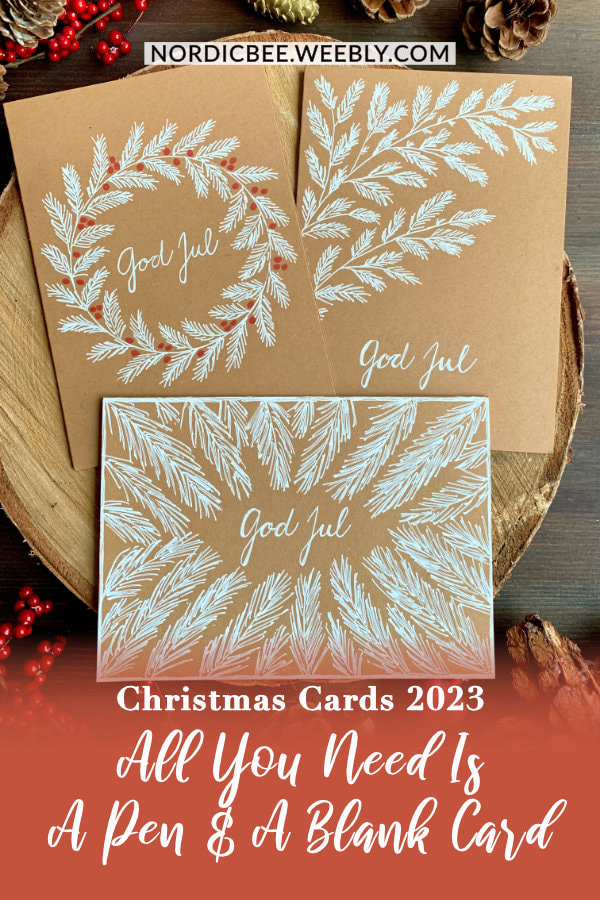
0 Comments
Leave a Reply. |
FOLLOW ME
SEE MORE


CATEGORIES
All
Stamping Die Cutting Using Stencil Heat Embossing Embossing or Texture Paste Distress Inks Nuvo Products Stamping & Colouring Stamping With Solid Stamps Watercolouring Watercolour Pencils Waterbased Markers Pencil Colouring Alcohol Markers Altenew Markers Zig Brush Markers Easy Backgrounds Stamped Backgrounds Small Stamp Ideas Simple Cards Complex Cards Cardmaking For Beginners All
Painting With Acrylics Painting With Gouache Painting With Watercolours Drawing With Fineliner Minimal Supplies Cards Christmas & Holiday
Love & Valentine Mother's Day Father's Day Halloween Spring Cards Summer Cards Autumn/Fall Cards Winter Cards Cards For Children Cards For Women Cards For Men Thank You Cards Sympathy Cards Get Well Soon Cards Floral & Leav Cards Rainbow Colours Messy Watercolouring Modern Art Inspirations Geometric Patterns Landscape Painting Acrylics
Gouache Watercolours Watercolour Pencils Waterbased Markers Distress Inks Alcohol Markers Colouring Pencils No Stamps No Dies Cards
Cardmaking On A Budget Let’s Colour Quick Cards Fun Masculine Cards Background Ideas Distress Ink Combinations |


 RSS Feed
