
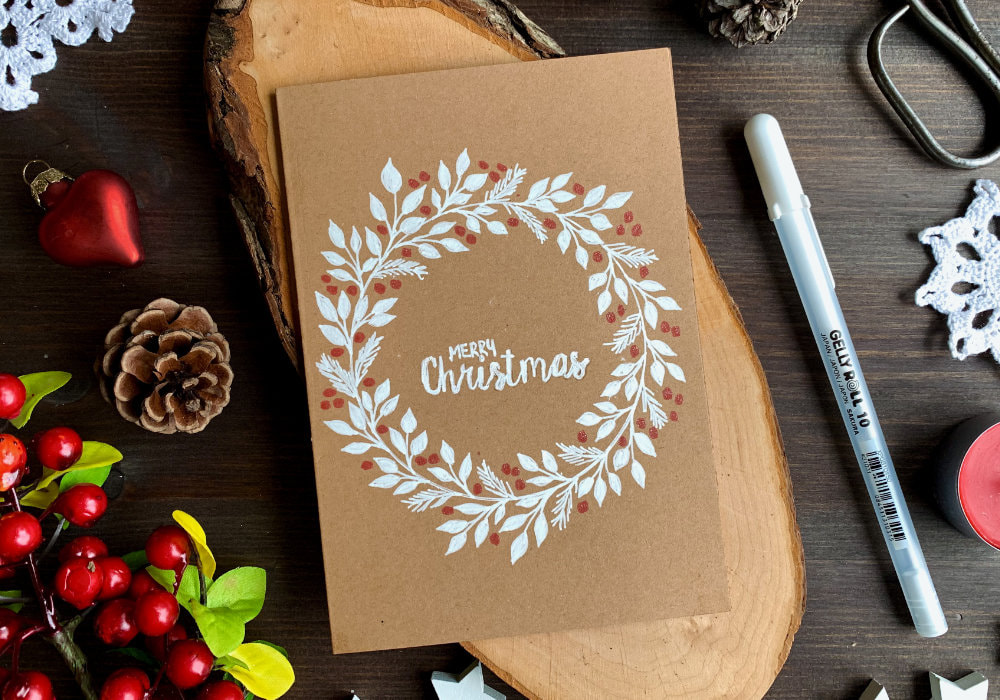
 Last year I made five cards where I drew very simple Christmas images using a white gel pen and you can see the cards here. These cards are not only very easy to make, perfect for beginners, but also budget friendly. Therefore I wanted to do something similar again this year and I decided to draw a very simple wreath. All you need to make this card, is a card base (blank card) and a white gel pen. Originally I was going to use a white pencil, which I tried on one card, but I was constantly sharpening the pencil, which wasn't enjoyable. However, if you have a good white pencil, you can give it a try. 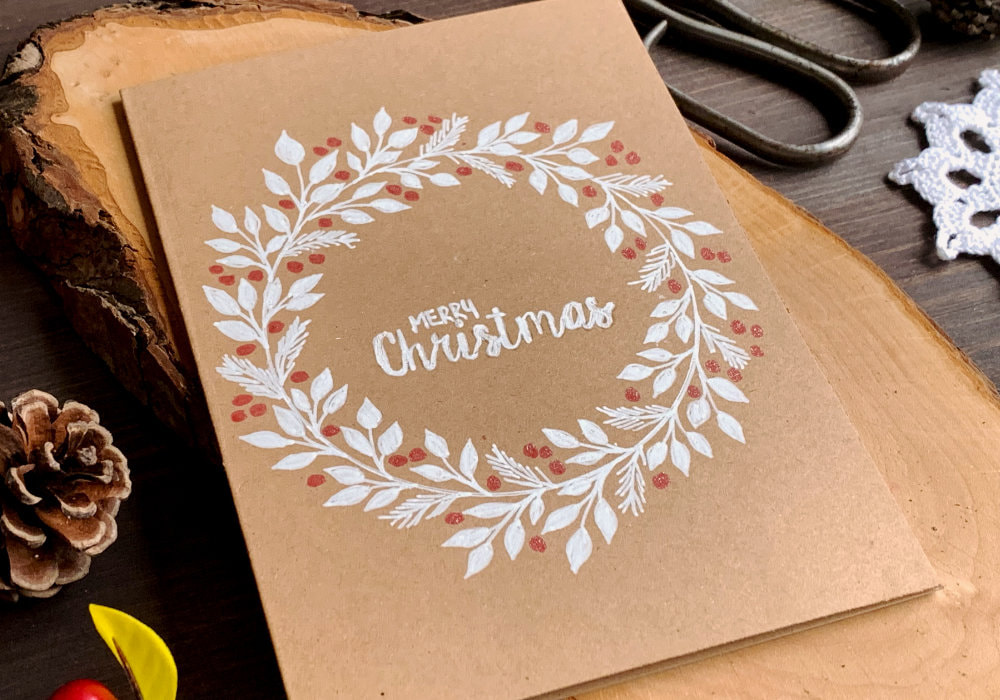 For my main card (card in the video) I used a craft card stock, but you can use also red, green, blue, etc. I make my own card bases, but you can also buy them already pre-made in a pack with envelopes, which might be a better option if you are a beginner or do not make too many cards. And to draw the wreath, as you already know from the title, I used a white gel pen and for the berries I also used a red gel pen. The red pen is optional, you can draw the berries in white or leave them out. Actually for one of my trial cards I used a red card stock, where I drew the berries with the white gel pen. You can see this card and the card where I used the white pencil below. And if a white card base is the only thing you have, you can use it with a black fine-liner or gel pen. 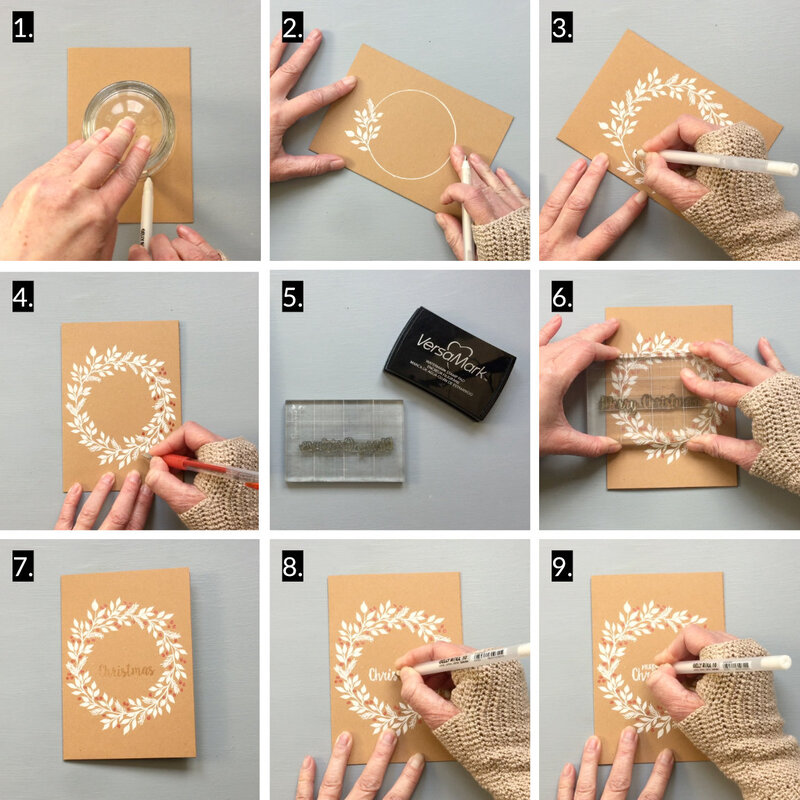 The wreath consists of five parts:
All of these are simple shapes. If you can draw lines, circles and tear/rain drop shapes, you are good to go.  I started with the circle and to draw it I used a cup. I centred it on my card and traced it with the gel pen. Then I drew in the brunches. I mainly drew the brunches with the leaves and in between I drew in the fir tree brunches. Drawing the leaf brunches I drew first a curved line that is connected to the circle and then the leaves. Most of the brunches consists of three leaves, but some have five. Drawing the fir tree brunches Again I started with a curved line, but shorter than the one with the leaves. And on each side I drew in quick motion, short strokes for the needles. The fir tree brunches I drew after every second leaf brunch. 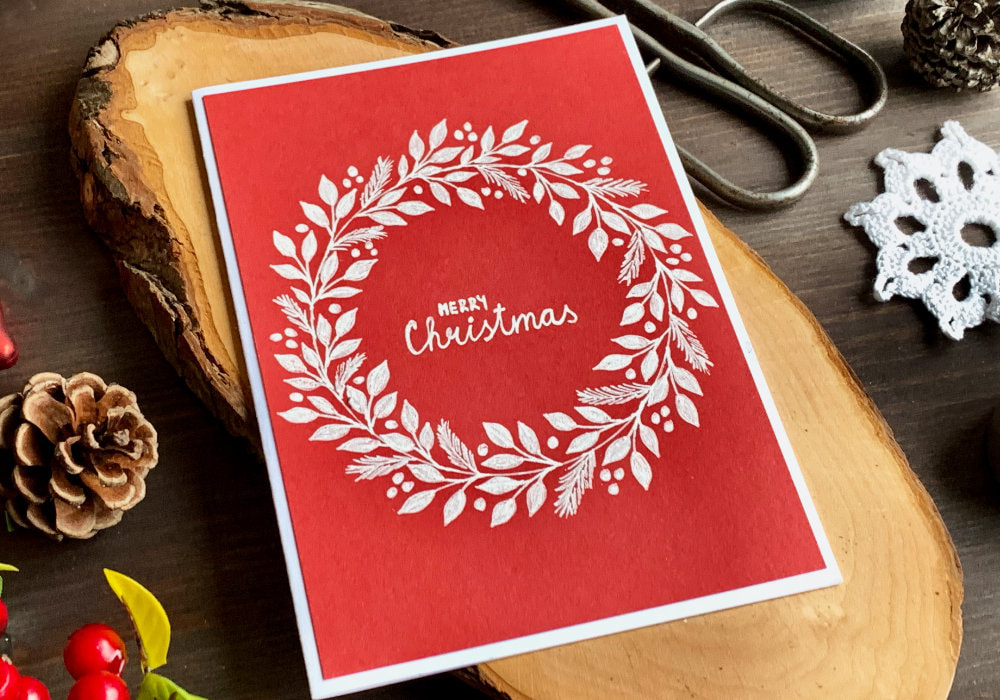 After I finished drawing the leaves, I drew in the berries. This is completely optional, the wreath looks great without them as well. I drew the berries with the red gel pen, but you can just use the white gel pen, if you do not have a red one. I placed them randomly, in the gaps between the brunches. Where possible I drew clusters of three, otherwise I drew in two or one. Lastly I worked on the greeting. Here you have a few options, you can simply write it yourself, you can use stamps and heat emboss in white. If you have the Dymo label maker, you can create a label, which you can also create with a printer (make sure you use a thicker paper for that) or you can use stickers, I saw some on Amazon and in some craft stores. 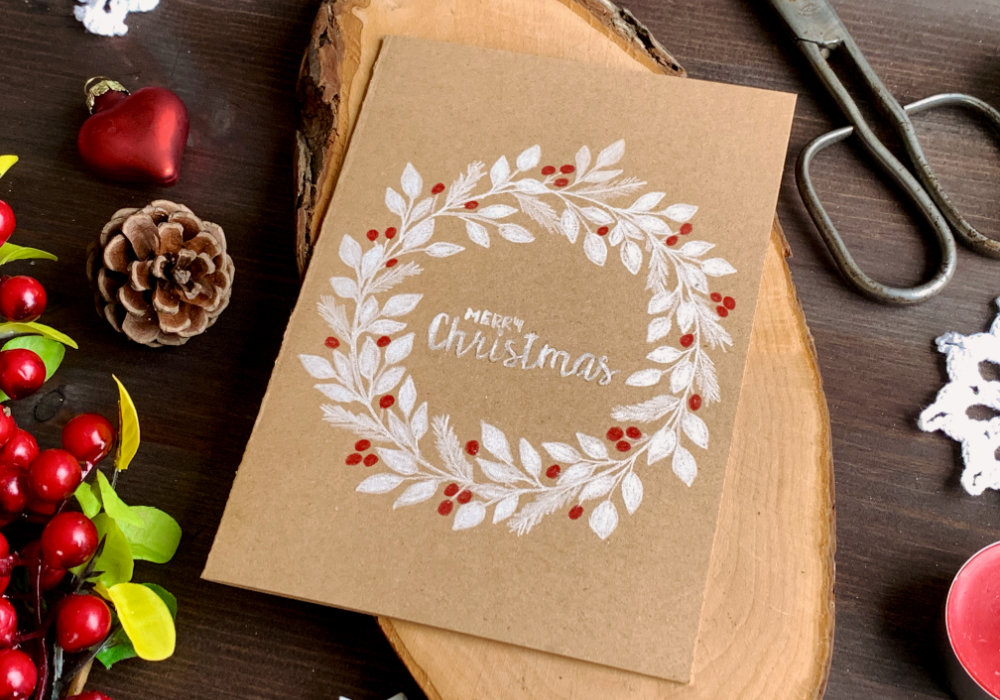 I was going to write the greeting fully myself, but I wanted to try something. I wanted to see if I can use a stamp with Versamark ink and go over it with the white gel pen. I only stamped the word Christmas and went over it with my gel pen and the word Merry I wrote myself above. To be honest, I prefer writing it myself and I did that on the red card. I hope you will try making this card yourself. Make sure you check out my video on YouTube and give it a Like as well. The list of product is down below, where you can also find a few blog posts that I think you might enjoy. And if you have any questions, just drop me a line. VIDEO TUTORIALWatch the video below or on my YouTube Channel. PRODUCTS USEDCLICK HERE TO SEE TO THE LIST OF PRODUCTS
Absofine, A4 Recycled Kraft Paper 320gsm (card base)
AmazonDE | AmazonUK Papermania, A6 Card Bases + Envelopes, Craft AmazonDE | AmazonUK Sakura Gelly Roll Pen, White AmazonDE | AmazonUK Tsukineko Versamark Watermark Ink Pad AmazonDE | AmazonUK Fiscars, Guillotine A5 AmazonDE | AmazonUK Tonic Studios, Guillotine A4 AmazonDE | AmazonUK Crafting Mat, Black AmazonDE | AmazonUK Disclaimer: Here you can find the products I used to make this card. Please note that the products are just a guide, you don't need the exact products or brands. For most of the products I include links to the shops where you can purchase these items if available. As I live in Europe, I provide links to UK and German stores. These are not affiliate links and every products I used for this card I purchased myself. YOU MIGHT ALSO LIKEPIN MEDid you like the card? I would love, if you pinned it to your board on Pinterest! 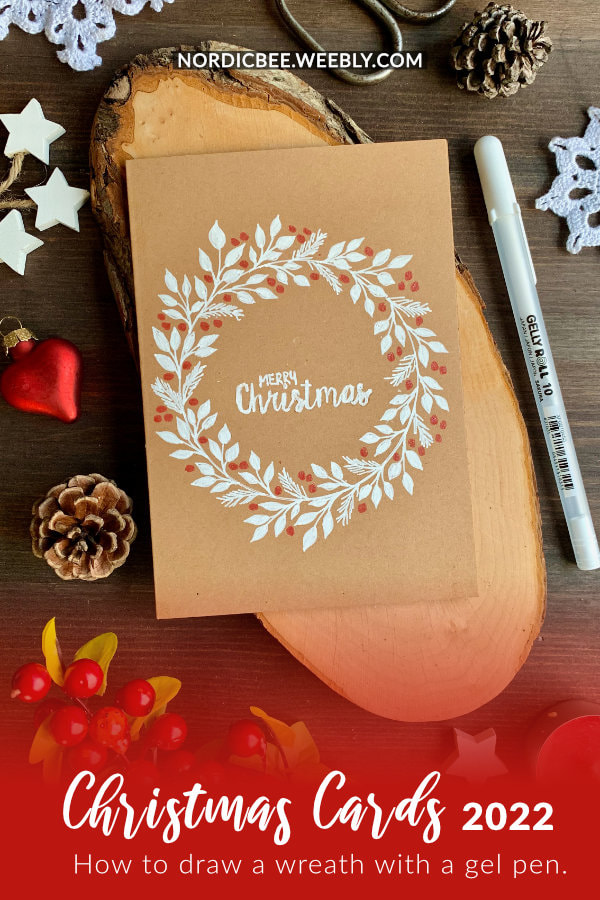
0 Comments
Leave a Reply. |
FOLLOW ME
SEE MORE


CATEGORIES
All
Stamping Die Cutting Using Stencil Heat Embossing Embossing or Texture Paste Distress Inks Nuvo Products Stamping & Colouring Stamping With Solid Stamps Watercolouring Watercolour Pencils Waterbased Markers Pencil Colouring Alcohol Markers Altenew Markers Zig Brush Markers Easy Backgrounds Stamped Backgrounds Small Stamp Ideas Simple Cards Complex Cards Cardmaking For Beginners All
Painting With Acrylics Painting With Gouache Painting With Watercolours Drawing With Fineliner Minimal Supplies Cards Christmas & Holiday
Love & Valentine Mother's Day Father's Day Halloween Spring Cards Summer Cards Autumn/Fall Cards Winter Cards Cards For Children Cards For Women Cards For Men Thank You Cards Sympathy Cards Get Well Soon Cards Floral & Leav Cards Rainbow Colours Messy Watercolouring Modern Art Inspirations Geometric Patterns Landscape Painting Acrylics
Gouache Watercolours Watercolour Pencils Waterbased Markers Distress Inks Alcohol Markers Colouring Pencils No Stamps No Dies Cards
Cardmaking On A Budget Let’s Colour Quick Cards Fun Masculine Cards Background Ideas Distress Ink Combinations |
 RSS Feed
