
Halloween Card With A Spooky Tree Silhouette & A Simple Distress Ink Blending Combination #9 + VIDEO27/10/2021 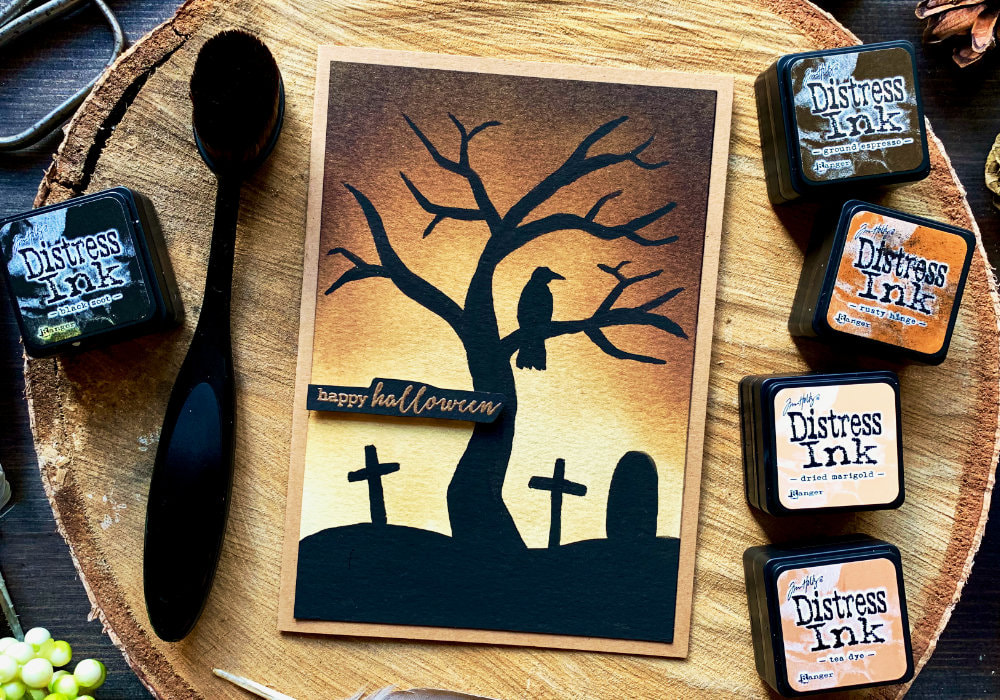 Even though Halloween is in a few days and it might be too late to be making cards I had to share this card with you. It was a last minute idea and I really like the result. In my previous blog post, where I made a card with a moon and bats, I mentioned that I was thinking about painting a tree. And this thought didn’t leave my head and especially after coming across a picture that you can see in my video, which had a background very similar to a card I made. I had to make one more Halloween card. I started by creating a background using Distress inks. The inks I used are Black Sooth, Ground Espresso, Rusty Hinge, Tea Die and Dried Marigold. If you do not have Distress inks, you can also use other inks that blend well, or you can use watercolours. To blend the inks I used a cheap make brush that I bough in a discount store and the card stock is the Canson XL watercolour paper. 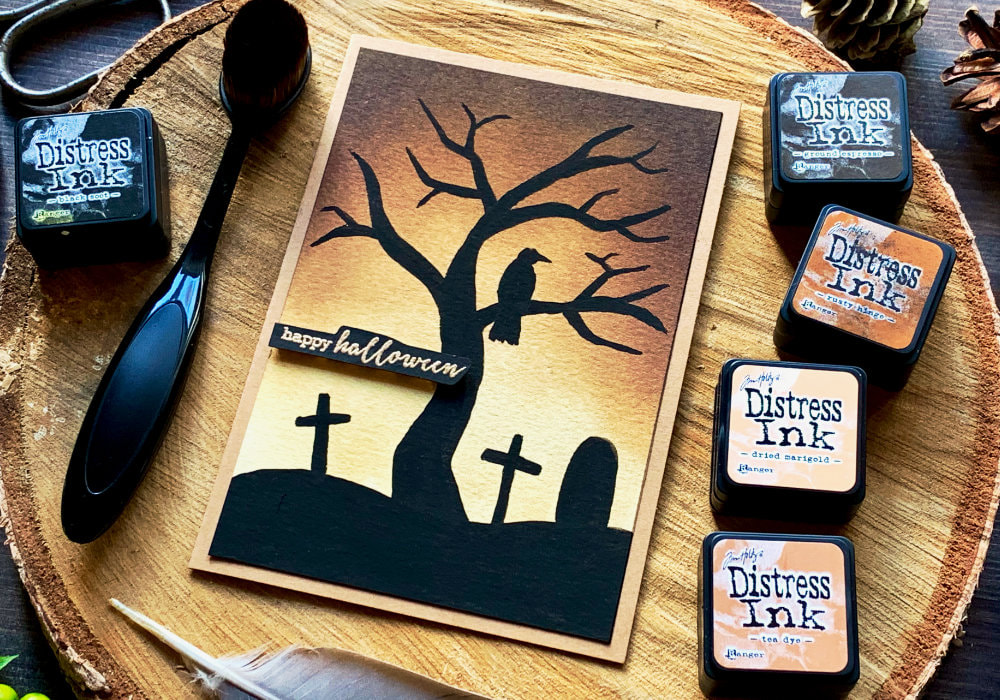 I began with blending the inks from the lightest to the darkest. I started with the Dried Marigold and covered more than a half of the card stock. This was a first coat, therefore I only applied the ink lightly. Next I switched to the Tea Die ink and here I started creating an arch. I think this creates a really cool effect. I skipped the Rusty Hinge, I will use it when I will go from dark to light and I blended in the Ground Espresso. And lastly I applied the Black Sooth, just at the top and little bit around the top half edges. Here I started applying more colour, making it more saturated. Now going the other direction, I applied the Ground Espresso, then the Rusty Hinge, the Tea Dye and lastly the Dried Marigold. Blending the colours together. I let the piece dry and then I started painting the tree. First I thought I will use a black alcohol marker, but it felt very dry when using it on the watercolour card stock. So, I decided to use a black gouache. I also have acrylic paints, but I like that gouache dries matt, while acrylics dry glossy. 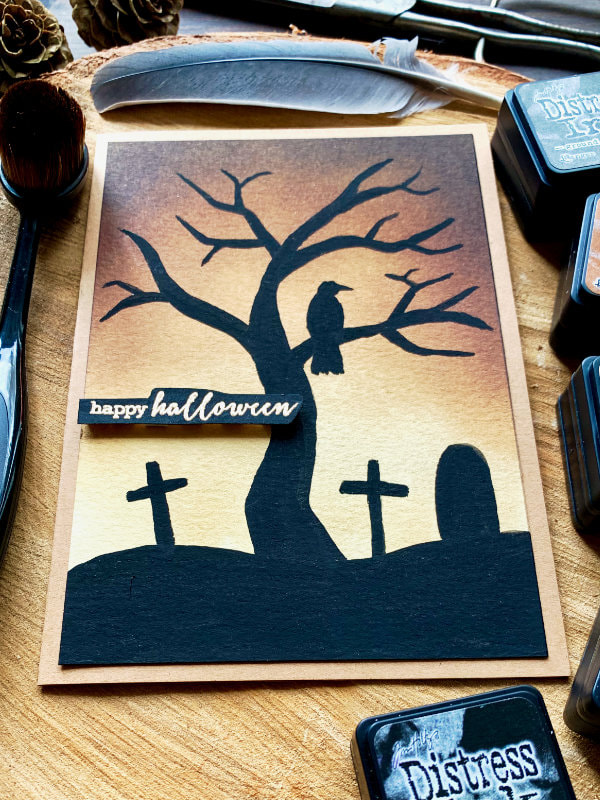 I started by painting the ground, just a simple, all black hill. To figure out how to paint a tree silhouette I googled few images, looking for something simple and then I practice a bit. Even if you are following other image, as you will be adding additional brunches, you will eventually end up painting something different. At least this happened to me. What worked for me is to paint the trunk of the tree, I also painted it little bit skewed. And at the top of the trunk I split it into two brunches. These were my two main, or initial brunches of the tree. As I didn’t want to mess it up, I drew the tree with my pencil first and then I used the paint. The advantage of using a pencil, is even if you make a little mistake, you can go over it with the black paint and no one will see it. However, one thing I wasn’t able to do, is to erase the pencil lines, it was also erasing the background colour. After I had the basic shape of the tree figured out, I painted additional brunches. Some I painted free hand, for some I used a pencil first. 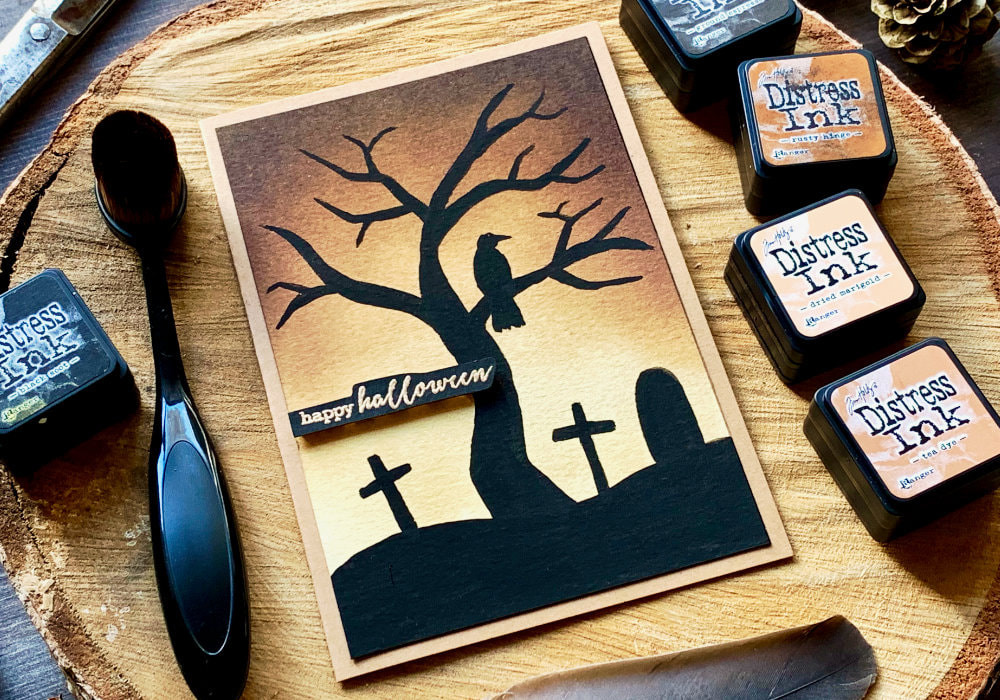 Another thing I wanted to paint, was a raven sitting on the tree. Therefore, as I was painting the brunches on the right I stoped and painted in the raven, before adding any additional brushes. I needed to have a space for the bird. Drawing and painting the raven wasn’t easy. I had troubles with the beak. On my trial card it looked a little bit like a duck. The beak needs to be sharp, thin and pointy at the end and slightly going downwards. Nevertheless, once I had the shape of the raven figured out, instead of just drawing it onto the panel (especially since I knew I can’t erase it), I decided to transfer it on a thin paper and trace it onto the panel with the tree. And then I used the black gouache and painted over the pencil lines. After painting the raven I was able to paint in additional brunches. You could leave it as it is, but I wanted to add a few more Halloween things. The picture that inspired me to make this card had pumpkins on the ground, which I found way too complicated. I decided to paint a grave yard. I painted in two crosses and a grave stone. This was much easier to do. 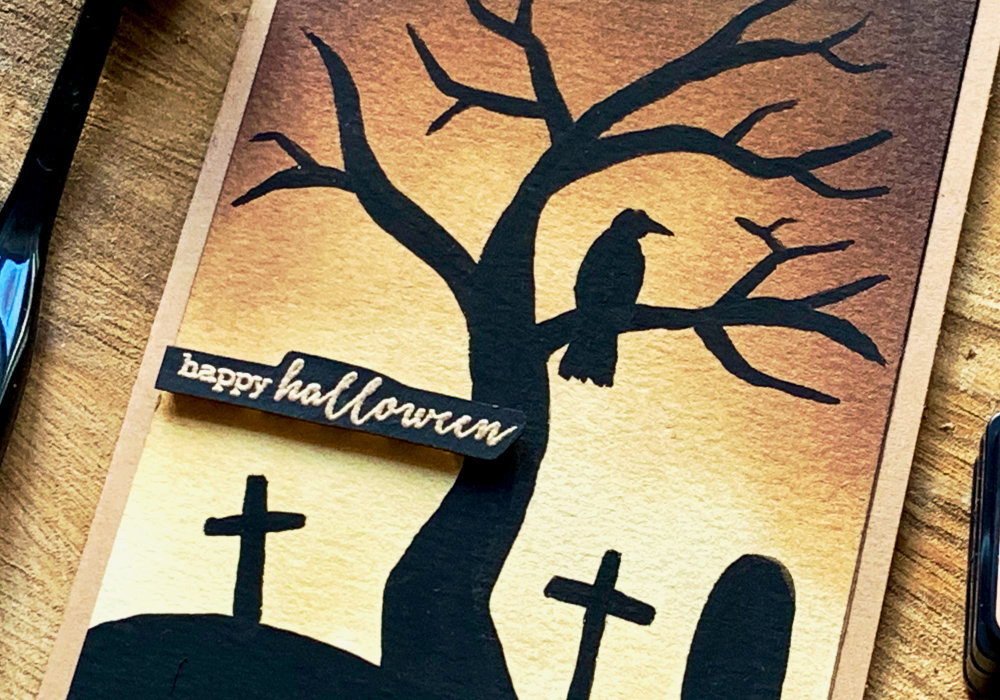 Another thing you can skip is adding a sentiment. I used a small Happy Halloween stamp from a sentiment stamp set by Clearly Besotted. I stamped and heat embossed it on a black card stock using a Metallic Brass powder from Wow. Actually I painted the card stock black, using the gouache, as sometimes the blacks do not match. I adhered the panel on top of a card base that I made out of a craft card stock. I used a simple double-sided tape. To attach the sentiment banner I used a foam tape. My foam tape is white, I would recommend, if you have a black one, use that. I hope you like this card and will create something similar. Make sure you check out my video on YouTube and give it a Like as well. The list of product is down below, where you can also find a few blog posts that I think you might enjoy. And if you have any questions, just drop me a line. VIDEO TUTORIALWatch the video below or on my YouTube Channel. PRODUCTS USEDDisclaimer: I’m currently not using any affiliate links. These links are just to help you find the products. The list includes alternatives to what I was using and while I haven't used some of them, I only recommend brands I trust. Tim Holtz Distress Mini Ink, Kit 3 (Black Soot) danipeussDE | CraftStashUK Tim Holtz Distress Mini Ink, Kit 14 (Ground Espresso) danipeussDE | CraftStashUK Tim Holtz Distress Mini Ink, Kit 6 (Rusty Hinge) daniPeussDE | CraftStashUK Tim Holtz Distress Mini Ink, Kit 11 (Tea Dye) danipeussDE | CraftStashUK Tim Holtz Distress Mini Ink, Kit 9 (Dried Marigold) danipeussDE | CraftStashUK Canson XL, Watercolour Cardstock , 300gsm/140lb AmazonDE | AmazonUK Daler Rowney, Gouache Set (Pack of 12) AmazonDE | AmazonUK Daler Rowney Watercolour Brushes 4, 6, 10 AmazonDE | AmazonUK Royal & Langnickel, Mixing Palette AmazonDE | AmazonUK Tsukineko Versamark Watermark Ink Pad AmazonDE | AmazonUK EK Success, Anti-Static Powder Tool AmazonDE | AmazonUK WOW! Embossing Powder, Metallic Brass AmazonDE | AmazonUK My Sweet Petunia, Mini MISTI Stamping Tool StempelmühleDE | BumbleberrysUK Joy Crafts, Kraft Paper,A4 300gsm/140lb (card base) KreativbuntDE | AmazonUK Sellotape Double Sided Tape AmazonDE | AmazonUK Stick It!, Double Sided Foam Tape AmazonDE | AmazonUK Fiscars, Guillotine A5 AmazonDE | AmazonUK Crafting Mat, Black AmazonDE | AmazonUK Other products for which I don't have a link: - Blending brush (from discount store) - Sentiment stamp set from Clearly Besotted YOU MIGHT ALSO LIKEPIN MEDid you like the card? I would love, if you pinned it to your board on Pinterest! 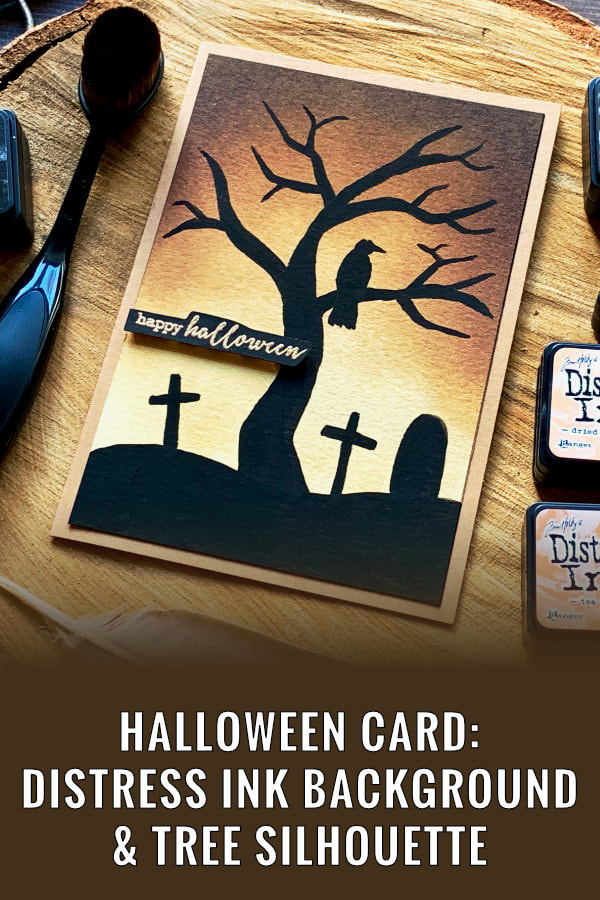
0 Comments
Leave a Reply. |
FOLLOW ME
SEE MORE


CATEGORIES
All
Stamping Die Cutting Using Stencil Heat Embossing Embossing or Texture Paste Distress Inks Nuvo Products Stamping & Colouring Stamping With Solid Stamps Watercolouring Watercolour Pencils Waterbased Markers Pencil Colouring Alcohol Markers Altenew Markers Zig Brush Markers Easy Backgrounds Stamped Backgrounds Small Stamp Ideas Simple Cards Complex Cards Cardmaking For Beginners All
Painting With Acrylics Painting With Gouache Painting With Watercolours Drawing With Fineliner Minimal Supplies Cards Christmas & Holiday
Love & Valentine Mother's Day Father's Day Halloween Spring Cards Summer Cards Autumn/Fall Cards Winter Cards Cards For Children Cards For Women Cards For Men Thank You Cards Sympathy Cards Get Well Soon Cards Floral & Leav Cards Rainbow Colours Messy Watercolouring Modern Art Inspirations Geometric Patterns Landscape Painting Acrylics
Gouache Watercolours Watercolour Pencils Waterbased Markers Distress Inks Alcohol Markers Colouring Pencils No Stamps No Dies Cards
Cardmaking On A Budget Let’s Colour Quick Cards Fun Masculine Cards Background Ideas Distress Ink Combinations |
 RSS Feed
