
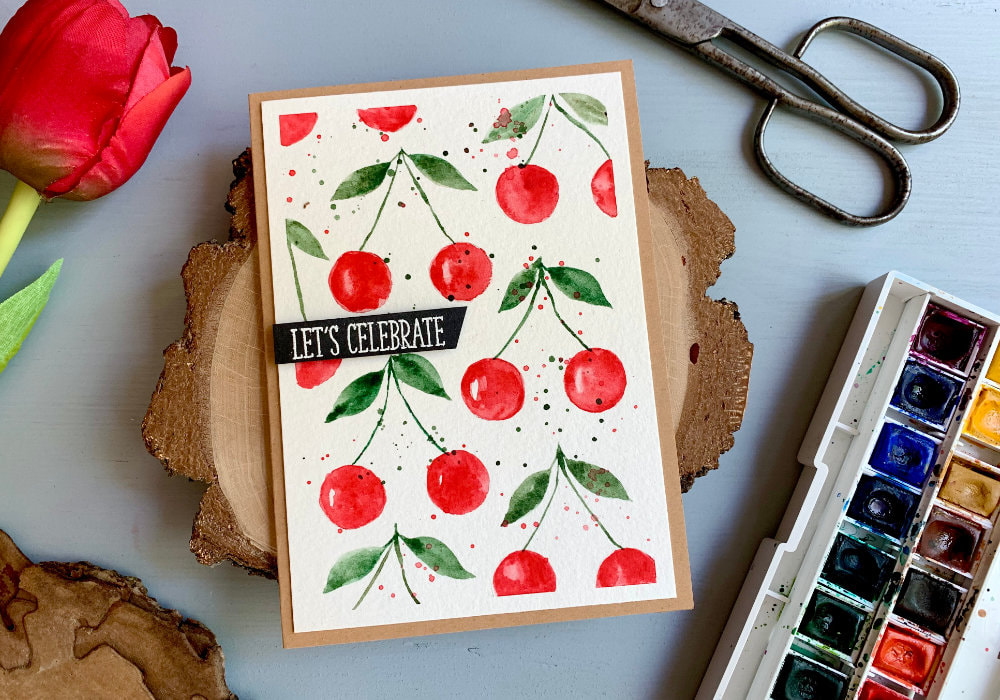
 Summer is here and I had the idea to paint a background with cherries using watercolours. This is one of my cards where I paint completely from scratch, but as I don't like t do anything very detailed and complicated, this painting is definitely perfect for beginners. It is also budget friendly as all you need are watercolour supplies and a card base. I taped my watercolour card stock that is smaller than A6 on top of a wooden board using a washi. Wile I didn't use too much water and warping wasn't a problem, I wanted to have a nice boarder. The shape of cherries is very simple. Two circles, two lines joined at the top and one or two leaves, which have the form of a rain drop. You might even try practicing by covering a printer paper with cherries using a pencil.  Since I was painting a background, I wanted it to be cohesive, with all the cherries being the same size, but when trying to paint free-hand, they were all different. Therefore I grabbed a circle punch in the size 5/8" and punched out a circle template. You can use a compass or anything circular, e.g. lid form a bottle. As I was painting on an A6 card stock, I needed something quite small. I placed the circle template on top of the card stock and drew the circles using a pencil. I drew only the circles, but you can also draw the stems and the leaves. I drew three sets of circles, those are going to be the only full cherries. The other ones will be partial images along the edges of the card stock. If you are also drawing only the circles, make sure you leave enough space for the stems and the leaves. Alternatively you could paint the cherries one by one.  Before I started painting I slightly erased the pencil lines, so they only slightly visible. I used the Winsor & Newton Cotman watercolour paints. For the cherries I used Cadmium Red Deep Hue and size 8 brush and for the stems and leaves I used Hookers Green Dark mixed with a little bit of Burnet Umber and a size 4 brush. You can use any brush that feels comfortable for you. I was painting in layers, first I applied a light coat of red, then I added more saturated colour and if necessary I added third coat once it was dry. The biggest struggle I had when painting is not to forget these little highlights. I'm not sure if they are necessary, but I don't think I have ever seen a cherry painting without it. I guess the texture of cherries does reflect light. And I definitely didn't disappoint, I forgot twice to add the highlights. Once was the first cherry, where I was able to lift up the colour. On other cherries I used a clean dry brush and lifted up the colour that way.  There are a few ways how you can add highlights to cherries. You can leave empty or unpainted spot, which I was trying to do on this particular card. I painted a few more cards, where I did the clean brush lifting technique after I painted the first layer. You can also add the highlights after the red paint is dry, using a white gel pen or gouache. After I was finished with the cherries, I let it dry and then I painted the stems and the leaves. The stems are simple two slightly curved lines joined a the top. I painted two leaves, you can paint only one. I did try to paint them with two strokes, first I painted a little stem and then I started using the tip of the brush, then I pressed down, creating a curve and slowly getting back to the point of the brush. This is not the only way to paint leaves, but it's definitely fun to at least try. Since I was using a size 4 brush, which is quite small, some of the leaves I had to fill in. 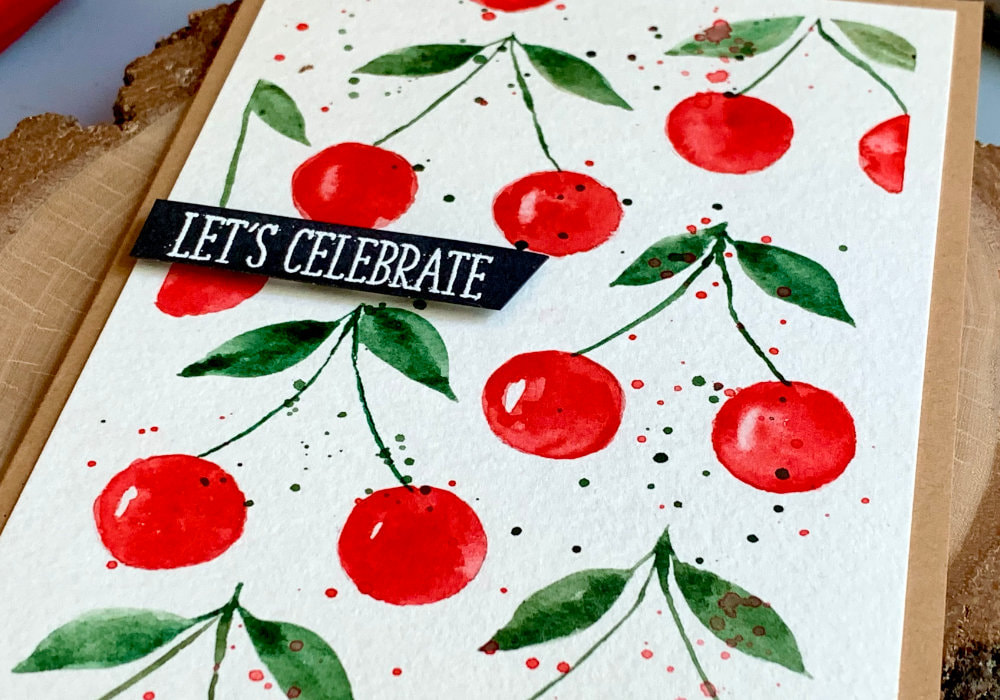 Once I was done with the three cherries, I drew circles for the rest of the cherries along the edges of the card stock and I followed the same process. At the bottom left corner, I only needed to paint the stems and the leaves, so I didn't need to draw any circles. And in some spots I painted only the red cherries and no leaves. If you are using a washi, when adding the images along the edges, you kind of need to visualize how it will look like once you remove it. It did happen to me in the past, while it looked great with the washi on, once I removed it, there were too many empty spaces. So, keep that in mind. If you want to avoid this, painting on a larger card stock and then cutting it down, might be an option for you. And you can always put the washi back on and paint a few additional images. I let the panel dry and then I added a splatter using the red and green paints. This step is optional, the painting looks great without any splatter, but when I use watercolours I always have the need to add splatter. 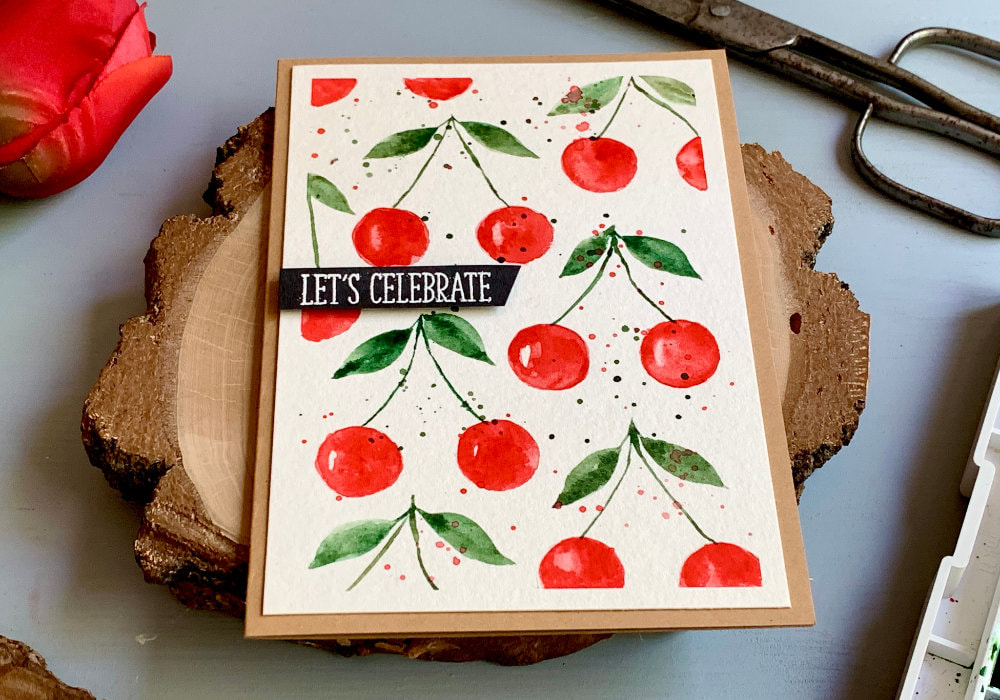 After the panel was dry, I removed the washi and then I adhered the panel on top of a card base that I made out of a craft card stock. Lastly I added a banner with a greeting that says Let's Celebrate using a foam adhesive. The greeting I stamped and heat embossed in white on a black card stock and cut into a banner. If you do not have any stamps, you could write the greeting yourself. You could also write it directly on top of the watercolour panel. In this case I would do that first, before you start painting. This way you will know where to place the cherries. I hope you will try making this card yourself. Make sure you check out my video on YouTube and give it a Like as well. The list of product is down below, where you can also find a few blog posts that I think you might enjoy. And if you have any questions, just drop me a line. VIDEO TUTORIALWatch the video below or on my YouTube Channel. PRODUCTS USEDCLICK HERE TO SEE TO THE LIST OF PRODUCTS
Canson XL, Watercolour Cardstock , 300gsm/140lb
AmazonDE | AmazonUK Winsor & Newton, Cotman Watercolor Palette AmazonDE | AmazonUK Winsor & Newton Cotman Watercolour Paint, Hookers Green Dark AmazonDE | AmazonUK Blue Squid Brush Set AmazonDE | AmazonUK Rayher, 5/8" Round Punch Alternative: Vaessen Round Punch AmazonDE | AmazonUK Faber Castell, HB Graphite Pencil AmazonDE | AmazonUK Staedtler, Eraser AmazonDE | AmazonUK Joy Crafts, Kraft Paper,A4 300gsm/140lb (card base) KreativbuntDE | AmazonUK Absofine, A4 Recycled Kraft Paper 320gsm (card base) AmazonDE | AmazonUK Papermania, A6 Card Bases + Envelopes, Craft AmazonDE | AmazonUK UHU, Liquid Glue AmazonDE | AmazonUK Fiscars, Guillotine A5 AmazonDE | AmazonUK Tonic Studios, Guillotine A4 AmazonDE | AmazonUK Crafting Mat, Black AmazonDE | AmazonUK Disclaimer: Here you can find the products I used to make this card. Please note that the products are just a guide, you don't need the exact products or brands. If available I include links to the stores where you can find the products. As I live in Europe, I provide links to UK and German stores. These are not affiliate links and every product I used for this card, I purchased myself. YOU MIGHT ALSO LIKEPIN MEDid you like the card? I would love, if you pinned it to your board on Pinterest! 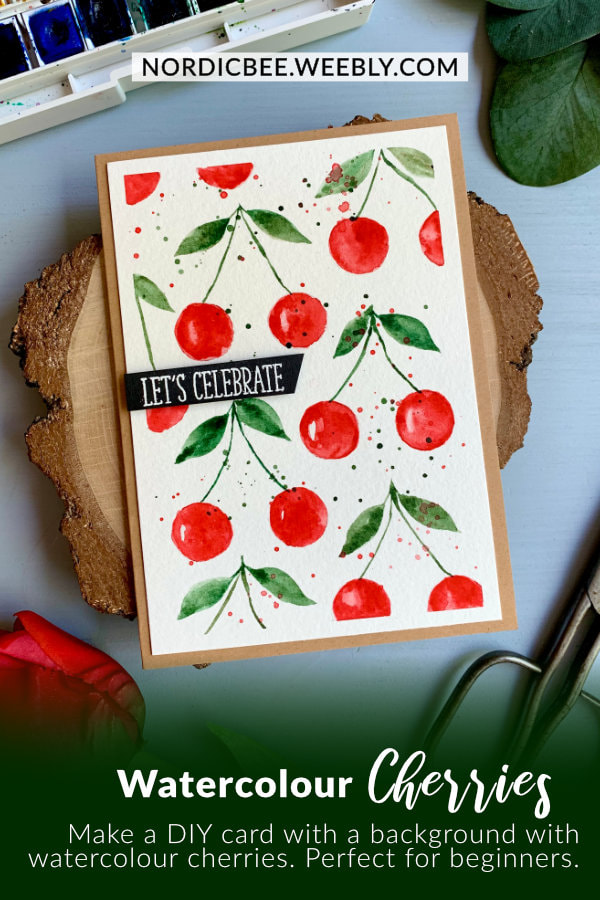
0 Comments
Leave a Reply. |
FOLLOW ME
SEE MORE


CATEGORIES
All
Stamping Die Cutting Using Stencil Heat Embossing Embossing or Texture Paste Distress Inks Nuvo Products Stamping & Colouring Stamping With Solid Stamps Watercolouring Watercolour Pencils Waterbased Markers Pencil Colouring Alcohol Markers Altenew Markers Zig Brush Markers Easy Backgrounds Stamped Backgrounds Small Stamp Ideas Simple Cards Complex Cards Cardmaking For Beginners All
Painting With Acrylics Painting With Gouache Painting With Watercolours Drawing With Fineliner Minimal Supplies Cards Christmas & Holiday
Love & Valentine Mother's Day Father's Day Halloween Spring Cards Summer Cards Autumn/Fall Cards Winter Cards Cards For Children Cards For Women Cards For Men Thank You Cards Sympathy Cards Get Well Soon Cards Floral & Leav Cards Rainbow Colours Messy Watercolouring Modern Art Inspirations Geometric Patterns Landscape Painting Acrylics
Gouache Watercolours Watercolour Pencils Waterbased Markers Distress Inks Alcohol Markers Colouring Pencils No Stamps No Dies Cards
Cardmaking On A Budget Let’s Colour Quick Cards Fun Masculine Cards Background Ideas Distress Ink Combinations |
 RSS Feed
