
How To Paint A Poinsettia Using Watercolours For Beginners | Holiday Card Series 2020 + VIDEO21/11/2020 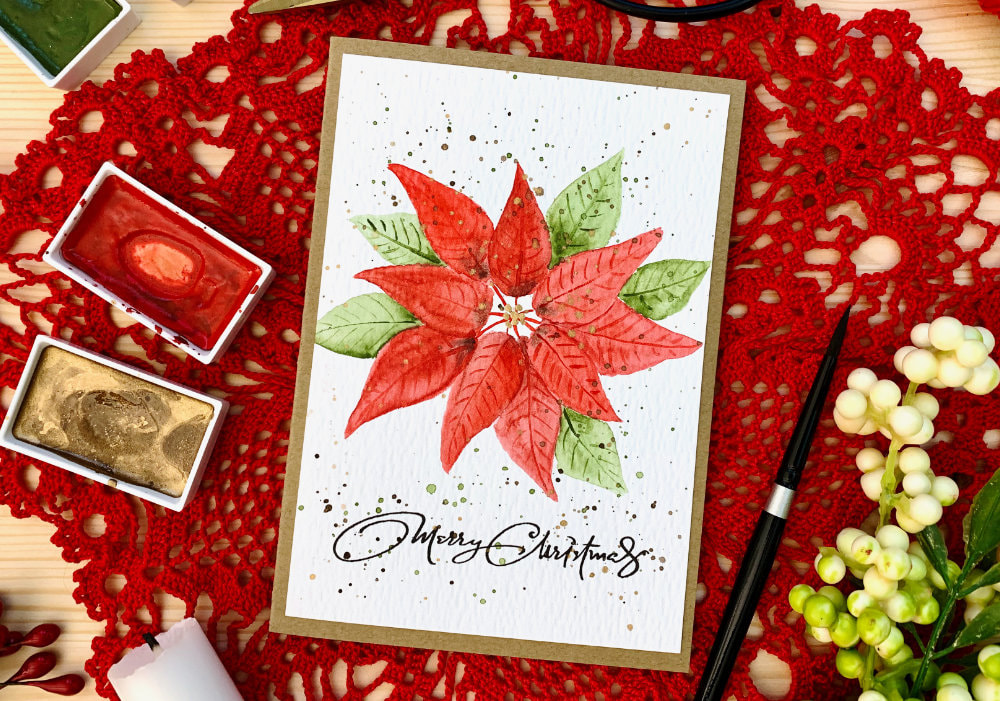
I’m having a lot of fun making cards where I paint my own images, so let’s make another one!
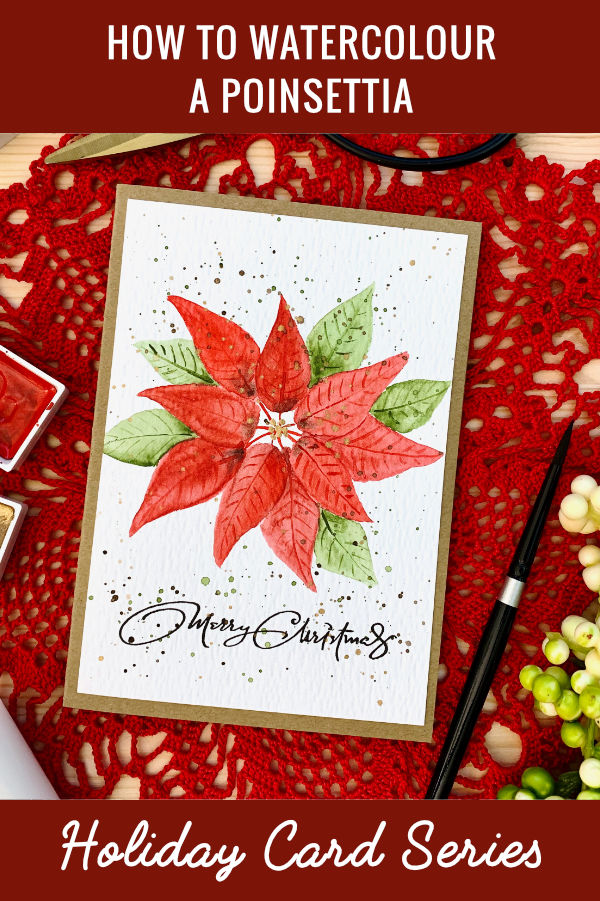
For the card six in my Holiday Card Series I really wanted to paint a poinsettia. The only problem was that I didn’t think I will be able to paint it, that it’s way too advanced for me. If you are new to my Blog or my YouTube channel, normally I make cards where I use stamps, dies, stencils and other things that make it easy for people, who cannot draw or paint to make beautiful cards. I just stamp an image and colour it, super easy. However at the beginning of this year I decided to challenge myself and step outside of my comfort zone and make few cards where I paint the images myself, completely from scratch. If you would like to see all the cards I made so far, just click here. 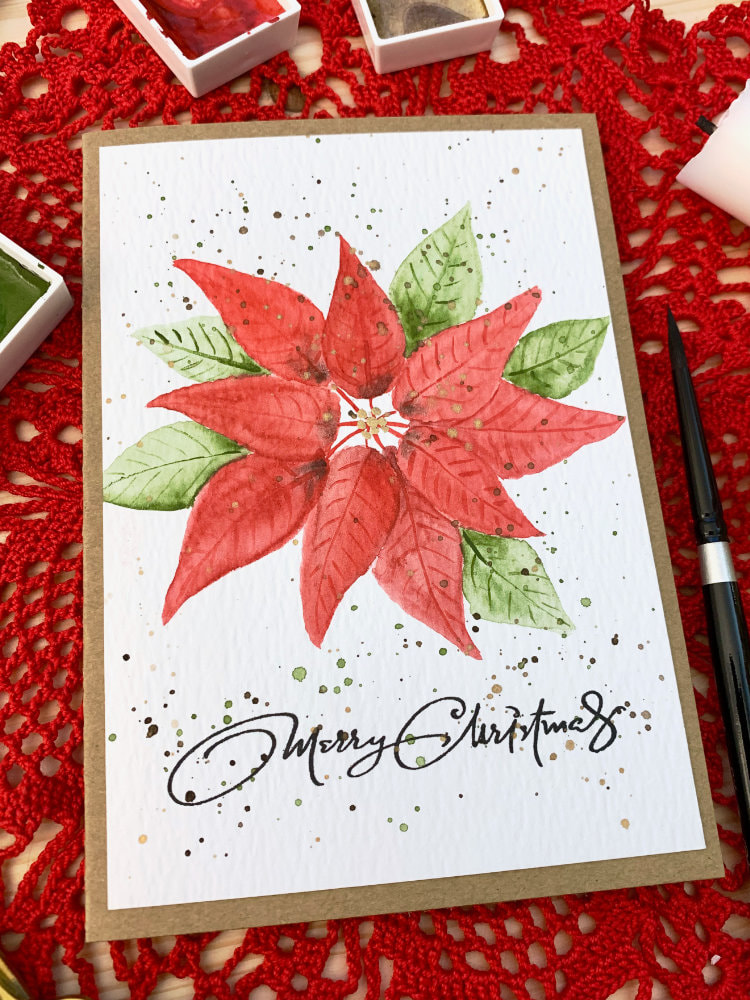
And since I’m a beginner, when it comes to watercolouring and painting or drawing my own images, painting the poinsettia flower, was rather intimidating for me. However, I did give it a try and the first practice piece, while not perfect, it resembled a poinsettia and that was all I wanted.
I practiced a bit, figuring out the best way to paint it and I talk about it in the video, therefore make sure you watch it. There are few ways to paint the flower, I saw people starting with the little stems that connect the leafs with the main stem and then paint the leafs. This method I didn’t like. I saw people starting with the bottom red leafs and painting the top leafs on top of them, I tried that as well and didn’t like it. My preferred way of painting the poinsettia flower is to start with the top red leafs and then paint the lower leafs in between them. You have to be careful here when painting the bottom leafs not to paint over the top leafs, but I was using a brush with a nice pointy tip, which made it easy for me. 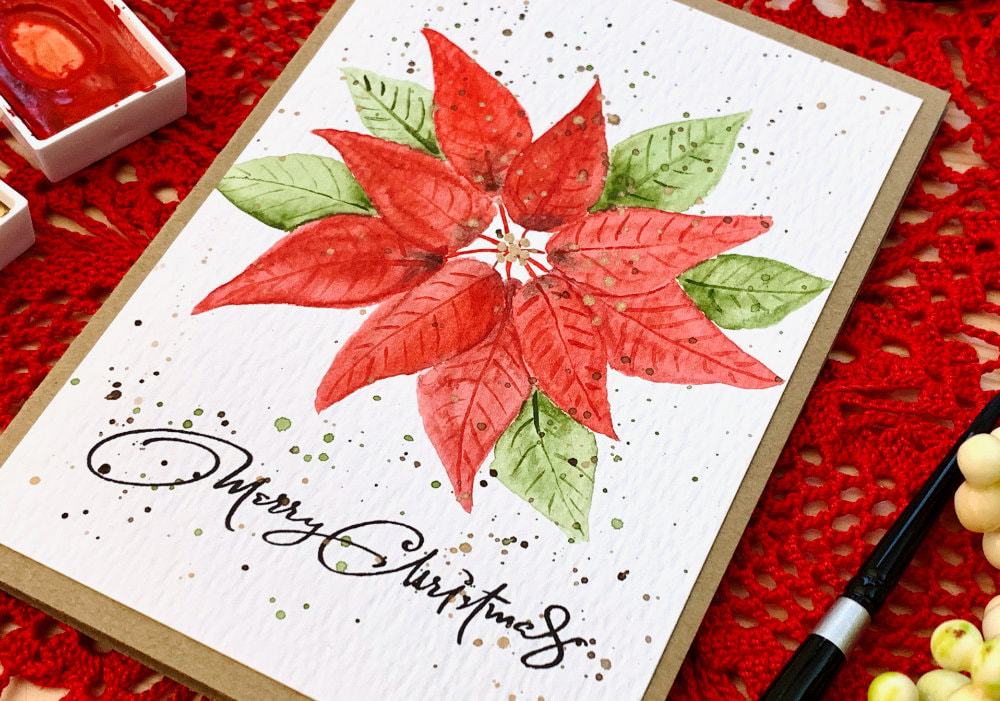
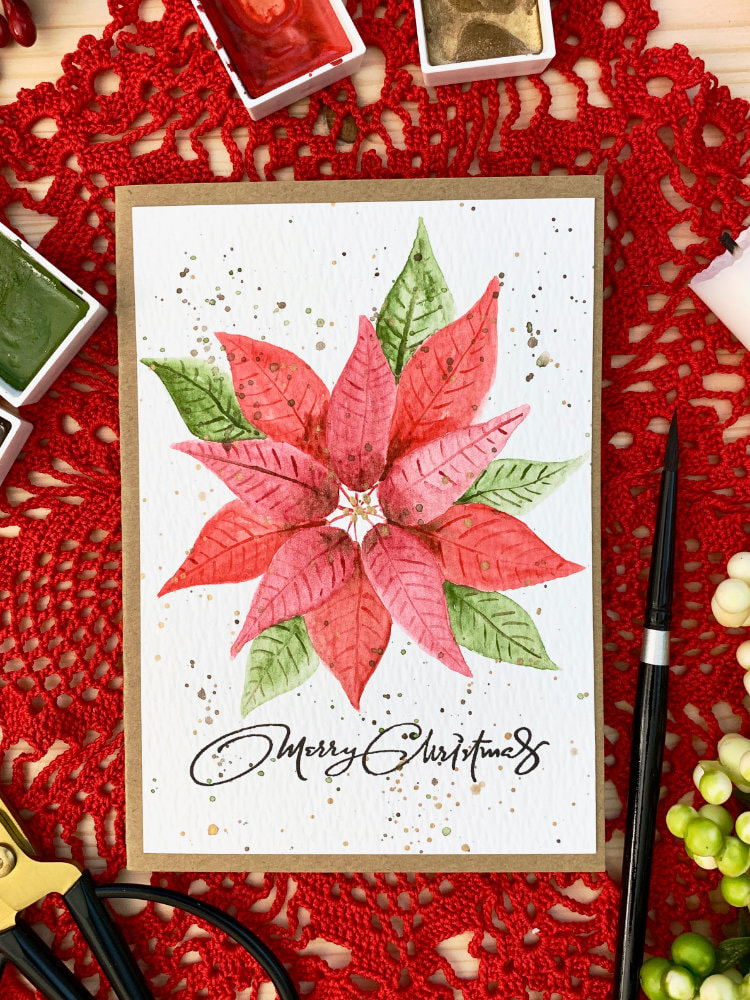
The shape of the leafs is similar to a slimmer drop, I didn’t want the leafs to be too round. You can of course paint them rounder, if you want. The poinsettia I have sitting on my desk, does have rounder leafs. I didn’t want to paint them too round, because I wanted to fit at least five leafs on the top layer.
I painted the leafs starting with an outline using the watercolours and then I filled the leafs with the colour. Not sure if this is a correct way of painting this, often I see people painting petals and leafs with one or two strokes. This is something I cannot do, plus I don’t even have a right brush for it. The brush I’m using is a size 8 brush. It’s was very cheap, you can see in the video that the coating on the brush is pealing off. This is however one of my favourite brushes, so I don’t care. Also I didn’t mentioned this in the video, but you could draw the poinsettia with a pencil first, if this is something you would prefer. Before I started painting the lower leafs, I let the piece dry and while it was drying, I worked on another flower. Using my time productively, instead of just waiting and doing nothing until the flower dries.
After I painted each red leaf I also added little bit of brown to the bottom of each leaf. I saw someone doing it in a tutorial and I liked the idea, so I did it too. However, this is completely optional.
If you would like the red leafs at the top and the bottom to be in different shades and your watercolour set don’t have different shades of your chosen colour, then I would recommend to mix the colours on a palette. I did this on other flowers that I painted since then. Next I painted the green leafs, pretty much the same way as I did the lower red leafs. I didn’t paint the green leafs between each of the read leafs, I thought it looks little bit more organic, but you can paint the green leafs between each of the the red leafs if you want. Fun fact, did you know that the colourful petals of the poinsettia are not the flower? They are the upper leafs of the flower that change their colour. The middle part of the poinsettia that grow in the center of each leaf bunch is the flower.
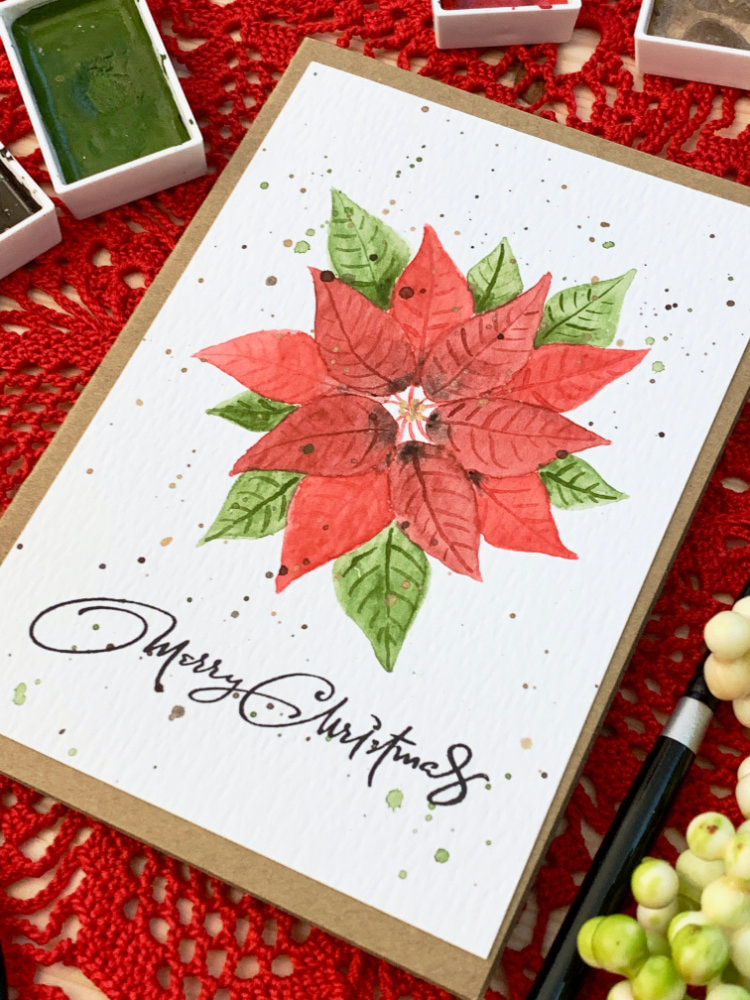
I let the whole piece to dry and then I painted the veins. Actually I painted them after each row of the leafs was dry, but you can do this once you’re finished painting all the leafs. Using a size 0 brush and the corresponding colour of the leaf (maybe little bit more darker) I first painted in the middle line and then the side lines, or veins.
The last part of pointing the poinsettia flower, is to paint in the little stems that are at the bottom of the leafs, which are connected then to the main stem. I just used red and connected all the red leafs, creating sort of a star in the middle. And then I painted in the actual flowers of the poinsettia, which are this little yellow or green dots (no idea how to call them). I used the gold paint, just to make it little bit more festive and painted few tiny dots in the middle, over the small stems that I painted earlier. You can of course leave the small stems and just paint the little flowers, if you want. To finish up the painting, I decided to add little bit of splatter, using the gold, brown and green paint. This is completely optional, you do not need to add splatter if you would like to have more of a cleaner look. You could also add few embellishments like enamel dots. 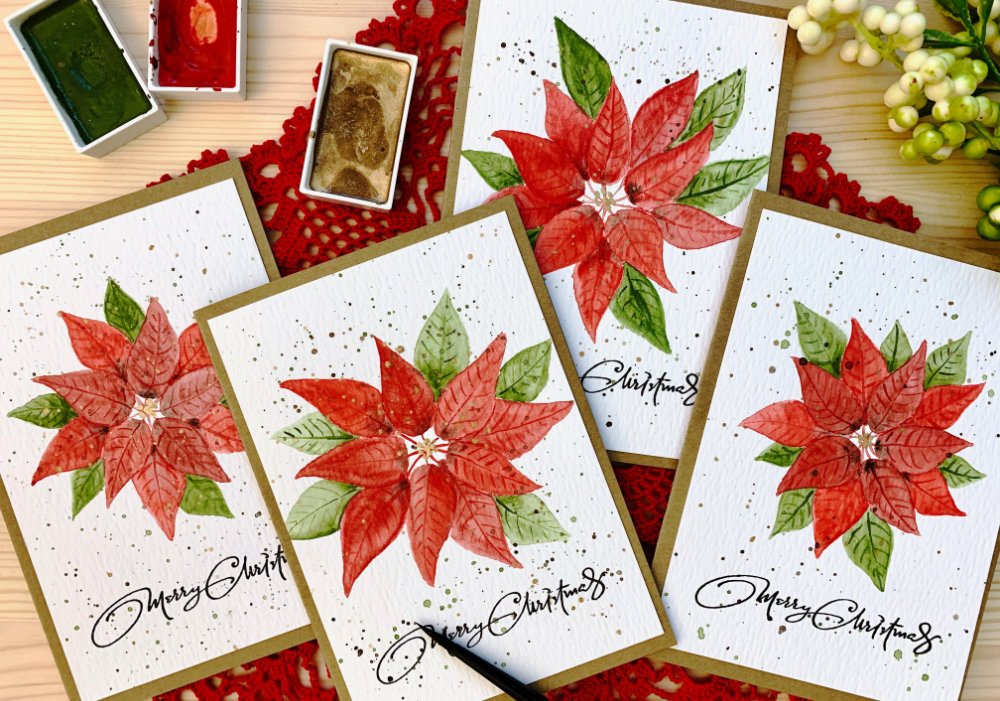
Another thing that is optional, is to add a sentiment. The card doesn’t really need a sentiment, but since I have many sentiment stamp sets, it’s difficult for me not to add one. I used a black ink and Merry Christmas stamp set from Clearly Besotted and I stamped it below the flower.
Lastly I adhered the watercolour panel on top of a card base that I pre-cut and pre-scored using a craft card stock. The panels are smaller then the card base. I do cut the panels slightly smaller, as it is easier to adhere. However, this time I had to cut them smaller, because I was using a card stock that comes only in the US letter size. I used to cut three A6 panels from that card stock, but I did some measuring and realized that if I cut four panels, they will be just eight millimetres smaller then an A6 panel. I think this makes a nice frame around the panel, especially when using a darker card stock for the card base. 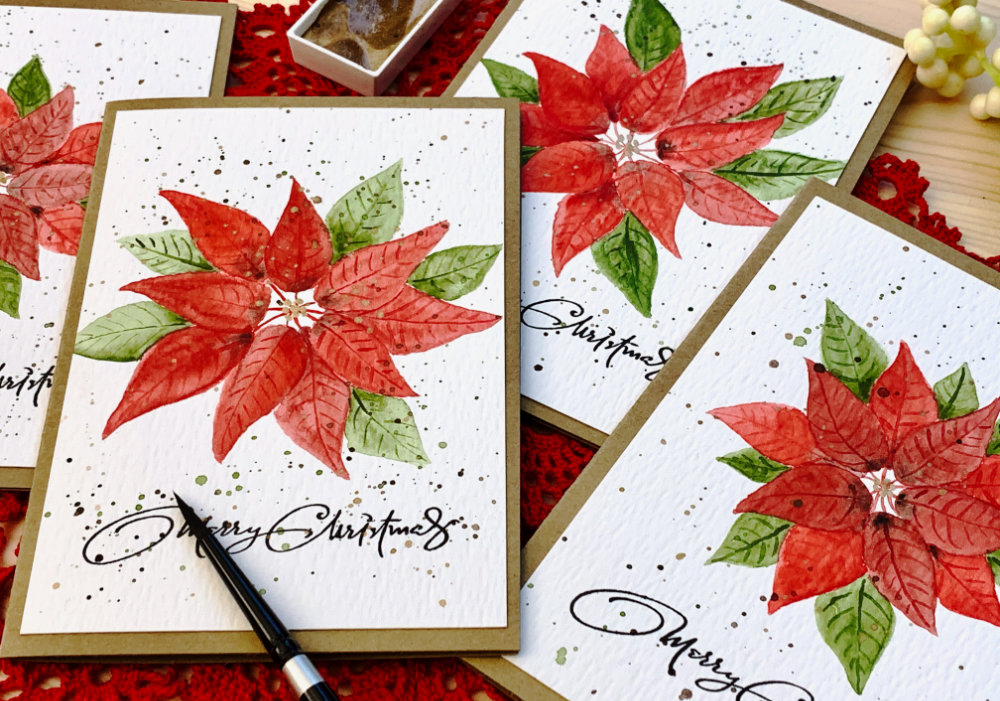
QUICK STEP-BY-STEP HOW TO
This finishes the card, I hope you enjoyed today’s project and will give it a try. Thank you for stopping by, have a great day and fantastic week! Sending hugs from Sweden! VIDEO TUTORIAL
Watch the video below or on my YouTube Channel.
PRODUCTS USED
Disclaimer: I’m currently not using any affiliate links. These links are just to help you find the products. The list includes alternatives to what I was using and while I haven't used some of them, I only recommend brands I trust.
Kuretake, Gansai Tambi, Watercolour Paints 36 Set
AmazonDE | AmazonUK Ranger Tim Holtz Watercolour Cardstock AmazonDE | AmazonUK Daler Rowney Watercolour Brushes AmazonDE | AmazonUK Daler Rowney Small Watercolour Brushes AmazonDE | AmazonUK Silver, Black Velvet brushes JacksonsArtUK Faber Castell, HB Graphite Pencil AmazonDE | AmazonUK Clearly Besotted, Most Wonderful (N.A.) Tsukineko, Versafine Ink pad, Onyx Black AmazonDE | AmazonUK My Sweet Petunia, Mini MISTI Stamping Tool StempelmühleDE | BumbleberrysUK Papermania, Stamp Block AmazonDE | AmazonUK Joy Crafts, Kraft Paper,A4 300gsm/140lb (card base) KreativbuntDE | AmazonUK Papermania, A6 Card Bases + Envelopes, Craft AmazonDE | AmazonUK Sellotape Double Sided Tape AmazonDE | AmazonUK Stick It!, Double Sided Foam Tape AmazonDE | AmazonUK Tonic Studios, Guillotine A4 AmazonDE | AmazonUK Crafting Mat, Black AmazonDE | AmazonUK YOU MIGHT ALSO LIKE
PIN ME
Did you like the card? I would love, if you pinned it to your board on Pinterest!
0 Comments
Leave a Reply. |
FOLLOW ME
SEE MORE


CATEGORIES
All
Stamping Die Cutting Using Stencil Heat Embossing Embossing or Texture Paste Distress Inks Nuvo Products Stamping & Colouring Stamping With Solid Stamps Watercolouring Watercolour Pencils Waterbased Markers Pencil Colouring Alcohol Markers Altenew Markers Zig Brush Markers Easy Backgrounds Stamped Backgrounds Small Stamp Ideas Simple Cards Complex Cards Cardmaking For Beginners All
Painting With Acrylics Painting With Gouache Painting With Watercolours Drawing With Fineliner Minimal Supplies Cards Christmas & Holiday
Love & Valentine Mother's Day Father's Day Halloween Spring Cards Summer Cards Autumn/Fall Cards Winter Cards Cards For Children Cards For Women Cards For Men Thank You Cards Sympathy Cards Get Well Soon Cards Floral & Leav Cards Rainbow Colours Messy Watercolouring Modern Art Inspirations Geometric Patterns Landscape Painting Acrylics
Gouache Watercolours Watercolour Pencils Waterbased Markers Distress Inks Alcohol Markers Colouring Pencils No Stamps No Dies Cards
Cardmaking On A Budget Let’s Colour Quick Cards Fun Masculine Cards Background Ideas Distress Ink Combinations |


 RSS Feed
