
 How many of you have been in a situation where you liked a card a crafter made and you would like to create something similar, but the products like stamps or dies the crafter used are too expensive. Or if you are like me the products are not sold in your country, not even near by country and the shipping costs are high. If this happened to you, the best option is to look for a product that is similar. There are a few options like:
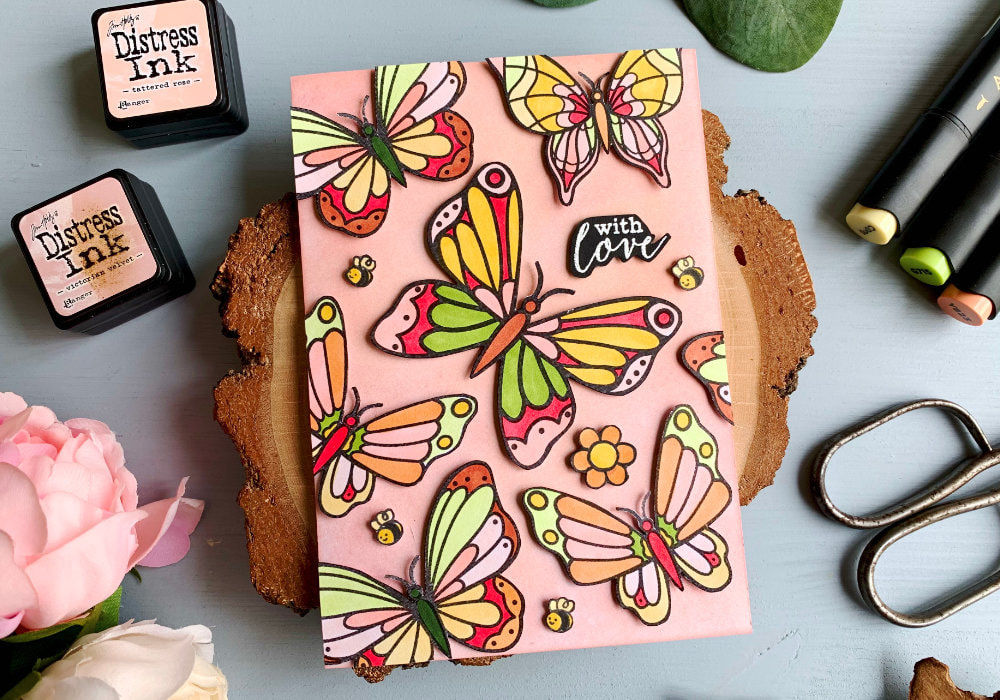
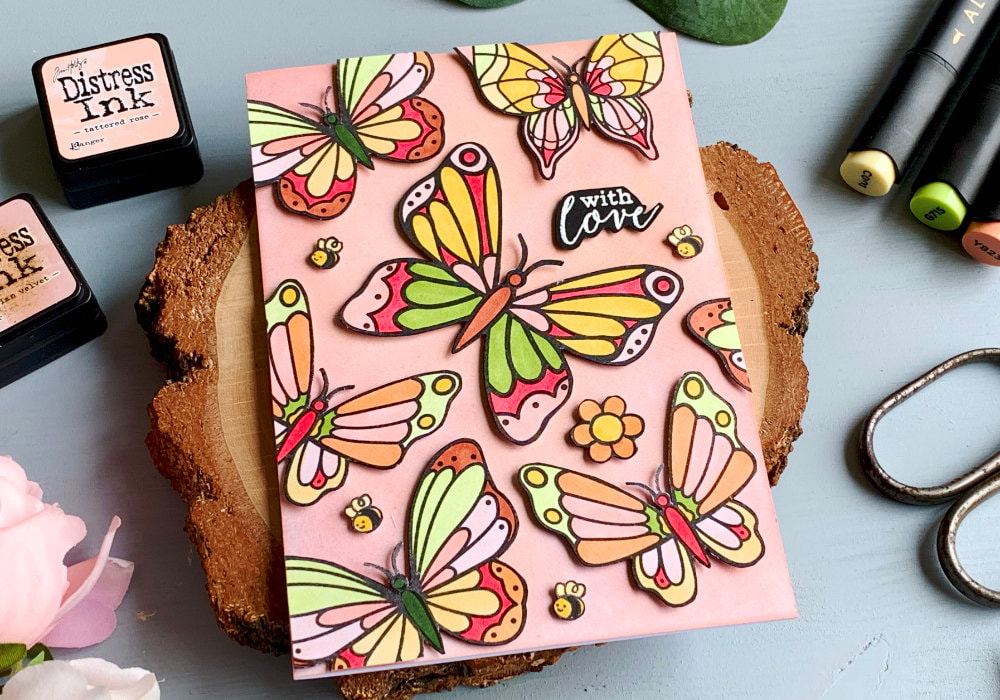 I really liked a card that Kristina Werner made, you can see the card here. She made three cards using a stamp set from Simon Says Stamp and the one with a background filled with butterflies really caught my eye. I very rarely create replicas of cards other crafter made, since I share my cards online, it would not make sense to copy others. But there was something about this card that I liked and I wanted to recreate it. The problem is, the stamp set is quite pricy, just below twenty five dollars. This is way above the price I'm willing to pay for stamp sets. Also you cannot get products from Simon Says Stamp anywhere else than in the US. That means, with the shipping costs, this would have been way too expensive for me. Especially when I don't really care much about butterfly image, I just liked the look of the card. However, not long ago I was looking for butterfly images on the website Freepik.com and I remembered a specific set that was very similar to the one from Simon Says Stamp. GET THE IMAGE: You can the images "Butterfly outline with linear flat details collection" HERE. 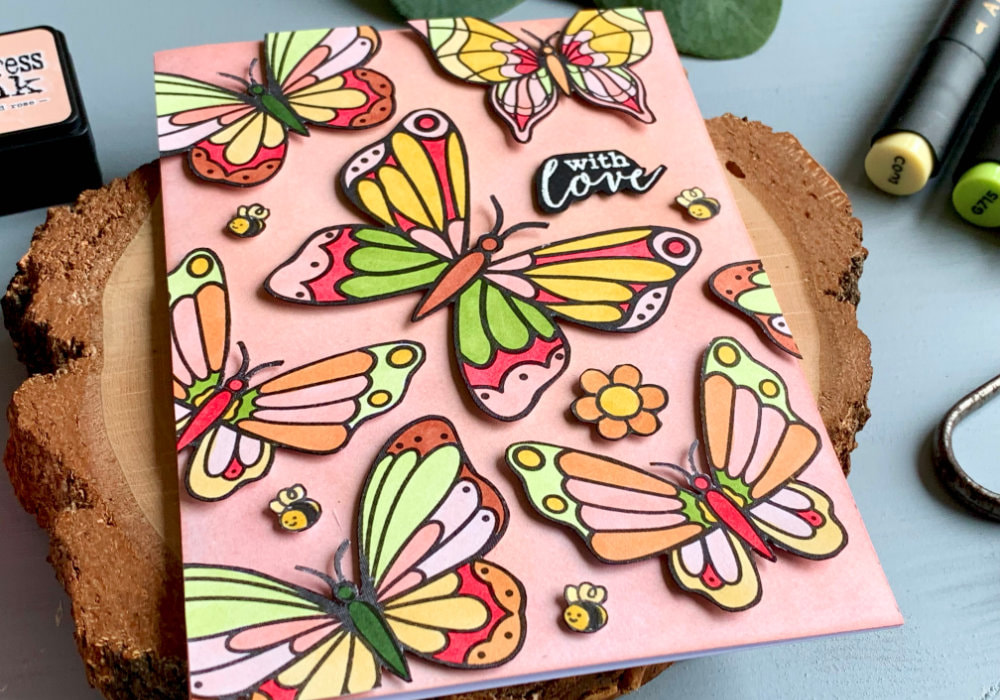 I downloaded the butterflies. I used the option of the .eps file which is a vector file. This way I could adjust the size without loosing any quality. I used six butterflies on an A5 size document. One I made slightly bigger just bellow 6cm high. And the rest was around 4.5cm high. I printed it out, I used a white 220gsm card stock from House Of Cards And Paper and then I started colouring the images. NOTE: If you would like to know more about printing of digital images, check out my blog post about Digital Stamps For Beginners. I coloured the images using the alcohol markers from Altenew. You can use any other brand, this is just what I have.  I used yellows, greens and reds. More specifically these markers: Yellows: Y823, Y612, Y205, C001 Greens: G554, G715, G702 Reds: R206, R301, R400 Once I finished colouring, I cut all the butterflies. I cut them right along the black line. You could see the white of the paper after the butterfly was cut. To cover that up and make the look more seamless or neater, I used a black marker and I went along the edges of each butterfly. You can adhere the butterflies on top of a white card base, but I wanted to have a colourful background. Kristina made created a green background and I actually created similar one as well. I do not have the same products, but I used the Shabby Shutters Distress inks, which gave me comparable results. However I didn't want to copy Kristina that much, so I decided to use pink Distress inks instead. I used the Distress inks the Tattered Rose and Victorian Velvet. 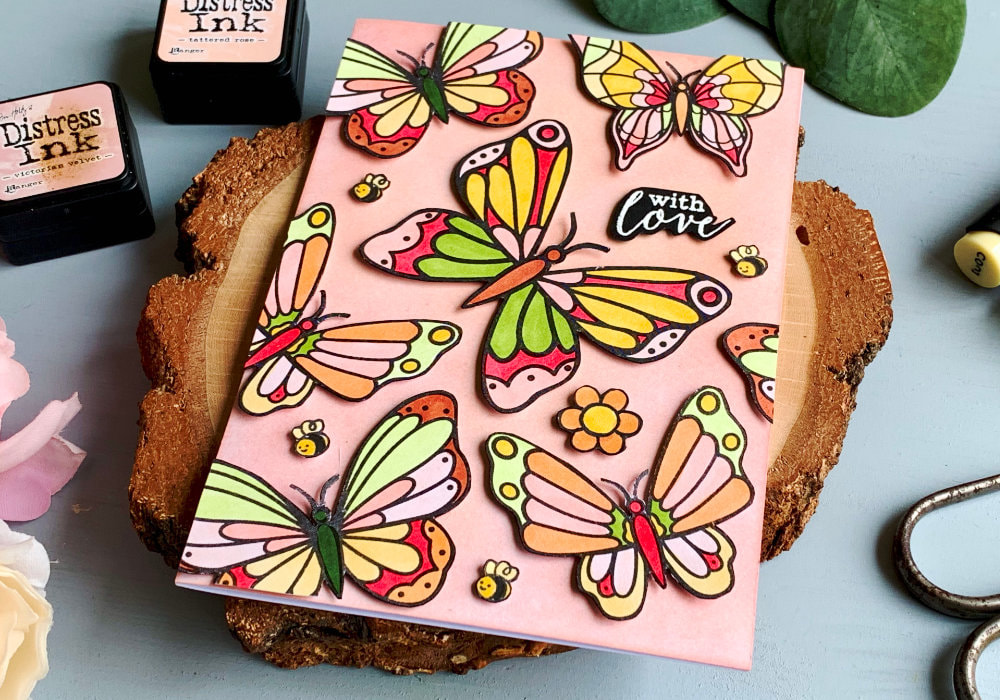 I started with the Tattered Rose and I covered the whole background. Then I went over it with the Victorian Velvet and once more I applied the Tattered Rose. This was a quite challenging application, because the Tattered Rose ink is quite light. At times I though I need a re-inker or the maybe the card stock is not the best for ink blending. But in the end I managed. The application was quite blotchy, but since most of the background will be covered with the butterflies, it didn't matter. Next I adhered all the butterflies and a greeting, using a foam tape. This was going to be my Mother's Day card and because I didn't have a stamp that was small enough. I picked greeting that says With Love, which is quite a neutral greeting and can be used for other occasions as well. 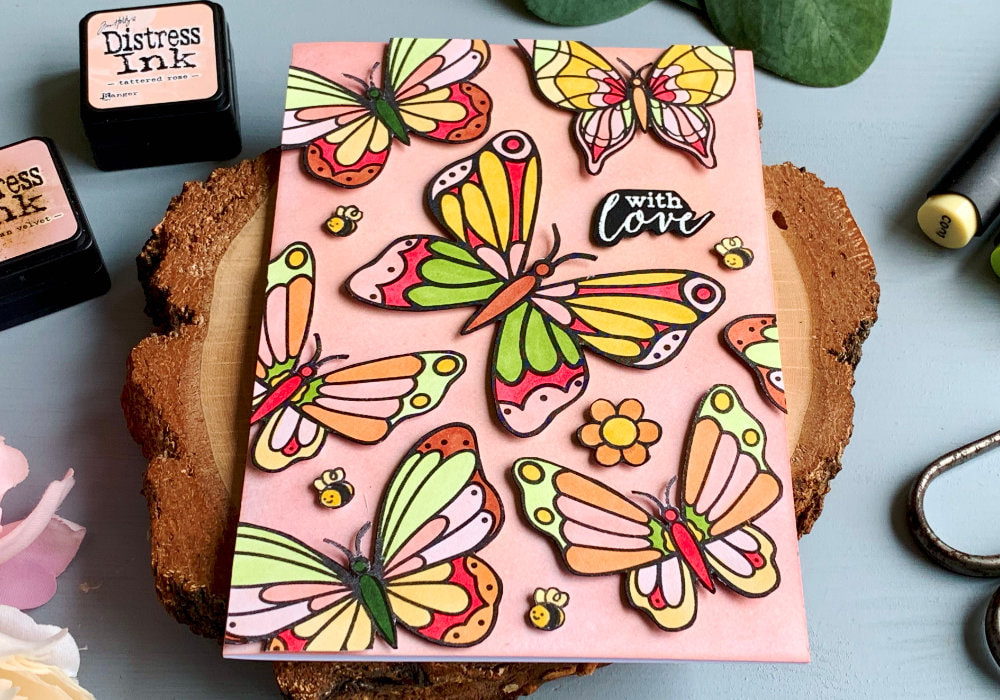 Except of the big butterfly, the rest I was going to cut as they were hanging of the sides of the panel. And I don’t like when the foam tape is on the parts that are sticking out. I don't like when the tape is visible, right at the edge, when you tilt your card. So what I did, I made pencil marks and I only placed the double sided foam tape on the parts that are going to be on top of the panel. But this is optional. There were a few empty spaces that looked off to me. And I wanted to add some smaller images to fill the gaps. I could have printed some images, but I had a stamp set that had a flower and a bee that fit perfectly, so I used those. I also used one of the extra pieces that I cut out and adhered it on one side of the panel. After I adhered all of the images, I attached the panel on top of a white card base using a liquid glue. I hope you will try making this card yourself. Make sure you check out my video on YouTube and give it a Like as well. Below you can find a few blog posts that I think you might enjoy and if you have any questions, just drop me a line. VIDEO TUTORIALWatch the video below or on my YouTube Channel. YOU MIGHT ALSO LIKEPIN MEDid you like the card? I would love, if you pinned it to your board on Pinterest! 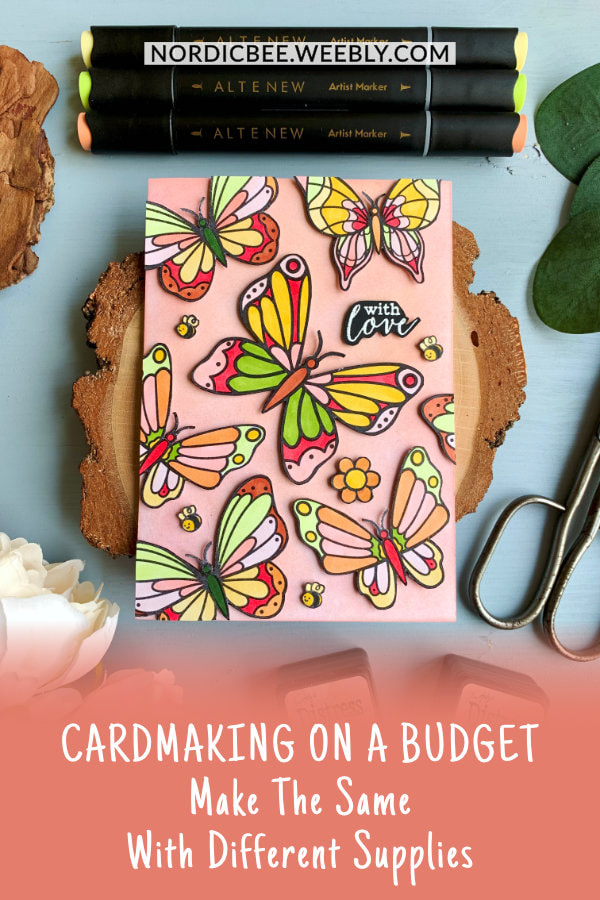
0 Comments
Leave a Reply. |
FOLLOW ME
SEE MORE


CATEGORIES
All
Stamping Die Cutting Using Stencil Heat Embossing Embossing or Texture Paste Distress Inks Nuvo Products Stamping & Colouring Stamping With Solid Stamps Watercolouring Watercolour Pencils Waterbased Markers Pencil Colouring Alcohol Markers Altenew Markers Zig Brush Markers Easy Backgrounds Stamped Backgrounds Small Stamp Ideas Simple Cards Complex Cards Cardmaking For Beginners All
Painting With Acrylics Painting With Gouache Painting With Watercolours Drawing With Fineliner Minimal Supplies Cards Christmas & Holiday
Love & Valentine Mother's Day Father's Day Halloween Spring Cards Summer Cards Autumn/Fall Cards Winter Cards Cards For Children Cards For Women Cards For Men Thank You Cards Sympathy Cards Get Well Soon Cards Floral & Leav Cards Rainbow Colours Messy Watercolouring Modern Art Inspirations Geometric Patterns Landscape Painting Acrylics
Gouache Watercolours Watercolour Pencils Waterbased Markers Distress Inks Alcohol Markers Colouring Pencils No Stamps No Dies Cards
Cardmaking On A Budget Let’s Colour Quick Cards Fun Masculine Cards Background Ideas Distress Ink Combinations |
 RSS Feed
