
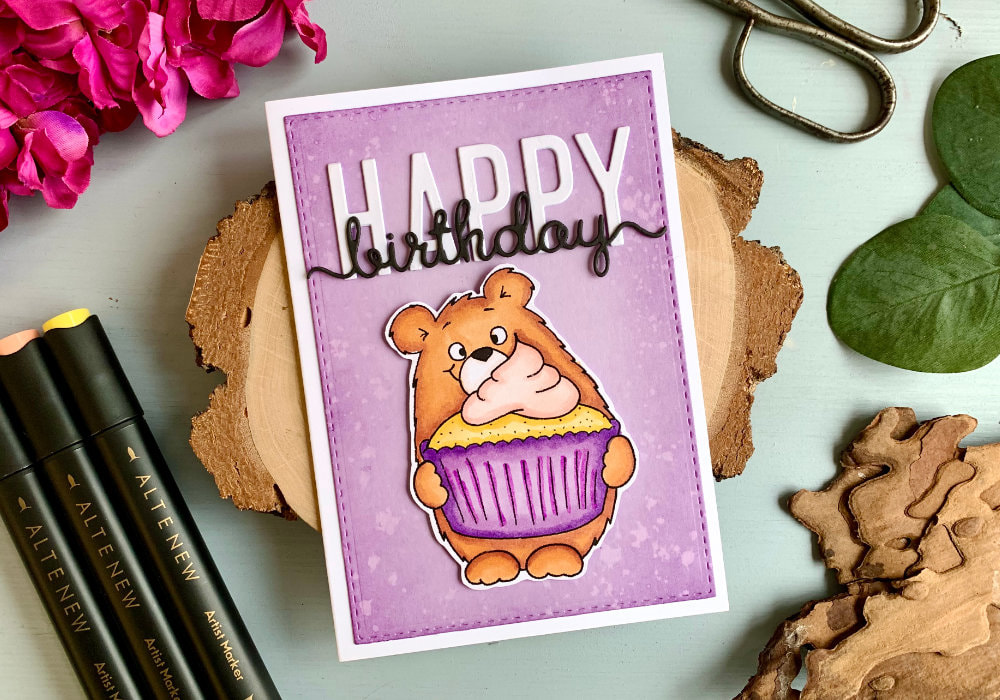
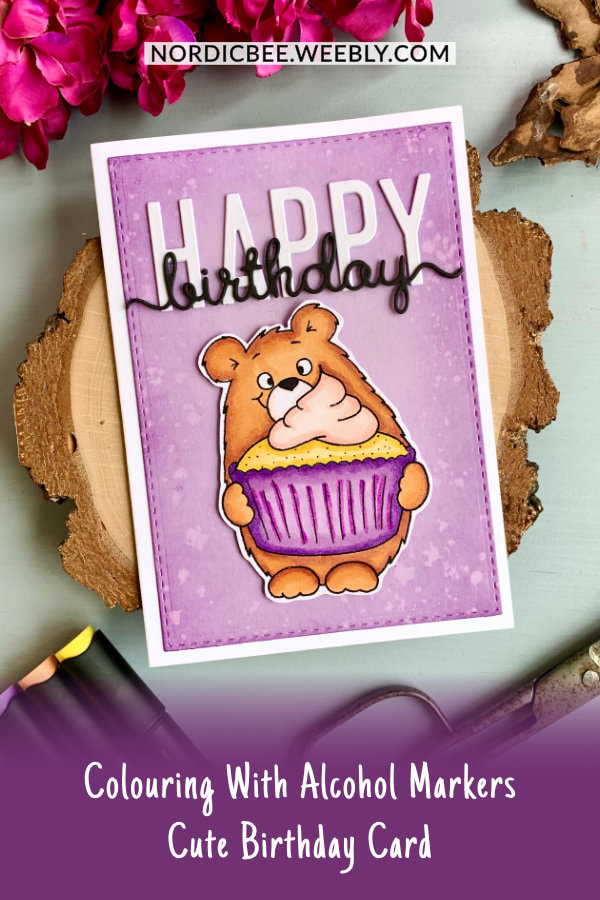
In my blog post and video about Digital Stamps, I downloaded a really cute digital stamp with a bear by Gerda Steiner Designs. This stamp came very useful, as I needed to create a Birthday card.
I coloured the image using the alcohol markers from Altenew. I don't have many colours, like browns. So I used what I had. You can use what ever brand you already have or is available to you. I used all the yellows from the set Summer Afternoon. The darker yellows I used for the body of the bear and the lighter yellows I used for the cupcake. 
From the set Shades of Purple I used R823, R702 and I also added R705. The icing I coloured with R301 and R400 from the set Red Sunset. The R400 with the combination of the clear marker I used to colour around the nose of the bear.
The colouring you can see in my quick video, but I didn't film how I made the card. So let me tell you how I made it. I first created a background panel out of a lilac card stock. I die-cut it using a stitched rectangular die and using the dusty concord ink I went over the edges, fading it out towards the middle. 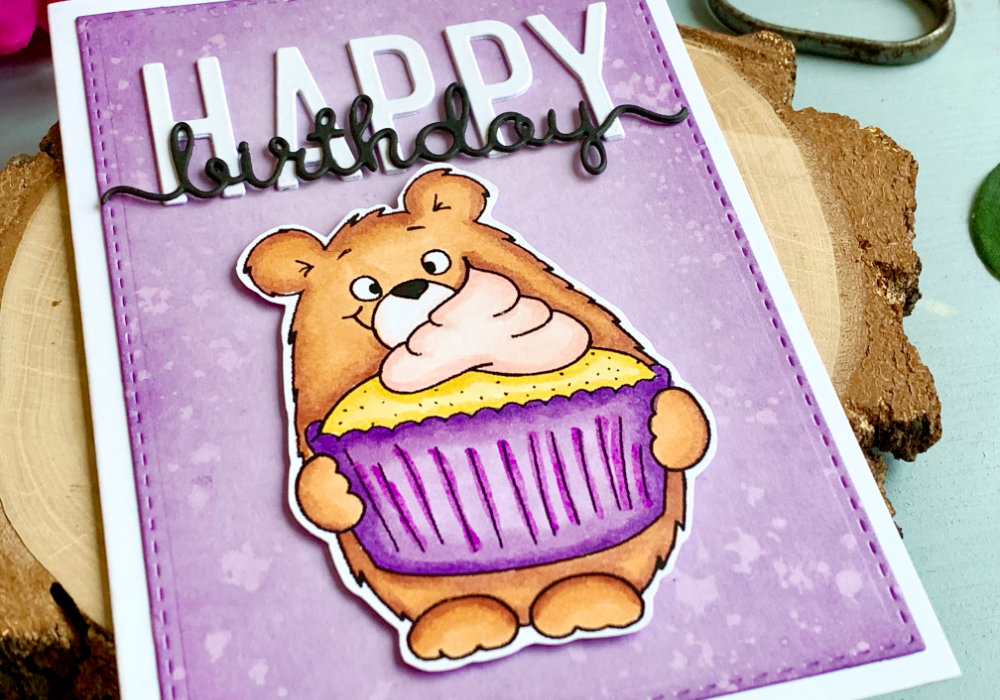
I also added splatter and soaked it up with a paper towel to add a little bit more interest.
For the greeting I used two types of dies. The word Happy, I die-cut out of a white card stock using letter dies. I die-cut each of the letters three times and glued them together. And I adhered the letters at the top fo the lilac panel. I was going to use a stamped banner for the word Birthday, but as I was going through my stash I came across a die with a handwritten greeting and I decided to use it instead. I die-cut it two times out of a black card stock and I glued it over the die-cut letters. 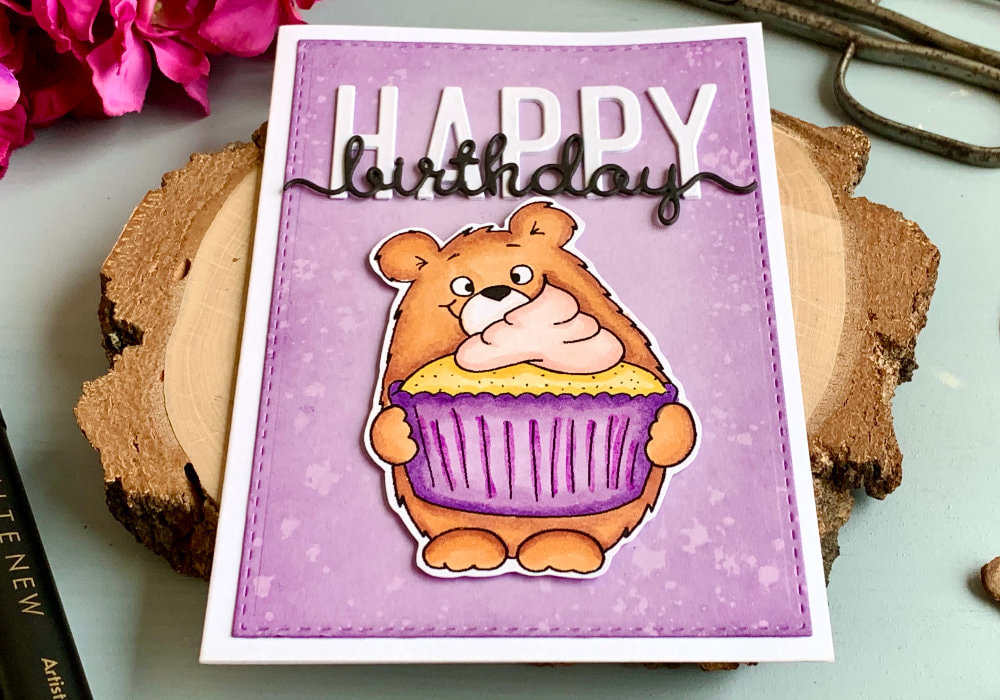
The tittle, meaning the dot above the "i" I die-cut three times, as the letter was above the empty space. So to add more hight I added one more tittle.
The bear I adhered below the greeting. For the bear I used a double-sided foam tape, but the rest I adhered using a liquid glue. Lastly I adhered the whole panel on top of a white card base. 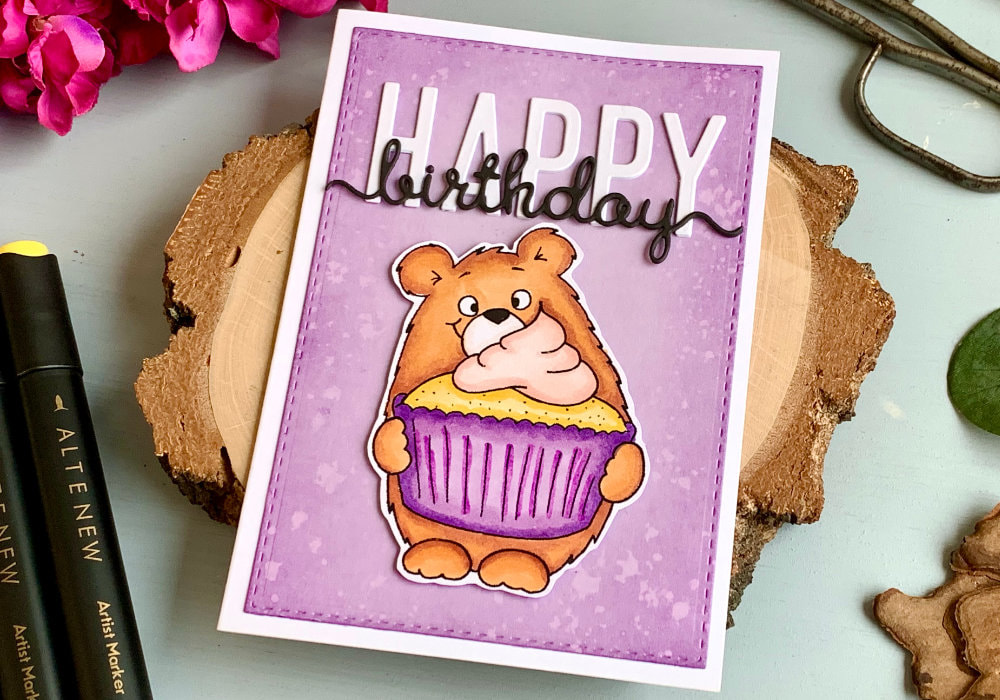
NOTE: I didn't write where you can get this digital stamp, because I could not find it anymore, not even for purchase. Annoying, I know. However, Gerda Steiner Designs has many similar digital stamps that are just as cute. And it seems like they are changing up their digital stamp offerings, so it's worth checking it out.
I really love how this card came together and I hope you will try making this card yourself, even if you use different stamp. Make sure you check out my video on YouTube and give it a Like as well. The list of product is down below, where you can also find a few blog posts that I think you might enjoy. And if you have any questions, just drop me a line. WATCH A QUICK VIDEO
Watch the video below or on my YouTube Channel.
YOU MIGHT ALSO LIKEPIN ME
Did you like the card? I would love, if you pinned it to your board on Pinterest!
0 Comments
Leave a Reply. |
FOLLOW ME
SEE MORE


CATEGORIES
All
Stamping Die Cutting Using Stencil Heat Embossing Embossing or Texture Paste Distress Inks Nuvo Products Stamping & Colouring Stamping With Solid Stamps Watercolouring Watercolour Pencils Waterbased Markers Pencil Colouring Alcohol Markers Altenew Markers Zig Brush Markers Easy Backgrounds Stamped Backgrounds Small Stamp Ideas Simple Cards Complex Cards Cardmaking For Beginners All
Painting With Acrylics Painting With Gouache Painting With Watercolours Drawing With Fineliner Minimal Supplies Cards Christmas & Holiday
Love & Valentine Mother's Day Father's Day Halloween Spring Cards Summer Cards Autumn/Fall Cards Winter Cards Cards For Children Cards For Women Cards For Men Thank You Cards Sympathy Cards Get Well Soon Cards Floral & Leav Cards Rainbow Colours Messy Watercolouring Modern Art Inspirations Geometric Patterns Landscape Painting Acrylics
Gouache Watercolours Watercolour Pencils Waterbased Markers Distress Inks Alcohol Markers Colouring Pencils No Stamps No Dies Cards
Cardmaking On A Budget Let’s Colour Quick Cards Fun Masculine Cards Background Ideas Distress Ink Combinations |
 RSS Feed
