
I wanted to be able to make cards, for which I don’t need any stamps and in my last haul I told you that I cannot draw or paint and I want to learn, but this might take some time. So I was thinking what else I can do, that doesn’t require stamps and the ability to draw. And I came up with something, this is nothing new, however, I mostly saw watercolour artists doing this with their own drawings.
It is so simple, but I never thought of that, because when I watch card makers, they all use stamps. Why not to print out some images and colour them? The only problem with printing is that I wanted to watercolour images and therefore I would need printer that has waterproof ink and also can print on heavy weight watercolour card stock. Well, I had neither of that. However, there is a solution, this is where I got the inspiration from watercolour artists. They often first draw the image separately and then trace it on the watercolour card stock. In my case, I left out the drawing and just found an outline image online. Please be aware of copyright laws and don’t use someone else images without permission, especially if you are planning to share it online or sell your creations. If you are creating cards for personal use, only to give it to your loved ones, that should be ok. 
To make such card, all you need a tracing paper or light weight paper, pencil, eraser, black liner, card base, and the final card stock you are going to be using for your card (you can also use the card base, if you like the card stock). I’m using a watercolour card stock and here I learned right at the beginning that it’s better to use a smoother card stock, preferably even hot pressed watercolour card stock that is very smooth. On the first watercolour card stock I use, as I was tracing the lines with my fine liner, the lines weren’t smooth. Talking about the fine liner, I would also recommend getting a thicker pen. I was using 0.3 pen and I think that is little bit too thin, I think to achieve the stamped look, the lines should be slightly thicker. And don’t forget to use waterproof fine liner, if you are going to be using watercolouring medium.
So how to put this card together? The first thing you need to do is to find an image online or in a book. There are also stamp companies that offer digital stamps, I will include some links in the supply list.The easiest is an outline image or an image that you can easily trace. The most simple thing to do is to print out the image in the size you want it to be on a card. 
But what if you don’t have a printer. No problem! All you need is a smart phone or a tablet and use your tracing paper and trace the image. You can do this if you have an image from a book. On a tabled or smart phone it can gets tricky, as the image tends to move if you are not careful, but it’s doable. I used the Photos app on my iPad to trace the image, but I resized the image in the app Procreate (any similar app will do). This way, even if the image moved, or resized while I was tracing it, I just moved it back to the original size and continued tracing.
The next steps are the same for those who printed the image as well as those who traced it. Flip the piece of paper with the image and cover it with the graphite of your pencil. Make sure that the whole piece is covered. You can also use graphite transfer paper, if you have it. After you apply the graphite flip it back and place the image on the final card stock you want to us. If you want to add a sentiment, make sure you leave enough space for it. Then start tracing the image. The graphite on the back will transfer to your card stock. Recently I watched a video from Kristina Werner, you can watch the video here. She used digital stamps and printed the images and she used LED light pad to trace the images directly onto the watercolour card stock. And this is also an option, but I don’t have such light. 
If you have a Cricut machine (maybe even Shilouette does it), you can use the pen option and draw the image that way. All you need is a waterproof marker, if you are watercolouring.
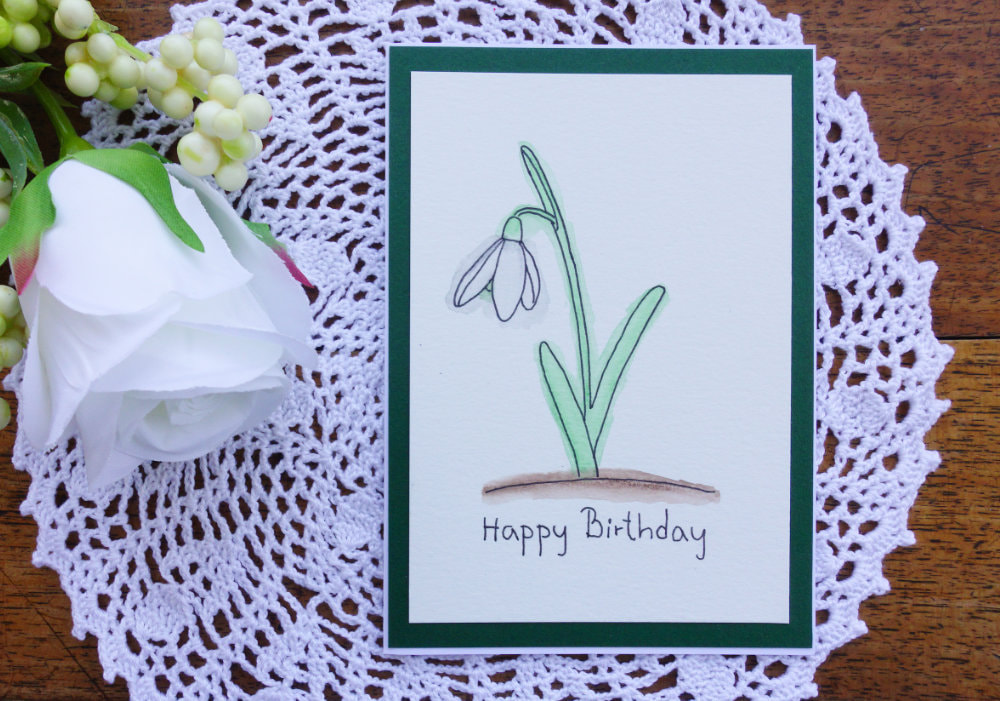
After the image is transferred, you can make some changes if you want. And technically you can start colouring, if you want to create a no-line coloured image. However, the project today is to create image that looks like you stamped it. To do that, you just trace the pencil lines with the black fine liner. And when the ink is dry, erase the pencil lines. You can leave it like it is, add a sentiment and adhere the panel to the card base, without doing any colouring. I decided to colour the image, using watercolouring pencils and do a messy watercolouring, which means I went outside of the lines. I had to re-do the card multiple times, because of the card stock I was using and I was ready to finally finish the card. However, I wish I did another layer of the colour as it was little bit too light. Once I was finished with the colouring, I wrote the sentiment. First I wrote it with a pencil and then I traced it with the fine liner. Again, this is not necessary, in the shops you can find cards that don’t include any sentiments. I noticed that the image of the Snowdrop I drew wasn’t cantered, so I took out my paper trimmer and trimmed it a bit and also adhered a dark green card stock on the back of it, to create a frame. Then I adhered the whole piece on top of a white card base. 
QUICK STEP-BY-STEP HOW TO
This finishes the card. This technique is nothing new, but because most card makers create cards using stamps, I thought I will bring this to the card making world. Make sure you check out my video, as I’m showing there one more step, because I could not find an outlined image that I would like. Of course you can just use a printer and print the image, if your printer can print on a thicker card stock. But by tracing the image, you can make few adjustments and the end result is more yours, at least in my opinion. Thank you for stopping by! As usual, if you have any questions, do not hesitate to drop me a line. VIDEO TUTORIAL
Watch the video below or on my YouTube Channel.
PRODUCTS USED
Disclaimer: I’m currently not using any affiliate links. These links are just to help you find the products. If I don’t find the exact product, I will provide an alternative.
Color Copy, White A4 300gsm card stock | AmazonDE | AmazonUK
Canson, Cold Press A5 300gsm watercolour card stock | AmazonDE | AmazonUK Faber-Castell Waterproof 0.3 Fine Liner | AmazonDE | AmazonUK Faber-Castell Water Colour Pencils (Pack of 24) | AmazonDE | AmazonUK Daler Rowney Watercolour Brushes | AmazonDE | AmazonUK Pencil Eraser If you are looking for digital stamps, I found them e.g. on these websites:
CHECK OUT MY OTHER CARDS FROM NO STAMPS OR DIES SERIES
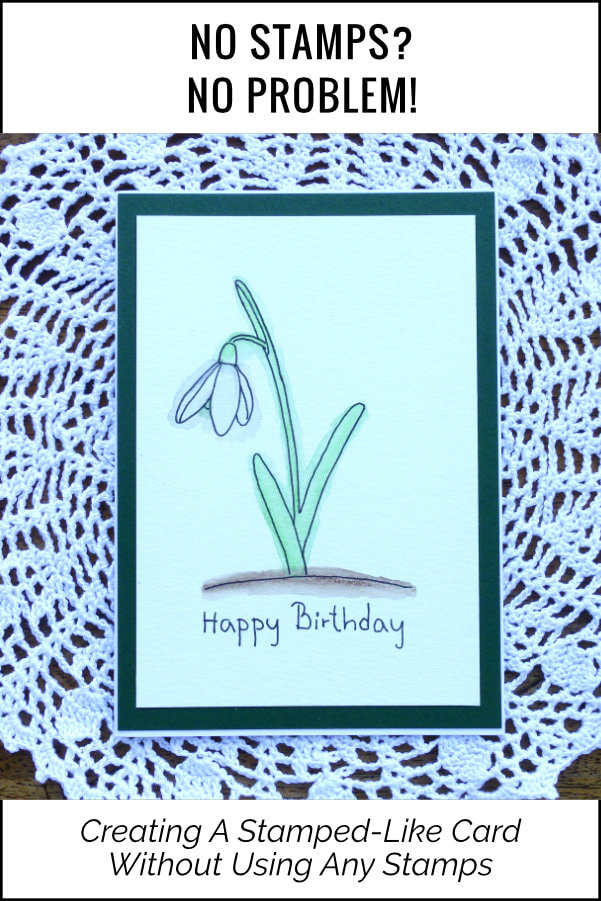
PIN ME
Did you like the card? I would love, if you pinned it to your board on Pinterest!
0 Comments
Leave a Reply. |
FOLLOW ME
SEE MORE


CATEGORIES
All
Stamping Die Cutting Using Stencil Heat Embossing Embossing or Texture Paste Distress Inks Nuvo Products Stamping & Colouring Stamping With Solid Stamps Watercolouring Watercolour Pencils Waterbased Markers Pencil Colouring Alcohol Markers Altenew Markers Zig Brush Markers Easy Backgrounds Stamped Backgrounds Small Stamp Ideas Simple Cards Complex Cards Cardmaking For Beginners All
Painting With Acrylics Painting With Gouache Painting With Watercolours Drawing With Fineliner Minimal Supplies Cards Christmas & Holiday
Love & Valentine Mother's Day Father's Day Halloween Spring Cards Summer Cards Autumn/Fall Cards Winter Cards Cards For Children Cards For Women Cards For Men Thank You Cards Sympathy Cards Get Well Soon Cards Floral & Leav Cards Rainbow Colours Messy Watercolouring Modern Art Inspirations Geometric Patterns Landscape Painting Acrylics
Gouache Watercolours Watercolour Pencils Waterbased Markers Distress Inks Alcohol Markers Colouring Pencils No Stamps No Dies Cards
Cardmaking On A Budget Let’s Colour Quick Cards Fun Masculine Cards Background Ideas Distress Ink Combinations |
 RSS Feed
