
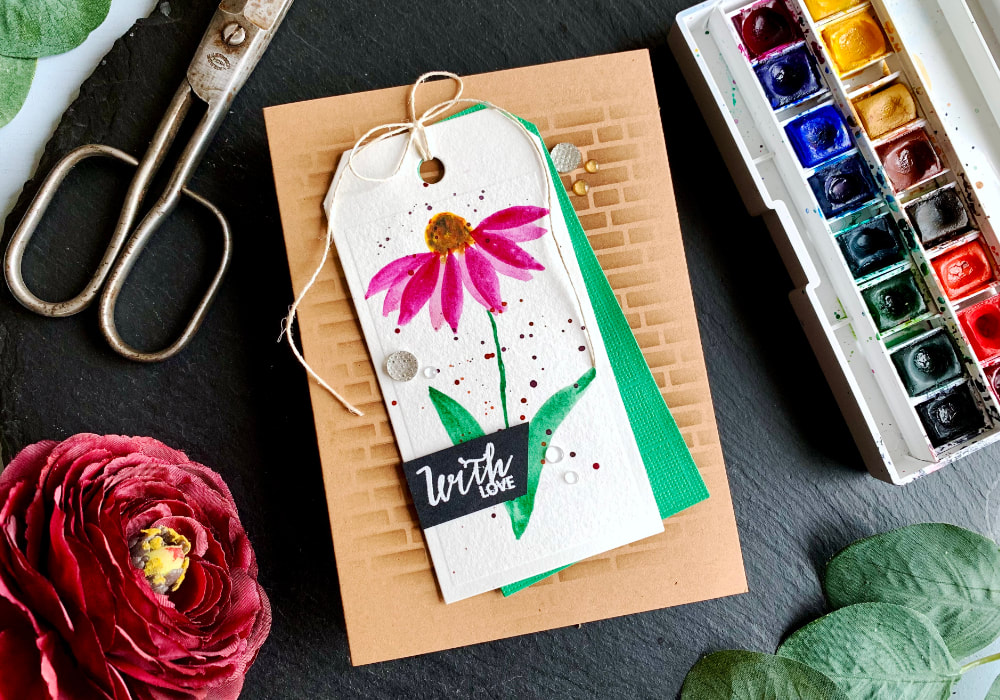
 I'm going to say this right at the beginning, since I'm labelling my card as for beginners. I used a few extra products like a stencil and a die, which beginners probably do not have. You can skip it! I just wanted to do something different than I usually do. Normally I would take a watercolour panel in the size of my card base, paint my image, maybe paint the edges of that panel to create a frame and adhere the whole thing on top of a card base. However I do have some cardmaking products lying around and I hardly ever use them on cards where I paint from scratch. So if you do not have any of the additional products, just skip it and paint only the flower. Again I found the idea for the card on Instagram. Emma Lefebvre @emjlefebvre was doing watercolour flower alphabet and painted coneflower. I really like it mainly because it looked simple to paint and I thought it would be great for a card. I wish though I checked a photo of a coneflower instead just following what I saw in the video. I cannot say I have never seen this flower, but surely not recently. So I didn't have a clue how it looks like.  I started with the flower. You can use any watercolour brand you want. If you are going to create a tag and therefore you are restricted with the size, you might use a pencil and sketch the top of the flower or place some pencil guides. Then using a yellow paint I created the top of the flower, you could also use orange if you want. When you google a coneflower the middle part is quite big, compared to the petals, so I was making sure not to paint it too small. While the yellow was still wet I put in a few dots of orange brown and brown paint across it. Next I painted the petals. I didn't wait for the top of the flower to dry. My watercolour palette has a perfect shade of purple. It's the Purple Lake from Winsor & Newton. I painted two rows of petals. I started with less saturated paint and I painted the petals along the bottom of the yellow middle. I used a heat tool to dry the petals and then I painted the second layer, for which I used more saturated colour.  To paint the petals is very easy. I used a size four round brush and with two strokes I painted each petal, starting with the tip of the brush, pressing down, back to the tip of the brush. Once I was happy with the look I painted the stem with the tip of the brush and then I painted the leaves. Just simple leaves, I don't even know if they are correct, probably not, but I wanted them to be plain. After the panel was dry I used the green and purple and created a splatter across the panel. Now! Here I reached the point where I decided to do a few extra things, but as I said those are optional. You can skip this and just adhere your panel on top of a card base and you are done.  I started with the card base. I thought it would be fun to add some pattern across it. I took a stencil with a brick pattern, placed it on top of a card based and used the Walnut Stain Distress ink and covered the background. I didn't need to fully cover it, also I didn't want to have a pattern from edge to edge. Next I used a tag die and die cut two tags one with the coneflower and the other out of a green card stock. For the green tag I used a green Distress ink and blended it along the edges. It just makes it more interesting and is completely optional. If you do not have a die to create a tag, what you could do is to use a paper trimmer and a hole punch and create it that way. 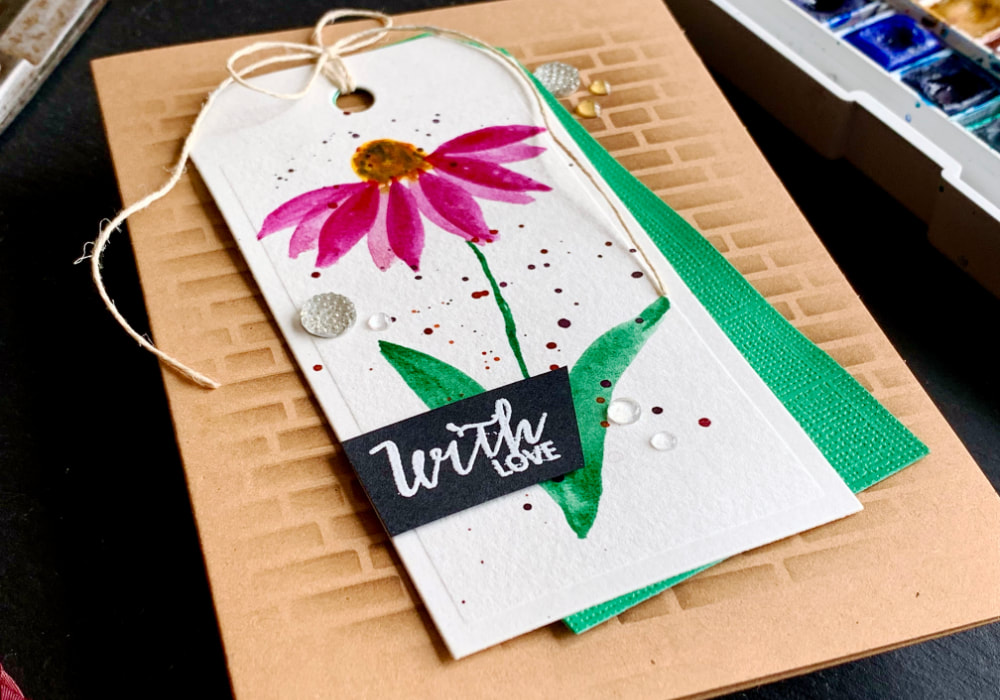 I put the tags together and used a bakers twine and tied a bow. I had to glue them together so the tag with the flower wasn't moving and then I adhered the tags on top of the card base over the brick pattern. I used a foam tape to have it a little bit raised. Lastly to finish up the card I added a few embellishments. I had these crystals for a very long time, I bought them because they look very nice, but I always forget to use them. This time I didn't forget. I adhered two of them and I also added a few clear Nuvo drops. You can see a quick video of me making this card on my YouTube channel or Instagram and make sure you subscribe/follow. WATCH A QUICK VIDEOWatch the video below or directly on my YouTube channel or Instagram. YOU MIGHT ALSO LIKEPIN MEDid you like the card? I would love, if you pinned it to your board on Pinterest! 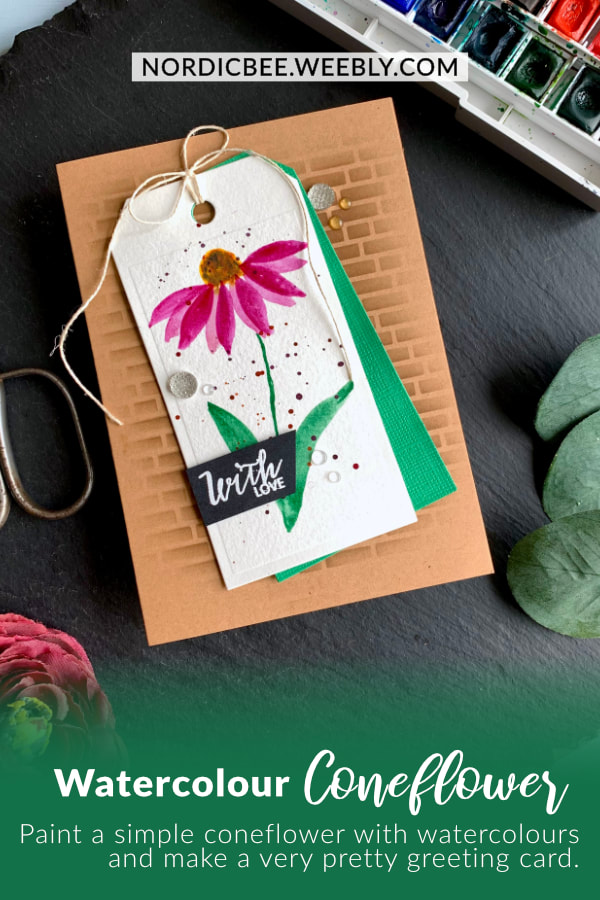
0 Comments
Leave a Reply. |
FOLLOW ME
SEE MORE


CATEGORIES
All
Stamping Die Cutting Using Stencil Heat Embossing Embossing or Texture Paste Distress Inks Nuvo Products Stamping & Colouring Stamping With Solid Stamps Watercolouring Watercolour Pencils Waterbased Markers Pencil Colouring Alcohol Markers Altenew Markers Zig Brush Markers Easy Backgrounds Stamped Backgrounds Small Stamp Ideas Simple Cards Complex Cards Cardmaking For Beginners All
Painting With Acrylics Painting With Gouache Painting With Watercolours Drawing With Fineliner Minimal Supplies Cards Christmas & Holiday
Love & Valentine Mother's Day Father's Day Halloween Spring Cards Summer Cards Autumn/Fall Cards Winter Cards Cards For Children Cards For Women Cards For Men Thank You Cards Sympathy Cards Get Well Soon Cards Floral & Leav Cards Rainbow Colours Messy Watercolouring Modern Art Inspirations Geometric Patterns Landscape Painting Acrylics
Gouache Watercolours Watercolour Pencils Waterbased Markers Distress Inks Alcohol Markers Colouring Pencils No Stamps No Dies Cards
Cardmaking On A Budget Let’s Colour Quick Cards Fun Masculine Cards Background Ideas Distress Ink Combinations |
 RSS Feed
