
Painting a simple watercolour roses and wreath and making a beautiful car for Mother's Day + VIDEO22/2/2021 
If you are living in Ireland or the UK another big card giving occasion is slowly approaching, which is Mother’s Day. Of course you can buy your cards, but if you would like to create something yourself and therefore make it even more special, look no further, because I have you covered.
I'm going to make a card with watercolour roses. I wanted to paint roses for some time and this was the perfect time to finally do it. However, I found roses rather intimidating to paint. If you are new to my blog, I’m quite new to painting and not just with watercolours. I mainly use stamps and I colour those images, which is super easy. And even thought I’m a beginner, last year I decided that I want to start making cards completely from scratch, without any stamps or dies. Yes, I’m not perfect, but so far what I created I really like. Therefore, if you are a beginner yourself, these cards should not be difficult for you, because if I can paint it, you can do too. There are not many supplies you need for this card. You need watercolours, some brushes and watercolour card stock. You will also need one or two jars with clean water and a paper towel to soak up excess water from your brush. And for the card, you will need a card base that you can either make yourself or you can buy them already pre-made and to adhere the panel onto the card base you need some kind of adhesive, I prefer using a double-sided tape. 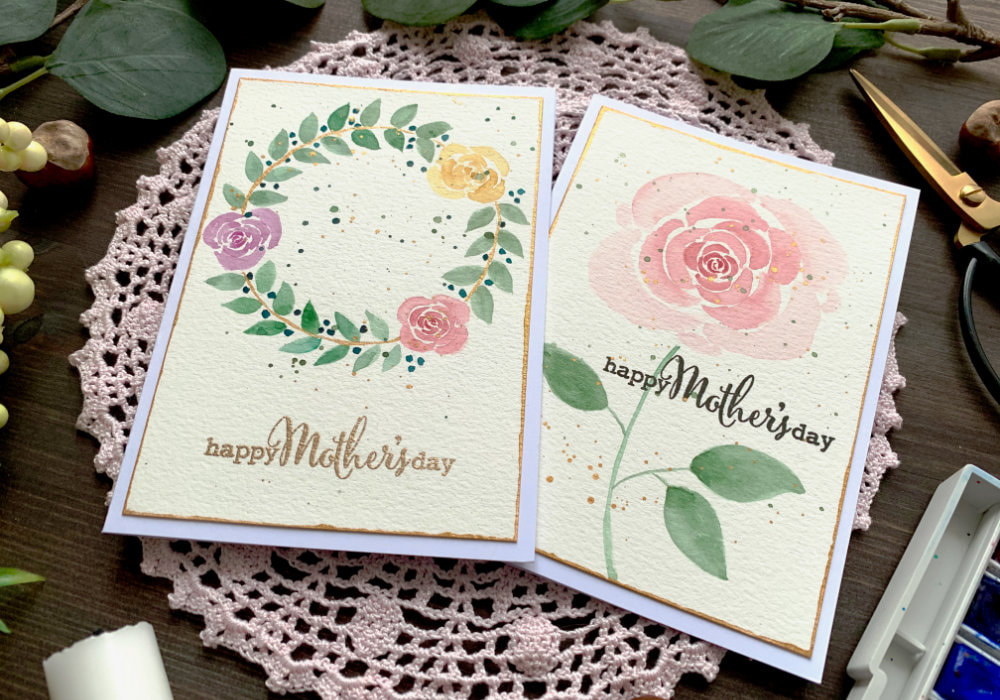
As always I started by practising. I needed to find the easiest way for me to paint the petals of the rose, how to paint the strokes, which brushes to use. I painted dozens of roses and leafs, utilising both sides of the watercolour card stock. I even used my iPad Pro and the app Procreate, to practice the shapes.
While there are few ways different people paint the roses, the main principle of painting a rose is the same. What helped me is to watch few videos to see which method or approach I like the best and my favourite videos you can find in this playlist that I put together, my absolute favourite is the first video by de Winton Paper Co. and the leaf tutorial by Jenna Rainey. To paint the rose you start with very small, more saturated strokes to create the middle, painting a tighter bundle of the petals, expanding outwards, going in a circle, creating bigger more lighter petals. The shape of the petals is a curved line, I think it’s called a “C-curve”. And you start painting the petal with the tip of your brush and the pressing down to make it wider and then slowly releasing it back to the tip. This is something I still need to work on, mainly when painting bigger flowers, but this is the general way of painting the petals of a rose. Another thing, which I forgot to mention in the video and also forgot to do in my example. It’s a good idea to wiggle the top of your brush as you are creating your C-curve, to give the petals more organic look. 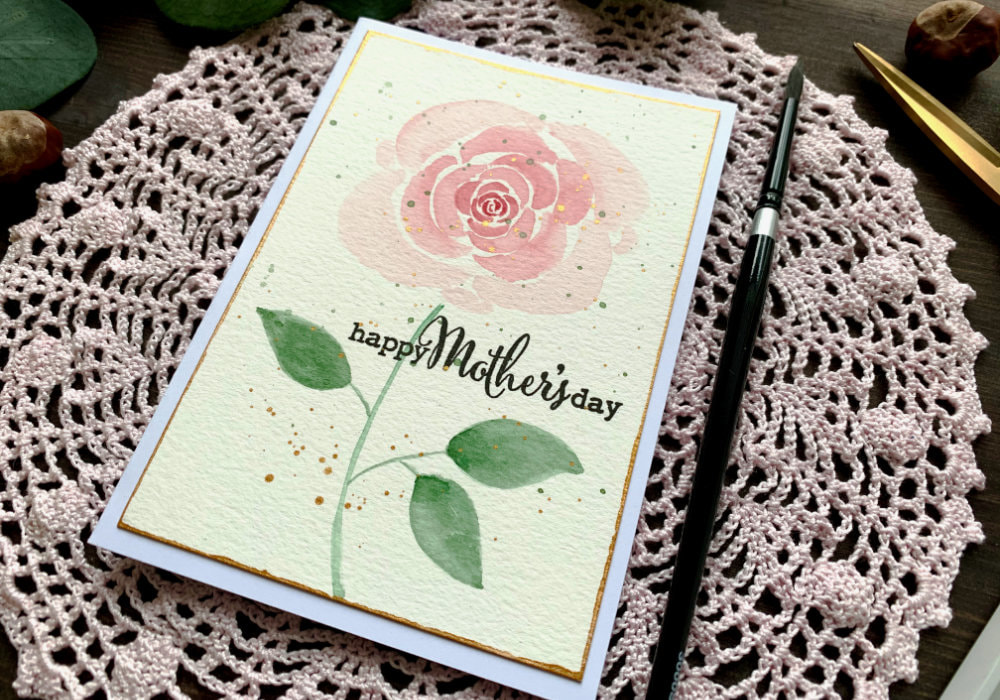
I created two cards and the card with the single rose, is my example piece that I mainly did for the video. What I struggled with are the outer leafs, especially the last four rows. Maybe I painted it too big. I mainly wanted to cover the whole panel and for that I had to paint quite a few rows of the petals, but the middle of the flower I was happy with. I didn't dislike it, but I saw it's not as I wanted it to be and I need more practice. Actually the only thing I didn’t like about this practice piece is the even number of the outer petals. More specifically the number of four. I don’t know what it is with four, but it just looks way too symmetrical.
I eventually made my practice rose into a card. I added a stem and few leafs. The leafs were the biggest pain, to be honest. I hate painting leafs, because I’m just not good at it. All the people I watch, paint the leafs with one or two strokes, which I simply cannot do. However, I found a good tutorial by Jenna Rainey that helped a bit. I needed more then one stroke, but at least I was able to get a leaf shape that I was happy with. And even though this rose is not perfect, I still liked the result. And what is really perfect, anyway? If you like it, that’s all what matters! Originally I wanted to paint a bundle of roses with leafs, but because I was struggling with the bigger petals and leafs, I decided to paint smaller roses and put them onto a wreath. Nothing complicated. 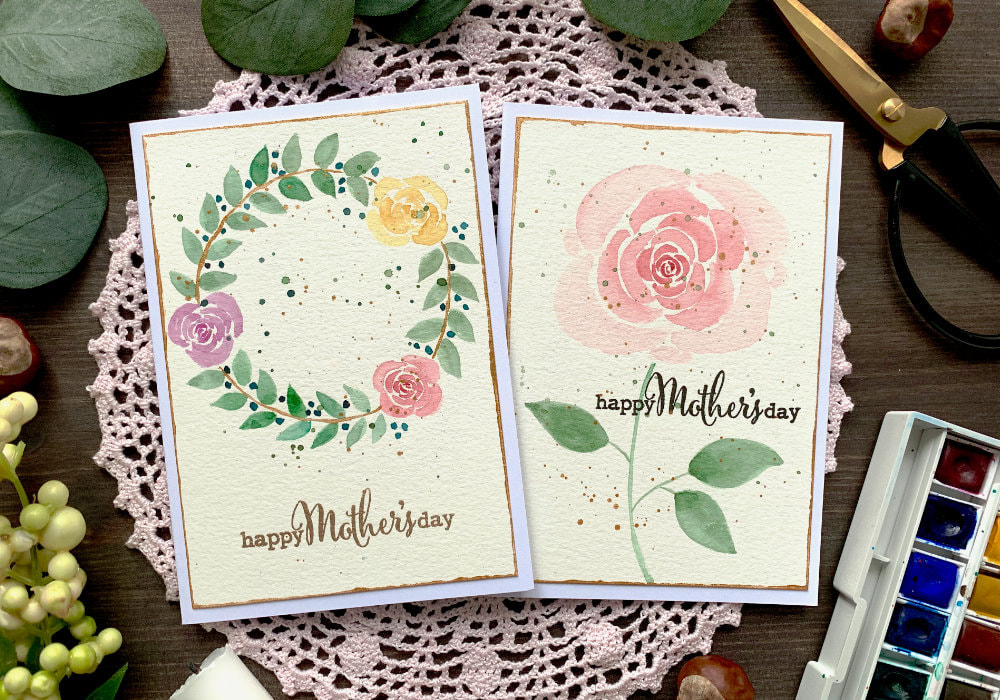
The wreath I painted is based on the wreath I painted for one of my Christmas cards last year. You can call this a wreath 2.0 or actually it’s more like 1.2. Technically it is the same wreath as the one on my Christmas cards, but with few roses in between.
To paint the wreath, I started with a circle that I drew using a cup. I placed the circle in the top part of the watercolour card stock, because I wanted to stamp a sentiment below it. If you are not adding any words to your card, you can place the wreath in the middle of the panel. Next I erased the pencil line at three points, where I wanted the roses to be and then I started painting. I began with my first rose. I decided to paint each rose in different colour, pink, purple and yellow. I painted it the same way as I did in my example piece. Starting with very small strokes expanding outwards. And because I made them smaller, they looked much nicer. Then I painted the leafs. Initially I thought I use different shades of green and blues for the leafs and paint each leaf in different colour, but in the end I stack with one shade of green. It was much simpler this way. The colours are really up to you. The shape of the leaf is like a tear drop. For me this is the easiest and probably the only leaf I can paint. I painted them along the circle until I reached the spot, where the next rose was going to be. Also I didn’t paint the leafs side by side, but the inner leaf was always slightly higher then the outer leaf. 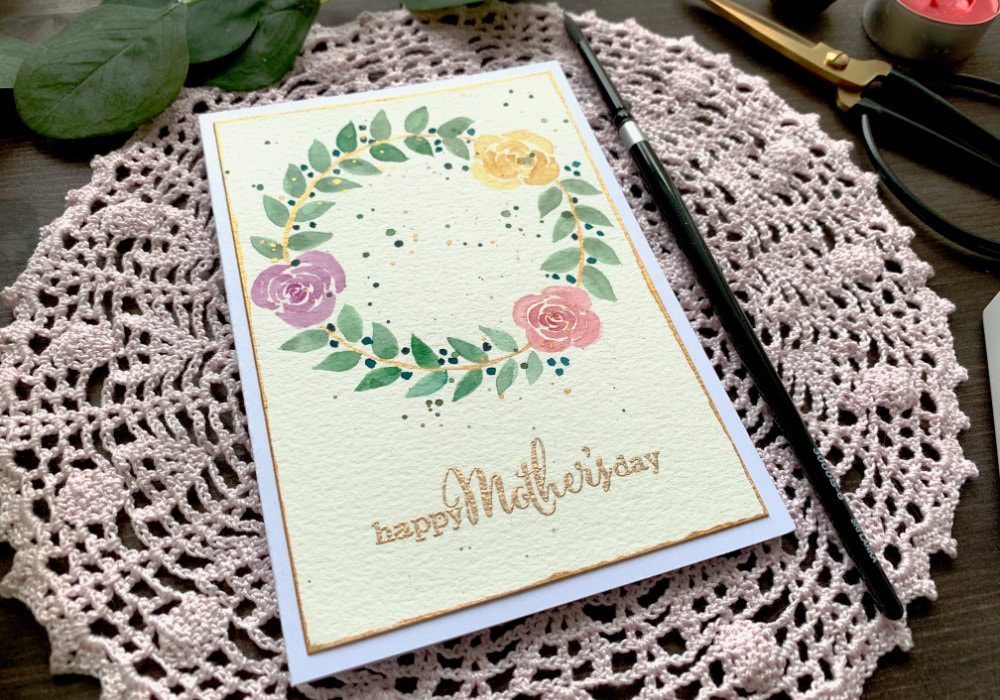
To finish up the wreath I covered the pencil line. On my Christmas card I used brown, but here I decided to use a gold paint.
There was still something missing, I thought there is too much of a white space. In such cases, when using watercolours, I always use splatter to fill up the space. I also added splatter on the card with the single rose. At this point you could adhere the panel to a card base, but I like to add a sentiment to my cards. You can write the sentiment yourself, but as a card maker I have plenty of sentiment stamps and I like to take advantage of that, mainly because my handwriting is all over the place. The sentiment is from an older stamp set by Clearly Besotted. I was going to use a black ink for the sentiment and I did use it for the card with the single rose. But for the card with the wreath I thought heat embossing the sentiment, using a golden (or actually metallic bras) embossing powder is better idea to match the gold on the wreath. I was ready to adhere the panel onto a card base, but I wanted to use a white card base and didn’t like that the whites didn’t match. Therefore I needed to create some kind of a border. There are few options you have and I decided to use the golden paint and I paint the edges of the watercolour panel. After everything was dry, I attached a double-sided tape on the back of both panels and I adhered them on top of the white card base. And that’s it, the card or cards are finished. Very simple and quick! VIDEO TUTORIAL
Watch the video below or on my YouTube Channel.
PRODUCTS USED
Disclaimer: I’m currently not using any affiliate links. These links are just to help you find the products. The list includes alternatives to what I was using and while I haven't used some of them, I only recommend brands I trust.
Winsor & Newton, Cotman Watercolor Palette
AmazonDE | AmazonUK Kuretake, Gansai Tambi, Stary Colours AmazonDE | AmazonUK Canson XL, Watercolour Cardstock , 300gsm/140lb AmazonDE | AmazonUK Silver, Black Velvet Brushes JacksonsArtUK Daler Rowney Watercolour Brushes 4, 6, 10 AmazonDE | AmazonUK Daler Rowney Small Watercolour Brushes 1, 3, 10/0, 3/0 AmazonDE | AmazonUK Color Copy , White Paper, A4 300gsm/140lb (card base) AmazonDE | AmazonUK Papermania, A6 Card Bases + Envelopes, White AmazonDE | AmazonUK Sellotape Double Sided Tape AmazonDE | AmazonUK You can find various sentiment stamp sets here: ClearlyBesottedUK CreateASmileDE SevenHillsCraftsUK Tsukineko, Versafine Ink pad, Onyx Black AmazonDE | AmazonUK Tsukineko Versamark Watermark Ink Pad AmazonDE | AmazonUK WOW! Embossing Powder, Metallic Brass AmazonDE | AmazonUK Docrafts Papermania, Heat Tool AmazonDE | AmazonUK EK Susccess, Anti-Static Powder Tool AmazonDE | AmazonUK My Sweet Petunia, Mini MISTI Stamping Tool StempelmühleDE | BumbleberrysUK Papermania, Stamp Block AmazonDE | AmazonUK Tonic Studios, Guillotine A4 AmazonDE | AmazonUK Crafting Mat, Black AmazonDE | AmazonUK YOU MIGHT ALSO LIKEPIN ME
Did you like the card? I would love, if you pinned it to your board on Pinterest!

0 Comments
Leave a Reply. |
FOLLOW ME
SEE MORE


CATEGORIES
All
Stamping Die Cutting Using Stencil Heat Embossing Embossing or Texture Paste Distress Inks Nuvo Products Stamping & Colouring Stamping With Solid Stamps Watercolouring Watercolour Pencils Waterbased Markers Pencil Colouring Alcohol Markers Altenew Markers Zig Brush Markers Easy Backgrounds Stamped Backgrounds Small Stamp Ideas Simple Cards Complex Cards Cardmaking For Beginners All
Painting With Acrylics Painting With Gouache Painting With Watercolours Drawing With Fineliner Minimal Supplies Cards Christmas & Holiday
Love & Valentine Mother's Day Father's Day Halloween Spring Cards Summer Cards Autumn/Fall Cards Winter Cards Cards For Children Cards For Women Cards For Men Thank You Cards Sympathy Cards Get Well Soon Cards Floral & Leav Cards Rainbow Colours Messy Watercolouring Modern Art Inspirations Geometric Patterns Landscape Painting Acrylics
Gouache Watercolours Watercolour Pencils Waterbased Markers Distress Inks Alcohol Markers Colouring Pencils No Stamps No Dies Cards
Cardmaking On A Budget Let’s Colour Quick Cards Fun Masculine Cards Background Ideas Distress Ink Combinations |
 RSS Feed
