
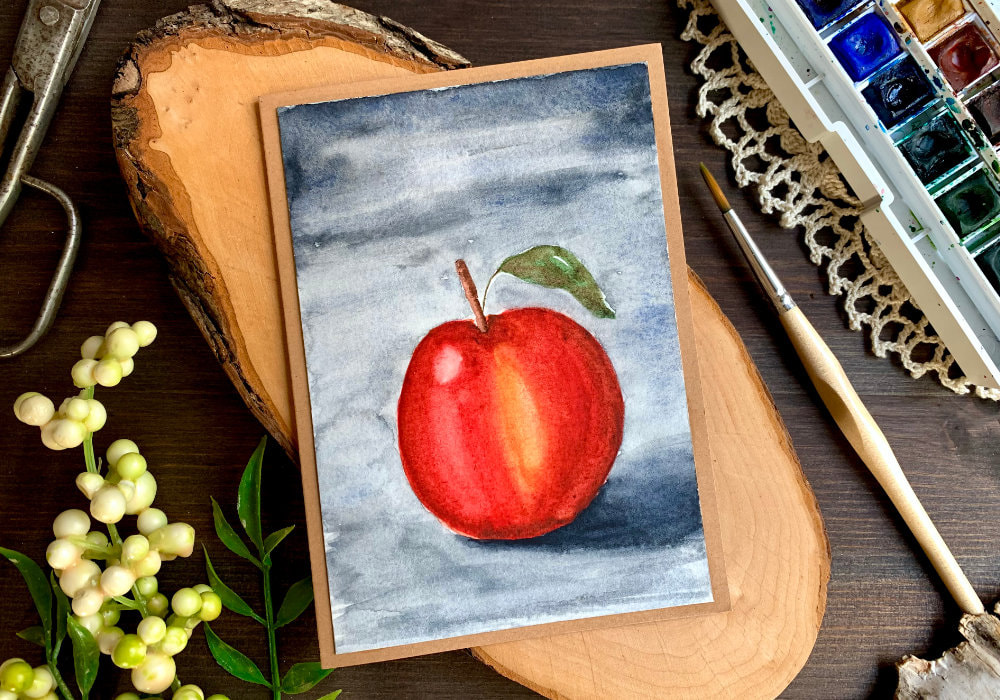
 Since is autumn I really wanted to paint an apple using watercolours. And this time I wanted to challenge myself. Most of the time I paint very simple, safe things and I enjoy those, but I feel that I’m not really improving. I’m stuck what I would call an advanced beginner level, which would be B1 if this would be a language. Of course I need to practice more, which is hard, as I use other colouring methods, not just watercolours, but I also need to start painting something more difficult. At least now and then. There are quite a few ideas I have to improve my watercolouring skills and one of them is using a reference photo and try to replicate that. This is very normal in watercolouring, but I just never do that. The stuff I paint doesn’t really need a reference photo. 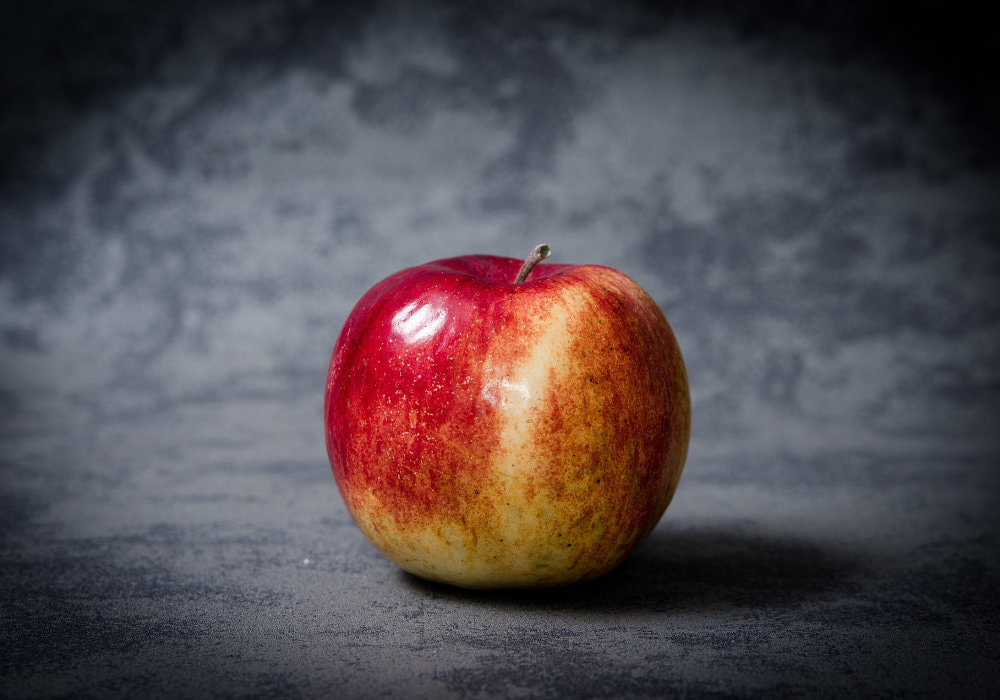 The photo I found is the one above. You can find it here. What caught my I is the background, because the apple is not a pretty red one. Which is not bad, but the colours are quite challenging. One side is red, then there is a very pale yellow and brown. And the most challenging part is the transition of the colours. The yellow is in a shape of inverted T, which I found difficult to recreate. I knew this might happen and I had a back up plan. However I started with this photo, as I wanted to give the colours a try. 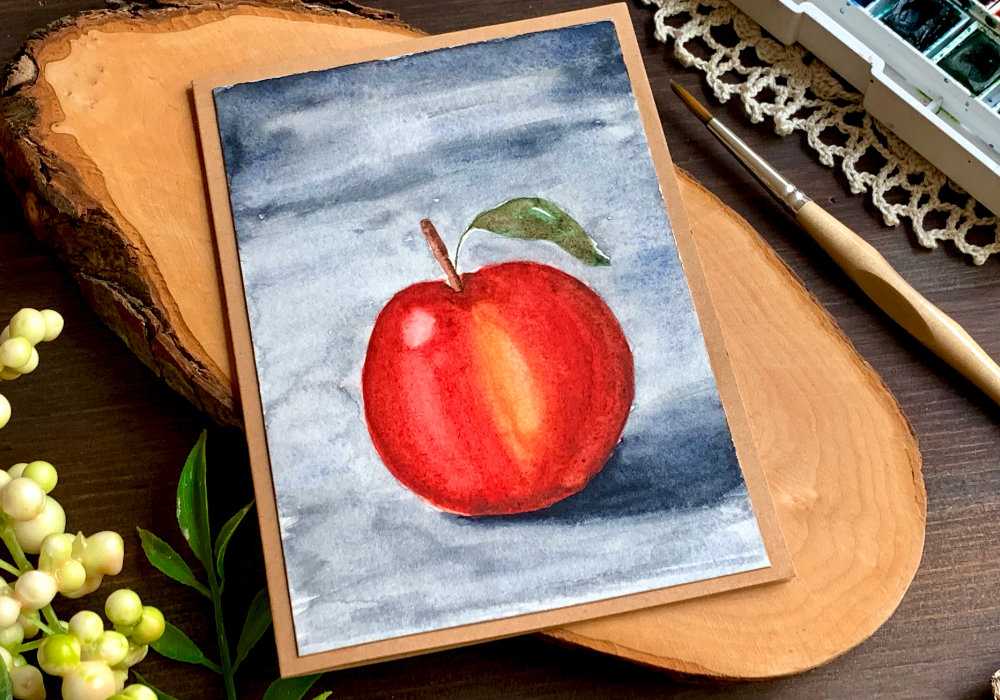 The first step was to sketch the apple. You can directly draw on top of the watercolour card stock. I prefer to sketch on something like a printer paper and transfer it onto the watercolour panel. After sketching, I scribble the led of the pencil on the back of the paper with the drawing, place it on top of the watercolour panel, secure it with washi and using a pen or pencil I trace over the lines, which transfers the image on top of the card stock. I started with the wet on wet technique, where I applied clean water over the whole apple and then I dropped in the colour. I painted one side red and the other yellow, just a light application. There is a highlight at the top left corner of the apple. I didn’t forget about it. My plan was to lift it after I applied the paint. Subsequently I will forget about it and will have to lift the paint again. 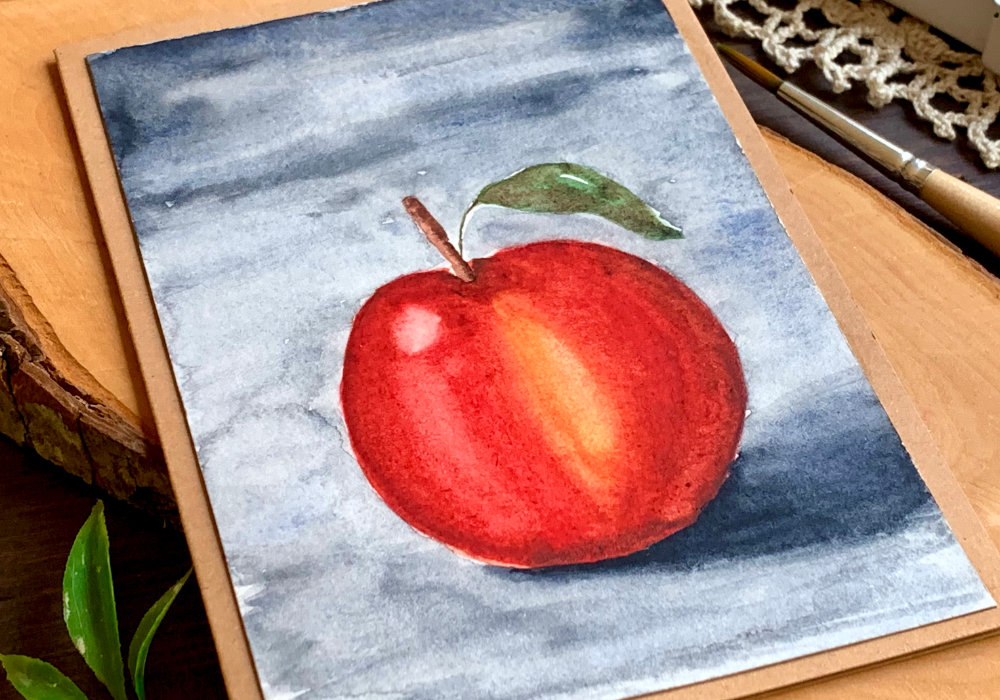 What you need to do here is to use a clean dry brush and go over the area where you want the highlight to be. You might need to do this multiple times, so dry your brush in between. You can leave the part unpainted and make the highlights that way or you can create the highlights at the end using a white gouache. I was trying to create the colour combination that is in the photo, adding more layers of the colours, but it was not working. Especially I could not get the brown.  As I mentioned, I expected that this will be difficult and I had another photo of an apple ready. This time I found just a sketch, which you can find here. I thought this will help me to get the shading done and I didn’t need to think about all the colours, because my plan was to paint the whole apple red. And I must the sketch say it really helped! I used red for most part, but I did keep a little bit of yellow. I used darker red and brown to create shadows and lighter red for the rest. I also created the highlights. I could have done better job with the shadows, but overall I really like how it turned out.  To finish up the painting of the apple, I painted the stem and the leaf. And after the apple was dry, I painted the background. The background is optional, you can skip it and just paint the shadow of the apple, or just a simple ground, so it’s not hovering. However, the background is very easy to paint. I started with the wet on wet technique to create a very light grey layer. I painted in sections, so the paper doesn’t dry and I was applying the paint in a messy, blotchy way. Once the background was dry, I painted the shadow for the apple and then I applied additional layer to the background trying to replicate the photo. 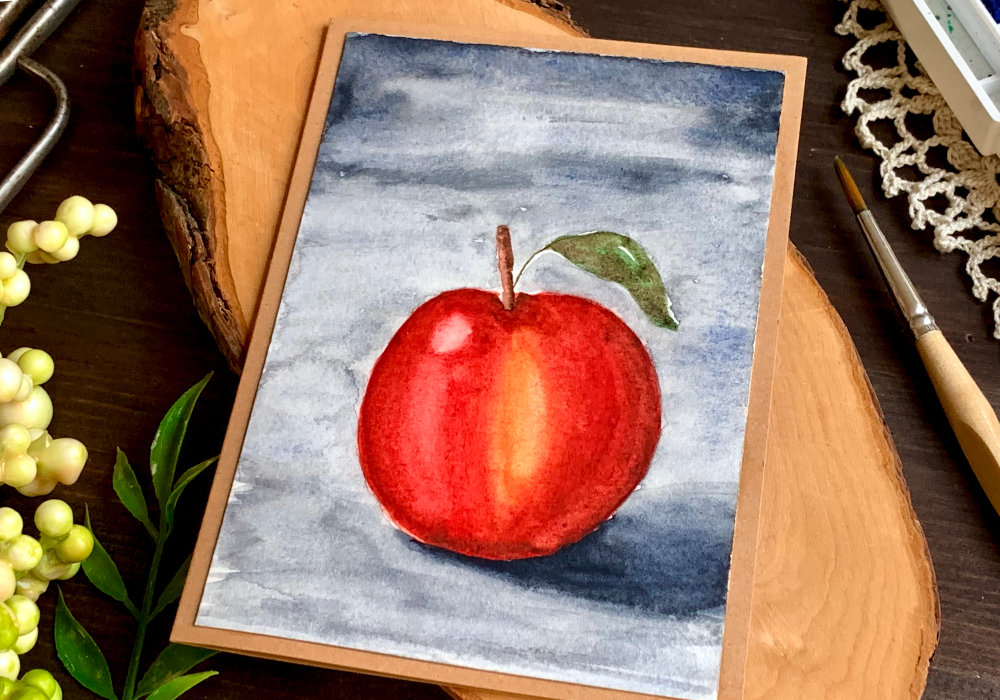 Lastly, after the panel was dry, I adhered it on top of a card base. I decided not to use any greeting as I thought the card doesn’t need it. I hope you will try making this card yourself. Make sure you check out my video on YouTube and give it a Like as well. The list of product is down below, where you can also find a few blog posts that I think you might enjoy. And if you have any questions, just drop me a line. VIDEO TUTORIALWatch the video below or on my YouTube Channel. PRODUCTS USEDCLICK HERE TO SEE TO THE LIST OF PRODUCTS
Winsor & Newton, Cotman Watercolor Palette
AmazonDE | AmazonUK Winsor & Newton Cotman Watercolour Paint, Hookers Green Dark AmazonDE | AmazonUK Silver, Black Velvet brushes JacksonsArtUK Canson XL, Watercolour Cardstock , 300gsm/140lb AmazonDE | AmazonUK Faber Castell, HB Graphite Pencil AmazonDE | AmazonUK Staedtler, Eraser AmazonDE | AmazonUK Joy Crafts, Kraft Paper,A4 300gsm/140lb (card base) KreativbuntDE | AmazonUK Absofine, A4 Recycled Kraft Paper 320gsm (card base) AmazonDE | AmazonUK Papermania, A6 Card Bases + Envelopes, Craft AmazonDE | AmazonUK UHU, Liquid Glue AmazonDE | AmazonUK Fiscars, Guillotine A5 AmazonDE | AmazonUK Tonic Studios, Guillotine A4 AmazonDE | AmazonUK Crafting Mat, Black AmazonDE | AmazonUK Disclaimer: Here you can find the products I used to make this card. Please note that the products are just a guide, you don't need the exact products or brands. If available I include links to the stores where you can find the products. As I live in Europe, I provide links to UK and German stores. These are not affiliate links and every product I used for this card, I purchased myself. YOU MIGHT ALSO LIKEPIN MEDid you like the card? I would love, if you pinned it to your board on Pinterest! 
0 Comments
Leave a Reply. |
FOLLOW ME
SEE MORE


CATEGORIES
All
Stamping Die Cutting Using Stencil Heat Embossing Embossing or Texture Paste Distress Inks Nuvo Products Stamping & Colouring Stamping With Solid Stamps Watercolouring Watercolour Pencils Waterbased Markers Pencil Colouring Alcohol Markers Altenew Markers Zig Brush Markers Easy Backgrounds Stamped Backgrounds Small Stamp Ideas Simple Cards Complex Cards Cardmaking For Beginners All
Painting With Acrylics Painting With Gouache Painting With Watercolours Drawing With Fineliner Minimal Supplies Cards Christmas & Holiday
Love & Valentine Mother's Day Father's Day Halloween Spring Cards Summer Cards Autumn/Fall Cards Winter Cards Cards For Children Cards For Women Cards For Men Thank You Cards Sympathy Cards Get Well Soon Cards Floral & Leav Cards Rainbow Colours Messy Watercolouring Modern Art Inspirations Geometric Patterns Landscape Painting Acrylics
Gouache Watercolours Watercolour Pencils Waterbased Markers Distress Inks Alcohol Markers Colouring Pencils No Stamps No Dies Cards
Cardmaking On A Budget Let’s Colour Quick Cards Fun Masculine Cards Background Ideas Distress Ink Combinations |
 RSS Feed
