
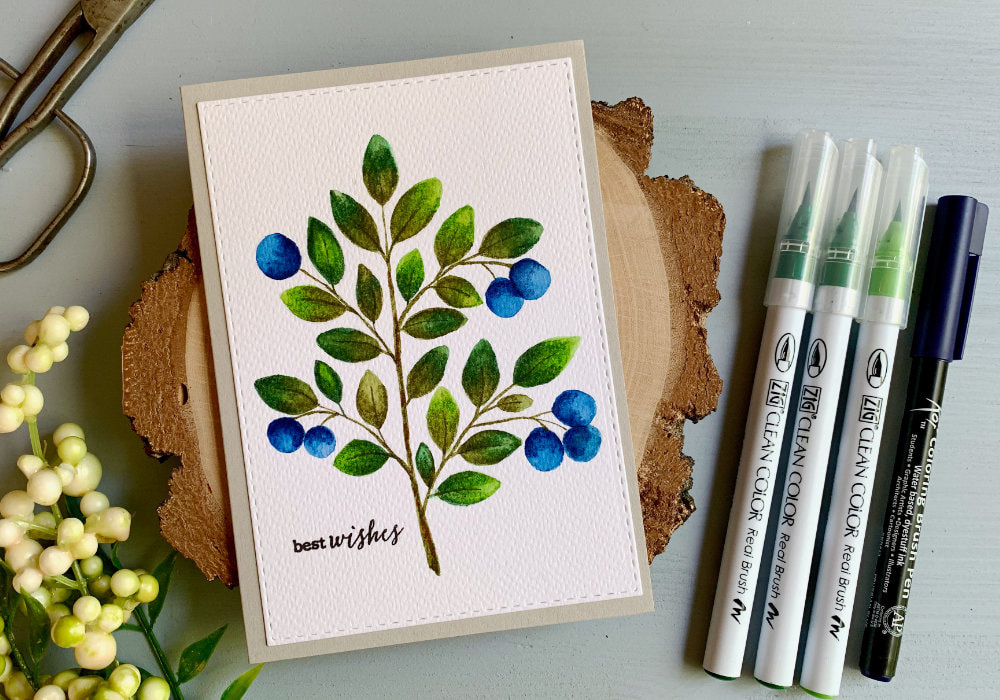
 The blueberry season is here! I live in Sweden and in our village the forest is covered with blueberries, which inspired the card today. The products you need are minimal. You can use watercolours, but I decided to change it up and picked waterbased markers for the colouring. I choose two different brands - Zigs for the leaves and Sakura Koi for the blueberries. I simply liked the colours. There are other brands that make such markers, you do not need to use these ones. Just use what you have in your stash or what is in your budget. I also used a water brush pen to spread the marker around, you can also use a round brush with water. The card stock is a cheap watercolour paper that I bought in the shop Flying Tiger. 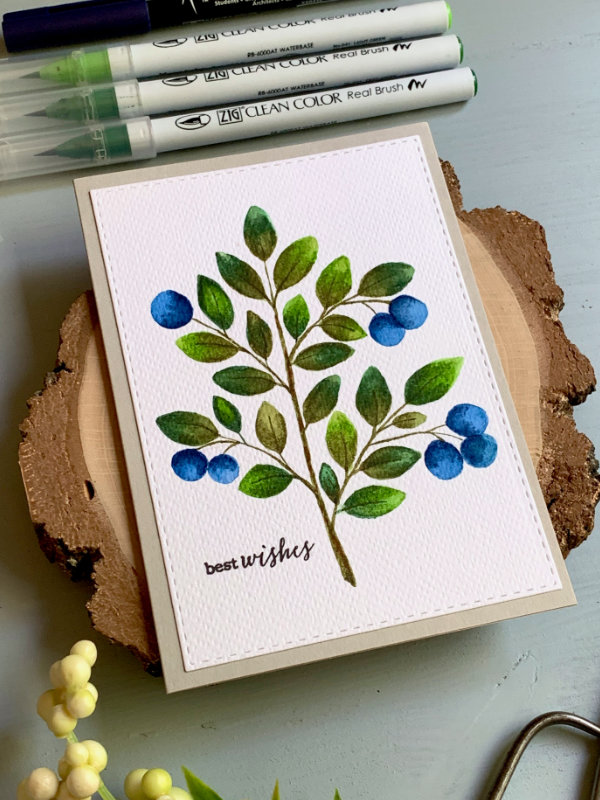 I started by creating a sketch, which I then transferred onto my watercolour card stock. To sketch the blueberries is very simple. As always I started with a zero confidence. I have never been a person who doodles, let alone who draws, therefore I always doubt myself. If you think about it, this image consists of bunch of ovals, or raindrop shapes for the leaves and circles for the blueberries. If you can draw those and some lines, then you should be able to draw a blueberry branch. Just get a scrap paper and give it a try. I was constantly erasing and re-drawing. DOWNLOAD MY BLUEBERRY BRANCH SKETCH However if you don't want to be drawing this yourself, I scanned an outline of my blueberry branch and you can downloaded here. It's not the best scan, probably not great for colouring, but it's great if you want to transfer it to your watercolour card stock. 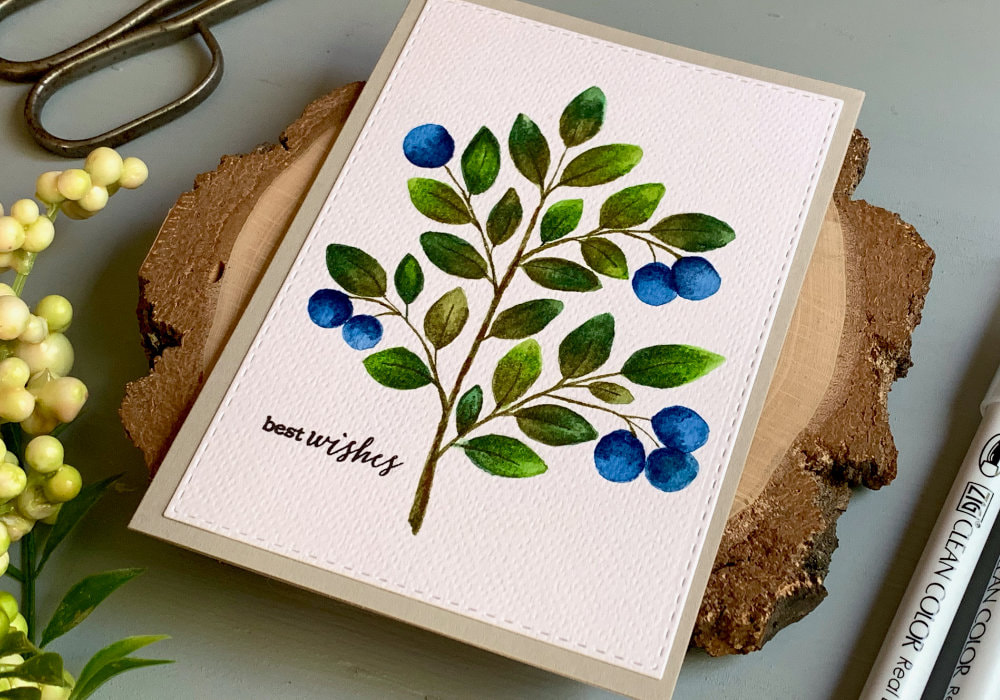 HOW TO TRANSFER IMAGE TO WATERCOLOUR CARD STOCK To transfer any outlines or sketches to your watercolour card stock, all you need to do is to print it onto a regular printer paper. Cover the back with the led of a pencil or use a transfer paper. Place it onto the watercolour card stock and trace the image with a pen. This will transfer the image onto the card stock. As I mentioned, I used waterbased markers to colour the image. If you have never used these markers, they can be used with water as watercolours or you can use them as alcohol markers, without water. In the video I said I used them in both ways, but thinking about it right now, I only use them as watercolours. I picked three shades of the green, which is optional, you can use only one. When I was choosing the shades and experimenting, I thought having the leaves in different shades looks interesting. For each leaf I used two shades and I applied darker shade at the bottom and lighter at the top. And as I went from a leaf to leaf I was switching between the shades of the green. 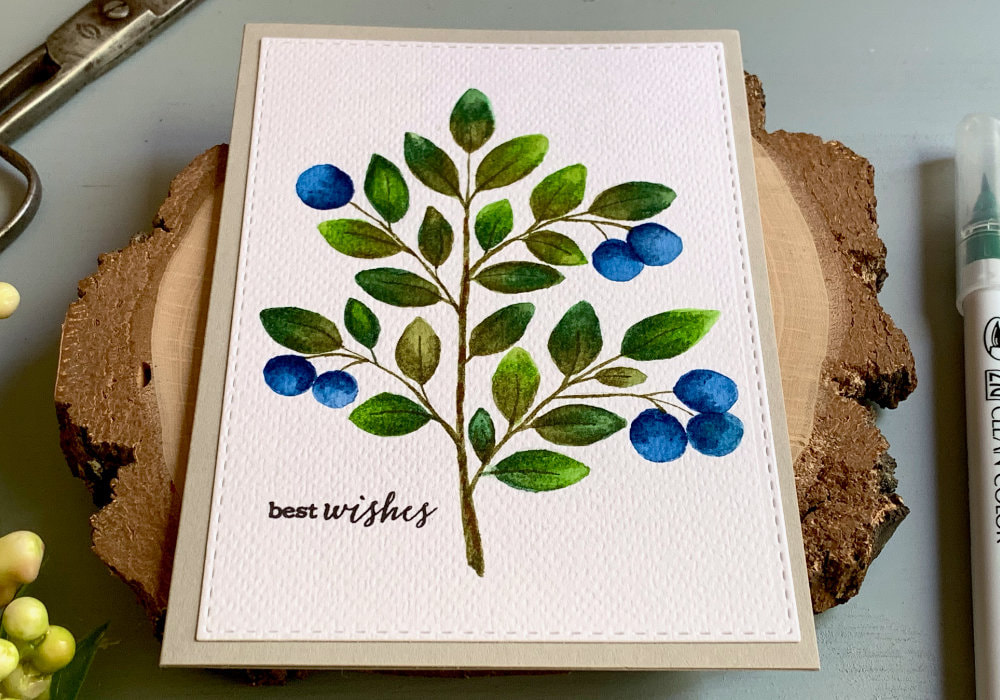 The shades of the Zig Brush Markers I used on the leaves are: 43 Olive Green, 44 Deep Green and 41 Light Green. For the blueberry I used the Sakura Koi marker 43 Persian Blue. There are a few ways of using these markers as watercolours, I know of three and to paint the blueberries I used the first two: First you can apply the marker (one or multiple) onto a part of the image (leave or berry in this case) and using a water brush pen or a round brush, activate the colour and spread the colour across the whole image. Because there is a part without the colour, this will create an ombré or gradient effect. This is perfect when you are using only one shade. 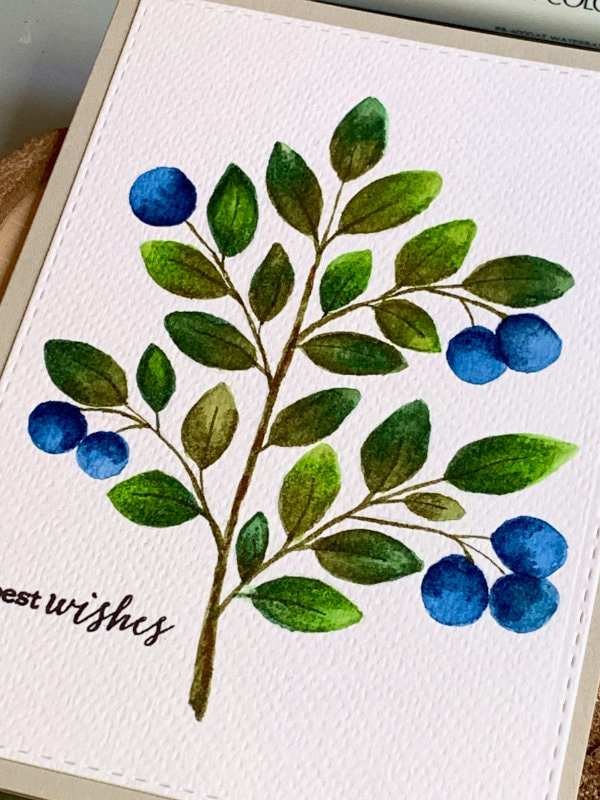 If you are using two or more markers. Then you can use them in the same way as alcohol markers, covering the whole image. With the added step of using a water brush pen or round brush with water. This activates the colour and mixes the colours together and gives them different look, compared to if you didn't use water. The third way of using these markers is to scribble the marker onto a slick surface, add a little bit of water and colour your image. This you can use when you want the colours to be much subtle. I use this method mainly when I want to add splatter to an image. One very helpful thing for me is to turn your card stock, depending on the direction of the leaf or berry. This is just for comfort. In my previous blog post I painted a brunch with leaves, but I didn’t want to move the card stock, because I was filming it, so it’s easier for the eye. This way it was quite difficult to paint. 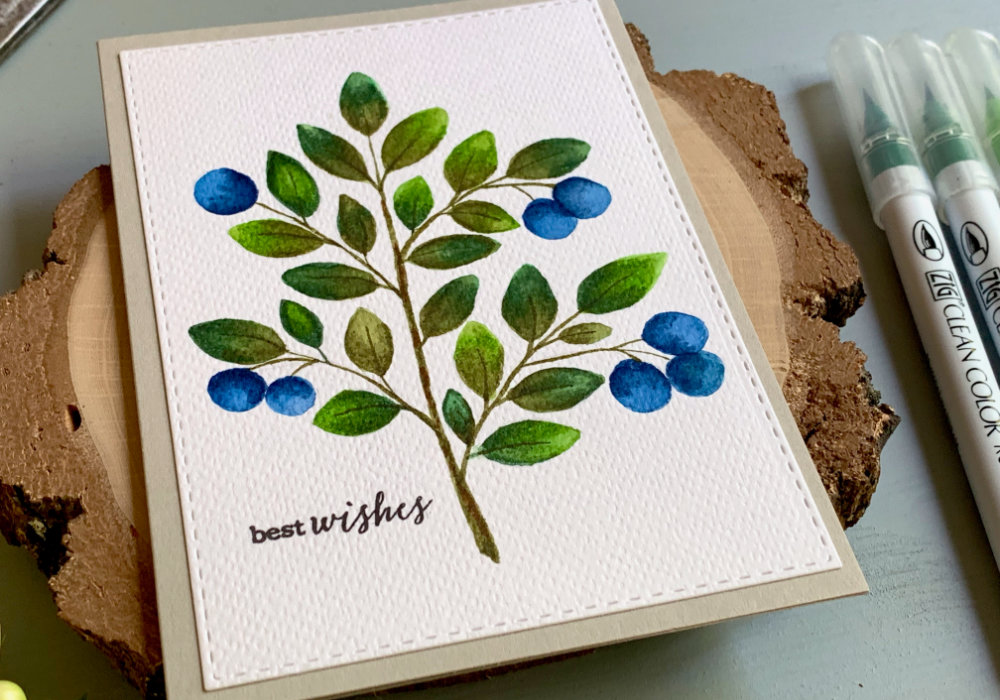 After I was finished with painting the blueberries I let it dry and then I trimmed the card stock, so it's smaller than the card base. I actually used a stitched rectangular die and run it through my die-cutting machine. Then I stamped the greeting. I used a small stamp from a sentiment stamp set by Clearly Besotted. I picked the words Best Wishes to make it more neutral and I stamped it with the Versafine ink Onyx black. If you do not have stamps with greetings, you can leave it without a sentiment or write it yourself with a black fineliner. Lastly I adhered the panel on top of a card base using a simple double-sided adhesive, but you can use a foam tape if you want it to be slightly raised. 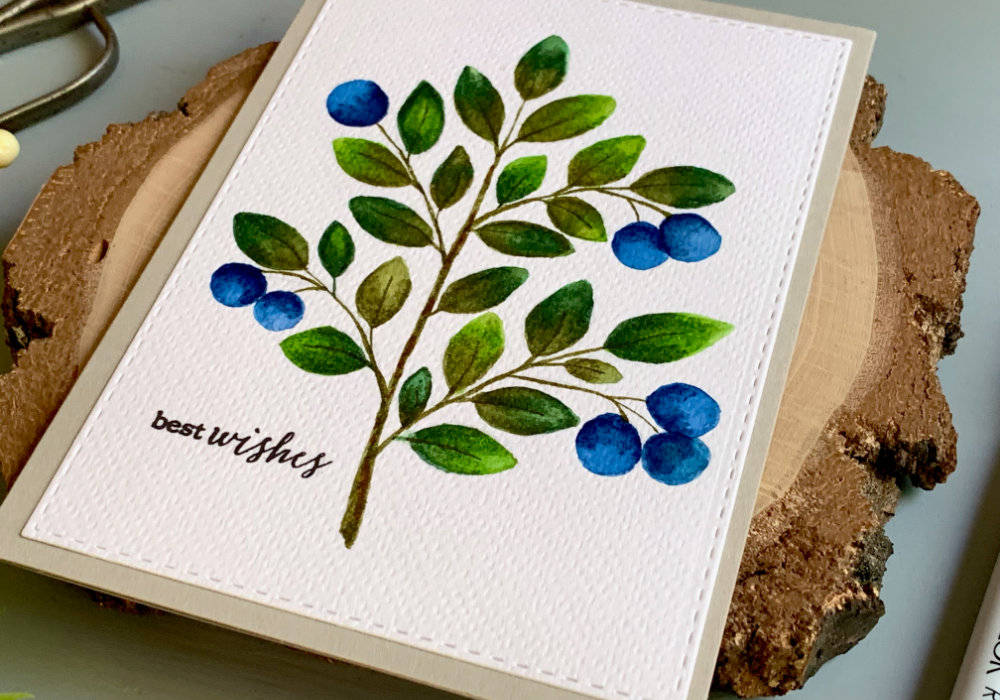 I used a grey card stock from the company Folia to create my card base, which is a new addition to my card stock stash. Usually I use white and craft card stock, sometimes black and I thought grey would be a great addition. I bought a pack of the grey card stock and as I opened it, I discovered that every page has a bar code printed on the top right side. I wonder if it's an error or they really are selling it like this. How annoying! This blog post was suppose to be a short one... oh well. I hope you will try making this card yourself. Make sure you check out my video on YouTube and give it a Like as well. The list of product is down below, where you can also find a few blog posts that I think you might enjoy. And if you have any questions, just drop me a line. VIDEO TUTORIALWatch the video below or on my YouTube Channel. PRODUCTS USEDCLICK HERE TO SEE TO THE LIST OF PRODUCTS
Flying Tiger, Watercolour Card Stock 300 gsm
FlyingTiger Kuretake, ZIG Clean Color Real Brush Markers AmazonDE | AmazonUK Sakura, Koi Water Based Brush Markers IdeeDE | GreatartUK Pentel, Water Brush Pen Set AmazonDE| AmazonUK Faber Castell, HB Graphite Pencil AmazonDE | AmazonUK Staedtler, Eraser AmazonDE | AmazonUK Clearly Besotted, Message Me, Sentiment Set Tsukineko, Versafine Ink pad, Onyx Black AmazonDE | AmazonUK Folia, Card Stock, 300gsm A4, Light Grey IdeeDE Sellotape Double Sided Tape AmazonDE | AmazonUK Fiscars, Guillotine A5 AmazonDE | AmazonUK Tonic Studios, Guillotine A4 AmazonDE | AmazonUK My Sweet Petunia, Mini MISTI Stamping Tool StempelmühleDE | BumbleberrysUK Papermania, Stamp Block AmazonDE | AmazonUK Crafting Mat, Black AmazonDE | AmazonUK Disclaimer: Here you can find the products I used to make this card. Please note that the products are just a guide, you don't need the exact products or brands. For most of the products I include links to the shops where you can purchase them if available. As I live in Europe, I provide links to UK and German stores. These are not affiliate links or sponsored products. Every products I used I purchased myself. YOU MIGHT ALSO LIKEPIN MEDid you like the card? I would love, if you pinned it to your board on Pinterest! 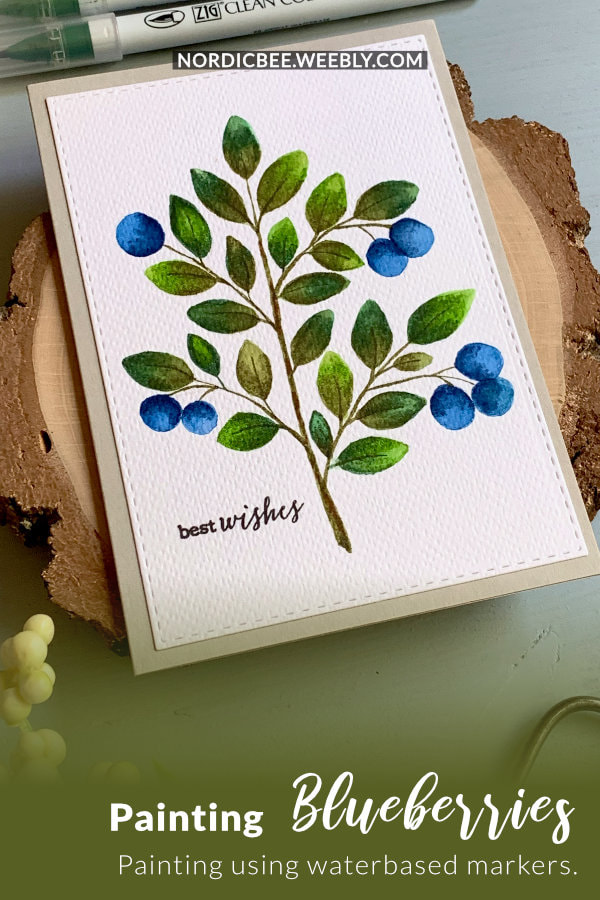
0 Comments
Leave a Reply. |
FOLLOW ME
SEE MORE


CATEGORIES
All
Stamping Die Cutting Using Stencil Heat Embossing Embossing or Texture Paste Distress Inks Nuvo Products Stamping & Colouring Stamping With Solid Stamps Watercolouring Watercolour Pencils Waterbased Markers Pencil Colouring Alcohol Markers Altenew Markers Zig Brush Markers Easy Backgrounds Stamped Backgrounds Small Stamp Ideas Simple Cards Complex Cards Cardmaking For Beginners All
Painting With Acrylics Painting With Gouache Painting With Watercolours Drawing With Fineliner Minimal Supplies Cards Christmas & Holiday
Love & Valentine Mother's Day Father's Day Halloween Spring Cards Summer Cards Autumn/Fall Cards Winter Cards Cards For Children Cards For Women Cards For Men Thank You Cards Sympathy Cards Get Well Soon Cards Floral & Leav Cards Rainbow Colours Messy Watercolouring Modern Art Inspirations Geometric Patterns Landscape Painting Acrylics
Gouache Watercolours Watercolour Pencils Waterbased Markers Distress Inks Alcohol Markers Colouring Pencils No Stamps No Dies Cards
Cardmaking On A Budget Let’s Colour Quick Cards Fun Masculine Cards Background Ideas Distress Ink Combinations |

 RSS Feed
