
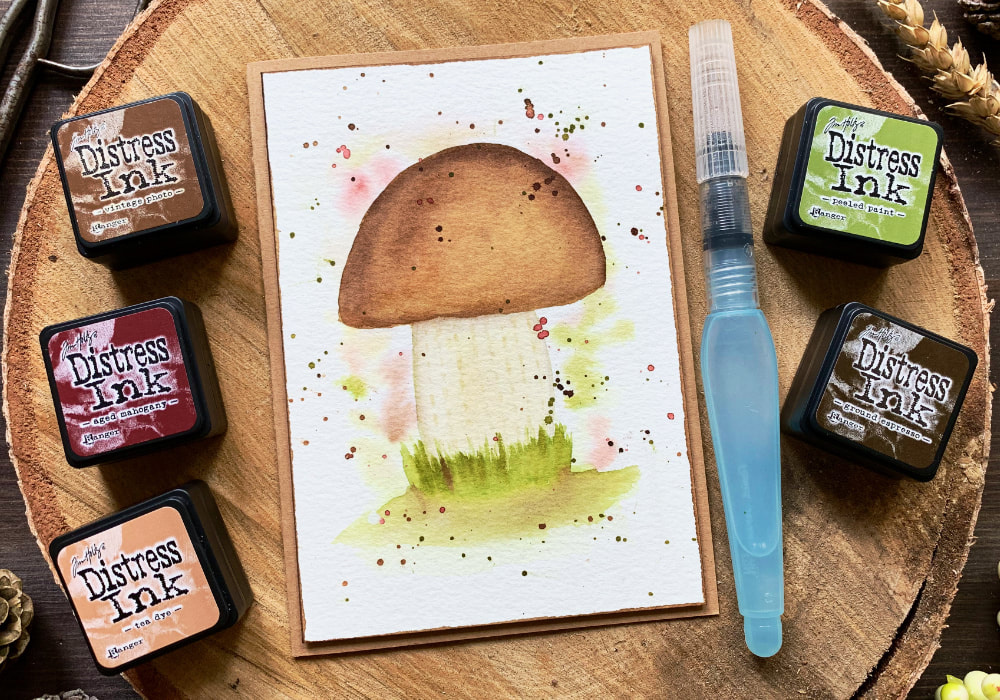
 Mushroom season has started here in Sweden and many parts of the world and I’m absolutely enjoying it. I love going for a walk in the woods and along the way pick some mushroom or just take photos of them. Our village is surrounded by forests, which is amazing. And this is what inspired todays card. I thought, why not to paint a mushroom, one of these brown ones. In my video where I talked about my favourite things about card making, which you can see HERE, I mentioned that one of my favourite colouring mediums are Distress inks. They are not only great for blending, but also can be used for watercolouring and this is another thing that inspired this card. However, if you don’t have Distress inks, no worries, you can use normal watercolours, those are also more budget friendly option. I would be using those, but time to time I like to switch it up. The card stock I used, is the Canson XL Watercolour paper that I cut down to fit my card base. And the brush I used for the main painting, is a water brush, that you fill with water, but I also use the typical brushes as well. 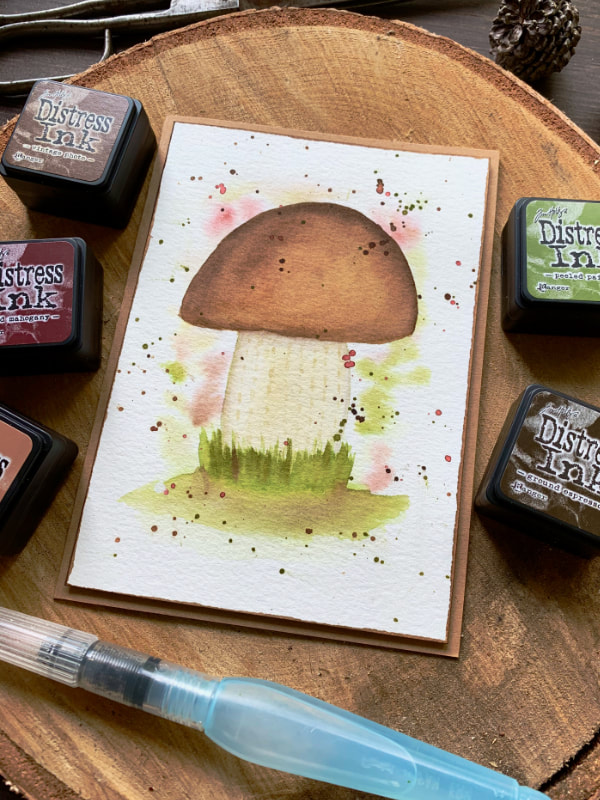 Before I painted the mushroom, I first drew an outline. You can go free hand, without drawing any outlines. The reason, I drew the outlines first is, I wanted to have a specific shape. The good thing for me, my practice peace was exactly what I wanted. So instead of drawing and erasing, I decided to trace the practice piece. You can do something similar, or if you have a printer, you can print out a photo and trace that, or if you find, you can print out an outline picture. I took a thin white paper, I placed it onto the painting with the practice piece and using my pencil I drew the outline of the mushroom. Then on the back of the white paper, I scribbled the graphite of the pencil, covering the part where the outline of the mushroom is. I placed the white paper on a watercolour panel that I was going to use to paint the mushroom and I traced the outline once again. This transferred the graphite on the back onto the watercolour card stock. The transfer was pretty light, but it was ok for me to see it. My pencil is not the one you would normally use, I think B2 is the one that is mostly used for this, you can even buy a transfer paper. Also the intensity of the transfer depends on the pressure you put, when tracing the outline. 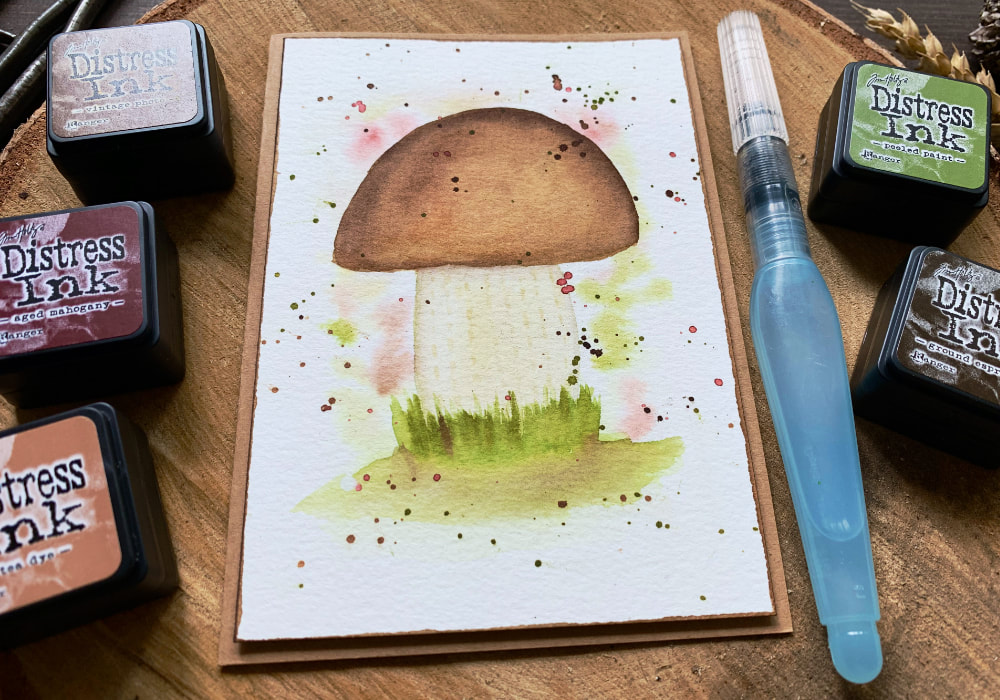 Before painting the mushroom, I decided to do a light wash of colour. I really like this effect when you put a light wash first. I didn’t want to cover the whole piece with colour, I only wanted to have little bit of colour around the mushroom. I started with clean water that I applied over and around the drawn piece. However, because the bottom of the mushroom (the stem) is white, I didn’t want to add any colour there, so I just put spots of colour here and there around the mushroom. I could have added some colour over the top of the mushroom, but I guess I wasn’t thinking about it. I mainly used green ink for that, but I also added few spots of brown and dark red. After it was dry, I started painting the mushroom. For the top I used three shades of brown, Ground Espresso, Gathered Twigs and Tea Dye. And for the bottom I used Antique Linen, which is like off white colour and little bit of Pumice Stone, which is grey, perfect for adding some shade. I started with the brown top and I started with the lightest colour, the Tea Dye ink and I covered the whole mushroom. After that I painted the stem using the Antique Linen ink. Next I applied the darkest brown - Ground Espresso - to the top, but I didn’t wait for the bottom part to dry and the brown seeped onto the stem. I was able to save it, by using clear water and clean brush, plus I also used the Pumice Stone to add a shadow underneath. This is not the best way, the best way would be either to wait till it dries, or use a drying tool. After that I was using my heat tool. I painted few layers of the brown. I was trying to create a gradient going from the darkest brown, to the middle brown (Gathered Twigs) and finishing with the lightest brown (which technically I applied first). For the bottom I used the Antique Linen, just a light wash and the Pumice Stone I used not only for the shade under the top of the mushroom, but also on the sides. One more thing that you can leave out, I painted vertical dash lines using the Antique Linen. I was following a photo of a mushroom that I photographed when walking in the woods and this mushroom has lines or small indents on the stem. After the stem was dry, I painted the grass underneath the mushroom. I started with a wash of green and then I painted in small vertical strokes around the stem to create the individual grasses. And to make it more seamless and smooth at the bottom of the grass, I used a clean water to spread the colour a bit. I also added few brown grasses, but it looked little bit weird, so I used my brush and spread the colour underneath the mushroom. I let the piece dry and then I added some splatter. You can leave it out, but I love splatter. I wanted to add more of the Aged Mahogany ink, which is dark red, but I also used some of the green and dark brown. 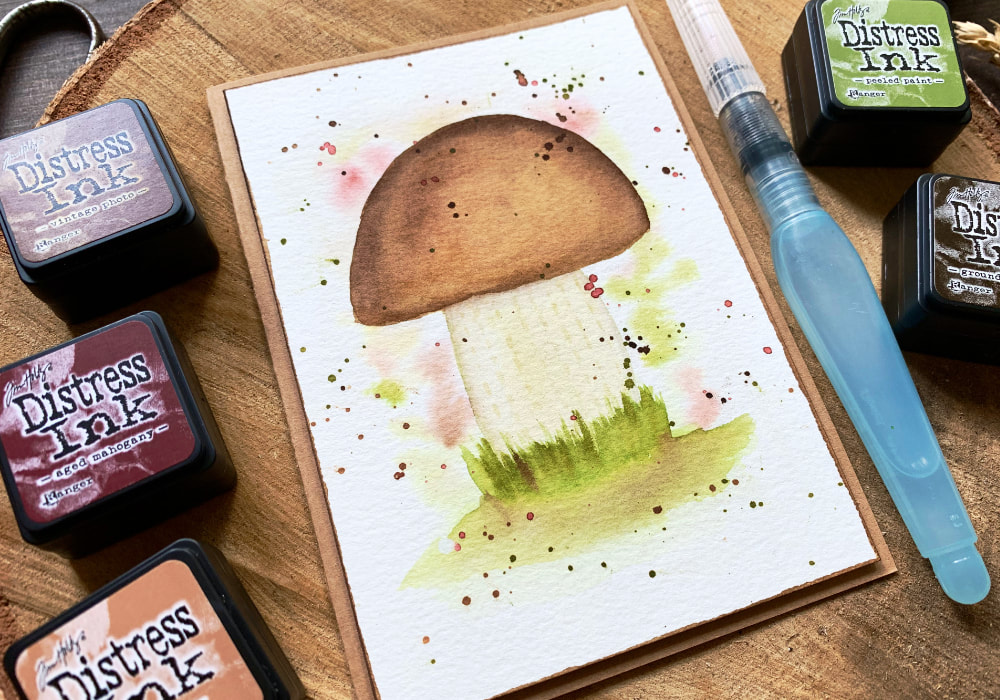 To finish up the painting I painted a border, which you also can skip. This is another thing I like to add, some kind of a detail to frame it up. I used the dark brown here and I dipped my brush into the paint making sure I have it on the edge of the bristles, because I used the edge of the brush to apply the colour to create the border. But as I said, you can skip this step. Lastly I adhered the panel on top of a card base I made out of craft card stock. And this time I used a double sided foam tape, so it’s little bit raised. I decided not to add any sentiment, but as always I was playing with the idea, you can see that in the video. So make sure you check out my video on YouTube, the list of product is down below, where you can also find few blog posts that I think you might like. And if you have any questions, just drop me a line. VIDEO TUTORIALWatch the video below or on my YouTube Channel. PRODUCTS USEDDisclaimer: I’m currently not using any affiliate links. These links are just to help you find the products. The list includes alternatives to what I was using and while I haven't used some of them, I only recommend brands I trust. Tim Holtz Distress Mini Ink, Kit 14 (Ground Espresso) danipeussDE | CraftStashUK Tim Holtz Distress Mini Ink, Kit 6 (Gathered Twigs) daniPeussDE | CraftStashUK Tim Holtz Distress Mini Ink, Kit 11 (Tea Dye) danipeussDE | CraftStashUK Tim Holtz Distress Mini Ink, Kit 3 (Antique Linen) danipeussDE | CraftStashUK Tim Holtz Distress Mini Ink, Kit 5 (Pumice Stone, Peeled Paint) daniPeussDE | CraftStashUK Tim Holtz Distress Mini Ink, Kit 12 (Aged Mahogany) danipeussDE | CraftStashUK Canson XL, Watercolour Cardstock , 300gsm/140lb AmazonDE | AmazonUK Pentel, Water Brush Pen Set AmazonDE| AmazonUK Joy Crafts, Kraft Paper,A4 300gsm/140lb (card base) KreativbuntDE | AmazonUK Papermania, A6 Card Bases + Envelopes, Craft AmazonDE | AmazonUK Stick It!, Double Sided Foam Tape AmazonDE | AmazonUK Fiscars, Guillotine A5 AmazonDE | AmazonUK Crafting Mat, Black AmazonDE | AmazonUK YOU MIGHT ALSO LIKEPIN MEDid you like the card? I would love, if you pinned it to your board on Pinterest! 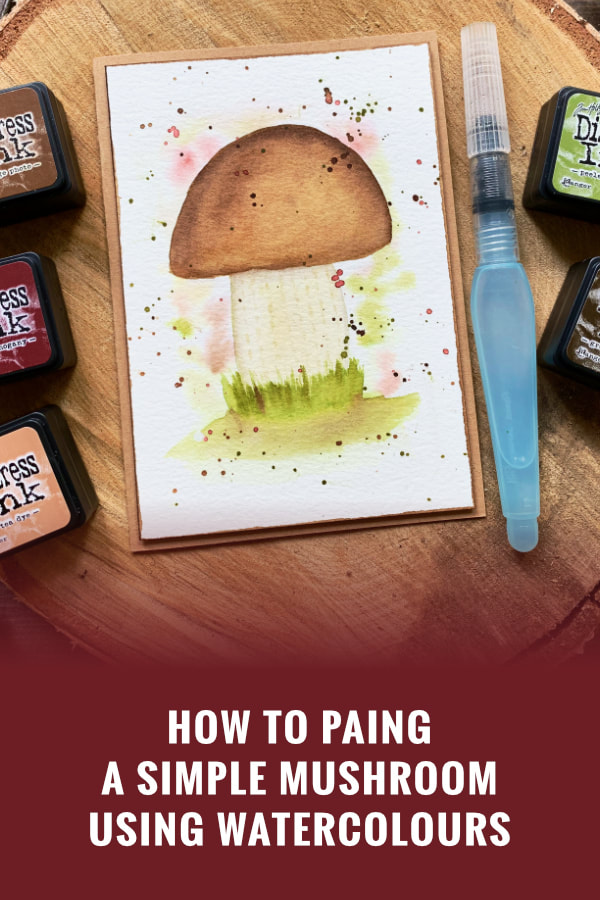
0 Comments
Leave a Reply. |
FOLLOW ME
SEE MORE


CATEGORIES
All
Stamping Die Cutting Using Stencil Heat Embossing Embossing or Texture Paste Distress Inks Nuvo Products Stamping & Colouring Stamping With Solid Stamps Watercolouring Watercolour Pencils Waterbased Markers Pencil Colouring Alcohol Markers Altenew Markers Zig Brush Markers Easy Backgrounds Stamped Backgrounds Small Stamp Ideas Simple Cards Complex Cards Cardmaking For Beginners All
Painting With Acrylics Painting With Gouache Painting With Watercolours Drawing With Fineliner Minimal Supplies Cards Christmas & Holiday
Love & Valentine Mother's Day Father's Day Halloween Spring Cards Summer Cards Autumn/Fall Cards Winter Cards Cards For Children Cards For Women Cards For Men Thank You Cards Sympathy Cards Get Well Soon Cards Floral & Leav Cards Rainbow Colours Messy Watercolouring Modern Art Inspirations Geometric Patterns Landscape Painting Acrylics
Gouache Watercolours Watercolour Pencils Waterbased Markers Distress Inks Alcohol Markers Colouring Pencils No Stamps No Dies Cards
Cardmaking On A Budget Let’s Colour Quick Cards Fun Masculine Cards Background Ideas Distress Ink Combinations |
 RSS Feed
