
I like to scroll through Instagram and Pinterest, searching for inspirations and that’s how I got the idea for today’s card. I’m not sure if I saw exactly what I created, I think I saw something like this on Instagram and of course I didn’t save it and of course I could not find it again. However on Pinterest I found a ton of pictures that were actually posters with similar idea. I just needed something for reference when I’m painting the leafs.
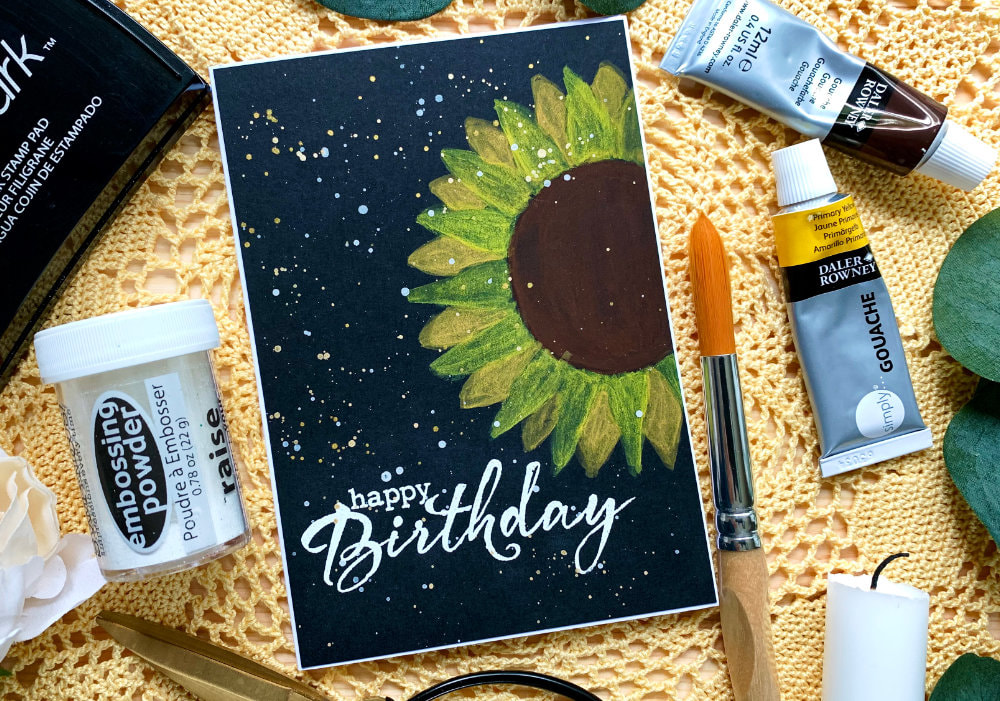
This is another very easy and especially quick card with minimal supplies, perfect for beginners. I’m using gouache here, but you can also use watercolours or acrylics. This project is not specific for gouache, I see gouache used on Instagram all the time and I just was curious, so I bought it. If you use watercolour, your black leafs will not be as opaque. If you would like to have the leafs opaque, then using black acrylics or black markers might be an option for you. 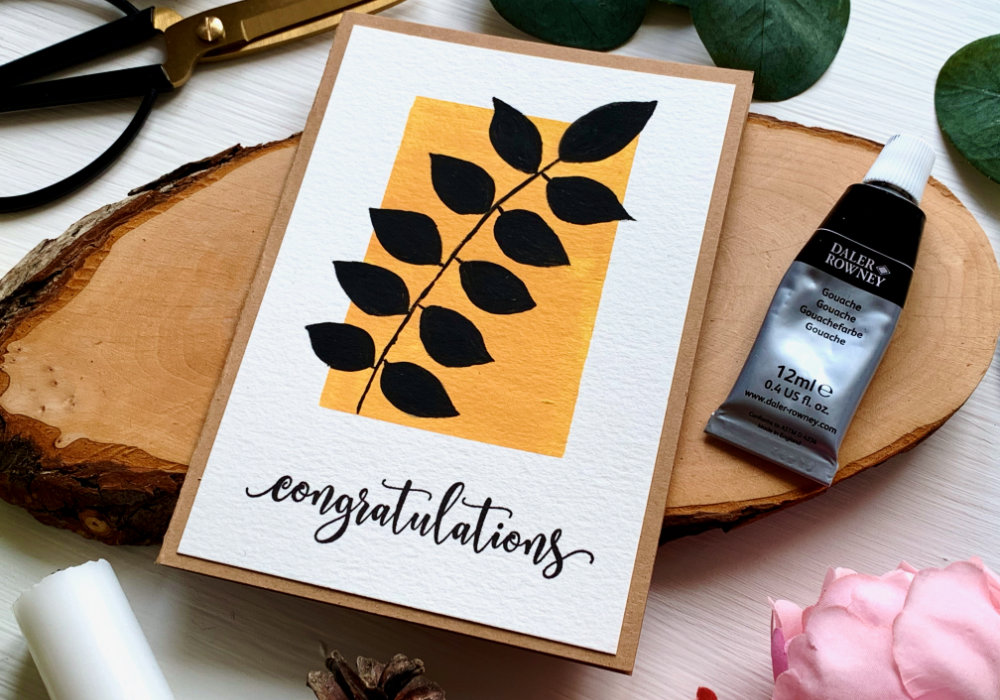
Other supplies you will need are the Canson XL watercolour card stock and brushes. For the background I used a flat brash, but you can also use a bigger round brush. And for the leafs I used a round brush in the size 4 and for the stems I used a small brush in the size 0.
I also had two jars with water and a paper towel on the side. I don’t use water with gouache, but I like to use damp brush. And if you do not feel like painting yourself, you can always use stamps or dies, as I did on my second card. I started with painting the background. I wanted it to be in the shape of a rectangle and I wanted it to be mustard yellow. The rectangle I created by using a washi tape, this way I had straight and crisp edges. You can do this also freehand, or you can create other shapes, like square, circle or oval. And the mustard yellow I had to mix myself, by mixing together yellow and orange and I added white, as I didn’t want the background to be too dark. 
I let the piece air dry and while I was waiting, because I mixed too much of the mustard yellow, I painted few more backgrounds.
Once the piece was dry, since I’m not good at painting leafs freehand, I first drew the brunch with the leafs using a pencil. I’m not good at drawing either, but I feel I have better control when drawing with a pencil and I can always erase. Actually I was quite surprised, how easy it was to draw the the leafs. After I drew the leafs, I took the black paint and with the size 4 brush I filled in the leafs. I did not follow the pencil lines exactly, as this is an opaque paint, I went outside of the lines, which covered the pencil lines. And to paint the line of the stem and the little stems that are attached to the leafs, I used a tiny brush in the size 0. When I paint these cards, I keep on mentioning that I’m a beginner myself and often I mention, where I had problems, when painting. This doesn’t mean I do not like what I painted, if I didn’t like the result, I would not have released it. It is just to encourage others, who might be intimidated to paint, that you don’t have to be an artist to paint and despite of lack of the correct supplies, skills or experience you can still paint something nice. You just need to experiment and practice. 
So what were the problems this time? The problems I had with this painting were the brushes. I like the brush to be stiff and with a pointy tip. I tried two brushes, the first was stiffer, but had no pointy tip, which made it quite difficult to paint the pointy tip of the leaf. And my second brush had a pointy tip but was very soft.
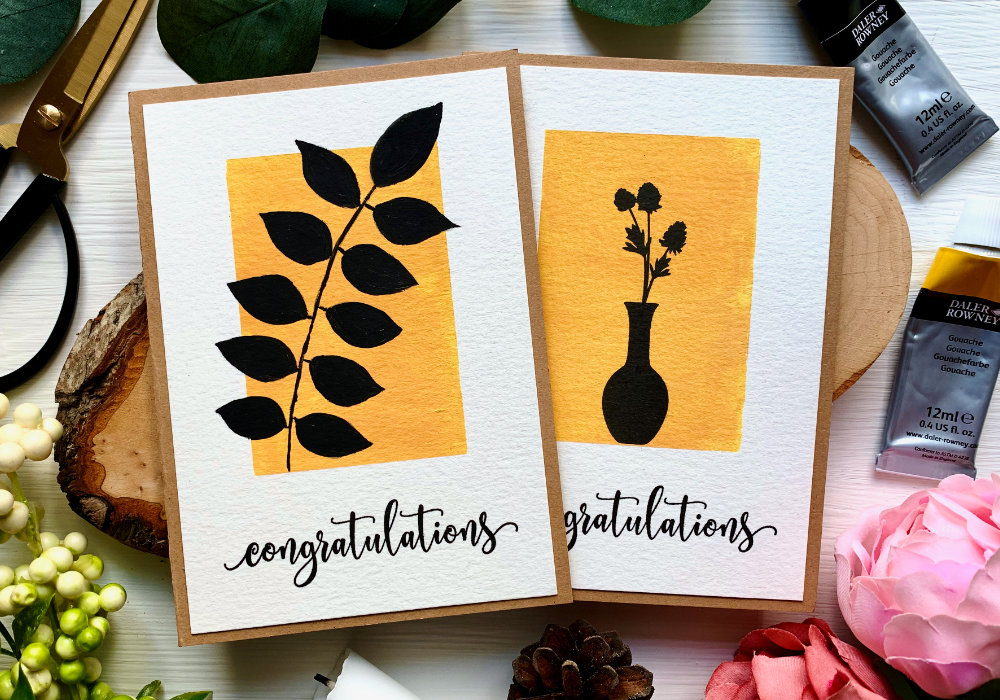
To paint the stem wasn’t easy either. In my previous post I mentioned that I am rather heavy handed and my hand tends to shake, when I try top paint a line. Plus I don’t have the best supplies for painting thin lines. I do have a small, size 0 brush, but the brush has short bristles and it doesn’t hold much paint, which made it more difficult to paint the stem in one go. The stem did turn out to be little bit wanky, but for me it’s not a big problem. After everything was dry, I stamped the sentiment that says “congratulations”. While I like to include a sentiment when I’m making a card, this is completely optional. If you decide to skip this step, just make sure your painting is more centred. When I paint I make sure I leave a space for the sentiment, therefore for this card I placed the rectangle little bit higher. 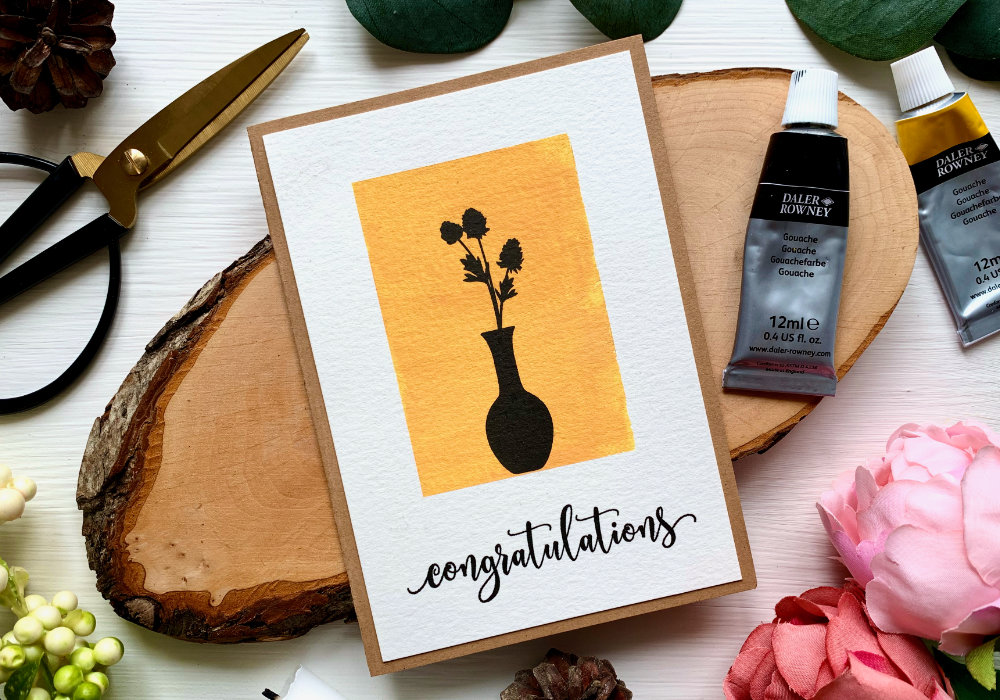
And I also stamped the second card, where I used a solid stamp with a vase and flowers. I wanted to use a solid stamp to match the leafs, but I think most of the flower stamp sets I have in my stash would work. So if you don’t want to be painting or drawing yourself, just use some stamps.
Lastly, as always I adhered the panel on top of a card base that I pre-cut and pre-scored using a craft card stock. VIDEO TUTORIAL
Watch the video below or on my YouTube Channel.
PRODUCTS USED
Disclaimer: I’m currently not using any affiliate links. These links are just to help you find the products. The list includes alternatives to what I was using and while I haven't used some of them, I only recommend brands I trust.
Daler Rowney, Gouache Set (Pack of 12)
AmazonDE | AmazonUK Canson XL, Watercolour Cardstock , 300gsm/140lb AmazonDE | AmazonUK Faber Castell, HB Graphite Pencil AmazonDE | AmazonUK Blue Squid Brush Set AmazonDE | AmazonUK Daler Rowney Small Watercolour Brushes 1, 3, 10/0, 3/0 AmazonDE | AmazonUK Royal & Langnickel, Mixing Palette AmazonDE | AmazonUK Avery Elle, Magnolia Stamp Set MennysShopDE | SevenHillsCraftsUK Clearly Besotted, Heartfelt Thanks Tsukineko, Versafine Ink pad, Onyx Black AmazonDE | AmazonUK My Sweet Petunia, Mini MISTI Stamping Tool StempelmühleDE | BumbleberrysUK Papermania, Stamp Block AmazonDE | AmazonUK Joy Crafts, Kraft Paper,A4 300gsm/140lb (card base) KreativbuntDE | AmazonUK Papermania, A6 Card Bases + Envelopes, Craft AmazonDE | AmazonUK Sellotape Double Sided Tape AmazonDE | AmazonUK Fiscars, Guillotine A5 AmazonDE | AmazonUK Crafting Mat, Black AmazonDE | AmazonUK YOU MIGHT ALSO LIKEPIN ME
Did you like the card? I would love, if you pinned it to your board on Pinterest!

0 Comments
Leave a Reply. |
FOLLOW ME
SEE MORE


CATEGORIES
All
Stamping Die Cutting Using Stencil Heat Embossing Embossing or Texture Paste Distress Inks Nuvo Products Stamping & Colouring Stamping With Solid Stamps Watercolouring Watercolour Pencils Waterbased Markers Pencil Colouring Alcohol Markers Altenew Markers Zig Brush Markers Easy Backgrounds Stamped Backgrounds Small Stamp Ideas Simple Cards Complex Cards Cardmaking For Beginners All
Painting With Acrylics Painting With Gouache Painting With Watercolours Drawing With Fineliner Minimal Supplies Cards Christmas & Holiday
Love & Valentine Mother's Day Father's Day Halloween Spring Cards Summer Cards Autumn/Fall Cards Winter Cards Cards For Children Cards For Women Cards For Men Thank You Cards Sympathy Cards Get Well Soon Cards Floral & Leav Cards Rainbow Colours Messy Watercolouring Modern Art Inspirations Geometric Patterns Landscape Painting Acrylics
Gouache Watercolours Watercolour Pencils Waterbased Markers Distress Inks Alcohol Markers Colouring Pencils No Stamps No Dies Cards
Cardmaking On A Budget Let’s Colour Quick Cards Fun Masculine Cards Background Ideas Distress Ink Combinations |
 RSS Feed
