
Quick & Easy Winter Watercolour Snowy Landscape At Night | CHRISTMAS CARDS 2022 - #2 + VIDEO15/11/2022 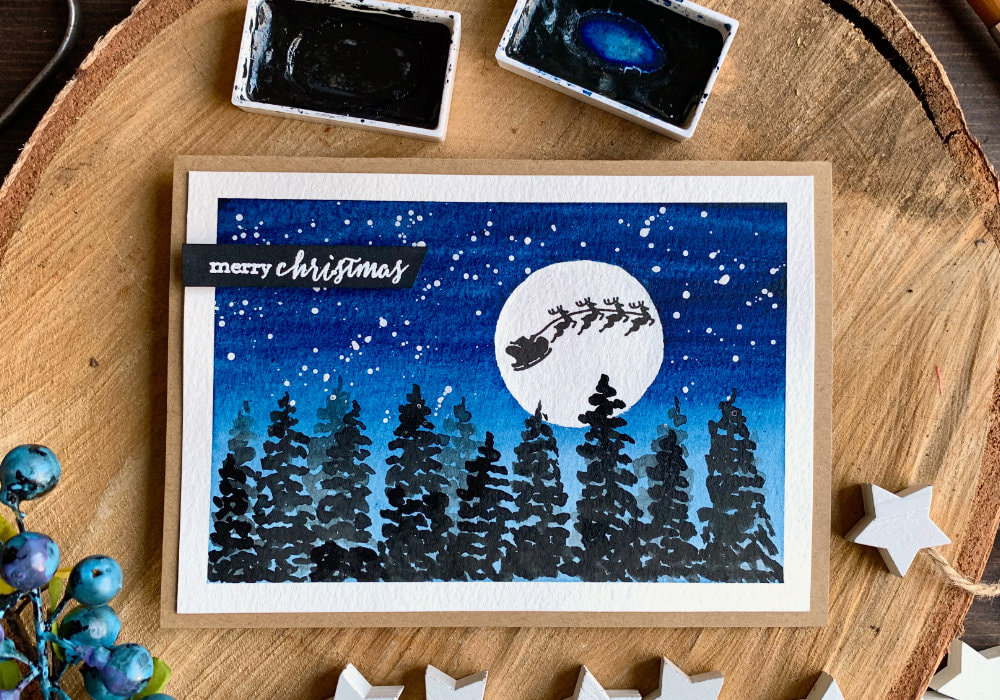 For my second card in my Christmas card series I wanted to do something simple, using watercolours. I decided to paint a quick and easy landscape with a night, snowy sky, a big moon and tree silhouettes. I even stamped a Santa as I had it in a stamp set I used on my previous card, just to make the card more Christmassy. When it comes to winter cards with landscapes or trees, I'm always on the fence. I always ask myself: Are they really Christmas cards? Shall I make them for my cards in January? Let me know what you think below. I taped a watercolour card stock that I cut down slightly smaller than my card base, using a washi tape. I drew a circle for the moon and then I applied a masking fluid first and let it dry. If you don't have masking fluid, you can carefully paint around the moon, or just don't paint the moon at all.  For the sky I used a dark blue paint and I was painting from very dark to very light, creating a sort of an ombré effect. I am using the Canson XL watercolour card stock, which is not the best with the wet on wet technique, therefore I did the wet on dry. I applied two layers, letting the piece dry fully between the layers. Next I painted the trees for which I used a black paint and I painted two layers. One was lighter and the other darker. There are a few ways of painting fir or pine trees, I just start at the top and go down in a zig zag dabbing motion. If it helps, you can also start with the line in the middle first and then do the painting of the brunches.  I let it dry and then I used a white gouache mixed with water to create a splatter to represent the snow. Actually in the video I removed the masking fluid before I painted the snow, therefore I created a mask so I don't get the splatter over the moon. After the piece was dry I removed the masking fluid and thought it would be fun to stamp a Santa with a sleigh. This is completely optional, if it wasn't for my first Christmas card in this series, I would not stamp it. On that card I used a stamp set which included a silhouette with Santa and reindeers and I thought it would look good on this card.  Lastly I adhered the watercolour panel onto a card base. The card base I made out of a craft card stock. I also adhered a banner with a Merry Christmas greeting. I stamped it on a black card stock and heat embossed it in white, then I cut a small banner and attached it onto the card using a few foam squares. You can see a quick video of me making this card on my YouTube channel or Instagram and make sure you subscribe/follow. WATCH A QUICK VIDEOWatch the video below or directly on my YouTube channel or Instagram. YOU MIGHT ALSO LIKEPIN MEDid you like the card? I would love, if you pinned it to your board on Pinterest! 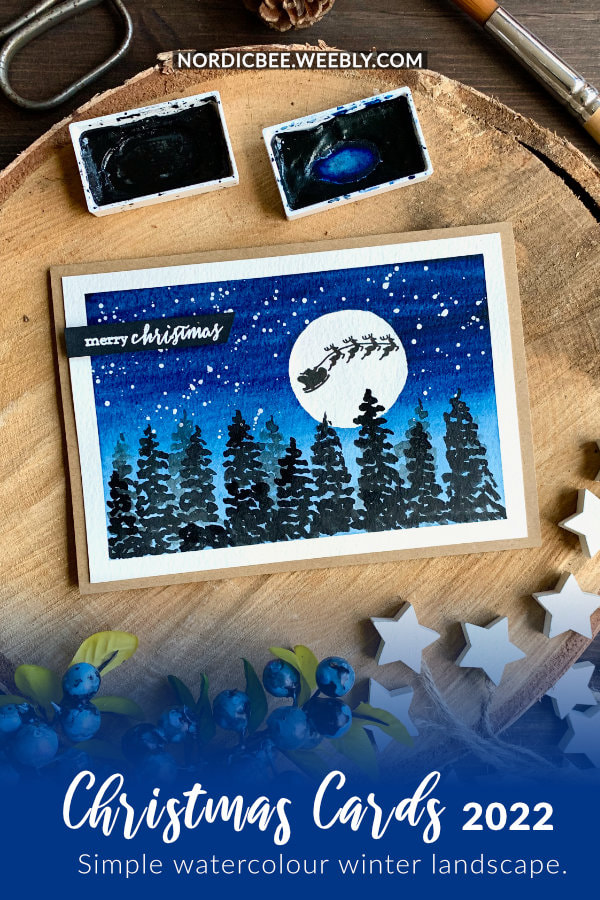
0 Comments
Leave a Reply. |
FOLLOW ME
SEE MORE


CATEGORIES
All
Stamping Die Cutting Using Stencil Heat Embossing Embossing or Texture Paste Distress Inks Nuvo Products Stamping & Colouring Stamping With Solid Stamps Watercolouring Watercolour Pencils Waterbased Markers Pencil Colouring Alcohol Markers Altenew Markers Zig Brush Markers Easy Backgrounds Stamped Backgrounds Small Stamp Ideas Simple Cards Complex Cards Cardmaking For Beginners All
Painting With Acrylics Painting With Gouache Painting With Watercolours Drawing With Fineliner Minimal Supplies Cards Christmas & Holiday
Love & Valentine Mother's Day Father's Day Halloween Spring Cards Summer Cards Autumn/Fall Cards Winter Cards Cards For Children Cards For Women Cards For Men Thank You Cards Sympathy Cards Get Well Soon Cards Floral & Leav Cards Rainbow Colours Messy Watercolouring Modern Art Inspirations Geometric Patterns Landscape Painting Acrylics
Gouache Watercolours Watercolour Pencils Waterbased Markers Distress Inks Alcohol Markers Colouring Pencils No Stamps No Dies Cards
Cardmaking On A Budget Let’s Colour Quick Cards Fun Masculine Cards Background Ideas Distress Ink Combinations |
 RSS Feed
