
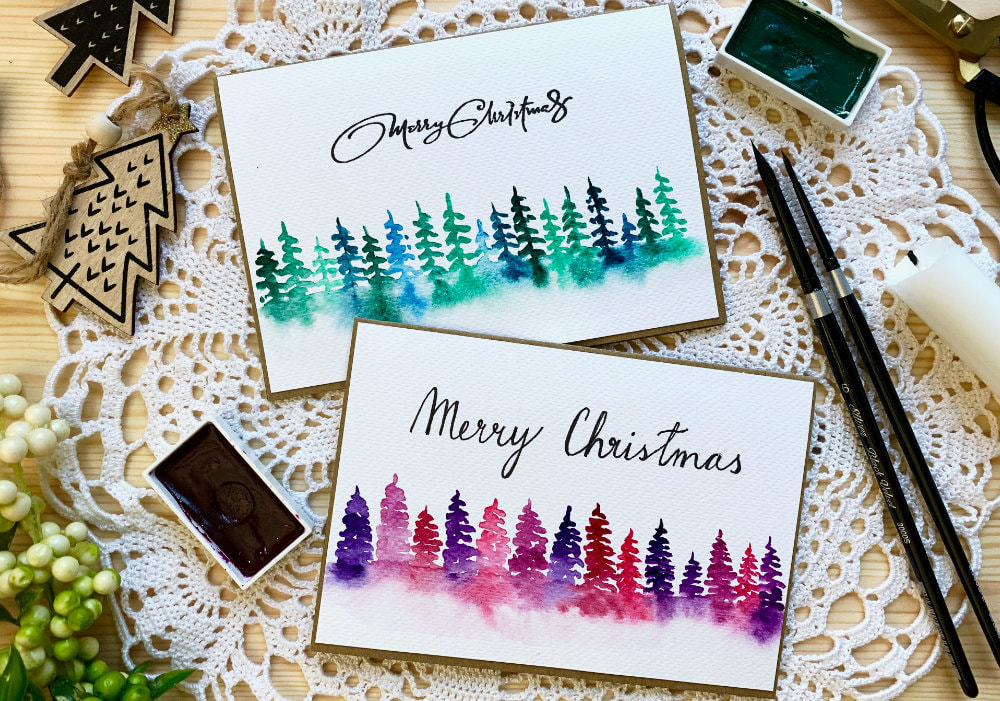
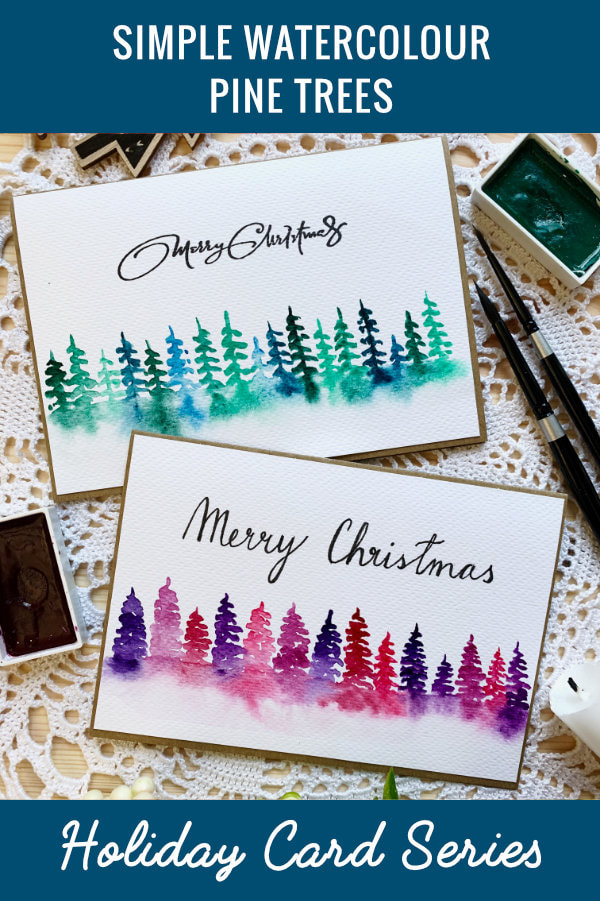
For the next card in my Holiday Card Series, I have for you a fun project. I’ve seen this done so many times on Instagram and I wanted to try it out. This is perfect for non traditional, more wintery cards, actually it can be given for other occasions as well, e.g. I made few birthday cards.
I’m not sure what the exact technique is called. It’s sort of a mixture of wet on dry technique and wet on wet technique and it creates this mystical loose watercolour tree line of pine trees. Painting the trees is easy, so if you are a beginner, this is definitely for you. The supplies you will need for this project are watercolours, watercolour card stock, brushes, two jars, one for dirty and the other for clean water and a paper towel to clean your brush and soak up excess water. I started with a practice piece. First to test the brushes. I tested few sizes and settled on the size 4 brush. I recently watched a video with a watercolour tutorial and the person advised to try different size of a brush, if you cannot get the strokes right. I agree with this hundred percent. 
I cut the piece of watercolour card stock in half, as I only needed a panel that I will attach onto a card base. If you like a little bit of a white boarder on the sides of your paintings then either use a masking tape or cut the card stock directly to the size you want, so you can better visualize where you need to paint. This card stock I was using was slightly bigger and I painted too many trees. I didn’t have to cut any of them, but the trees are going from one border to the other. It doesn’t look bad, I just would have preferred if there was a little bit of a white space on the sides.
To paint the tree line, I started by applying clean water to the bottom of the card stock. The part where I applied the water was about two centimetres wide. I was generous with the water, but not to the point where it would be pooling. If this happens, just take a paper towel and soak up the excess water. Where you apply the water will vary, depending where or if you will add a sentiment. I applied the water at the bottom of the panel, because I will be adding a Merry Christmas sentiment at the top. If you want to add the sentiment below or not at all, then you will apply the water closer to the middle. 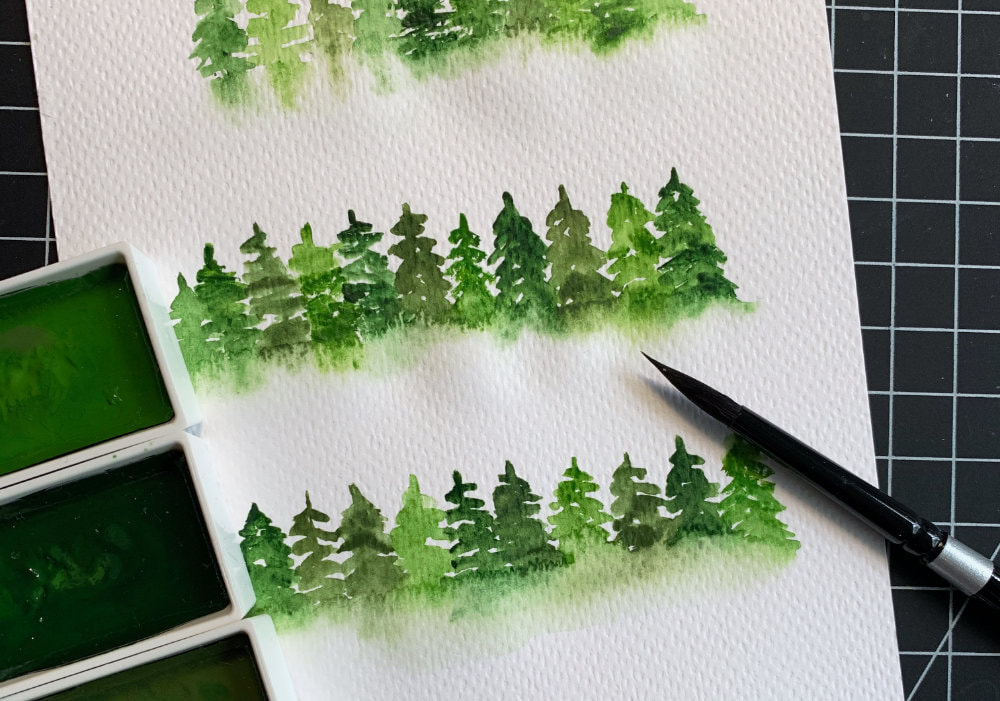
I had to reapply the clean water as I was painting the trees, because it was drying out and the colour wasn’t spreading any more. I was using a very cheap card stock, it actually cost me three euro. You can of course use an expensive card stock if you want, but I’m not only on a budget, I’m also a beginner and my painting skills are not at a level, where buying such a card stock would be an investment. It would be more like waste of money. I would be too intimidated to use it and it would most likely be sitting in my drawer as I would not want to waste it.
I follow quite a few watercolour artists and there are few that are all about the 100% cotton watercolour card stock. I find this so irritating, as their videos are mainly aimed at beginners. They never say, this is the best, but I know it’s expensive, you can get this instead. Expensive supplies are not what beginners need, practice is what we need, with whatever supplies we can afford. And I like the results on my 3 EUR card stock and if you like it too, there is a proof that you do not have to have expensive supplies. Plus let’s face it, I’m making a card not a painting for a gallery. 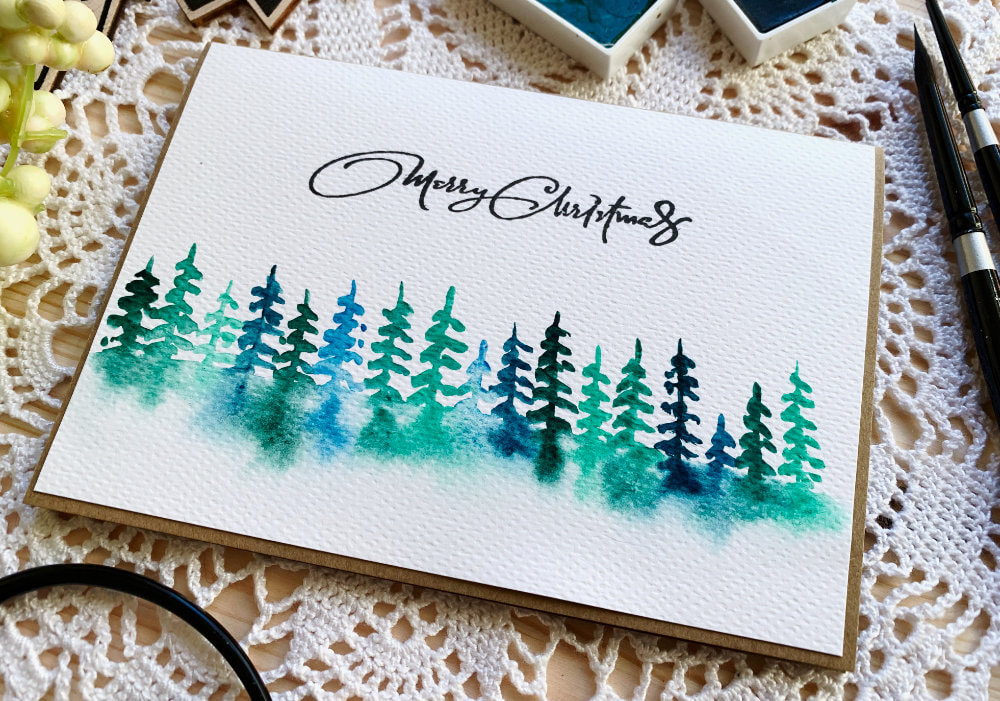
I painted two different versions of the trees. The first version is based on the trees I saw on Instagram. Well, sort of, I still need a lot of practice.
In all the videos, the artist started with the trunk. Just a straight line. And then adding the brunches, doing small strokes on each side, not making the trees too bushy. The other version, is my preferred version. This is something I came up with myself, I did not see anyone painting this, although for sure there are people who paint the trees the same way. There are many way of painting the trees. I like this version, because I don’t do the line for the trunk here, which is great as I’m not the best, when it comes to paining lines. You can of course paint the trunk, but I found it to be restrictive in a way. When I painted the trunk, I somehow always finished one brunch on one side and then went to the other side. Here I started with a very small line at the top, about two or three millimetres long. And then I did small strokes going from side to side, in sort of a continuous motion. As I was going from top to bottom I was trying to make the tree wider. On each of the panels I started painting on the left, making my way to the right. I picked few different shades of colours - blues for the first card and purples and pinks for the second. And as I was painting I also varied the height of the trees. 
To paint the trees, I started with the wet on dry technique at the top, where the paper is dry and the brush is wet and I finished with the wet on wet technique, when the brush meets the part where I applied the clean water. This is when the magic happens, the colour reacts with the water and spreads out.
I also went into the wet part of the paper as I was painting the brunches, just to make it little bit more saturated. If it wasn’t enough, I added more colour just to the bottom part. I added the colour only at the top part, where I applied the clean water. You can go further down if you want. I did this on each of the trees and once I was finished I let it dry. After the panels were dry, I added the sentiments. For one card I wrote the sentiment by hand. This is not my preferred option, since my handwriting is not consistent. Plus the card stock was quite textured, so it was not easy to write on with a fine liner. My preferred version is to stamp a sentiment, because it’s just so convenient. The stamp set I used is very old and sadly the company doesn’t sell them any more. Since the card stock is really textured, I used a stamping tool, which allows you to stamp multiple times, without messing it up. If you don’t have such a tool and are using an acrylic block, then the best is to use a smoother card stock, such as Canson XL or instead of using cold pressed watercolour card stock, use hot pressed card stock, which has a very smooth texture. 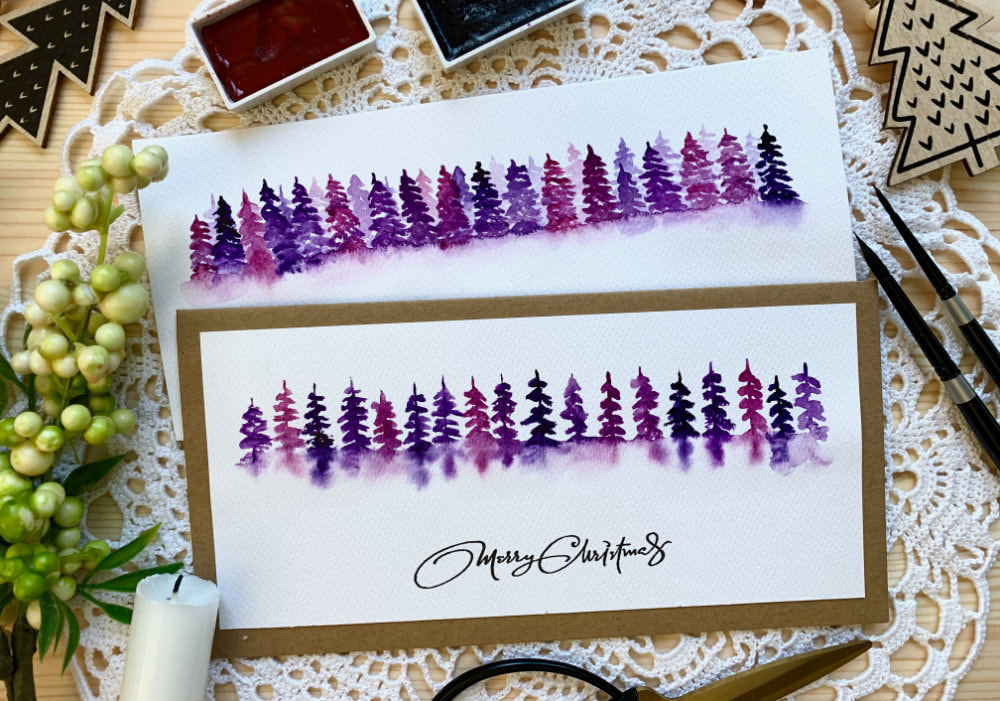
After I was done with the sentiments I adhered the panels on top of a card bases using a double sided tape.
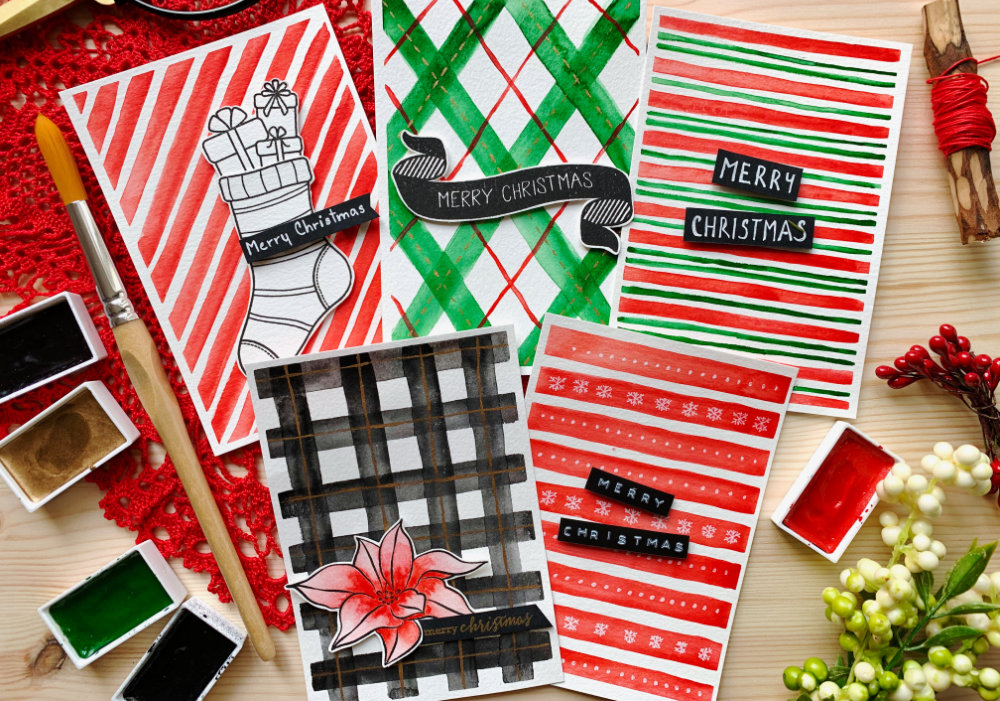
I also made few long cards, with long card bases. The painting took longer then using A6 panels, but for this type of a painting, long cards are perfect. QUICK STEP-BY-STEP HOW TO
Thank you for stopping by! As usual, if you have any questions, do not hesitate to drop me a line. Sending hugs from Sweden! VIDEO TUTORIAL
Watch the video below or on my YouTube Channel.
PRODUCTS USED
Disclaimer: I’m currently not using any affiliate links. These links are just to help you find the products. The list includes alternatives to what I was using and while I haven't used some of them, I only recommend brands I trust.
Kuretake, Gansai Tambi, Watercolour Paints 36 Set
AmazonDE | AmazonUK Daler Rowney Watercolour Brushes AmazonDE | AmazonUK Silver, Black Velvet brush, Size 4 JacksonsArtUK Flying Tiger, Watercolour Pad Canson, Cold Pressed Watercolour Card Stock, 300gsm A5 AmazonDE | AmazonUK Canson XL, Watercolour Cardstock , 300gsm/140lb AmazonDE | AmazonUK Joy Crafts, Kraft Paper,A4 300gsm/140lb (card base) KreativbuntDE | AmazonUK Papermania, A6 Card Bases + Envelopes, Craft AmazonDE | AmazonUK Papermania, Tall/Slim Card Base + Envelopes AmazonDE | AmazonUK Faber-Castell Waterproof 0.3 Fine Liner AmazonDE | AmazonUK Clearly Besotted, Most Wonderful Tsukineko, Versafine Ink pad, Onyx Black AmazonDE | AmazonUK My Sweet Petunia, Mini MISTI Stamping Tool StempelmühleDE | BumbleberrysUK Sellotape Double Sided Tape AmazonDE | AmazonUK Tonic Studios, Guillotine A4 AmazonDE | AmazonUK Crafting Mat, Black AmazonDE | AmazonUK YOU MIGHT ALSO LIKEPIN ME
Did you like the card? I would love, if you pinned it to your board on Pinterest!
1 Comment
21/9/2023 16:06:10
Great article! It's clear, concise, and packed with valuable information. Leave a Reply. |
FOLLOW ME
SEE MORE


CATEGORIES
All
Stamping Die Cutting Using Stencil Heat Embossing Embossing or Texture Paste Distress Inks Nuvo Products Stamping & Colouring Stamping With Solid Stamps Watercolouring Watercolour Pencils Waterbased Markers Pencil Colouring Alcohol Markers Altenew Markers Zig Brush Markers Easy Backgrounds Stamped Backgrounds Small Stamp Ideas Simple Cards Complex Cards Cardmaking For Beginners All
Painting With Acrylics Painting With Gouache Painting With Watercolours Drawing With Fineliner Minimal Supplies Cards Christmas & Holiday
Love & Valentine Mother's Day Father's Day Halloween Spring Cards Summer Cards Autumn/Fall Cards Winter Cards Cards For Children Cards For Women Cards For Men Thank You Cards Sympathy Cards Get Well Soon Cards Floral & Leav Cards Rainbow Colours Messy Watercolouring Modern Art Inspirations Geometric Patterns Landscape Painting Acrylics
Gouache Watercolours Watercolour Pencils Waterbased Markers Distress Inks Alcohol Markers Colouring Pencils No Stamps No Dies Cards
Cardmaking On A Budget Let’s Colour Quick Cards Fun Masculine Cards Background Ideas Distress Ink Combinations |
 RSS Feed
