
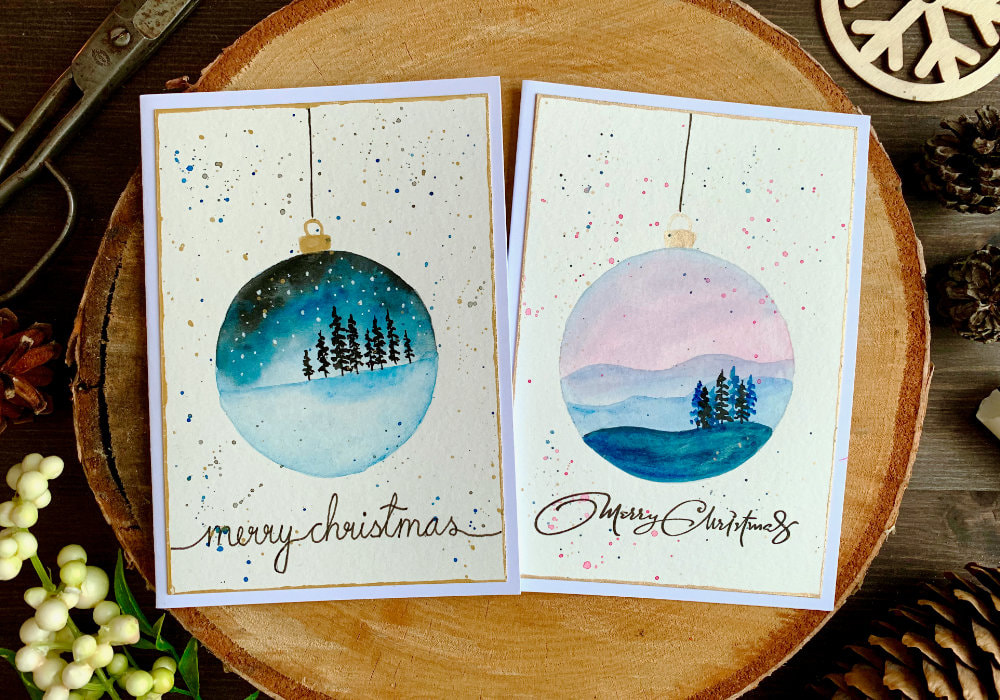
 I’m already on card number seven in my Christmas card series and so far I haven’t made any cards where I painted everything from scratch with watercolours. Well, it’s time to correct that! This year I made a few cards, where I painted a landscape, which is something that is perfect for a Christmas card and what’s even better, is to paint a Christmas ornament with a landscape. This is a very simple painting, perfect for beginners. What’s good about it, is that you do not need too many products to make these cards. It’s not as minimal as the card number five, where I only used a blank card and a pen, but all the products you can get cheaply and you can find them easily in any craft store and even in a supermarket. 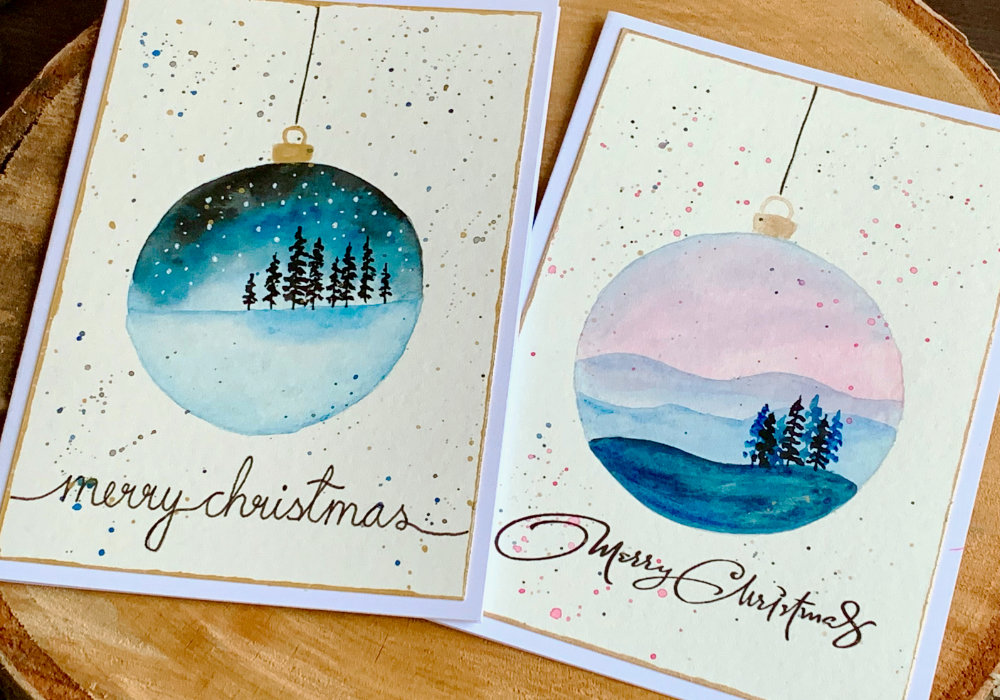 The products you need are watercolours, I used blues, black and golden paint. You also need a brush and watercolour card stock, I cut my slightly smaller than A6. To create a circle you need a pencil and a compass or a glass. I also used a black fine liner to write the greeting and for the falling snow I used a white gel pen. To make it into the card I used a white card base, but if you don’t have one, you can get a bigger watercolour paper, like A5 and fold it in half. Please note that you do not need the exact products I used in the video, as some of them are not the cheapest. Just use what you have in your stash or what you can afford. As you can see in the photos, I made two cards. My initial idea was to paint a few trees with a night snowy sky and icy ground, using blues and black paints. However, after I finished the painting, remembered my card with mountains that I painted back in May and I thought that might look good as an ornament as well. So I decided to paint two cards. PAINTING AN ORNAMENT WITH A SNOWY NIGHT SKY LANDSCAPE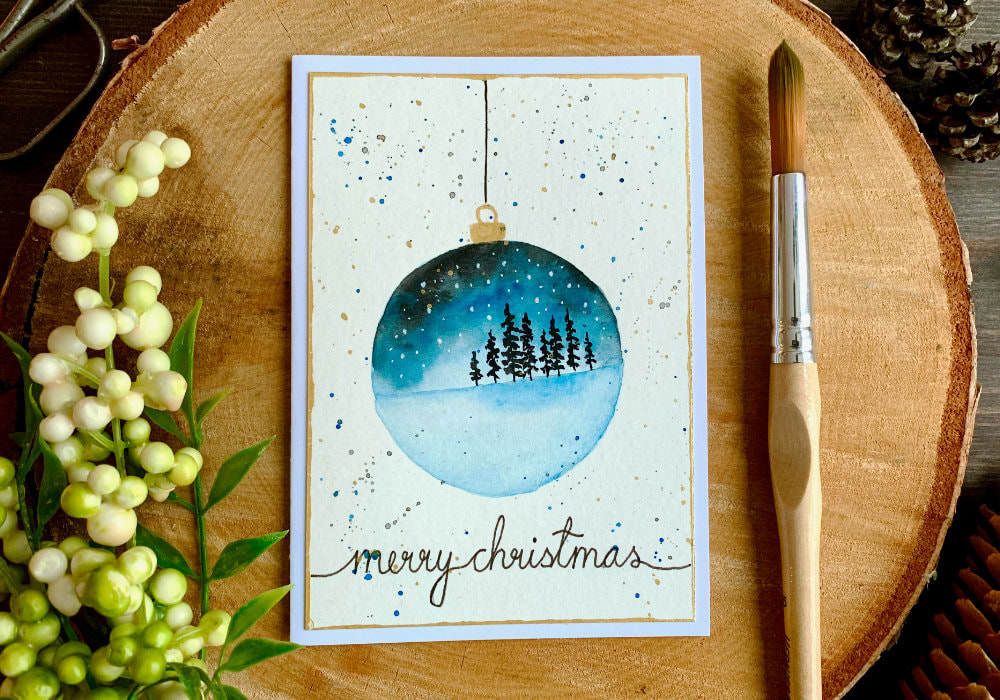 To paint the first card, I started by drawing the circle. The circle is about six and half millimetre in diameter. I drew it closer to the bottom, this is because I wanted to have a string at the top and if it was too short, it would look weird, at least in my head. I also left enough space at the bottom for the greeting. Here you have the option to apply a masking fluid, I used it on the second painting. What the masking fluid does, it creates a barrier and this way you don’t need to worry you will go outside of the lines. Even though I used a spare brush, I don’t care much about to apply it, I still treated it with a little bit of soap and water. This prevents the masking fluid gumming up your brush, something I learned from Kristina Werner. 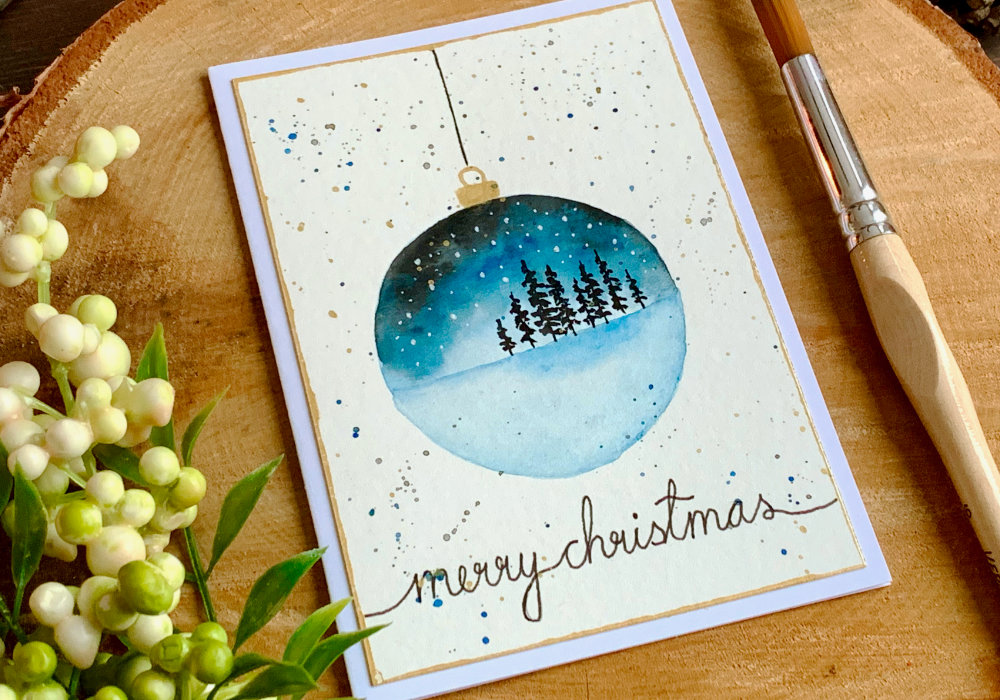 For the first card I did the wet on wet technique. I began with the sky and I applied clean water only on the first half of the circle, maybe slightly lower. I did this because the sky will be darker than the ground and I’m also using different shade of blue for the ground, therefore I didn’t want the colours to be mixing. I started with a lighter shade of my darkest blue paint, then I added black at the top and I was intensifying the colour and building the sky until I was happy with the look. I also stopped adding colour slightly above the middle, because I wanted the part above the ground to be light. Next I painted the ground, here I used a lighter blue paint. I began by wetting the bottom half of the circle and I made sure I created a ground, just a straight line using the wet brush. Then I added the paint, first very light and then at the bottom of the circle I added slightly darker paint. 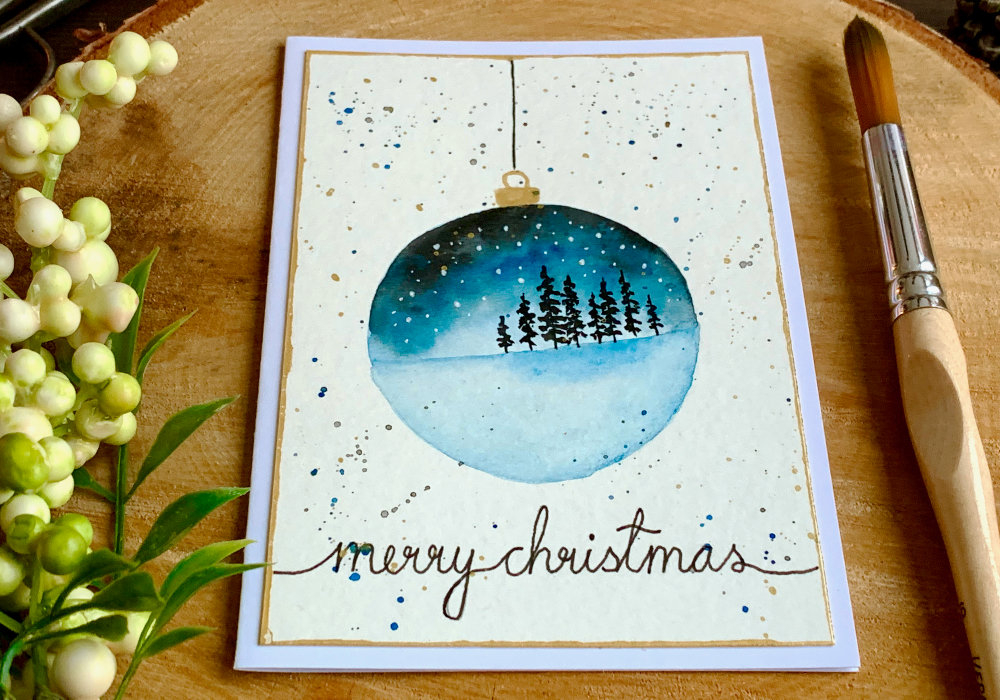 After the piece was dry, I painted the trees, using the black paint. Just a few pine trees in different sizes on the right side of the ornament. I started with a straight line for the trunk and then in a dabbing motion using the tip of the brush I painted the brunches, going zig zag from top to bottom. I painted pine trees few times before, one of the examples is a Christmas card from last year that you can see here. Once I was done with the trees I thought that the ground was little bit too light. I decided to add more colour and definition to the top of the ground, especially to the line that separates the ground from the sky. I first applied clean water over the whole bottom area and then I added a darker shade of the blue below the tress to create sort of a shade and I also extended the colour across the line of the ground to make it more distinct. 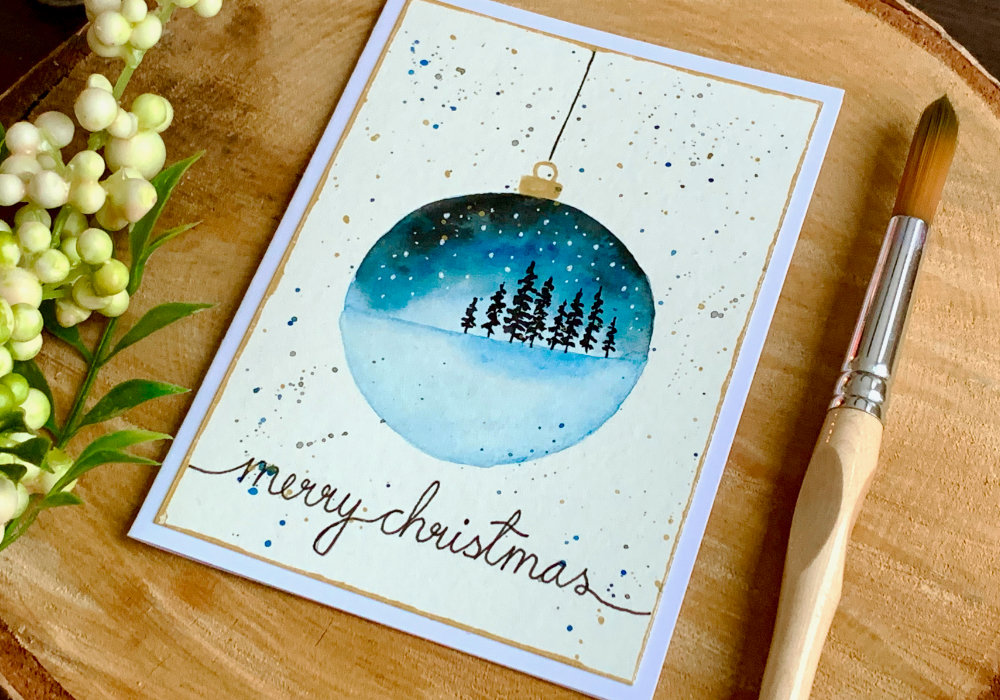 To create the snow I took my white gel pen and I created tiny dots across the sky. In this case I didn’t want to add any splatter as I wanted the white to be only inside of the ornament. And as you know splatter goes everywhere. Next I painted the top of the ornament in gold with a little loop and then I drew a black line with a black fine liner. You can paint it with the gold paint, but I like to have some black up there. Also if you don’t have a gold paint, you can use the black fine liner to create the ornament topper. Below the ornament I wrote the sentiment, just simple Merry Christmas. As my handwriting is rather inconsistent I wrote it first with my pencil and then I went over it with the fine liner. I waited a bit for the ink to dry and then I erased the pencil lines. However if you do not feel brave enough to write your own greeting, you can skip it or if you have stamps, you can use those. 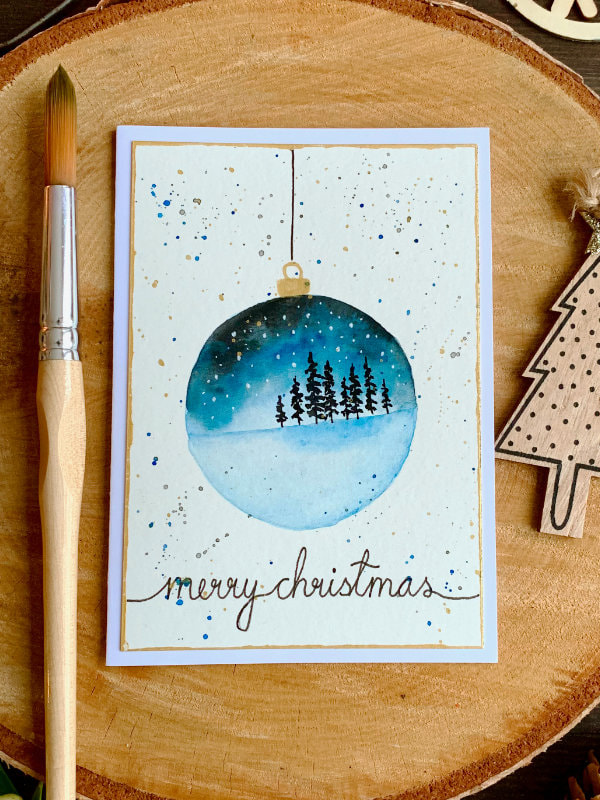 It wouldn’t be my watercolour painting if I didn’t add a splatter. I took the same colours I used in the painting, I dabbed a dump brush in the paint and using my finger I tapped on the brush to create the droplets. I also used the golden paint for the edges of the panel. As you might have seen on my previous cards I like to do this, I like to add some kind of a boarder to the panel. However, this time as I wanted to use a white card base and I didn’t want the bright white of the card base clashing with the off-white of the watercolour paper, adding a colour to the edges of the panel, makes it more… I really don’t know what kind of word to use here, harmonious? Lastly, after everything was dry, I adhered the panel on top of the card base using a double-sided tape. PAINTING ORNAMENT WITH A LANDSCAPE WITH MOUNTAINS AT SUNSET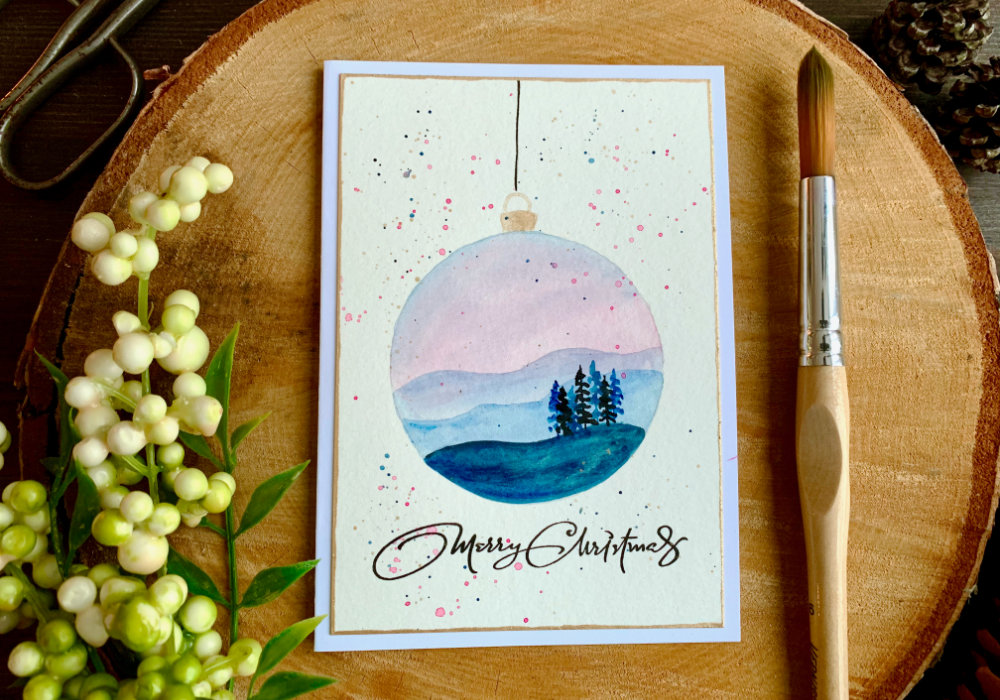 The second card I started with drawing the circle and then I pretty much did exactly the same as on my original card back in May. Starting with the sky, which I painted blue at the top going into pink towards the area where the first mountain will be. The first mountain I painted light blue, then the middle one I painted little bit darker and the hill at the bottom I painted with black mixed with blue. Also after I painted each layer, I dried it first with my heat tool. Next I painted the trees, added the sentiment, this time using a stamp. Then I added the the splatter, painted the edges of the panel and adhered it onto the card base. 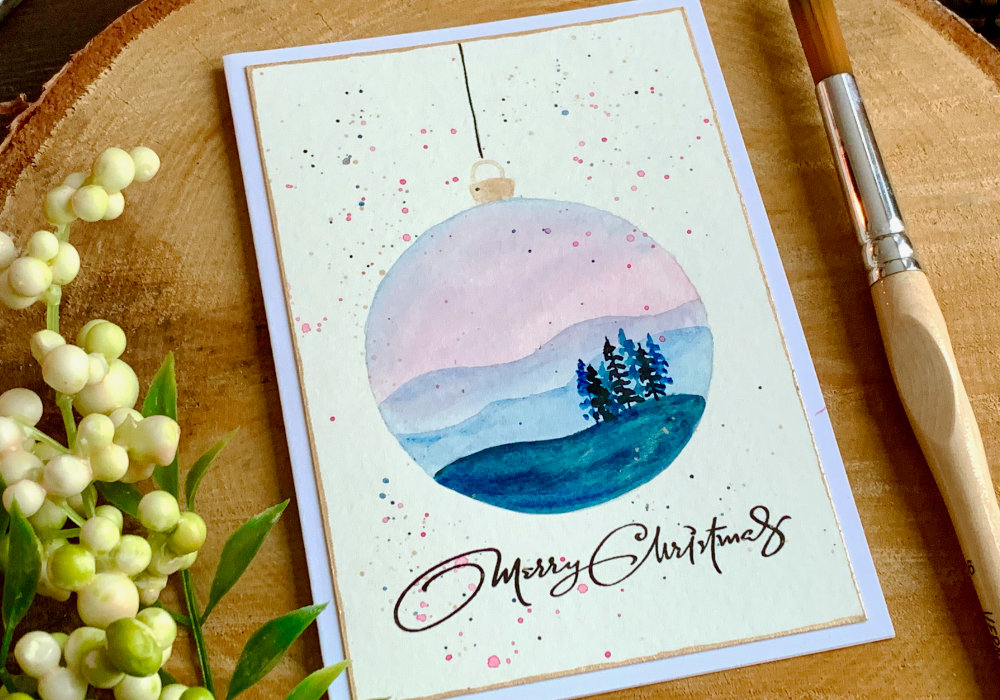 This card is super easy! Actually the only thing I was worried about is staying inside of the lines. What worked for me is to be very careful when applying the colour close to the edge and also I used the tip of the brush to go around the edges to smooth the lines. If you have troubles staying inside of the lines, the best thing is to use the masking fluid. That’s all for today, I hope you will try making these cards yourself. Make sure you check out my video on YouTube and give it a Like as well. The list of product is down below, where you can also find a few blog posts that I think you might enjoy. And if you have any questions, just drop me a line. VIDEO TUTORIALWatch the video below or on my YouTube Channel. PRODUCTS USEDDisclaimer: I’m currently not using any affiliate links. These links are just to help you find the products. The list includes alternatives to what I was using and while I haven't used some of them, I only recommend brands I trust. Kuretake, Gansai Tambi, Watercolour Paints 36 Set AmazonDE | AmazonUK Kuretake, Gansai Tambi, Stary Colours AmazonDE | AmazonUK Canson XL, Watercolour Cardstock , 300gsm/140lb AmazonDE | AmazonUK Silver, Black Velvet brushes JacksonsArtUK Sakura Gelly Roll Pen, White AmazonDE | AmazonUK Faber-Castell PITT Artist Pen 0.5mm Fineliner - Black AmazonDE | AmazonUK Faber Castell, HB Graphite Pencil AmazonDE | AmazonUK Compass Tsukineko, Versafine Ink pad, Onyx Black AmazonDE | AmazonUK Clearly Besotted, Most Wonderful, Greeting Stamp My Sweet Petunia, Mini MISTI Stamping Tool StempelmühleDE | BumbleberrysUK Sellotape Double Sided Tape AmazonDE | AmazonUK Color Copy , White Paper, A4 300gsm/140lb (card base) AmazonDE | AmazonUK Papermania, A6 Card Bases + Envelopes, White AmazonDE | AmazonUK Fiscars, Guillotine A5 AmazonDE | AmazonUK Crafting Mat, Black AmazonDE | AmazonUK YOU MIGHT ALSO LIKE  PIN MEDid you like the card? I would love, if you pinned it to your board on Pinterest! 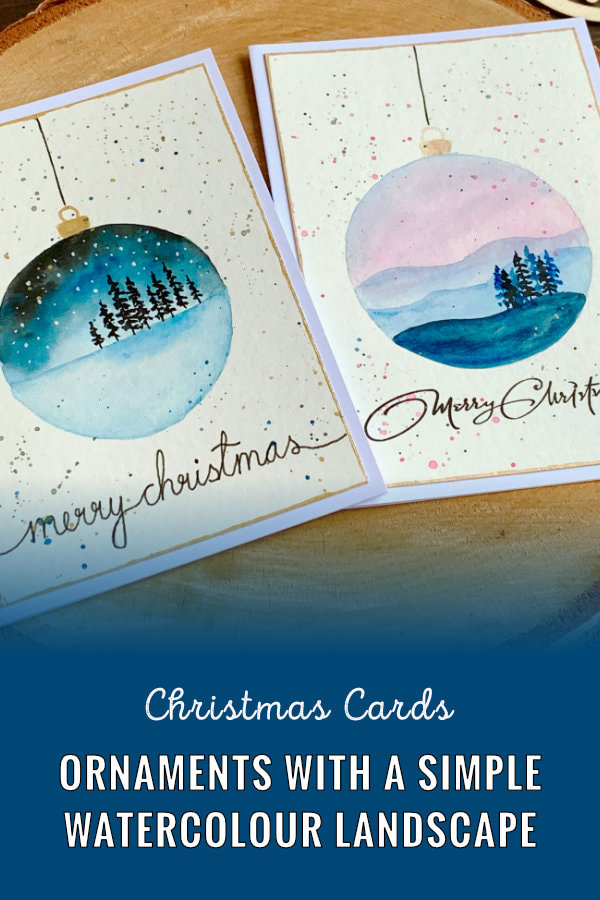
0 Comments
Leave a Reply. |
FOLLOW ME
SEE MORE


CATEGORIES
All
Stamping Die Cutting Using Stencil Heat Embossing Embossing or Texture Paste Distress Inks Nuvo Products Stamping & Colouring Stamping With Solid Stamps Watercolouring Watercolour Pencils Waterbased Markers Pencil Colouring Alcohol Markers Altenew Markers Zig Brush Markers Easy Backgrounds Stamped Backgrounds Small Stamp Ideas Simple Cards Complex Cards Cardmaking For Beginners All
Painting With Acrylics Painting With Gouache Painting With Watercolours Drawing With Fineliner Minimal Supplies Cards Christmas & Holiday
Love & Valentine Mother's Day Father's Day Halloween Spring Cards Summer Cards Autumn/Fall Cards Winter Cards Cards For Children Cards For Women Cards For Men Thank You Cards Sympathy Cards Get Well Soon Cards Floral & Leav Cards Rainbow Colours Messy Watercolouring Modern Art Inspirations Geometric Patterns Landscape Painting Acrylics
Gouache Watercolours Watercolour Pencils Waterbased Markers Distress Inks Alcohol Markers Colouring Pencils No Stamps No Dies Cards
Cardmaking On A Budget Let’s Colour Quick Cards Fun Masculine Cards Background Ideas Distress Ink Combinations |
 RSS Feed
