
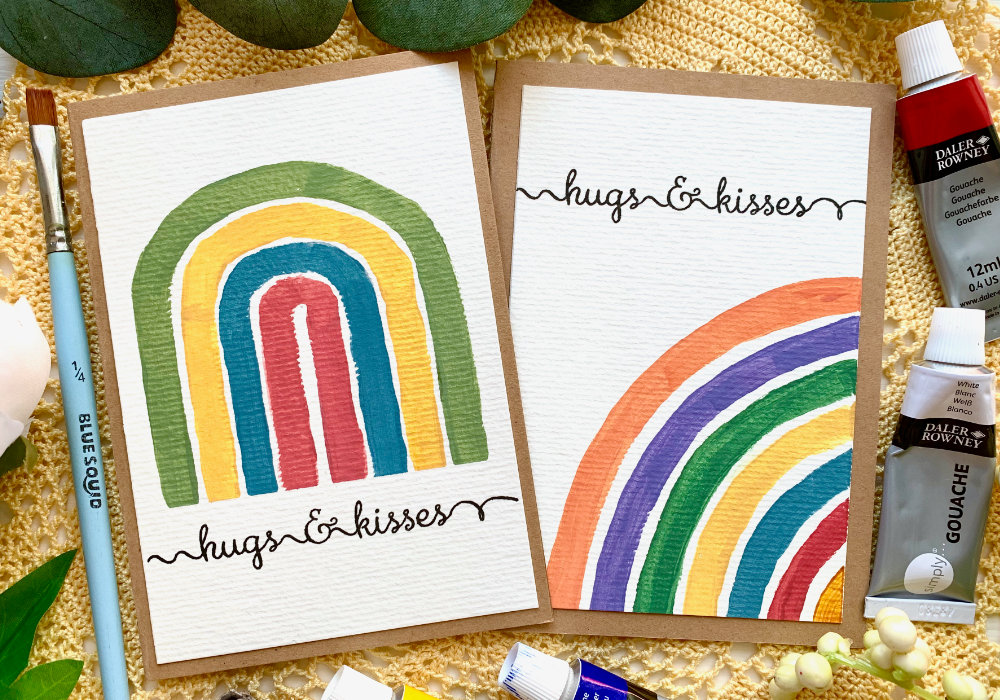
Simple Birthday Card With Rainbow Painted With Watercolours | DIY CARDS FOR BEGINNERS + VIDEO13/4/2023 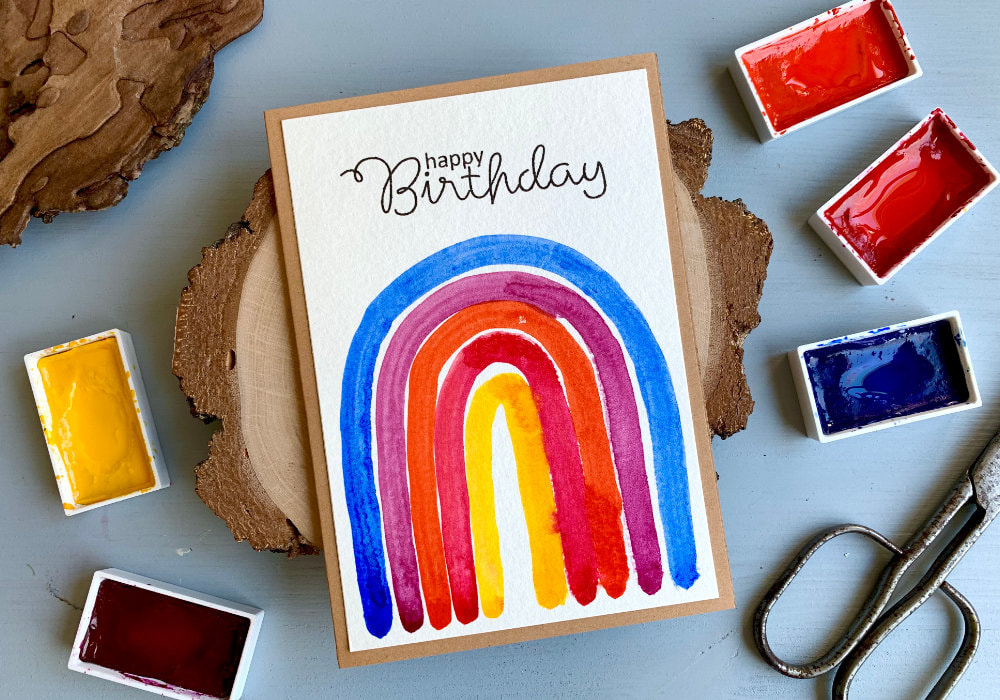 I've been enjoying making vertical videos because it allows me to make quick and simple cards and the card in this blog post is just that. I decided to paint a simple rainbow this time with watercolours. I already made cards with rainbows and for those I used gouache. You can see these cards here. I picked five paints.I didn't want to paint a traditional rainbow, going in the correct order. I started with blue, then purple, orange, pink and yellow. The colours are completely your choice. Also you can use any watercolour products you have or you can afford.  The "hardest" part was getting the hight so it's not looking too small or too big. I painted starting with the biggest arch, making my way inwards. My brush didn't hold enough paint, but this is because I was using a smaller flat brush. I use smaller brushes simply because I'm making cards, which are usually smaller in size. If you do not have a flat brush, you can use a round brash as well. Since the brush didn't hold enough paint and water, I simply went back and re-painted those sections that didn't have enough paint. What I like with watercolours compared to gouache when painting rainbow, is that if the lines touch the colours combine. I really like this effect, but I wasn't going to force it. Here only the yellow and the pink mixed.  If you do not like this effect, maybe wait until the arch is dry before painting the next, or paint carefuly around those arches. Or use other colouring medium such as gouache, acrylics and so on. After I was finished, I let the piece dry. Before you put your paints away, you could add a little bit of spatter across the panel. I decided not to do that this time, as I create splatter most of the time I use watercolours. Next I stamped the greeting, I picked a Happy Birthday sentiment from Clearly Besotted. I stamped it above the rainbow using a black ink. You could play with the position of the greeting. You could do it the opposite way, or palace the rainbow in the middle and create a banner with the greeting and adhere it over it.  Lastly I adhered the panel on top of a card base using a liquid glue and the card is finished. As I said, quick and simple. You can see a quick video of me making this card on my YouTube channel or Instagram and make sure you subscribe/follow. WATCH A QUICK VIDEOWatch the video below or directly on my YouTube channel or Instagram. YOU MIGHT ALSO LIKEPIN MEDid you like the card? I would love, if you pinned it to your board on Pinterest! 
0 Comments
Leave a Reply. |
FOLLOW ME
SEE MORE


CATEGORIES
All
Stamping Die Cutting Using Stencil Heat Embossing Embossing or Texture Paste Distress Inks Nuvo Products Stamping & Colouring Stamping With Solid Stamps Watercolouring Watercolour Pencils Waterbased Markers Pencil Colouring Alcohol Markers Altenew Markers Zig Brush Markers Easy Backgrounds Stamped Backgrounds Small Stamp Ideas Simple Cards Complex Cards Cardmaking For Beginners All
Painting With Acrylics Painting With Gouache Painting With Watercolours Drawing With Fineliner Minimal Supplies Cards Christmas & Holiday
Love & Valentine Mother's Day Father's Day Halloween Spring Cards Summer Cards Autumn/Fall Cards Winter Cards Cards For Children Cards For Women Cards For Men Thank You Cards Sympathy Cards Get Well Soon Cards Floral & Leav Cards Rainbow Colours Messy Watercolouring Modern Art Inspirations Geometric Patterns Landscape Painting Acrylics
Gouache Watercolours Watercolour Pencils Waterbased Markers Distress Inks Alcohol Markers Colouring Pencils No Stamps No Dies Cards
Cardmaking On A Budget Let’s Colour Quick Cards Fun Masculine Cards Background Ideas Distress Ink Combinations |
 RSS Feed
