
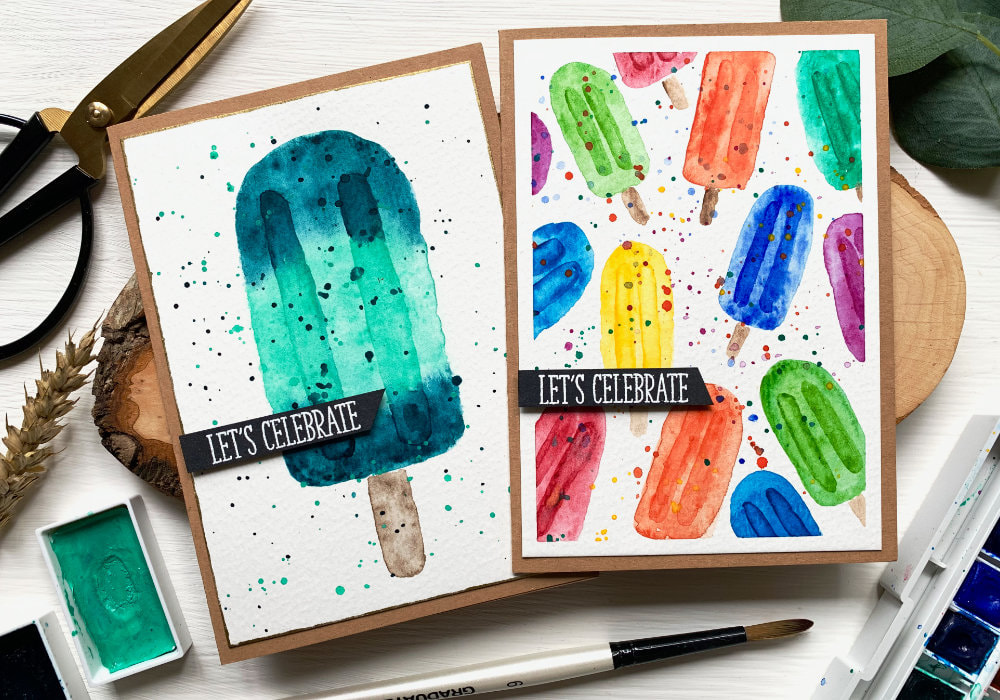
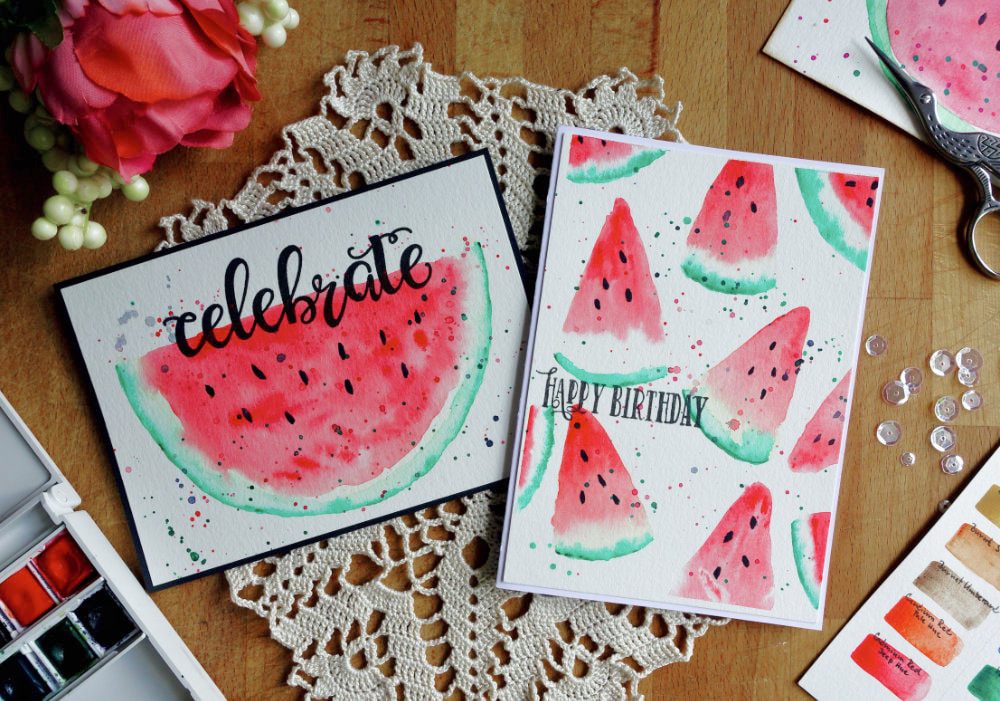
 I have been planing to release completely different blog post, me talking about things I like and dislike about card making. However not only I didn’t manage to film it, but I’m not 100% confident talking into the camera. Will see maybe next week. Although I had to quickly make a card, I’m so happy I did make this card. There were few options I was playing with, but in the end I settled on painting a very easy ice lolly using watercolours and I didn’t paint just one card but two cards. Actually I painted multiple ones as it was so addictive. This cards are definitely for beginners as well for those who are looking for DIY cards on a budget. As I said the cards are budget friendly and the supplies are very minimal. You will need watercolours, watercolour card stock, brushes. I usually try out few different brushes to see which one feels the best. I also used a washi, few banners with a sentiment, some adhesive and a card base that I pre-made. And of course I have two jars with water and a paper towel. The list of supplies you will find below, but you do not need the exact brands I’m using, anything you have or is in your budget will do. 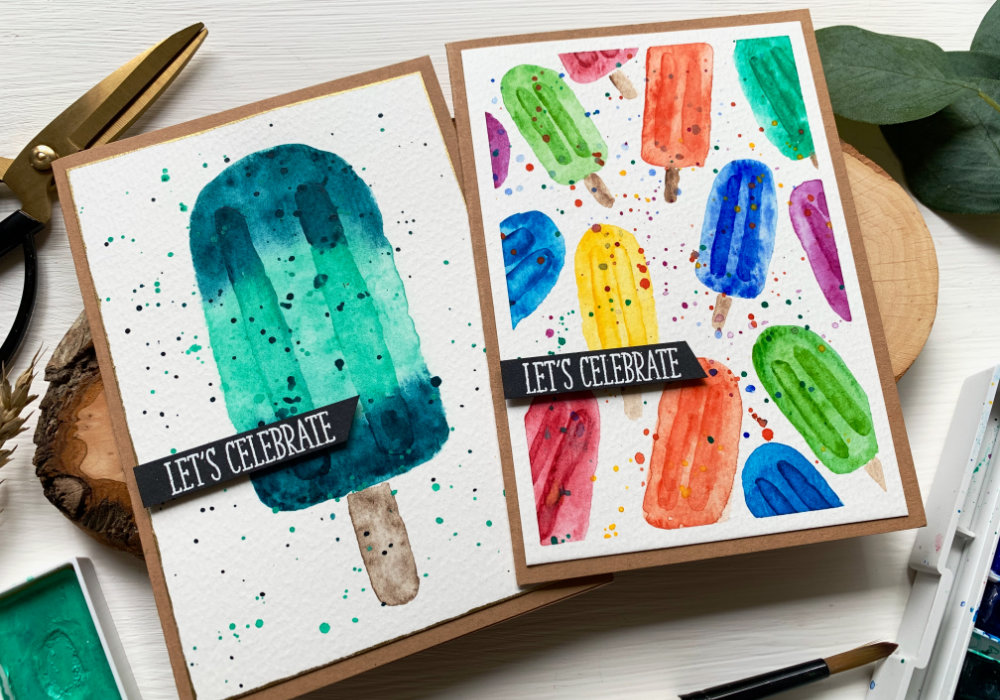 I’m making a card in the size A6 (US equivalent is A2) and even though I’m using an A6 size watercolour card stock, I still cut it down as it’s easier to adhere onto the card base. Talking about the card bases, if you do not want to make your own, or you don’t have the supplies for it, you can always buy them already pre-made, often they are sold in a pack. I would not recommend buying an A5 watercolour paper and folding it in half as it could crack, but you can try that if you don’t have any other option. This is such a simple card, if you know how to paint a rectangle with a rounded top, you are good to go. You can watch my video over on my YouTube channel, if you want to see how exactly I painted this. You can also check out the videos I watched and found very helpful, one is from Wonder Forest and the other is from Emma Jane Lefebvre channels. For the first card I painted one big ice lolly, in two different colours, darker on the top and the bottom and lighter in the middle. And the colours I chose are mint and turquoise. However, you can use just one colour or darker at the top and lighter at the bottom to make it even more simple. 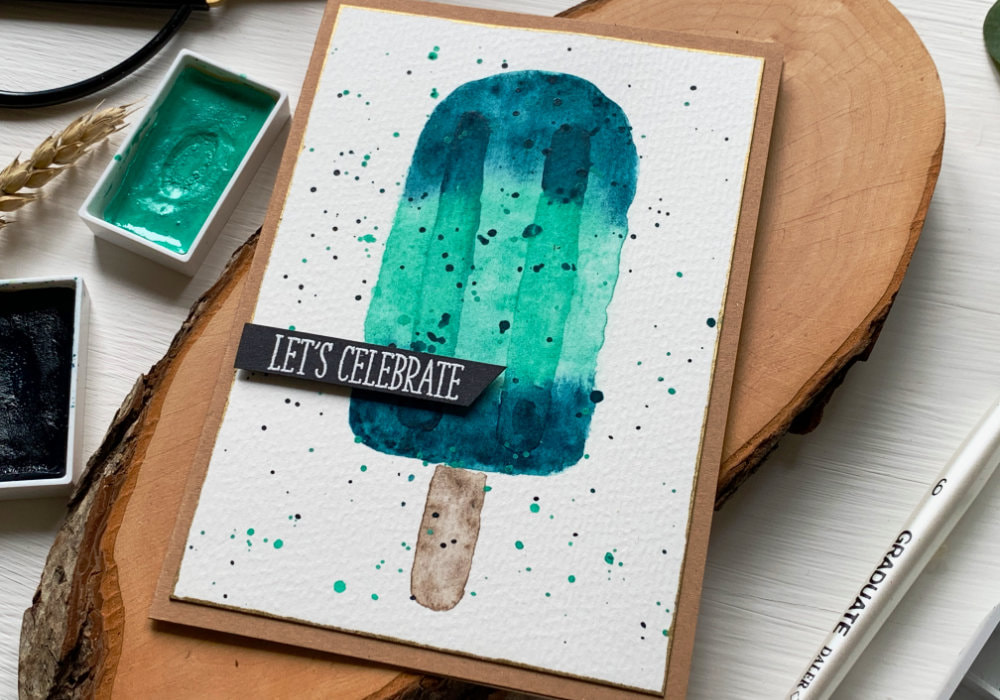 I began with a light wash of the mint colour, not only it was useful for the video, but if the colours do not clash, this is way better than using clean water. This way you can see where you are applying the water. Other option would be to sketch the ice lolly with a pencil. I started with creating an outline using the tip of my brush and then I filled it with water. Make sure you don’t add too much water, you don’t want any of the water to be pooling. If that happens, just use a paper towel to soak it up. After I applied the water, I added the colours. First I started with the turquoise at the top and the bottom, and I used my brush to spread the colour around. The amount of paint you add is up to you, I prefer my colours to be saturated, but you can also dilute the paint with water to create a lighter shade. Next I used the mint paint and I painted the middle, again using my brush to help it to move around and to blend it in with the darker colour. While the paint was still wet, I used even more concentrated paint and added few drops of colour here and there. I wanted to have this organic look. Although, I’m not sure I’m using the correct term. What I mean this uneven, blotchy watercolour look. 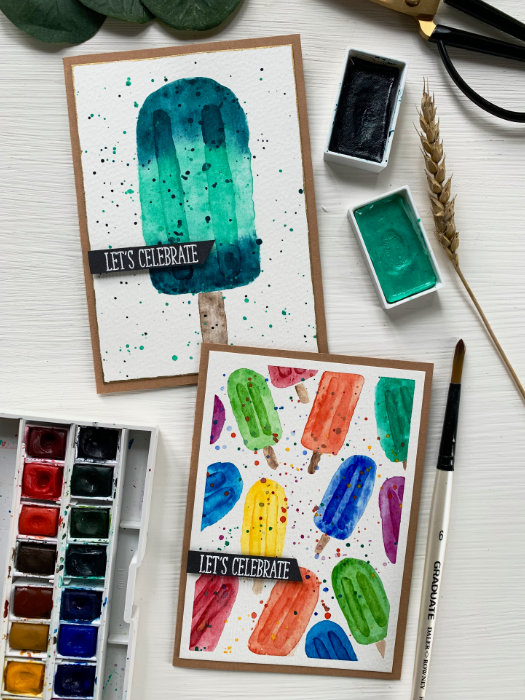 Once the piece was dry I painted in two lines, these indents that many of the ice lollies have. You want to create darker edges, sort of an illusion of a depth. There are two ways of painting this. First option is to start with a darker paint to paint an outline and then using a lighter paint or clean water to fill up the lines. The second option is to paint the middle of the lines using a lighter paint and then with the tip of your brush add the darker paint along the edges. I prefer the first option, but I also did the second option, especially if I felt that there is not enough paint along the edges. One important thing is not to use too much water, there were times I had way too much water on my brush. If that happens to you, just soak up the excess water with a paper towel. The last thing that was missing on this ice lolly is the wooden stick at the bottom. I used a dark brown brown for the stick, but you can also use yellow brown. I started with a light wash and then I added few drops of more saturated colours here and there and also around the edges. 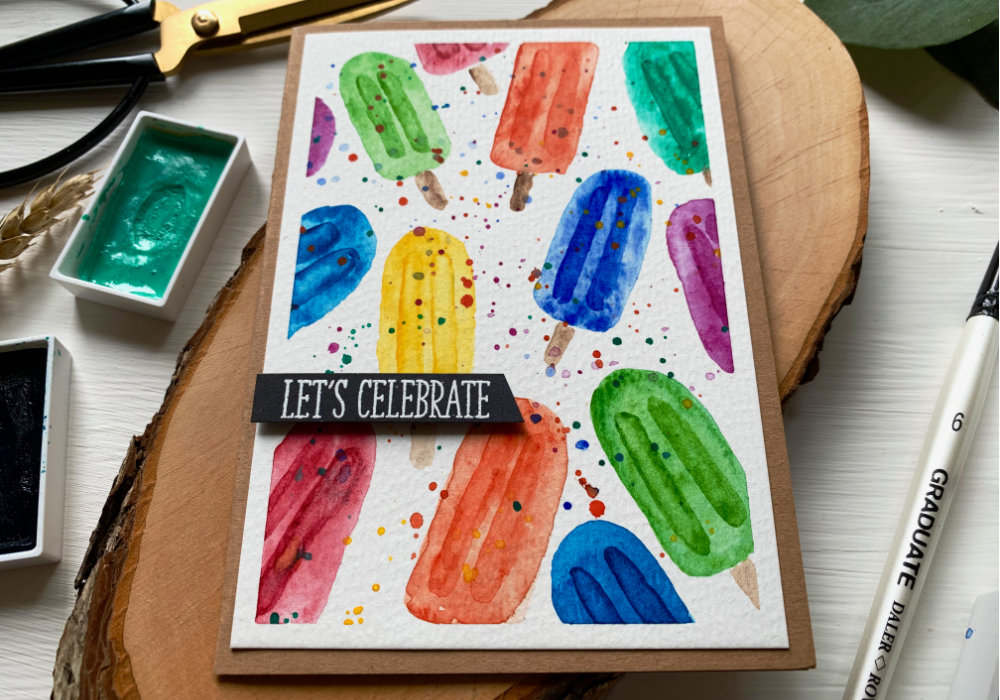 After everything was dry, I added splatter all over the panel. You can skip this if you prefer more cleaner look, but I love splatter. I would even say that sometime I over do it, but for me splatter is sort of an embellishment to fill up the white spaces. You can also use enamel dots or sequins if you want. Another optional thing I like to do is to add a frame and when I use watercolours I like to use black or golden paint across the edges of the card stock. Other option would be to use a black fine liner and draw a frame with a solid or dash line. You could adhere a darker card stock below the watercolour paper to create the frame or if you have a die-cutting machine, you can use a die and die-cut the watercolour paper. The simplest would be a stitched rectangular or scalloped die. For the card second card I did pretty much the same, except I painted the ice lollies much smaller to fill up the background. I used few different colours because I wanted the background to be colourful, but I only use one colour per popsicle. Actually, is it ice lolly or popsicle? I think popsicle is a brand and ice lolly is the general name for it. If I’m wrong, let me know in the comments. 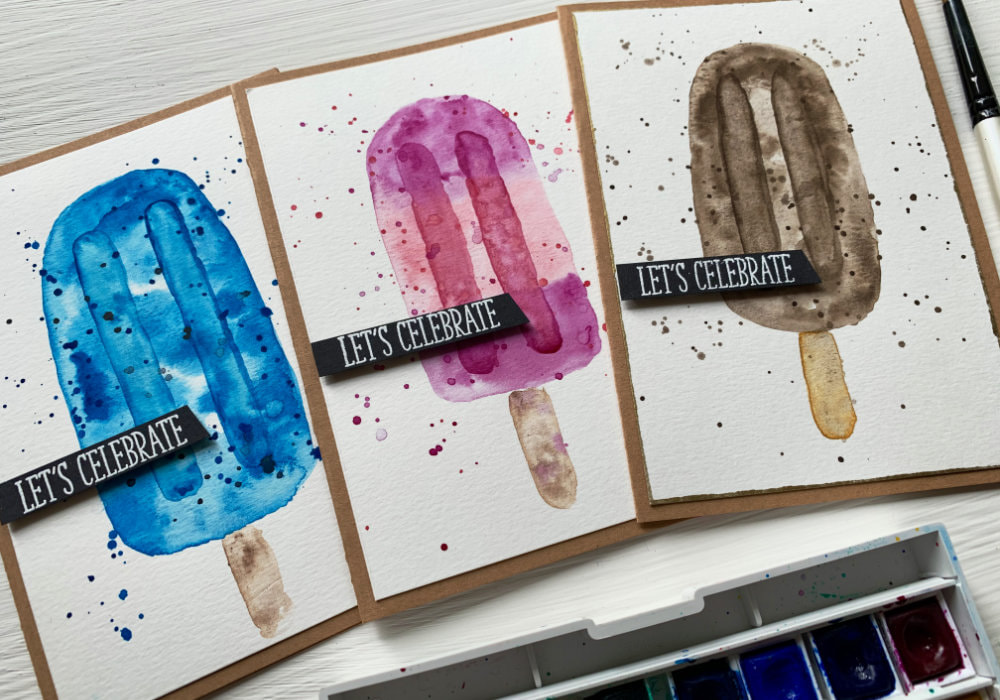 Few tips for painting the background. When you are painting, you need to keep in mind that you need to add the wooden sticks, therefore you need to leave enough space for it. What I did, I painted few popsicles first, then I painted the wooden sticks and then I continued painting additional ice lollies. You might find easier, if you sketch the popsicles first and then paint them in. Also I taped my card stock using a washi, mainly to prevent any warping, but also to create a nice frame. If you use a washi or painters tape, do not forget to paint in some ice lollies along the edges, otherwise once you remove the washi, you might have too much of white space. Last year when I painted a background with watermelons and after I took off the washi, there was too much of white space. Ever since, when I paint a background I make sure I add some images along the edges, as you would have if you used a pattern paper. To finish up the cards I adhered them on top of a craft card base, using a double-sided tape. And lastly I adhered a banner with a sentiment using few foam squares. The sentiment says “Let’s Celebrate” and I heat embossed it with a white embossing powder. You can use what ever sentiment you want, this one is form a very old stamp set by Clearly Besotted. If you don't have any sentiment stamps, you can leave it out, the sentiment is optional. Make sure you check out my video on YouTube, the list of product is down below, where you can also find few blog posts that I think you might like. And if you have any questions, just send me a comment. VIDEO TUTORIALWatch the video below or on my YouTube Channel. PRODUCTS USED Disclaimer: I’m currently not using any affiliate links. These links are just to help you find the products. The list includes alternatives to what I was using and while I haven't used some of them, I only recommend brands I trust. Kuretake, Gansai Tambi, Watercolour Paints 36 Set AmazonDE | AmazonUK Winsor & Newton, Cotman Watercolor Palette AmazonDE | AmazonUK Tritart, Watercolour Card Stock 300 gsm AmazonDE Blue Squid Brush Set AmazonDE | AmazonUK Daler Rowney Watercolour Brushes 4, 6, 10 AmazonDE | AmazonUK Canson XL, Watercolour Cardstock , 300gsm/140lb AmazonDE | AmazonUK Joy Crafts, Kraft Paper,A4 300gsm/140lb (card base) KreativbuntDE | AmazonUK Papermania, A6 Card Bases + Envelopes, Craft AmazonDE | AmazonUK Sellotape Double Sided Tape AmazonDE | AmazonUK Dovecraft, Foam Squares AmazonDE | AmazonUK Fiscars, Guillotine A5 AmazonDE | AmazonUK Crafting Mat, Black AmazonDE | AmazonUK YOU MIGHT ALSO LIKEPIN MEDid you like the card? I would love, if you pinned it to your board on Pinterest! 
0 Comments
Leave a Reply. |
FOLLOW ME
SEE MORE


CATEGORIES
All
Stamping Die Cutting Using Stencil Heat Embossing Embossing or Texture Paste Distress Inks Nuvo Products Stamping & Colouring Stamping With Solid Stamps Watercolouring Watercolour Pencils Waterbased Markers Pencil Colouring Alcohol Markers Altenew Markers Zig Brush Markers Easy Backgrounds Stamped Backgrounds Small Stamp Ideas Simple Cards Complex Cards Cardmaking For Beginners All
Painting With Acrylics Painting With Gouache Painting With Watercolours Drawing With Fineliner Minimal Supplies Cards Christmas & Holiday
Love & Valentine Mother's Day Father's Day Halloween Spring Cards Summer Cards Autumn/Fall Cards Winter Cards Cards For Children Cards For Women Cards For Men Thank You Cards Sympathy Cards Get Well Soon Cards Floral & Leav Cards Rainbow Colours Messy Watercolouring Modern Art Inspirations Geometric Patterns Landscape Painting Acrylics
Gouache Watercolours Watercolour Pencils Waterbased Markers Distress Inks Alcohol Markers Colouring Pencils No Stamps No Dies Cards
Cardmaking On A Budget Let’s Colour Quick Cards Fun Masculine Cards Background Ideas Distress Ink Combinations |
 RSS Feed
