
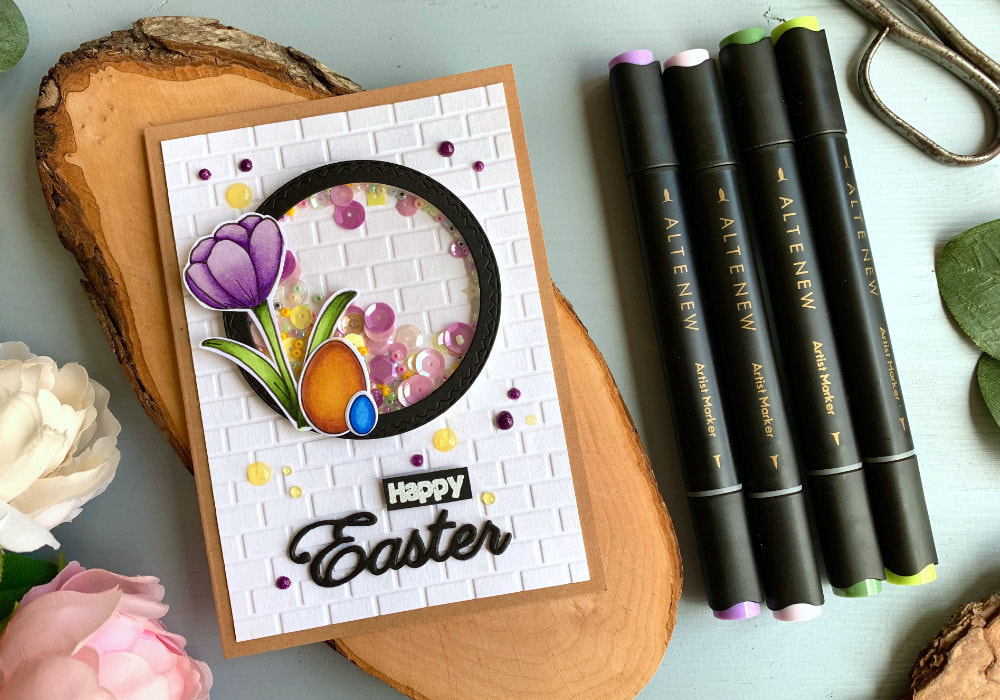
 I haven't made Easter cards for a few years now, because I do not see Easter as a card giving occasion. The same as Halloween. However, I've been seeing card videos for Easter and even though I already had a card planned, which was a card with a crocus flower. I decided to make it into an Easter card and not only that, I also decided to make it into a shaker card. I do not have a stamp for a crocus flower, so I had to draw it. You do not need to use a crocus flower, other flower would be great as well, even just the eggs would be enough. I was thinking doing just that, but I really wanted to use crocus. While the flower looks simple, for somer reason I was struggling, when drawing it. It's funny, because I want to draw a rose for my next card and that I find much simpler. Anyways, in the end I managed to draw a pretty flower, which I then transferred onto my card stock that I used for the colouring. 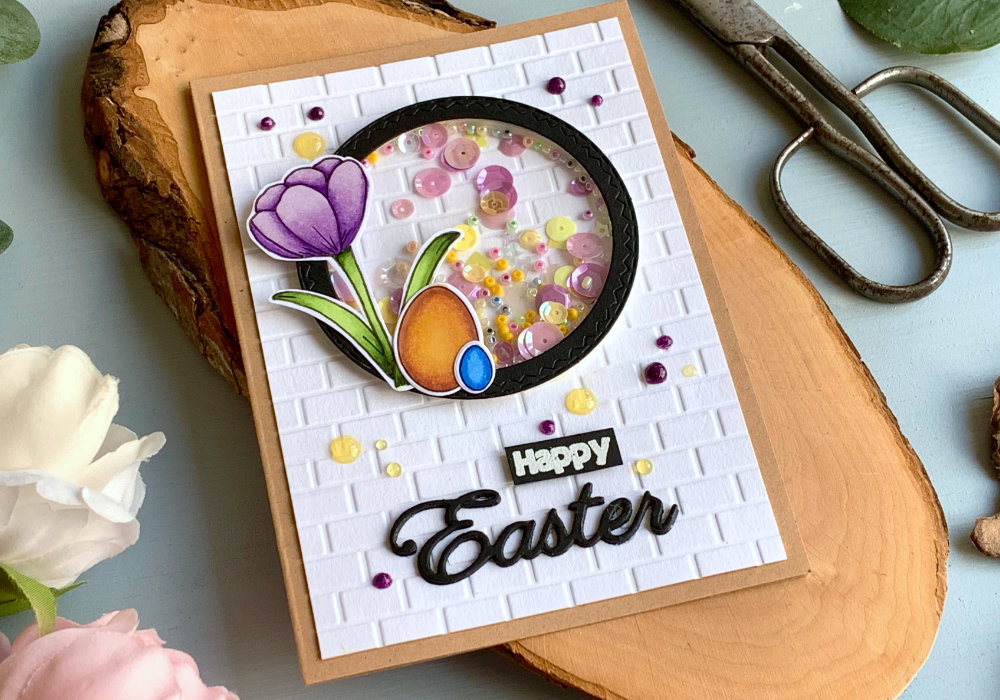 After I transferred the image, I traced the lines with a black fine-liner. I wanted it to resemble a stamped image. I also wanted to add a few details to the images, just a few simple lines. Not a line shading that is a little bit extreme for my taste, just a few lines here and there. As I'm not good at it and I didn't want to mess it up, I only added some lines at the bottom of the front petals and the leaves. Next I started colouring. I used the alcohol markers from Altenew and while I do not have too many colours I do have purples, so this was the perfect time to use them. Again I did my typical colouring, creating an ombre effect. When using the alcohol markers I usually start with the darkest shade which I blend with the lightest shade and then I bring in the mid shade and blend it with the lightest shade again. With the greens I started with the two lighter shades, as I didn't know if I will be using the darkest green. In the end I did, but then I repeated my usual process. 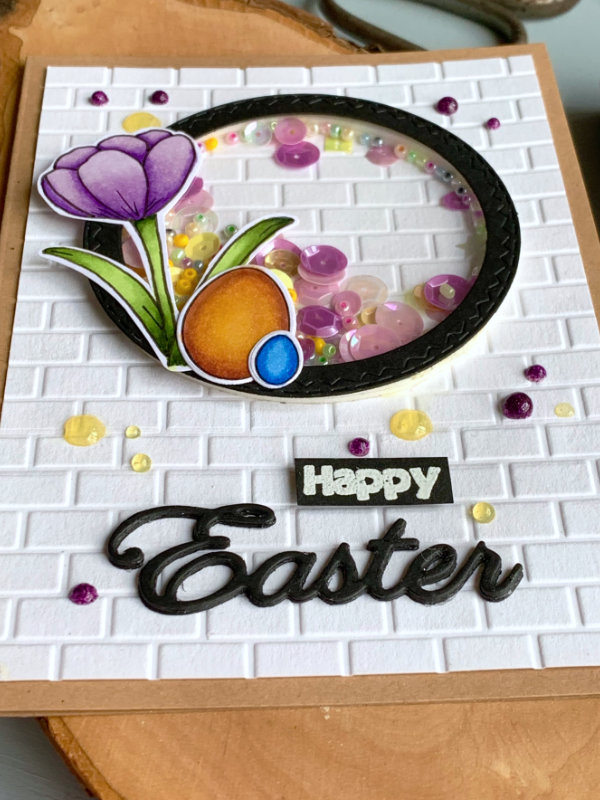 Markers I used, from darkest to lightest shade:
Once I was done with the colouring, I fussy-cut the image. Just like I would do with a stamped image for which I do not have a coordinating die. While I do not make Easter cards anymore, when I started card making I bought a few Easter products like a die set with eggs. I used two smallest sizes and before I die-cut them I first place the dies onto the card stock (the same I used for the flower) and with the fine-liner I traced the inside of the egg. I wanted it to match the flower. After that I die-cut the eggs and coloured them with the alcohol markers. I was thinking about adding some details, like circles, lines etc., but in the end I only coloured them using one colour - yellow for the bigger egg and blue for the smaller egg. 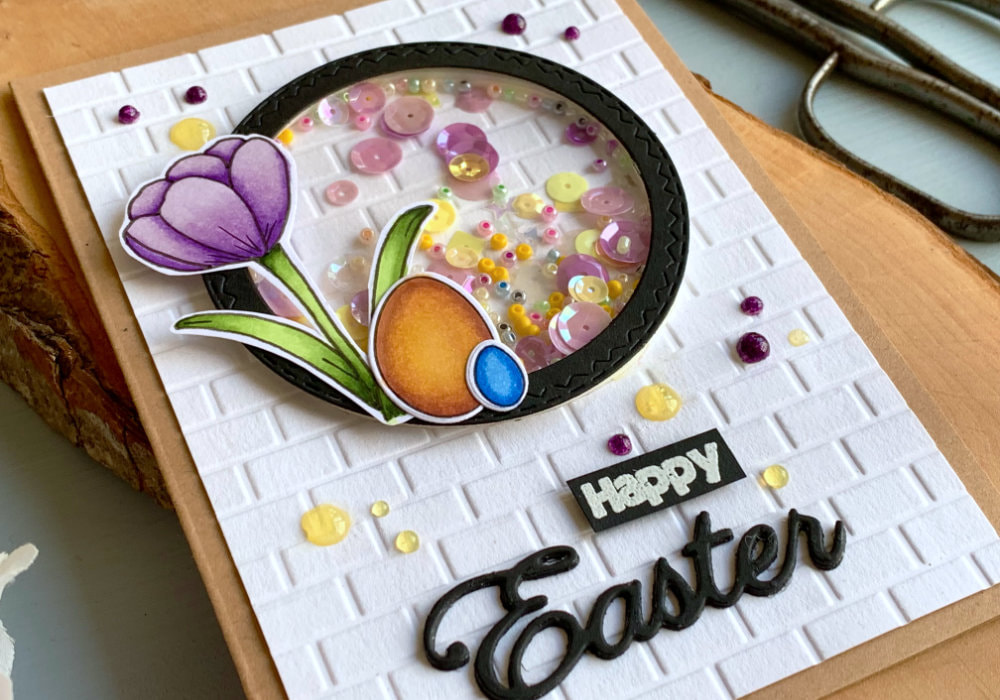 I also die-cut the frame for the saker part. I wanted the shaker element to sit on top of my panel, rather than it being below it. You need a double layer of the foam tape and when putting the shaker element below the panel, it makes the whole card rather bulky. Putting the shaker on top decreases the bulk. So I die-cut a circle frame using two sizes of circle dies. I also die cut a circle window out of an acetate and then I glued the frame and the acetate together. Next I created a background panel, for which I used an embossing folder with a brick pattern. I bought the embossing folder years ago and never realized how small it is. As I put the card stock into the folder it was sticking out. Luckily this is a continuous pattern and after I run it through the die-cutting machine, I was able to flip the card stock and align the already embossed pattern with the pattern on the embossing folder and run it through the die-cutting machine. You would not know that the embossing folder was too small. 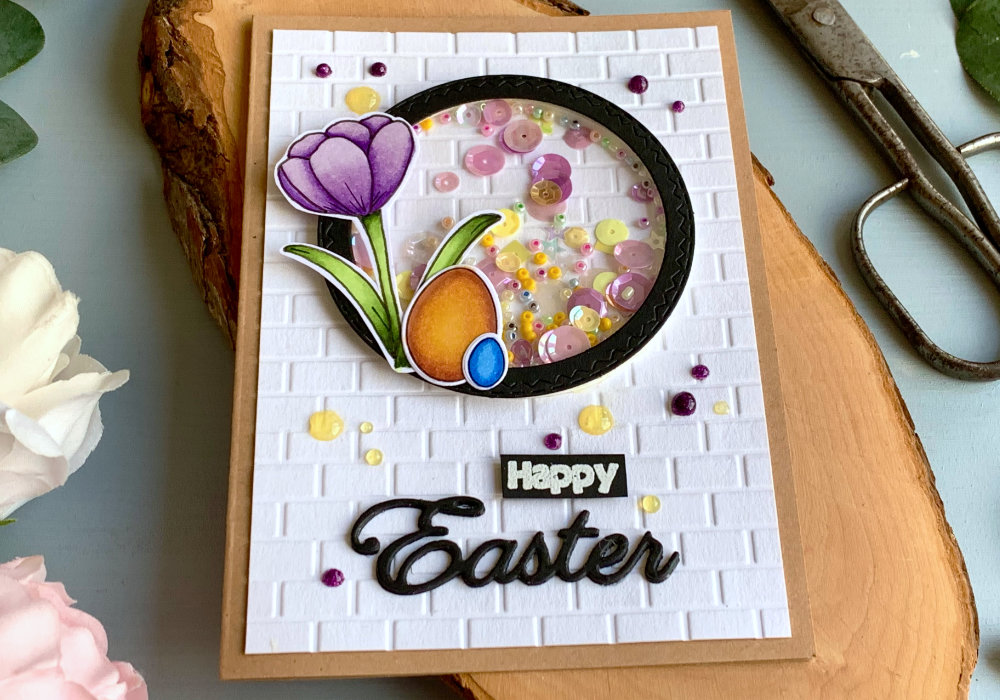 Now I was ready to put the shaker elements together. First I adhered two layers of thin strips of a double-sided foam tape on the back of the shaker window. Then I placed purple and yellow sequins and beads in the upper middle part of the brick panel and lastly I put the shaker window over it. For the greeting I die-cut the word Easter four times out of a black card stock, I glued them together and then I adhered it below the shaker element. I didn't have alone standing word Happy, so I looked through my stash and found a greeting with a very nice bold font. The sentiment says Oh, happy day! and I heat embossed it on a black card stock and cut out the word happy into a banner. I adhered it above the word Easter using a foam tape. 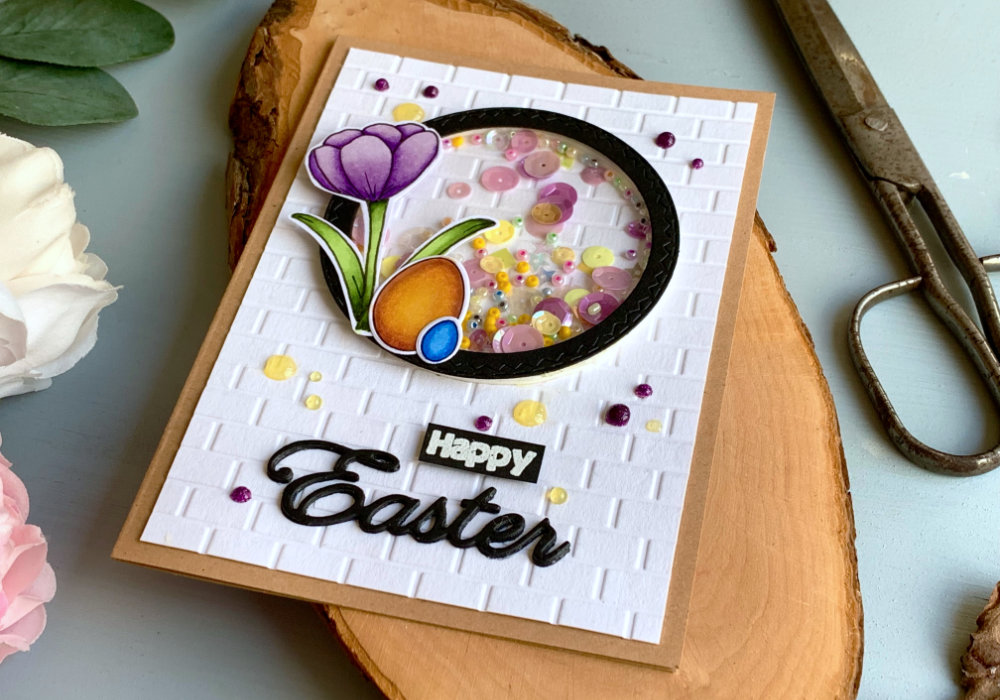 After that I attached the panel on top of a card base that I made out of a craft card stock, using a liquid glue. The card looked great, but I decided to add a few Nuvo drops here and there, which finishes the card. I hope you will try making this card yourself. Make sure you check out my video on YouTube and give it a Like as well. The list of product is down below, where you can also find a few blog posts that I think you might enjoy. And if you have any questions, just drop me a line. VIDEO TUTORIALWatch the video below or on my YouTube Channel. PRODUCTS USEDCLICK HERE TO SEE TO THE LIST OF PRODUCTS
Canson Bristol Card Stock 250gsm
AmazonDE | AmazonUK Altenew, Alcohol Markers - Shades of Purple MennysShopDE | SevenHillsCraftsUK Altenew, Alcohol Markers - Green Fields MennysShopDE | SevenHillsCraftsUK Faber-Castell PITT Artist Pen 0.5mm Fineliner - Black AmazonDE | AmazonUK Faber-Castell Waterproof 0.3 Fine Liner AmazonDE | AmazonUK Faber Castell, HB Graphite Pencil AmazonDE | AmazonUK Staedtler, Eraser AmazonDE | AmazonUK Sizzix, Framelits Die Set, Egg Sizzix Crafter's Companion, Heat Resistant Acetate AmazonDE | AmazonUK Cheery Linn Designs, Easter Die Marianne Design Folder Extra - Bricks Tsukineko Versamark Watermark Ink Pad AmazonDE | AmazonUK Stampendous, Embossing Powder, White AmazonDE | AmazonUK Docrafts Papermania, Heat Tool AmazonDE | AmazonUK EK Susccess, Anti-Static Powder Tool AmazonDE | AmazonUK Absofine, A4 Recycled Kraft Paper 320gsm (card base) AmazonDE | AmazonUK Lucy’s Cards Sequins LucysCardsUK Sellotape Double Sided Tape AmazonDE | AmazonUK Fiscars, Guillotine A5 AmazonDE | AmazonUK Tonic Studios, Guillotine A4 AmazonDE | AmazonUK EK Success, Scissors AmazonDE | AmazonUK My Sweet Petunia, Mini MISTI Stamping Tool StempelmühleDE | BumbleberrysUK Papermania, Stamp Block AmazonDE | AmazonUK Crafting Mat, Black AmazonDE | AmazonUK Disclaimer: Here you can find the products I used to make this card. Please note that the products are just a guide, you don't need the exact products or brands. If available I include links to the stores where you can find the products. As I live in Europe, I provide links to UK and German stores. These are not affiliate links and every product I used for this card, I purchased myself. YOU MIGHT ALSO LIKEPIN MEDid you like the card? I would love, if you pinned it to your board on Pinterest! 
0 Comments
Leave a Reply. |
FOLLOW ME
SEE MORE


CATEGORIES
All
Stamping Die Cutting Using Stencil Heat Embossing Embossing or Texture Paste Distress Inks Nuvo Products Stamping & Colouring Stamping With Solid Stamps Watercolouring Watercolour Pencils Waterbased Markers Pencil Colouring Alcohol Markers Altenew Markers Zig Brush Markers Easy Backgrounds Stamped Backgrounds Small Stamp Ideas Simple Cards Complex Cards Cardmaking For Beginners All
Painting With Acrylics Painting With Gouache Painting With Watercolours Drawing With Fineliner Minimal Supplies Cards Christmas & Holiday
Love & Valentine Mother's Day Father's Day Halloween Spring Cards Summer Cards Autumn/Fall Cards Winter Cards Cards For Children Cards For Women Cards For Men Thank You Cards Sympathy Cards Get Well Soon Cards Floral & Leav Cards Rainbow Colours Messy Watercolouring Modern Art Inspirations Geometric Patterns Landscape Painting Acrylics
Gouache Watercolours Watercolour Pencils Waterbased Markers Distress Inks Alcohol Markers Colouring Pencils No Stamps No Dies Cards
Cardmaking On A Budget Let’s Colour Quick Cards Fun Masculine Cards Background Ideas Distress Ink Combinations |

 RSS Feed
