
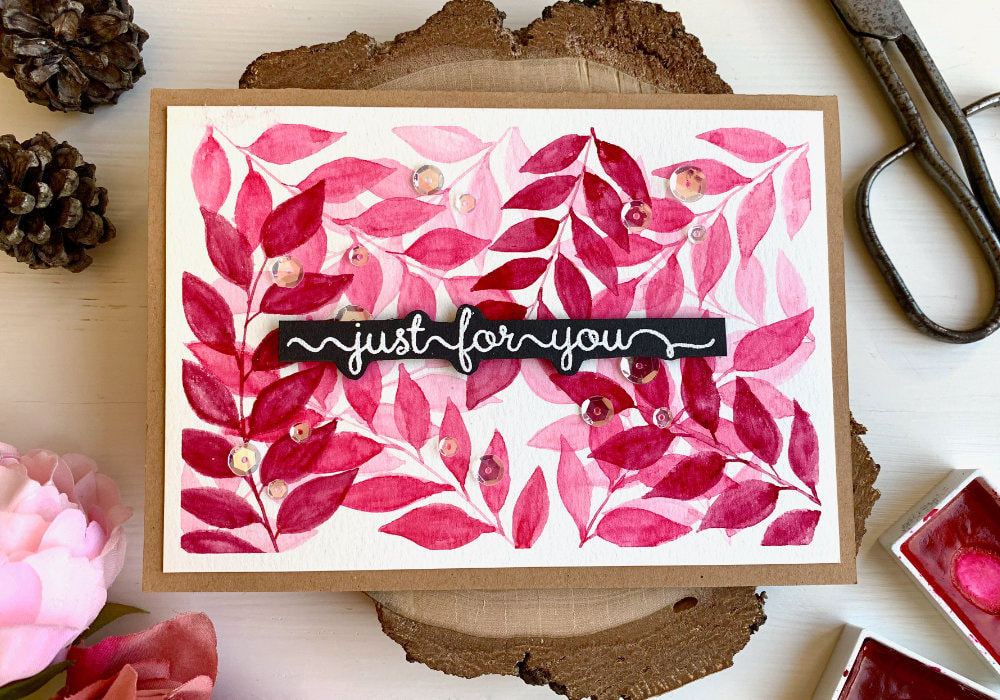
 I've been seeing people painting leaves and I just love it! I've made cards with leaves that I shared on this blog before and in this blog I have a new card, this time with a background of watercolour leaves. I used to be "scared" to paint leaves with watercolours, mainly because the tutorials and videos I watched showed people painting the leaves with one or two strokes, which I cannot do. Due to this I thought that this is the right way of painting leaves and I am just not good. However, then I found more videos and in these people used more strokes, which means there is not one way of painting anything. So, if you are a beginner or looking for card ideas on a budget, this is definitely for you, make sure you give it a try. Originally I was planning to give this card for Mother's day, but then I send it to a friend for her Birthday. Since I put a very neutral greeting on this card, I made it a card for many occasions. However, the words I put on my card are irrelevant, you can always adjust it to the occasion of your choice. And in this case, you can change the colours to make it more masculine.  As I mentioned this is a budget friendly card. All you need for the painting is a watercolour card stock, watercolours, brushes, paper towel and jars with water. I used three different shades of pink, because I'm doing a layering technique, but you do not need as many. You need at least one darker shade and dilute it with water. For the card you will need a card base and adhesive. And something for the greeting. If you have, you can use stamps, or just a black or white marker and simply writhe the word directly onto the card or create a banner. There are a few other things I used, but those are optional. Before I started painting, I taped my watercolour paper to a board using a washi tape, which creates a boarder along the panel and also it keeps the card stock in place and prevents it from warping.  To paint the background with the leaves, I was doing a layering technique, meaning I was painting in layers. I used three shades of pink, starting with a few lighter brunches, then mid shade and lastly with darkest shade. For the first layer I painted one brunch in each corner, altogether four brunches. For the second layer I also painted four brunches in each corner. I was covering the white space, but I was also going over the layer below. And lastly I painted the brunches with the darkest shade, here I painted three brunches, painting over the brunches below. The way I painted the leaves, I started with a curved line. I used a long thin bristle brush, which helps me to paint long thin lines. I pretty much gave up on trying to do this with a round brush, I'm just too heavy handed and had problems achieving long thin lines. However, it is possible, if you only have a round brush, just use the tip to paint the line. Maybe in the future, if you decide to do more of watercolouring, then I would recommend getting the long bristle brush.  Next I painted the individual leaves using a size six round brush. Personally I am not a huge fan of this brush when painting leaves, but I tried other brushes in my stash and this was the only one that I was happy about. I started with a little stem going off the main stem and then I painted an outline of the leaf and filled it with the colour. I repeated this for each leaf on each side and the one on the top. After the panel was dry, I adhered it onto a card base using a double-sided tape. The card base I made myself, but you can buy them pre-made with envelopes or you can also use an A5 size watercolour card stock and carefully fold it in half. Then I adhered the greeting in the middle using a few foam squares, so it's little bit raised. The greeting says "just for you" and I heat embossed it with a white embossing powder on a black card stock that I cut into a banner.  Lastly I adhered a few clear sequins across the background, this is to add a little bit of sparkle to it, however this is completely optional. I hope you will try making this card yourself. Make sure you check out my video on YouTube and give it a Like as well. The list of product is down below, where you can also find a few blog posts that I think you might enjoy. And if you have any questions, just drop me a line. VIDEO TUTORIALWatch the video below or on my YouTube Channel. PRODUCTS USEDClick Here To See To The List OF Products
Kuretake, Gansai Tambi, Watercolour Paints 36 Set
AmazonDE | AmazonUK Silver, Black Velvet brushes JacksonsArtUK Canson XL, Watercolour Cardstock , 300gsm/140lb AmazonDE | AmazonUK Clearly Besotted, Sentiment stamp set Tsukineko Versamark Watermark Ink Pad AmazonDE | AmazonUK Stampendous, Embossing Powder, White AmazonDE | AmazonUK Docrafts Papermania, Heat Tool AmazonDE | AmazonUK EK Susccess, Anti-Static Powder Tool AmazonDE | AmazonUK Joy Crafts, Kraft Paper,A4 300gsm/140lb (card base) KreativbuntDE | AmazonUK Absofine, A4 Recycled Kraft Paper 320gsm (card base) AmazonDE | AmazonUK Papermania, A6 Card Bases + Envelopes, Craft AmazonDE | AmazonUK Neat & Tangled, Clear Sequins SevenHillsCraftsUK Sellotape Double Sided Tape AmazonDE | AmazonUK Dovecraft, Foam Squares AmazonDE | AmazonUK UHU, Liquid Glue AmazonDE | AmazonUK Fiscars, Guillotine A5 AmazonDE | AmazonUK Tonic Studios, Guillotine A4 AmazonDE | AmazonUK My Sweet Petunia, Mini MISTI Stamping Tool StempelmühleDE | BumbleberrysUK Crafting Mat, Black AmazonDE | AmazonUK Disclaimer: Here you can find the products I used to make this card. Please note that the products are just a guide, you don't need the exact products or brands. For most of the products I include links to the shops where you can purchase them if available. As I live in Europe, I provide links to UK and German stores. These are not affiliate links and every product I purchased myself. YOU MIGHT ALSO LIKEPIN MEDid you like the card? I would love, if you pinned it to your board on Pinterest! 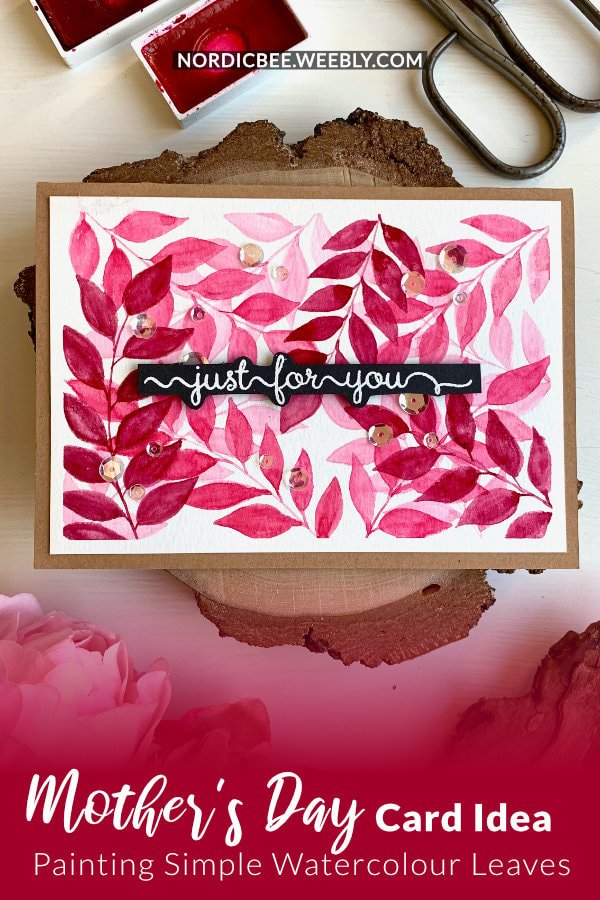
0 Comments
Leave a Reply. |
FOLLOW ME
SEE MORE


CATEGORIES
All
Stamping Die Cutting Using Stencil Heat Embossing Embossing or Texture Paste Distress Inks Nuvo Products Stamping & Colouring Stamping With Solid Stamps Watercolouring Watercolour Pencils Waterbased Markers Pencil Colouring Alcohol Markers Altenew Markers Zig Brush Markers Easy Backgrounds Stamped Backgrounds Small Stamp Ideas Simple Cards Complex Cards Cardmaking For Beginners All
Painting With Acrylics Painting With Gouache Painting With Watercolours Drawing With Fineliner Minimal Supplies Cards Christmas & Holiday
Love & Valentine Mother's Day Father's Day Halloween Spring Cards Summer Cards Autumn/Fall Cards Winter Cards Cards For Children Cards For Women Cards For Men Thank You Cards Sympathy Cards Get Well Soon Cards Floral & Leav Cards Rainbow Colours Messy Watercolouring Modern Art Inspirations Geometric Patterns Landscape Painting Acrylics
Gouache Watercolours Watercolour Pencils Waterbased Markers Distress Inks Alcohol Markers Colouring Pencils No Stamps No Dies Cards
Cardmaking On A Budget Let’s Colour Quick Cards Fun Masculine Cards Background Ideas Distress Ink Combinations |
 RSS Feed
