
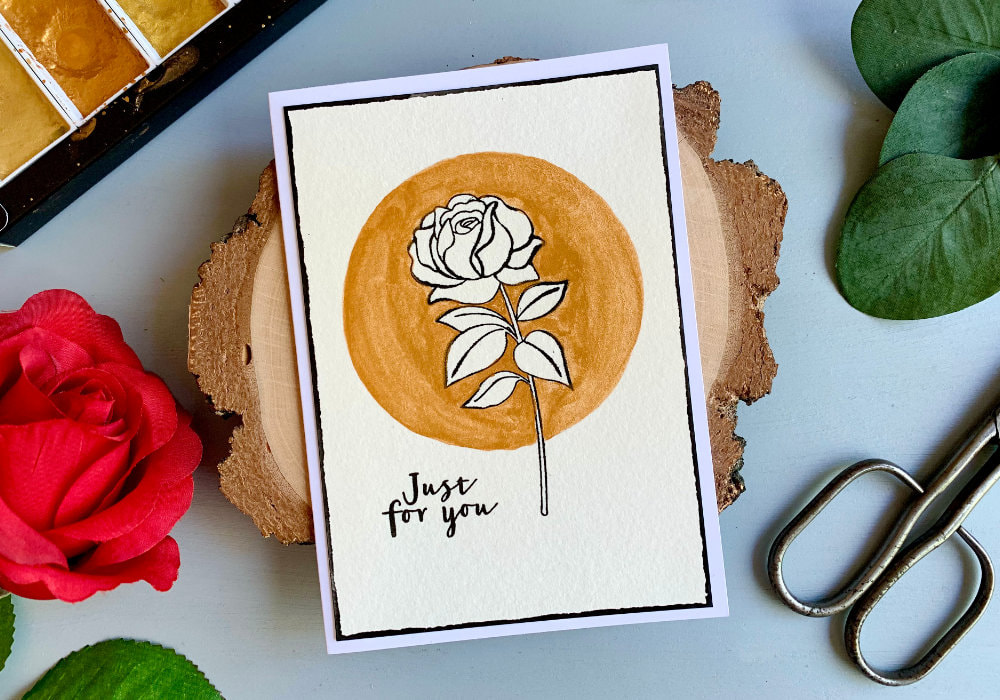
 I follow a few people on Instagram who paint or draw or both and sometime ago I saw a video where the person drew a flower and painted a golden background around it in a shape of circle, while leaving the flower unpainted just black and white. It looked really good and I thought I could do the same, but instead of drawing the flower, I can just use stamps. And that's what I did and I love the result. I think this is a perfect idea if you are a beginner cardmaker and do not have many supplies yet. All you need to do to make this card is to get a stamp set with a flower. You can buy something new or like me just search through your stash and find something that would fit.  I used my stamping tool for the stamping, which is always useful as you can re-stamp, but of course you can use an acrylic block. Should you have imperfect stamping with gaps, what you could do is use a black fine-liner and correct it that way. Since I'm using watercolours for the background, I used a waterproof black ink, more specifically the Versafine ink in Onyx black. After I stamped the flower, I used a compass to draw a circle. If you do not have a compass, you can use a glass for example. I also slightly erased the pencil lines, so they are only somewhat visible.  Next I painted the circle I used the golden watercolour set from Kuretake, more specifically the red gold and I painted the circle. First I painted directly around the flower and then I filled the circle. This way I find it easier not to have streaks. During the painting process I managed to cover some of the black lines and here is when the stamping tool was very useful. I still had the stamp inside and was able to re-stamp. However if I had removed the stamp, I would use a black fine-liner or just leave it as it is. It wasn't that bad. I let it dry and then I painted the corners of the panel using a black paint. This is something I like to do, just to create a separation between the panel and the card base. You can skip it if you want.  After the black paint was completely dry I stamped the greeting. I went with a neutral sentiment that says Just for you, making this card perfect for many occasions, from Birthday to Mother's day or simply saying Hello. Lastly I adhered the panel on top of a white card base using a liquid glue and the card is finished. Quick and simple to make and I think it looks really pretty and elegant. You can see a quick video of me making this card on my YouTube channel or Instagram and make sure you subscribe/follow. WATCH A QUICK VIDEOWatch the video below or directly on my YouTube channel or Instagram. YOU MIGHT ALSO LIKEPIN MEDid you like the card? I would love, if you pinned it to your board on Pinterest! 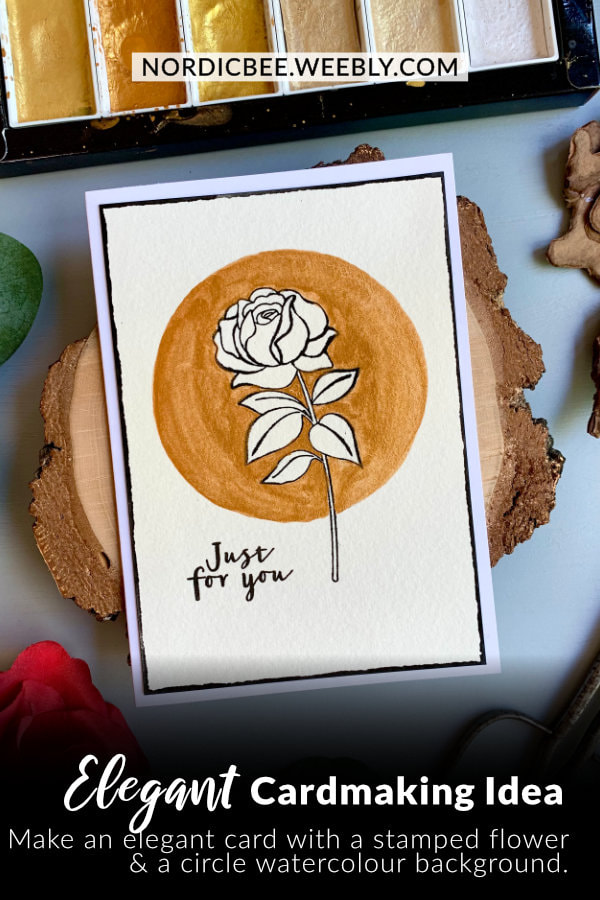
0 Comments
Leave a Reply. |
FOLLOW ME
SEE MORE


CATEGORIES
All
Stamping Die Cutting Using Stencil Heat Embossing Embossing or Texture Paste Distress Inks Nuvo Products Stamping & Colouring Stamping With Solid Stamps Watercolouring Watercolour Pencils Waterbased Markers Pencil Colouring Alcohol Markers Altenew Markers Zig Brush Markers Easy Backgrounds Stamped Backgrounds Small Stamp Ideas Simple Cards Complex Cards Cardmaking For Beginners All
Painting With Acrylics Painting With Gouache Painting With Watercolours Drawing With Fineliner Minimal Supplies Cards Christmas & Holiday
Love & Valentine Mother's Day Father's Day Halloween Spring Cards Summer Cards Autumn/Fall Cards Winter Cards Cards For Children Cards For Women Cards For Men Thank You Cards Sympathy Cards Get Well Soon Cards Floral & Leav Cards Rainbow Colours Messy Watercolouring Modern Art Inspirations Geometric Patterns Landscape Painting Acrylics
Gouache Watercolours Watercolour Pencils Waterbased Markers Distress Inks Alcohol Markers Colouring Pencils No Stamps No Dies Cards
Cardmaking On A Budget Let’s Colour Quick Cards Fun Masculine Cards Background Ideas Distress Ink Combinations |

 RSS Feed
