
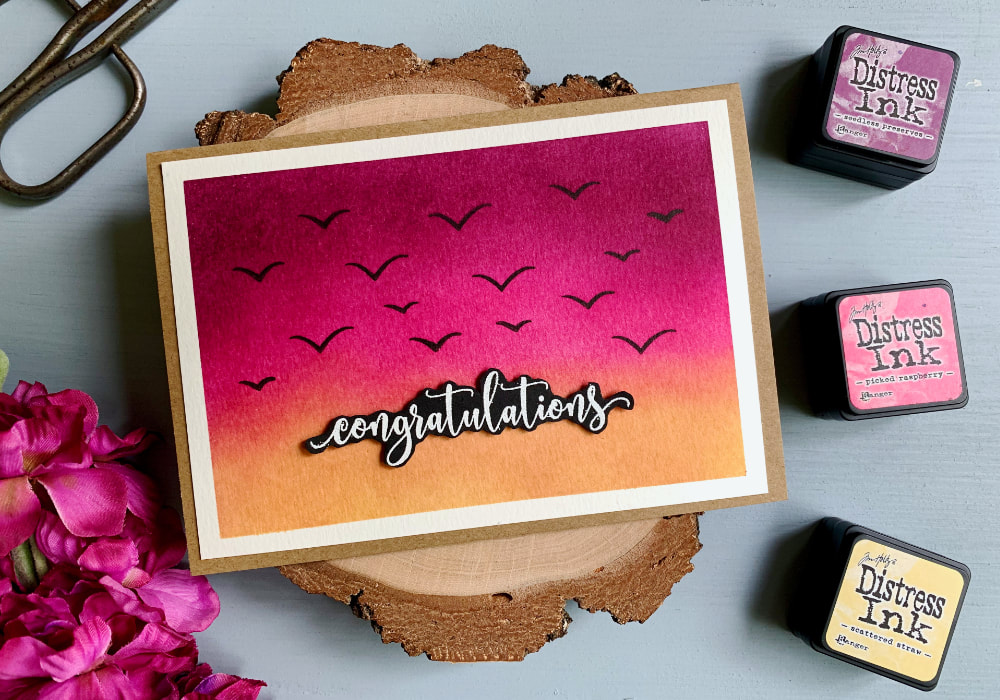
 I have a new addition to my Distress Ink Blending Combination series for you today. I created a sky at a sunset and then I stamped a few silhouettes of birds. I used Distress inks for this background, you can use any other ink that blends well and if you do not have inks, you can use watercolours. The card stock I used for the blending is the Canson XL watercolour paper and I taped it to a board (a laminated card stock) using a washi tape. I really like to use this card stock as it's smooth and the ink blends very well. 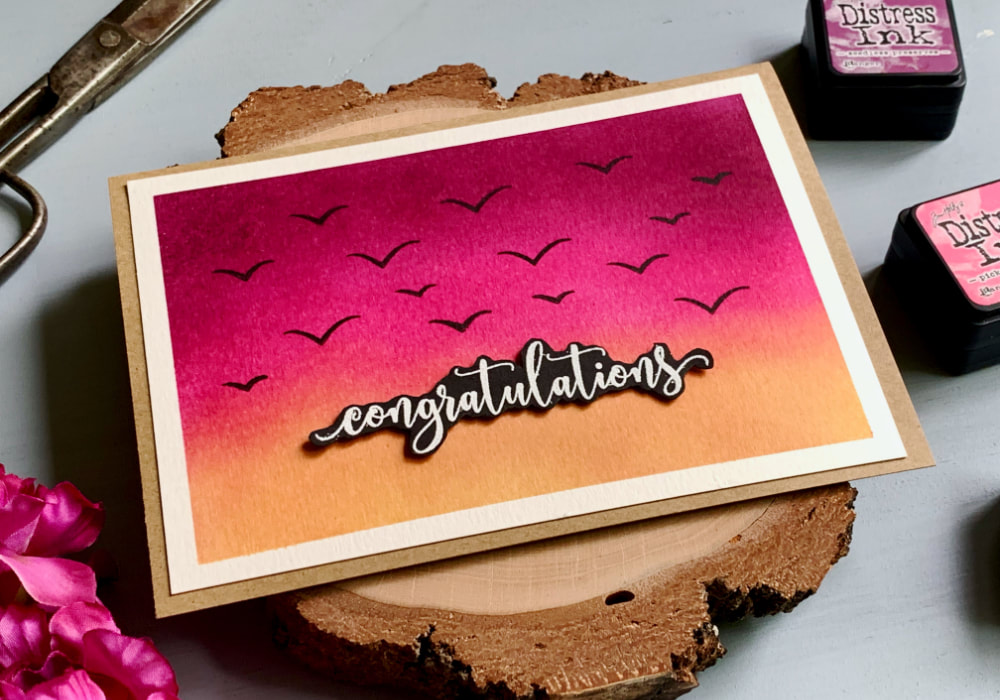 Next I started blending. The inks I used are: - Seedless Preserves - Picked Raspberry - mScattered Straw This is the exact order from top to bottom. I started with the Scattered Straw just because I only have one blending tool, which is a make up brush. This way, I only needed to clean the brush slightly before using the purple ink and because the pink and purple are similar, I only needed to clean the brush properly once, when applying the second layer. As I said here, I applied two layers of the ink to make the colours more vivid and during the second application I worked on blending the inks together. 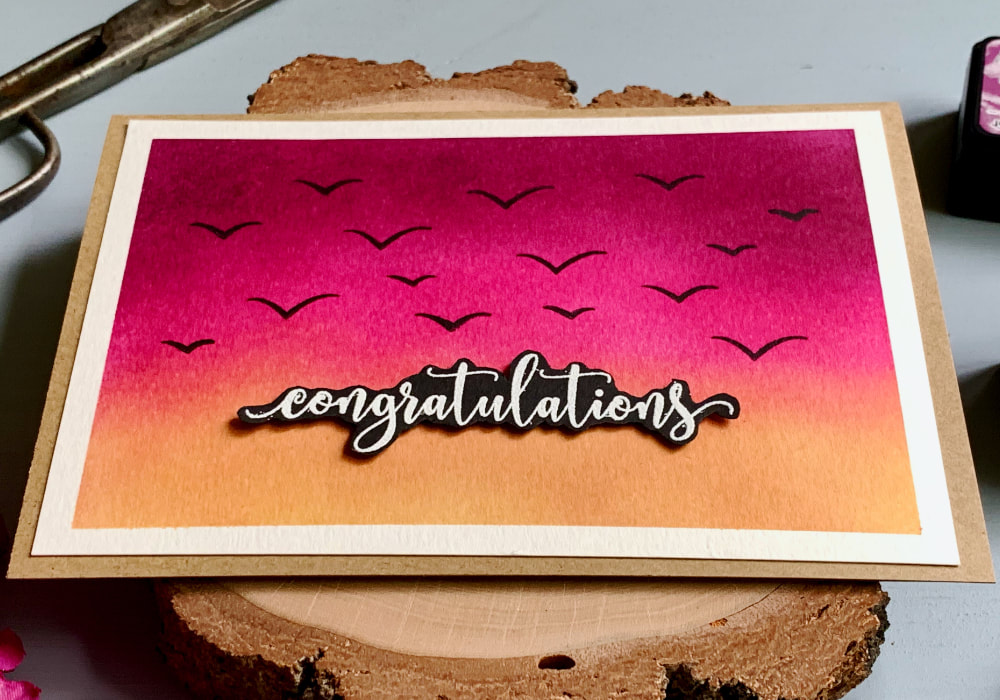 The main idea for this background was to add silhouettes of birds flying in the sky. First I wanted to paint them in with watercolours, but as Distress inks react with water I didn't want to risk it. I also thought about using a fine line, which is an option as well, but then I remembered that I have a stamp set with bird silhouettes and that's what I used to add the birds. Just simple stamping using a black ink. The greeting that I added says Congratulations and I heat embossed it on a black card stock using a white embossing powder. Since this is a handwritten greeting and I wanted to cut it into a banner, I decided to cut close to the letters, so it's not too bulky. I adhered it at the bottom of the card using a double-sided foam adhesive. 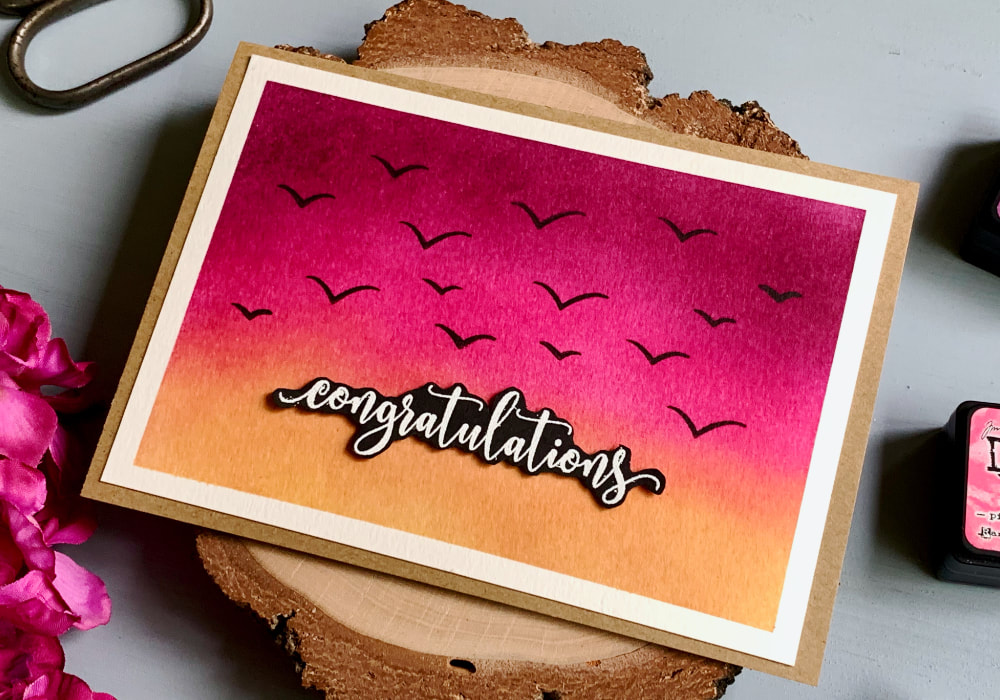 Lastly I attached the panel onto a card base using a simple double-sided tape. The card base I made myself using a craft card stock. You can see a quick video of me making this card on my YouTube channel or Instagram and make sure you subscribe/follow. QUICK VIDEOWatch the video below or directly on my YouTube channel or Instagram. YOU MIGHT ALSO LIKEPIN MEDid you like the card? I would love, if you pinned it to your board on Pinterest! 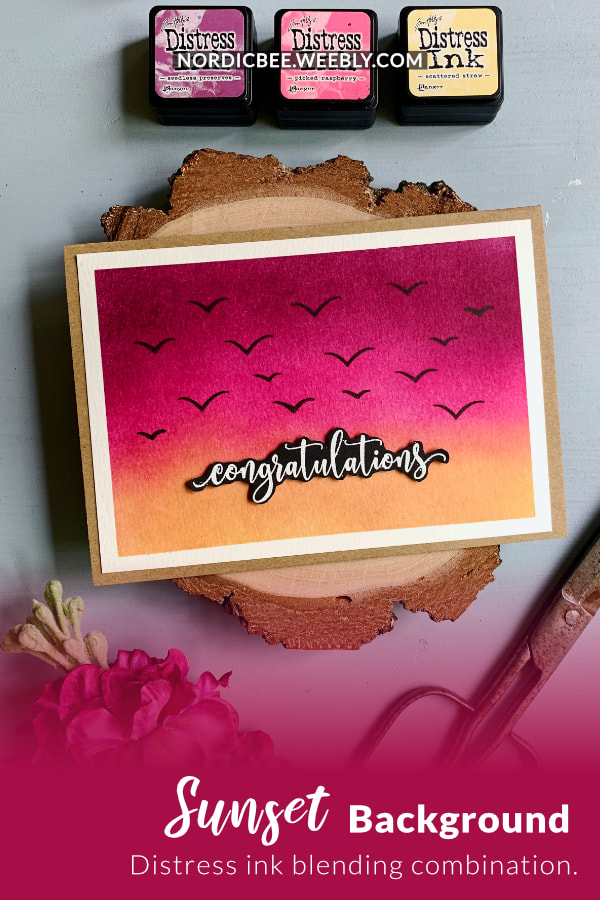
0 Comments
Leave a Reply. |
FOLLOW ME
SEE MORE


CATEGORIES
All
Stamping Die Cutting Using Stencil Heat Embossing Embossing or Texture Paste Distress Inks Nuvo Products Stamping & Colouring Stamping With Solid Stamps Watercolouring Watercolour Pencils Waterbased Markers Pencil Colouring Alcohol Markers Altenew Markers Zig Brush Markers Easy Backgrounds Stamped Backgrounds Small Stamp Ideas Simple Cards Complex Cards Cardmaking For Beginners All
Painting With Acrylics Painting With Gouache Painting With Watercolours Drawing With Fineliner Minimal Supplies Cards Christmas & Holiday
Love & Valentine Mother's Day Father's Day Halloween Spring Cards Summer Cards Autumn/Fall Cards Winter Cards Cards For Children Cards For Women Cards For Men Thank You Cards Sympathy Cards Get Well Soon Cards Floral & Leav Cards Rainbow Colours Messy Watercolouring Modern Art Inspirations Geometric Patterns Landscape Painting Acrylics
Gouache Watercolours Watercolour Pencils Waterbased Markers Distress Inks Alcohol Markers Colouring Pencils No Stamps No Dies Cards
Cardmaking On A Budget Let’s Colour Quick Cards Fun Masculine Cards Background Ideas Distress Ink Combinations |
 RSS Feed
