
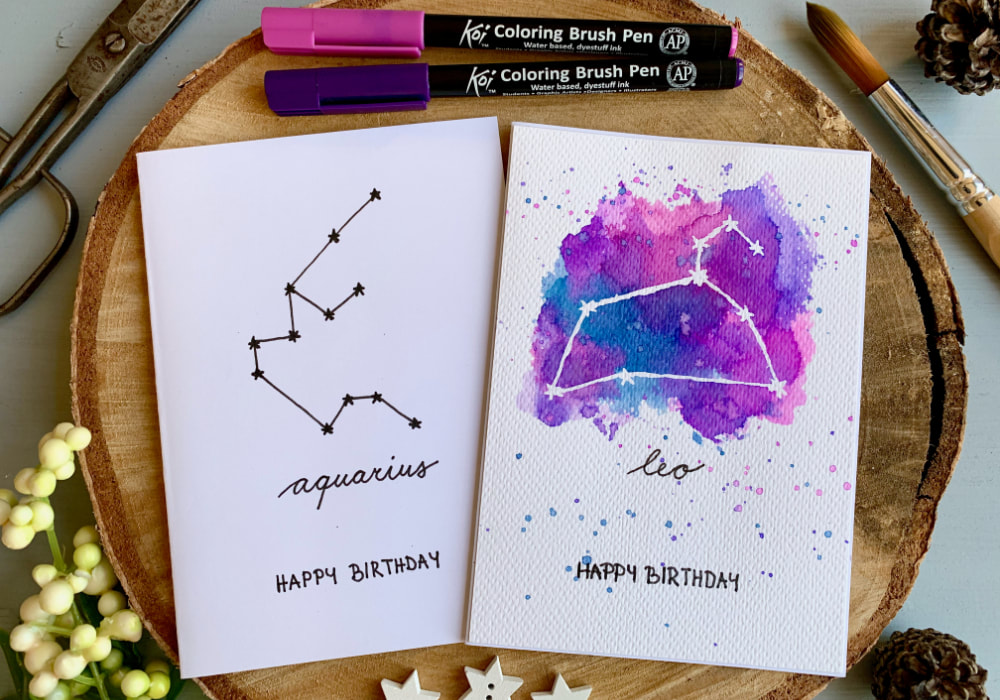
 Since it's start of the year, there is no need to make complicated cards. Although thinking about it, I hardly ever make complicated cards. Either way, today's cards are very simple, I decided to draw the Zodiac star signs. This is something I wanted to do for a while. I'm making two cards, both of them are very simple, perfect for beginners. BLACK AND WHITE CARD WITH A ZODIAC SIGNThe products I used are also very simple, you definitely do not need any stamps or dies. Especially the first card, this could not be more budget friendly card. All you need is a white blank card, a pencil and an eraser and a black fine liner. I used two fine liners, in two sizes. The smaller one is only to draw the stars, I found it much easier to draw them with the smaller sized pen. 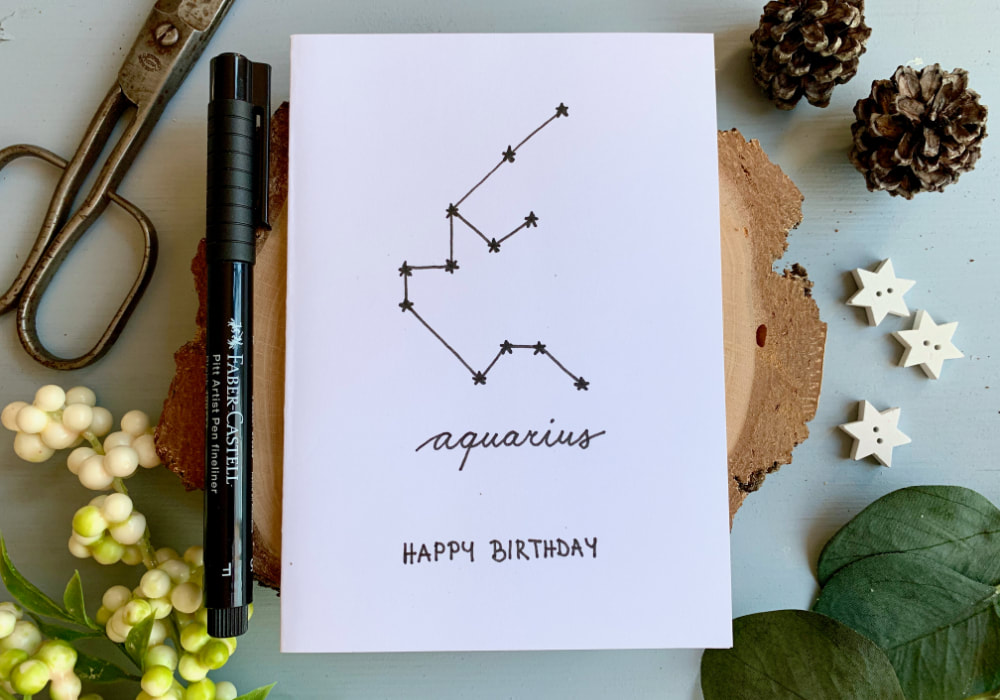 I followed an image that I found by googling, you can find that image here. The images were very simple and that's what I liked about them. However, there are plenty of other images that you can follow, I just googled the words "Zodiac stars signs". Also there are many versions of the star signs, I just hope I drew the correct ones. There are star signs that are very simple, only a few lines, like Aries and thee are star signs that are more complicated, like Sagittarius. I chose signs that are in between, neither too simple or too complex. On the first card I drew the star sign of Aquarius, which is coincidently my star sign. I drew directly onto the card base. I started by drawing it with the pencil, which you can skip, you can directly draw it with the fine liner right away. I find it easier to draw with the pencil first and if I make a mistake I can simply erase the lines and correct them. This helps especially with the placement as the most difficult part of this drawing was for me to get the image centred. 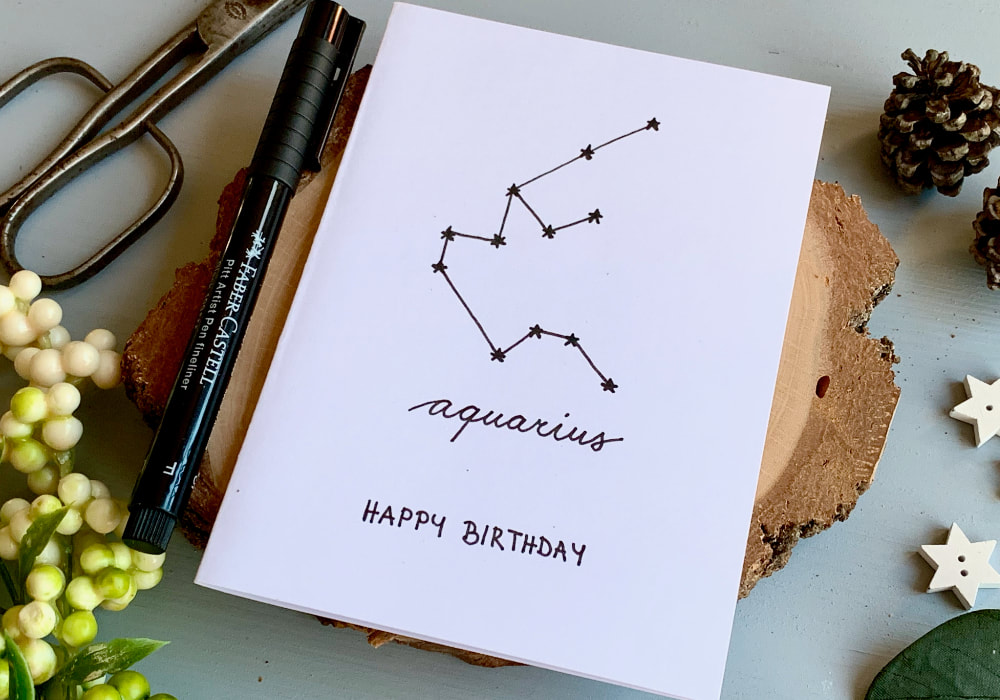 After I was happy with the look of the image, I went over the lines with the black fine liner and I also drew the stars. The stars were little tricky for me, somehow my hand wanted to do something different, especially at the bottom of the star. What helped me to draw them, is to start with lines. One short line at the top, then a horizontal line below it and two lines in the shape of an A at the bottom. Then shaped the lines into small triangles. Once I was done with the stars, I wrote the word "Aquarius" below the star sign and below that I wrote the greeting "Happy Birthday". As my handwriting can get hectic at times, both I wrote first with my pencil, I also used a ruler and draw a line to get the words straight and centred. And when I was happy with the look, I took the fine liner and wrote over it. I erased the pencil line and the card is finished. Very simple and minimal! 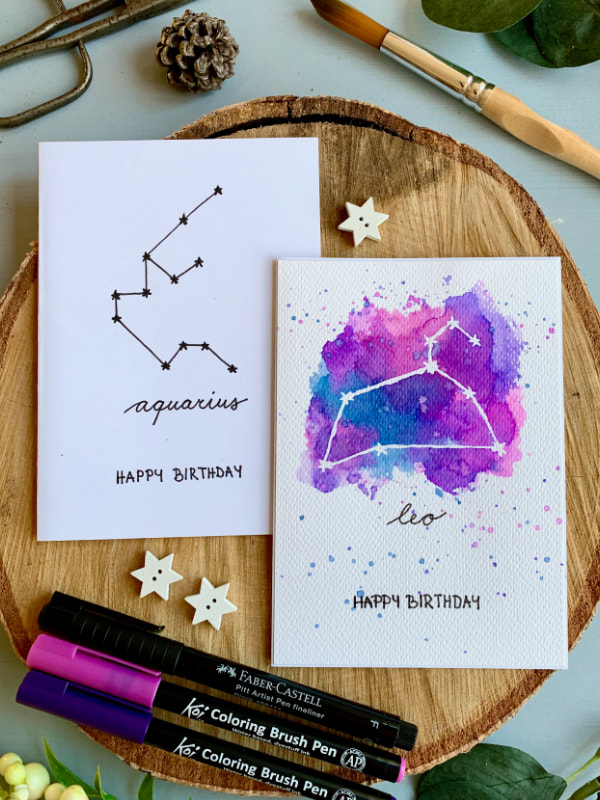 INK SMOOSHING WITH WATER-BASED MARKERS AND ZODIAC SIGN CARDThe next card requires a few more products, as I'm going to create a watercolour background. Except of the items I used on the first card, I used watercolour card stock, brushes and water-based markers. You can also use normal watercolours or Distress inks. To draw the star sign I was originally going to use a white gel pen, but I didn't get good results. You can use the fine liner, it looks good in black as well. I really wanted the star sign to be white and therefore I used a masking fluid. To create the background I wanted to do the ink smooshing technique and that's why, as my last item in the supply list is a small piece of acetate. You can also use a clear packaging. If you do not have any of those, you can simply use watercolours and do the wet on wet technique. On this card I drew the star sign of Leo. I started by drawing with the pencil and then using a brush I covered the drawn lines with the masking fluid. Then I also drew the stars and once I was done, I let it dry. 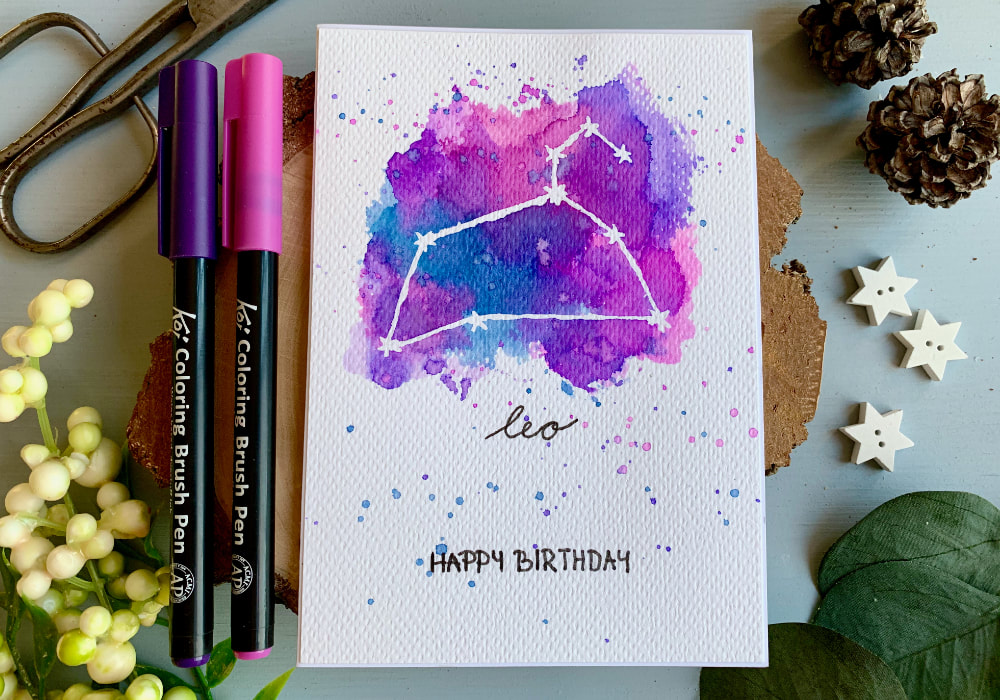 NOTE: So your brush doesn’t get ruined using the masking fluid, to protect it I put little bit of soap into the bristles, rinsed it with water, just a bit - so you still have the soap on the brush. And then I apply the masking fluid. I learned this from Kristina Werner, she even mentioned this tip in one of her recent videos. After the masking fluid was fully dry, I started painting the background. There are two ways you can do the ink (or in this case paint) smooshing technique. One technique is where you put your inks or paints onto a slick mat, add water and smoosh your card stock over it. Here you don’t have much control about what happens and where the inks go. I wanted the colour only to be over the star sing, therefore the technique I’m doing here is with an acetate, which gives more control where the paint is going. I started by scribbling the water-based markers onto the acetate, then I applied a little bit of water using a brush. I flipped the acetate over and smooshed it onto the watercolour paper, over the star sign. I used pink, purple and blue markers and I repeated this technique with each of them until I was happy with the look. I also used my brush to help the colour move around, not at the edges, those I wanted to be as they are, but in the middle. And I also used the brush to soak up the excess water. 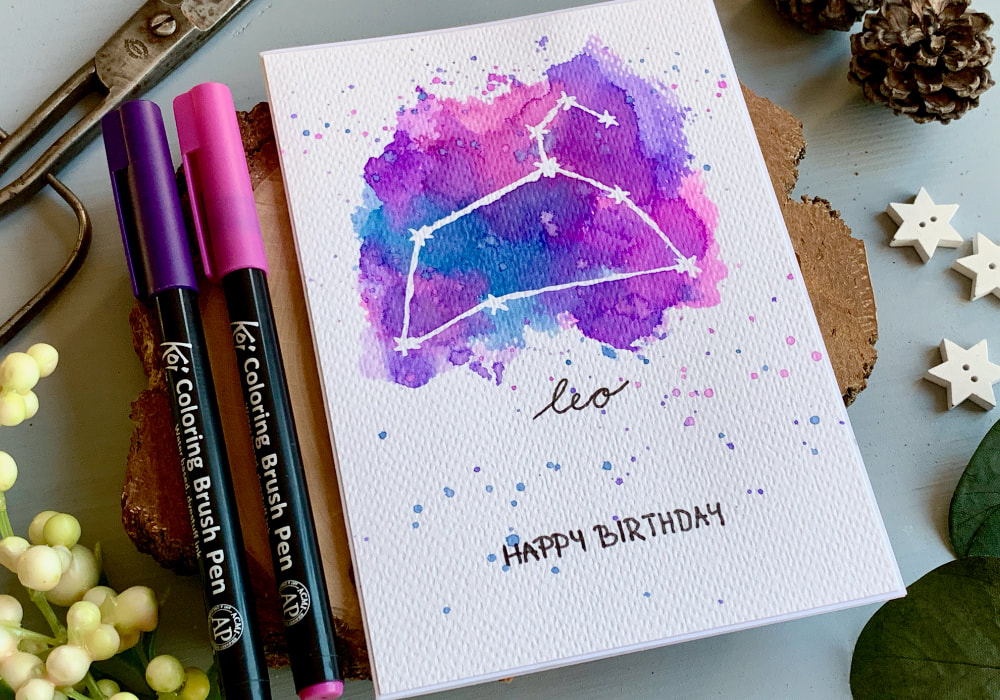 I wiped the ink with a kitchen towel before applying the next colour and I made sure the acetate is fully dry. This is not only because I was applying a new colour, but often after I squish the paint, there is some paint left on the acetate, especially around the edges. And sometimes, when I apply the next ink and there is left over paint, I get colour where I don’t want to. By drying the acetate fully, I avoid having unwanted scotches of colour. Before I put the markers away I thought it needed some splatter, but I think this every time I use watercolours. If you don't want to add splatter you can leave it out. I let the panel dry and then I wrote the name of the star sign "Leo" and the "Happy Birthday" greeting. I did the same as on the first card, first I wrote it with a pencil and then I went over it with the black fine liner. 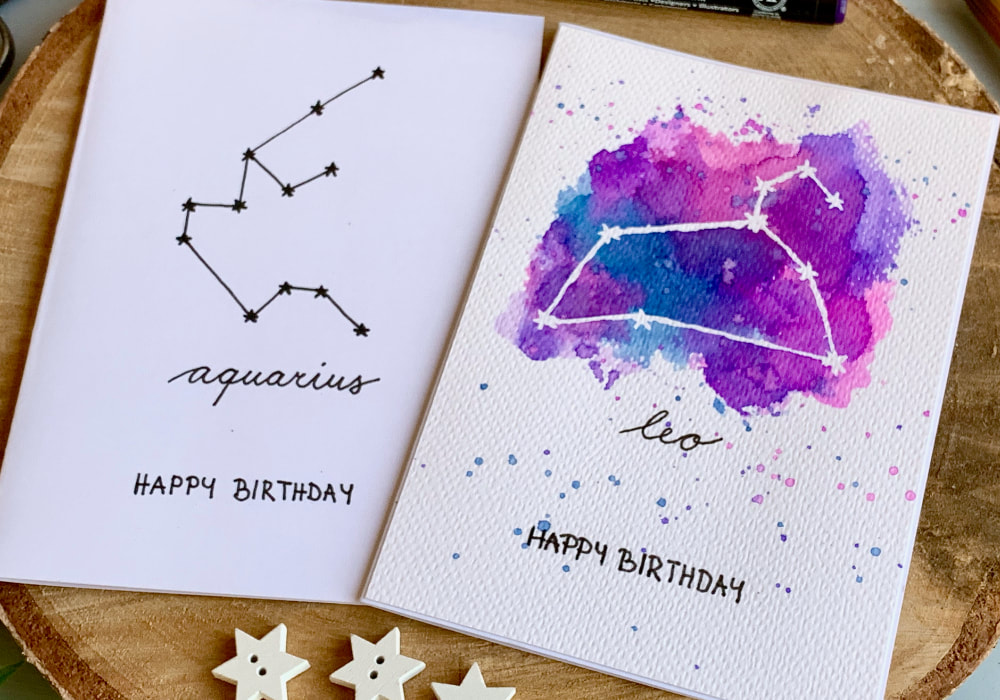 I erased the pencil lines and removed the masking fluid. I used my finger and rubbed it off. And lastly I adhered the panel on top of the card base. I hope you will try making these cards yourself. Make sure you check out my video on YouTube and give it a Like as well. The list of product is down below, where you can also find a few blog posts that I think you might enjoy. And if you have any questions, just drop me a line. VIDEO TUTORIALWatch the video below or on my YouTube Channel. PRODUCTS USEDColor Copy , White Paper, A4 300gsm/140lb (card base) AmazonDE | AmazonUK Papermania, A6 Card Bases + Envelopes, White AmazonDE | AmazonUK Flying Tiger, Watercolour Card Stock 300 gsm FlyingTiger Faber-Castell PITT Artist Pen 0.5mm Fineliner - Black AmazonDE | AmazonUK Faber Castell, HB Graphite Pencil AmazonDE | AmazonUK Staedtler, Eraser AmazonDE | AmazonUK Faber-Castell Waterproof 0.3 Fine Liner AmazonDE | AmazonUK Sakura, Koi Water Based Brush Markers IdeeDE | GreatartUK Daler Rowney Watercolour Brushes 4, 6, 10 AmazonDE | AmazonUK Daler Rowney Small Watercolour Brushes 1, 3, 10/0, 3/0 AmazonDE | AmazonUK Schmincke, Masking Fluid AmazonDE | AmazonUK Sellotape Double Sided Tape AmazonDE | AmazonUK Fiscars, Guillotine A5 AmazonDE | AmazonUK Tonic Studios, Guillotine A4 AmazonDE | AmazonUK Crafting Mat, Black AmazonDE | AmazonUK Disclaimer: Here you can find the products I used to make this card. Please note that the products are just a guide, you don't need the exact products or brands. For most of the products I include links to the shops where you can purchase them if available. As I live in Europe, I provide links to UK and German stores. These are not affiliate links and every product I purchased myself. YOU MIGHT ALSO LIKEPIN MEDid you like the card? I would love, if you pinned it to your board on Pinterest! 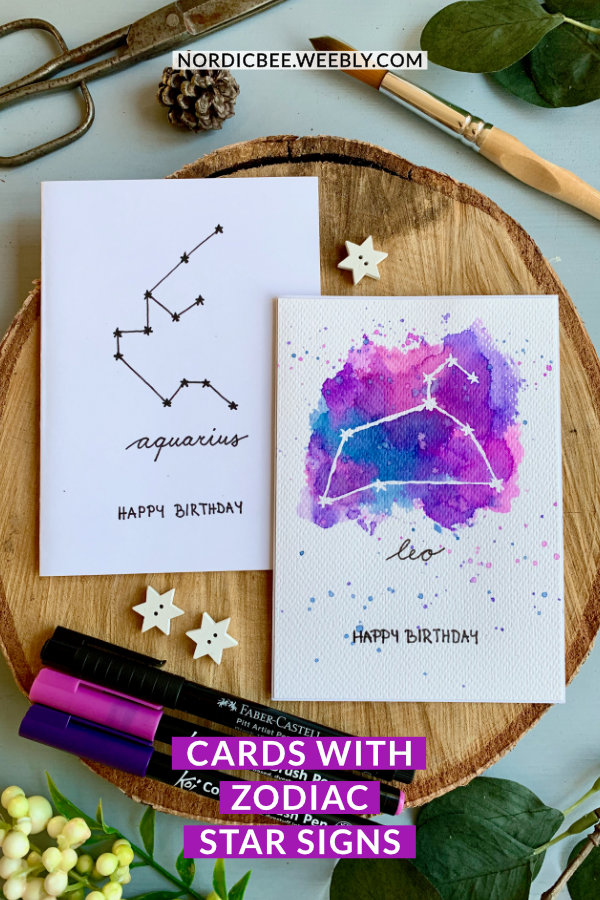
0 Comments
Leave a Reply. |
FOLLOW ME
SEE MORE


CATEGORIES
All
Stamping Die Cutting Using Stencil Heat Embossing Embossing or Texture Paste Distress Inks Nuvo Products Stamping & Colouring Stamping With Solid Stamps Watercolouring Watercolour Pencils Waterbased Markers Pencil Colouring Alcohol Markers Altenew Markers Zig Brush Markers Easy Backgrounds Stamped Backgrounds Small Stamp Ideas Simple Cards Complex Cards Cardmaking For Beginners All
Painting With Acrylics Painting With Gouache Painting With Watercolours Drawing With Fineliner Minimal Supplies Cards Christmas & Holiday
Love & Valentine Mother's Day Father's Day Halloween Spring Cards Summer Cards Autumn/Fall Cards Winter Cards Cards For Children Cards For Women Cards For Men Thank You Cards Sympathy Cards Get Well Soon Cards Floral & Leav Cards Rainbow Colours Messy Watercolouring Modern Art Inspirations Geometric Patterns Landscape Painting Acrylics
Gouache Watercolours Watercolour Pencils Waterbased Markers Distress Inks Alcohol Markers Colouring Pencils No Stamps No Dies Cards
Cardmaking On A Budget Let’s Colour Quick Cards Fun Masculine Cards Background Ideas Distress Ink Combinations |
 RSS Feed
