
While the stamps I use (not just from my masculine cards, but any cards), are very important for me, otherwise I would not buy them. They are the main part of the card and they are the starting point of the card. However because the stamp set I used for the cards in this blog post is so simple, I did not do too much of the colouring. I decided that the main topic of the cards for this post, is the background. Not just one but six different backgrounds that you can re-create using different stamps and colours. Especially since Father’s day is coming up, I thought you might need few more ideas.
I started by stamping all the images I needed, including the sentiments. I stamped at least one of the big bears and multiple of the small bears. To stamp the bears I used the Versafine ink in Onyx black and I stamped them onto the Bristol card stock from Canson. The sentiments I heat embossed on a black card stock, using a white embossing powder. 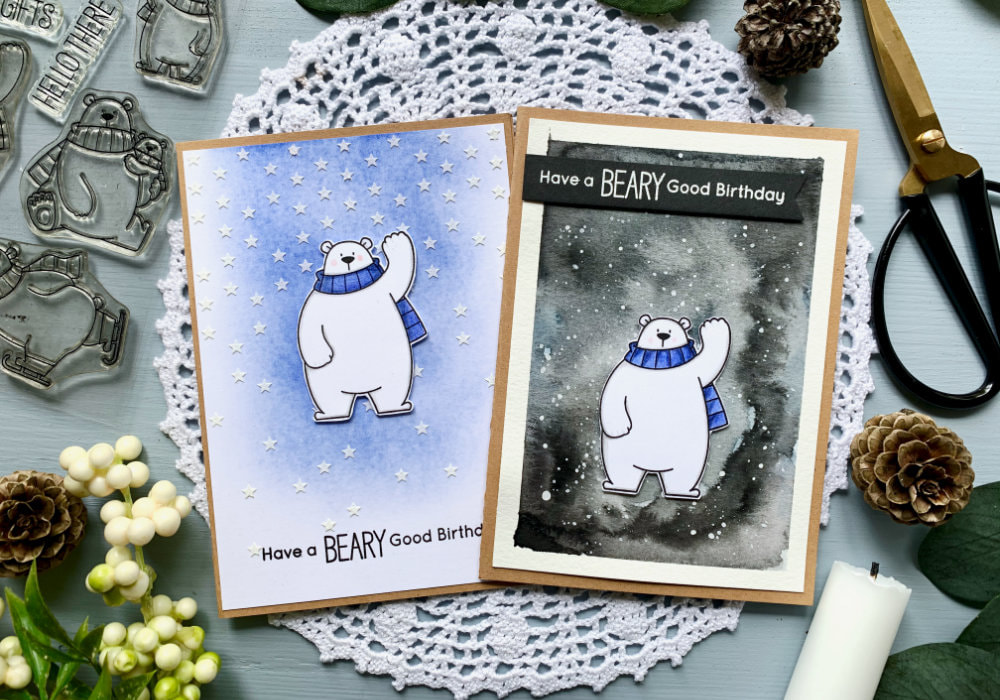
Then I coloured all the images with colouring pencils from Faber-Castell. As I said I didn’t do anything complicated, just simple colouring as the bears are white. And then I used my scissors to cut out all the bears and the sentiments I made into banners.
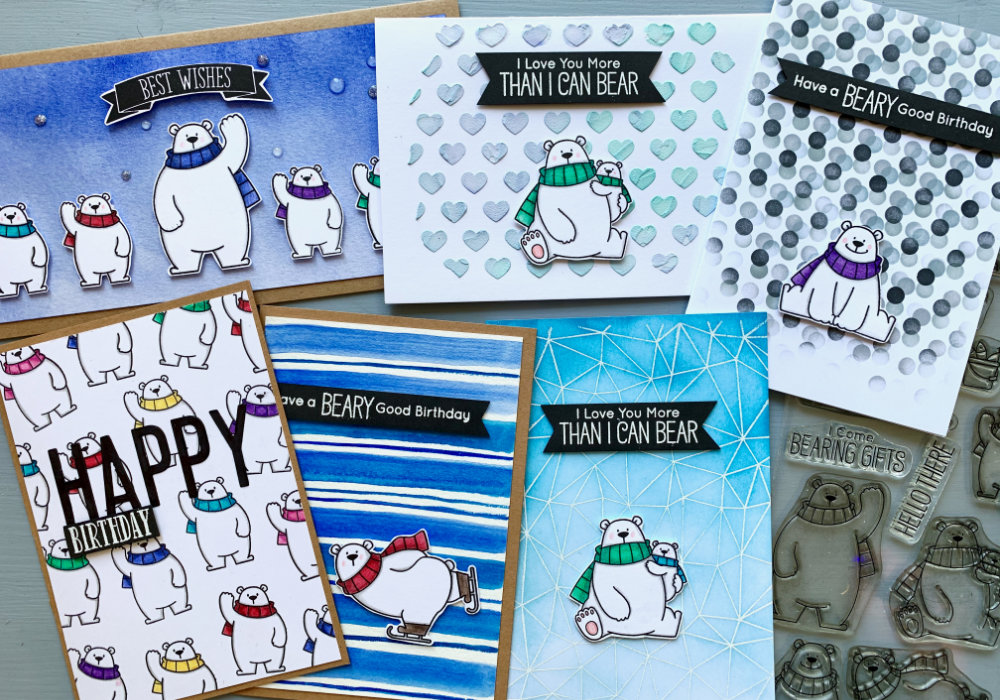
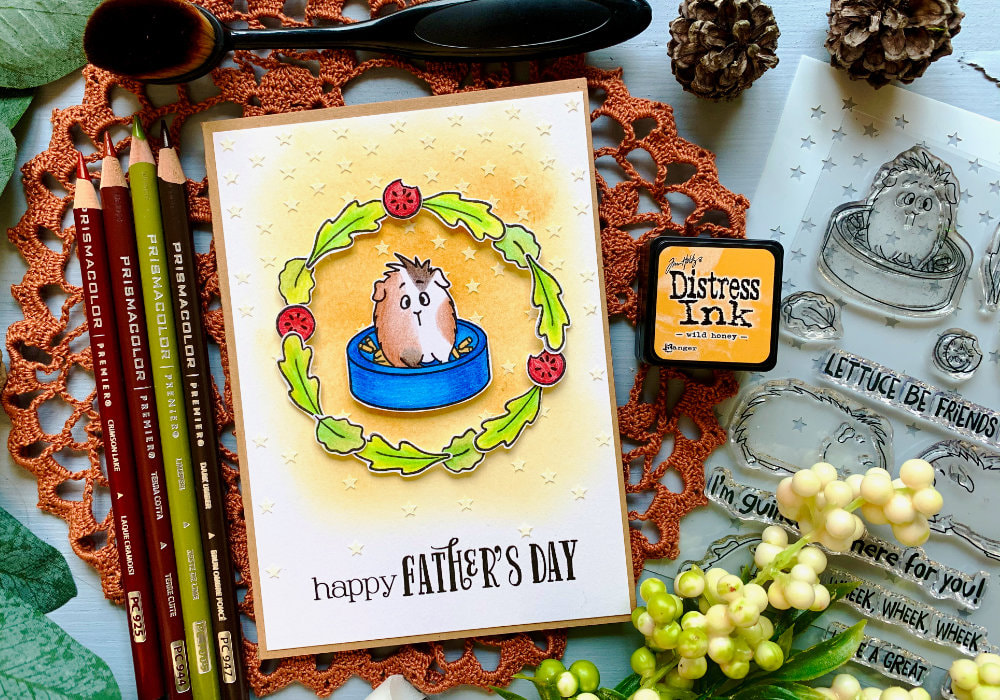
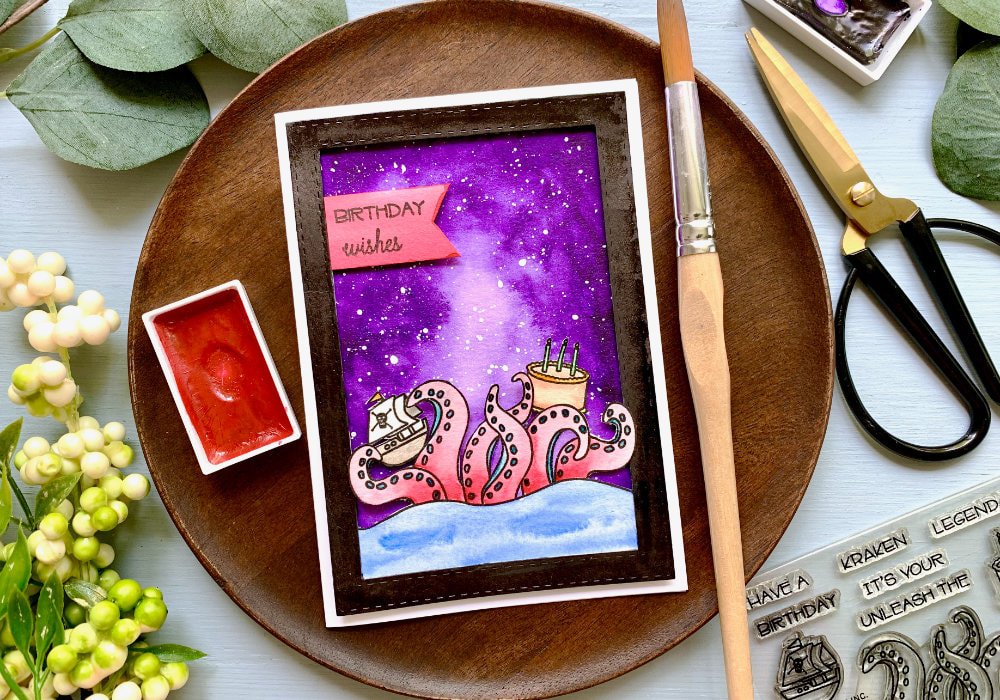
Before we get into creating all the backgrounds, I also took the opportunity, to recreate my first two cards in these series. The one with the guinea pig and the salad wreath and the one with the octopus and the galaxy background, just to show you that you don’t need to have the exact stamp set I use. Neither of the cards I re-created exactly, the stamp set with the bears doesn’t have any small stamps so I could not do the wreath and I didn’t add a frame to the second card. So you don’t need to be 100% exact, when getting inspiration from other crafters. BACKGROUND #1: Using stamps from the stamp set
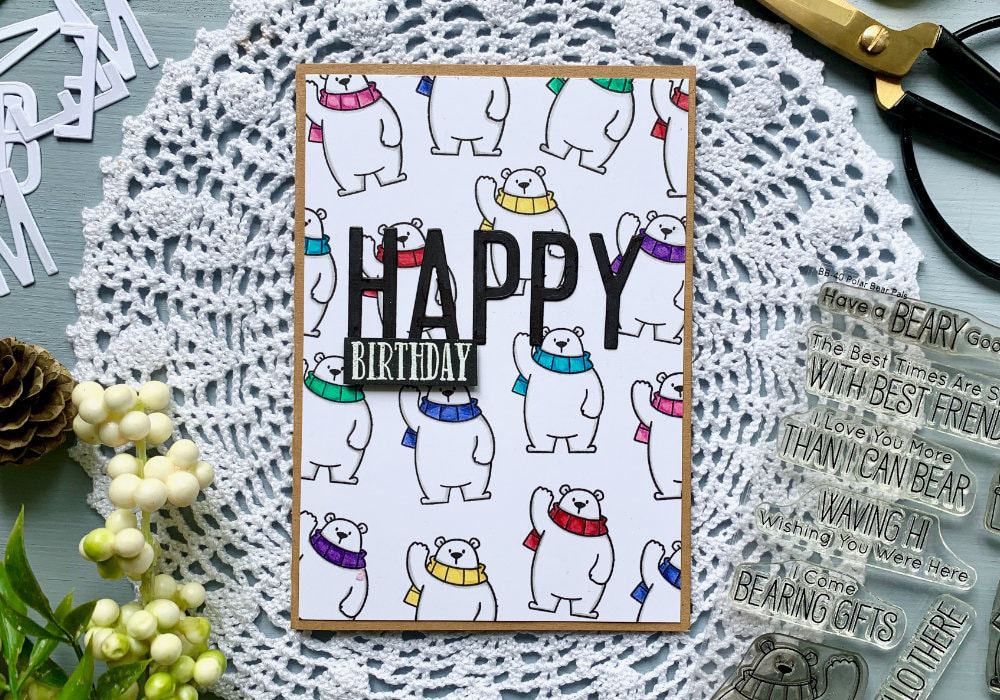
For the first background I used the stamp with the small bear and I stamped it a cross the panel to create a pattern. This is the easiest thing you can do with any stamp set you have. Even with the octopus stamp I used in my previous blog post, I could stamp it along the edges of the panel. And now thinking about it, I might do it. You can leave it black and white, or colour it. Here I decided to colour them the same way as the rest of the bears, which did take some time.
Since this was quite a bold and busy background, I thought the best thing would be to add a big die cut sentiment. I die cut the letters “Happy” using the Fine Alphabet die set from Altenew. I bought it few years ago and this was the first time I used it. And the word “Birthday” I stamped on a black card stock and heat embossed it with a white embossing powder. The letters I had already pre-die cut from a white card stock, but because you would hardly see it, if I left it white, I coloured them with a black alcohol marker. I adhered all the letters in the middle of the panel with the bears, using a liquid glue and the banner with the word “Birthday” I adhered below it, using a foam tape. If you have a die cutting machine, you could die cut multiple letters and stuck them up to create little bit of dimension. And if you don’t have any letter dies, you could try stamping a big bold sentiment. BACKGROUND #2: Using watercolours to create patterns
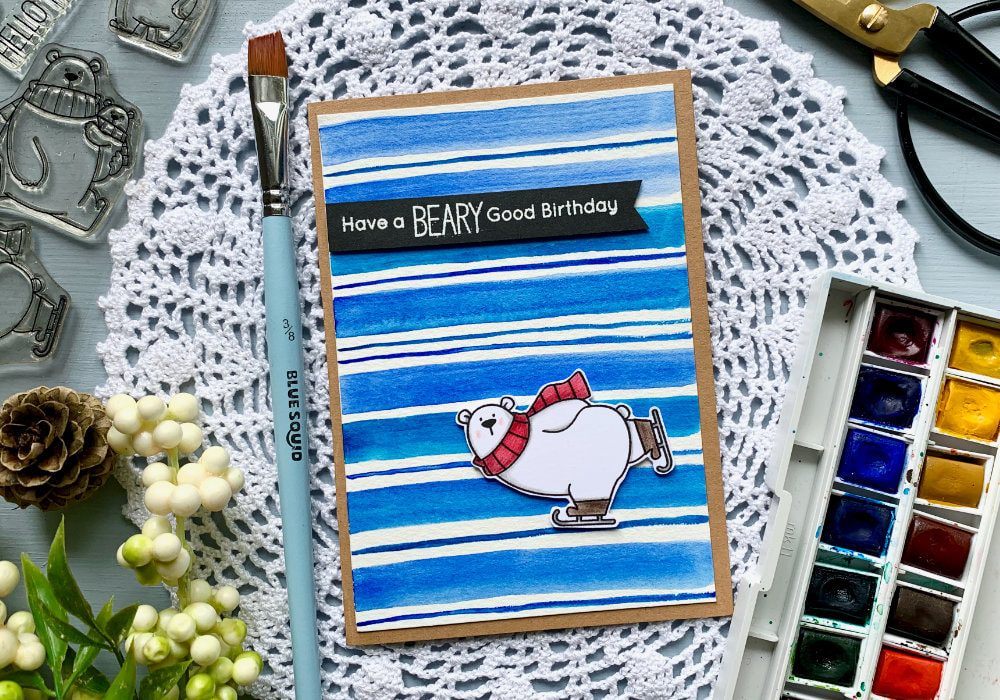
The next background is one if the quickest and easiest backgrounds you can make. Just take your watercolours and create a simple pattern. There are so many options, I created few of them for my Christmas cards, but here I painted simple stripy background. I used two different brushes to create thick and thin lines and I was switching between them as I moved from the top to the bottom.
After the piece was dry, I adhered one of the bears and a banner with the sentiment on top of the panel using a double sided foam tape. I think this particular bear is the most fun out of all in the stamp set, just skating across the card. BACKGROUND #3: Using background stamps
Another great and easy idea to create backgrounds, is to use background stamps. You can keep it simple and stamp the background using a black ink. Or you can also heat emboss it with embossing powder in white or in different colours, or add colour using inks or watercolours.
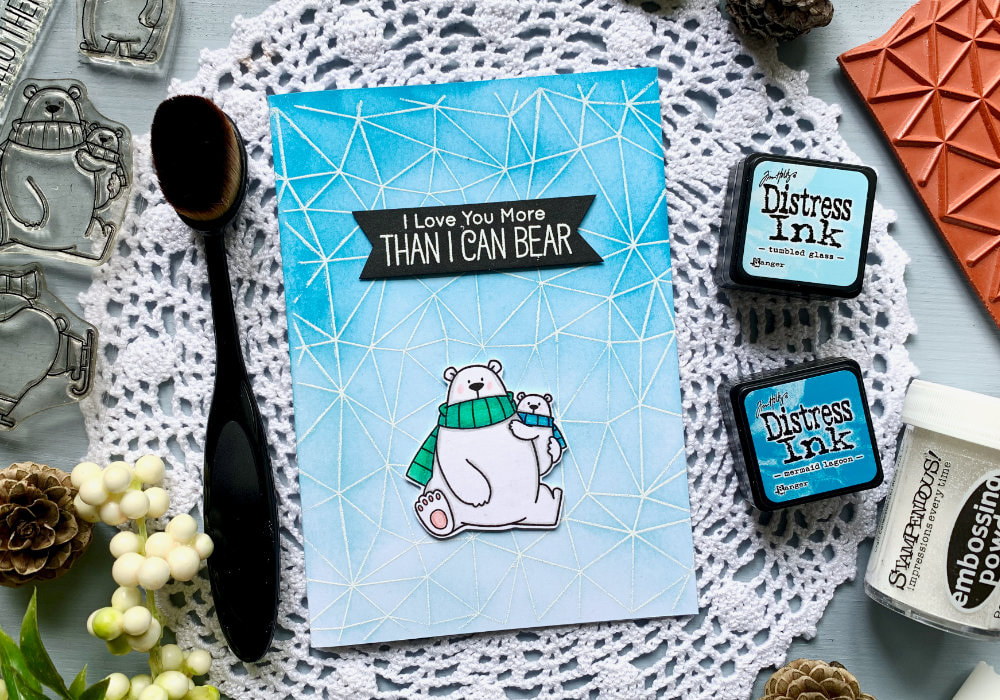
I started with stamping the background stamp directly onto the card base using the Versamark ink. I also used the Tim Holtz stamping tool, but it didn’t make it much easier. I had troubles getting an impression in the middle of the card, I had to re-stamp so many times, but in the end I managed to get a good impression. Then I sprinkled a white embossing powder all over it and using my heat tool, I melted the powder. Next I took out two Distress ink colours, Mermaid Lagoon and Tumbled Glass and I applied them across the card stock. After the piece was dry, I adhered one of the bears and the sentiment using a foam tape. BACKGROUND #4: Using stencils & Distress inks
The next option to create quick backgrounds, is to use stencils. The great thing about stencils is that they are inexpensive and you can create very interesting backgrounds. There are few options you have, when using stencils and the first one is to use Distress inks, or similar to add colour.
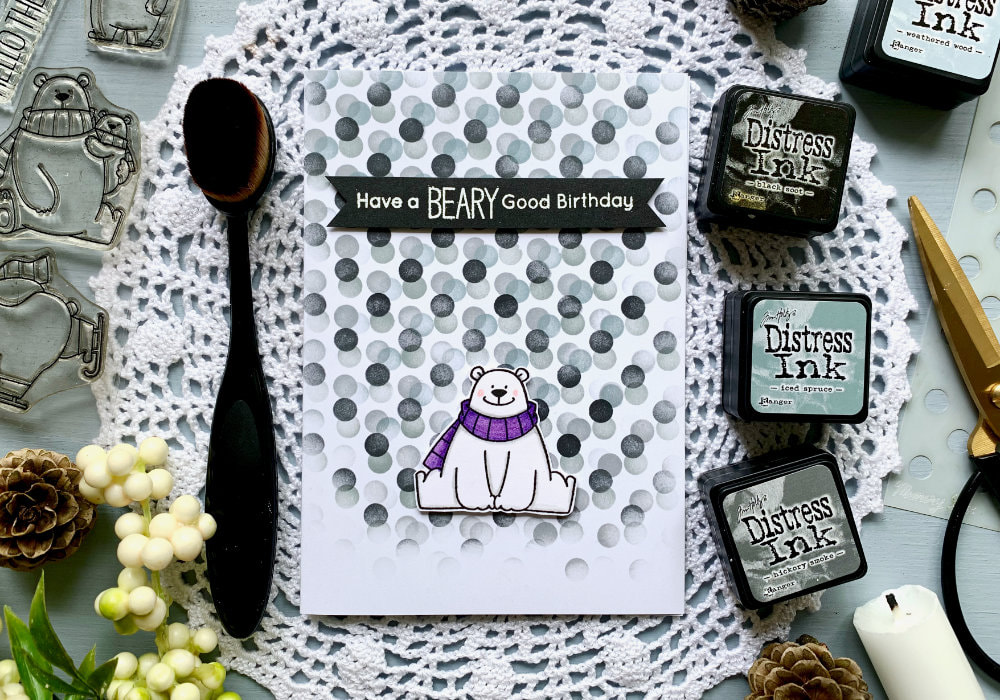
I’m using a stencil with a dotted background and Distress inks in various shades of grey, more specifically Weathered Wood, Iced Spruce, Hickory Smoke and Black Soot. I applied the inks across the stencil, directly onto the card base. Once I was done with one colour, I moved the stencil and applied the next colour and I repeated this process for all four shades. This created a really a cool effect. And again, after I was done I adhered one of the bears and the sentiment using a double sided foam tape. BACKGROUND #5: Using stencils and embossing paste
Another option that you can do, when using stencils is to use an embossing paste or texture paste. I already used the embossing paste on the card with the guinea pig. On that card I used the paste and nothing else, which you can do too, but since I already done it, this time I added colour to it, using Distress inks.
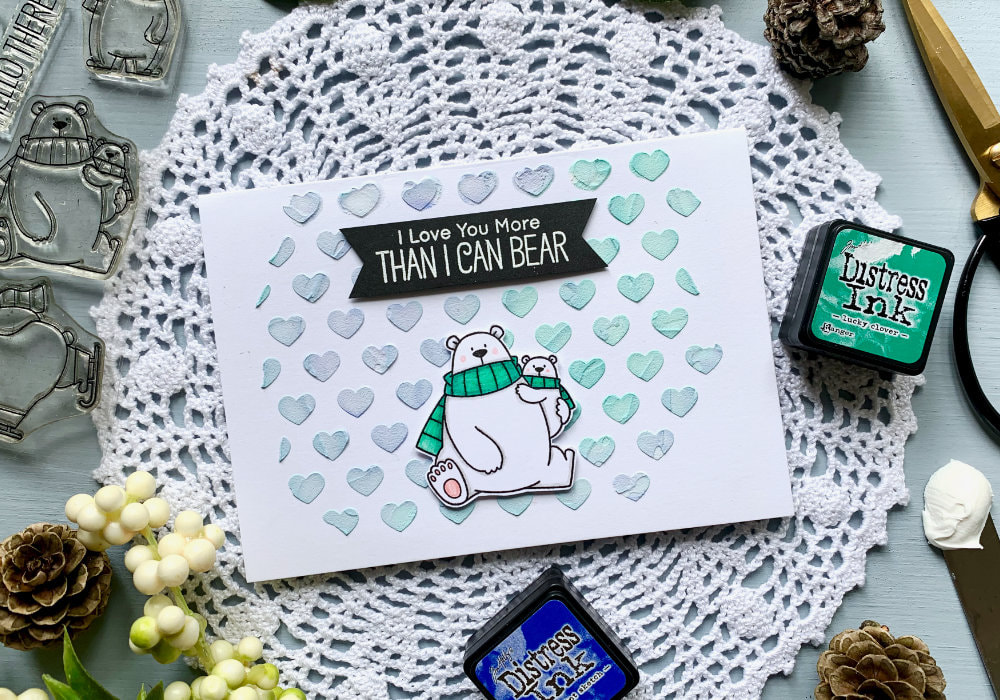
I squeezed the inks few times onto a laminated card stock and using my palette knife, I mixed them with little bit of the the embossing paste, you don’t need much. The inks I used are the Lucky Clover and Blueprint Sketch. Then I scooped up the paste with the palette knife and applied it across a stencil. For this card I’m using a stencil with hearts, I used it few times before. The thing is, even though stencils are quite cheep, I don’t have that many, because when I go to buy crafty supplies, the stencils I want, are always sold out. Since the paste is white, the colours were very light. If you would like to have more vibrant colours, you would need to add more ink, or if you have, re-inkers would be the best. Another option would be to use a transparent embossing paste. I have never used that kind of a paste, therefore I cannot confirm if that works. I didn’t want the application of the paste to be super smooth and even, that’s why the hearts on the left and right are not fully filled. I let the piece dry, which took about an hour. And once it was dry I adhered the bear and the sentiment using a double sided foam tape. BACKGROUND #6: Using Distress inks
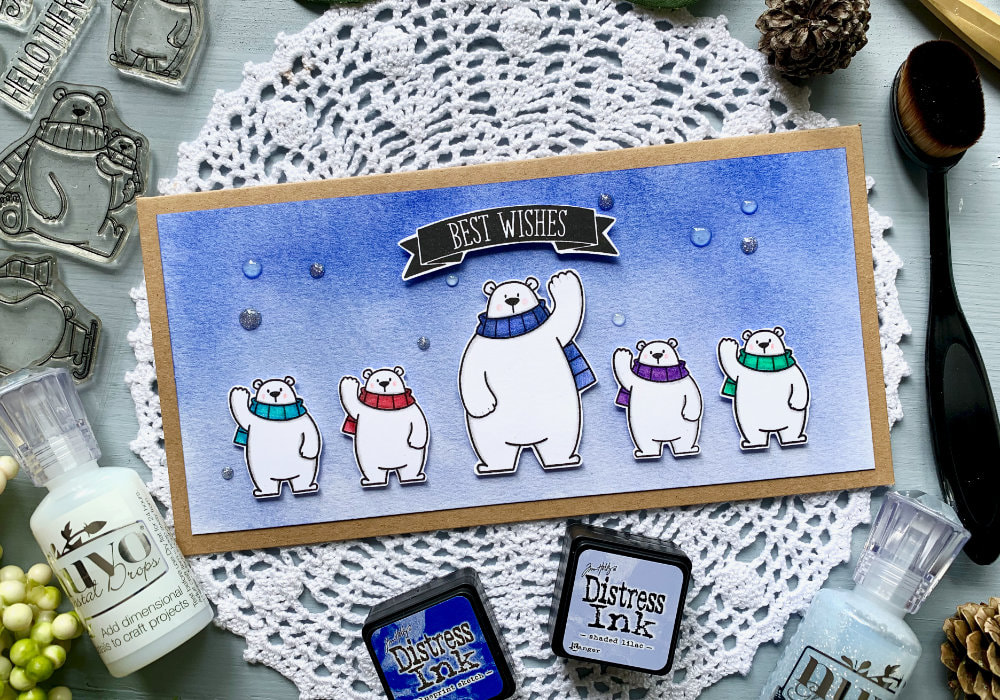
I know I used Distress inks few times already, but I used them in combination with other products. To keep it super simple, you can only use Distress inks and use just one colour or multiple. Here I used two colours, Blueprint Sketch at the top and at the bottom I used the Shaded Lilac and the card stock is the Canson XL, watercolour. I like to use it with Distress inks, as it’s smooth and the application is quite easy.
This is actually a bonus card, after I was done making the five card, I stumbled across a card, when I was surfing through various crafting blogs. For this card they used stamped cacti and adhered them next to each other on a long (slim line) card. And I thought I could make something similar using the waving bears, which come in two sizes. After I finished the background I adhered the big bear in the centre using a double sided foam tape. Then I adhered the small bears, two on each side and to help me to keep them on the same level I used a ruler. And lastly I adhered the sentiment, right above the big bear. For this card I used a sentiment from a different stamp set that says “Best Wishes”. I needed a neutral sentiment, as this card is going to my dad for his Name day. I’m from Slovakia and we celebrate Name days and I don’t have any stamp set that is exactly for this occasion. 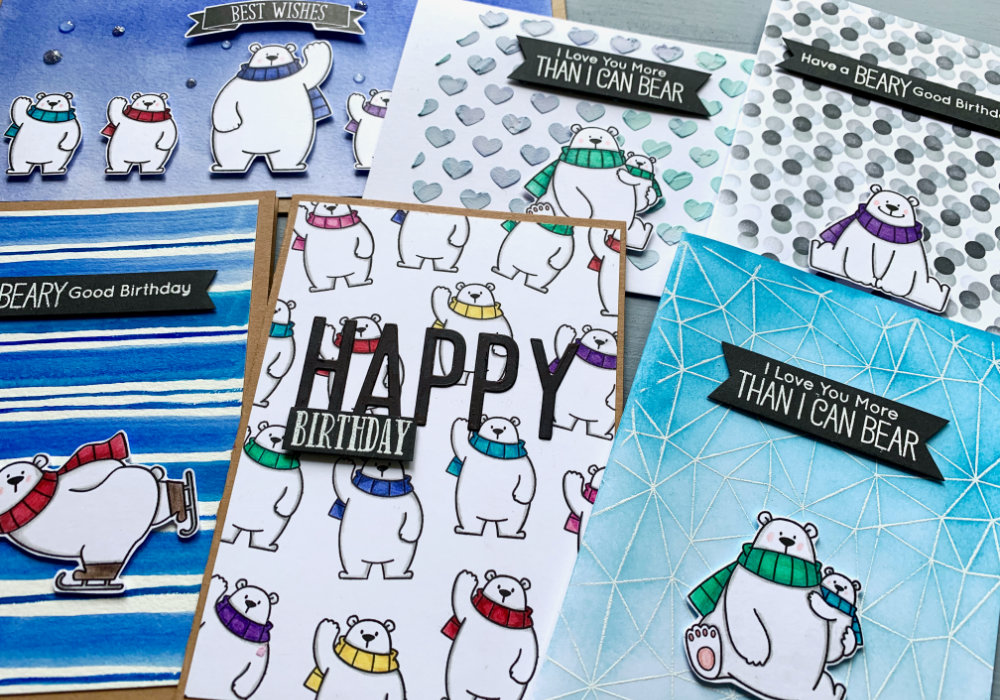
I thought this card needed some embellishments, so I squeezed few of the Nuvo drops in clear and silver. At first I squeezed out group of threes on each side, but then I added few additional drops here and there. When using Nuvo drops, I find it helpful to first squeeze few drops onto a scrap of paper, not only to get it flowing, but also for later to try if it’s dry. This way I don’t need to be touching those on the card.
Lastly all panels with the backgrounds that I did not create directly onto a card base, I attached onto card bases using a double sided tape. VIDEO TUTORIAL
Watch the video below or on my YouTube Channel.
PRODUCTS USED
Disclaimer: I’m currently not using any affiliate links. These links are just to help you find the products. The list includes alternatives to what I was using and while I haven't used some of them, I only recommend brands I trust.
MFT, Polar Bear Pals | MyFavouriteThings
Faber-Castell, Polychromos Colour Pencils | AmazonDE | AmazonUK Tsukineko, Versafine Ink pad, Onyx Black | AmazonDE | AmazonUK Tsukineko Versamark Watermark Ink Pad | AmazonDE | AmazonUK Stampendous, Embossing Powder, White | AmazonDE | AmazonUK EK Susccess, Anti-Static Powder Tool | AmazonDE | AmazonUK Altenew, Fine Alphabet Die Set | StempelmühleDE | SevenHillsCraftsUK Altenew, Alcohol Markers - Green Fields | MennysShopDE | SevenHillsCraftsUK Nuvo Medium Glue Pen | AmazonDE | AmazonUK Winsor & Newton, Cotman Watercolor Palette | AmazonDE | AmazonUK Blue Squid Brush Set | AmazonDE | AmazonUK Altenew, Embossing Paste | StempeloaseDE | SevenHillsCrafts MFT, Abstract Background Stamp Memory Box, Dots Stencil MFT, Staggered Hearts Stencil Tim Holtz Distress Mini Ink, Kit 14 | danipeussDE | CraftStashUK (Hickory Smoke, Blueprint Sketch) Tim Holtz Distress Mini Ink, Kit 13 | danipeussDE | CraftStashUK (Mermaid Lagoon) Tim Holtz Distress Mini Ink, Kit 8 | danipeussDE | CraftStashUK (Tumbled Glass) Tim Holtz Distress Mini Ink, Kit 7 | danipeussDE | CraftStashUK (Weathered Wood) Tim Holtz Distress Mini Ink, Kit 10 danipeussDE | CraftStashUK (Iced Spruce) Tim Holtz Distress Mini Ink, Kit 3 | danipeussDE | CraftStashUK (Black Soot) Tim Holtz Distress Mini Ink, Kit 15 | danipeussDE | CraftStashUK (Lucky Clover) Tim Holtz Distress Mini Ink, Kit 4 danipeussDE | CraftStashUK (Shaded Lilac) My Sweet Petunia, Mini MISTI Stamping Tool | StempelmühleDE | BumbleberrysUK Tonic Studios, Tim Hotz Stamping Platform, Large | AmazonDE | AmazonUK Papermania, Stamp Block | AmazonDE | AmazonUK Canson Bristol Card Stock 250gsm | AmazonDE | AmazonUK Canson XL, Watercolour Cardstock , 300gsm/140lb | AmazonDE | AmazonUK Color Copy , White Paper, A4 300gsm/140lb (card base) | AmazonDE | AmazonUK Joy Crafts, Kraft Paper,A4 300gsm/140lb (card base) | KreativbuntDE | AmazonUK Papermania, Tall/Slim Card Base + Envelopes | AmazonDE | AmazonUK Dovecraft, Foam Squares | AmazonDE | AmazonUK Sellotape Double Sided Tape | AmazonDE | AmazonUK EK Success, Scissors | AmazonDE | AmazonUK Fiscars, Guillotine A5 | AmazonDE | AmazonUK Crafting Mat, Black | AmazonDE | AmazonUK YOU MIGHT ALSO LIKE
PIN ME
Did you like the card? I would love, if you pinned it to your board on Pinterest!

0 Comments
Leave a Reply. |
FOLLOW ME
SEE MORE


CATEGORIES
All
Stamping Die Cutting Using Stencil Heat Embossing Embossing or Texture Paste Distress Inks Nuvo Products Stamping & Colouring Stamping With Solid Stamps Watercolouring Watercolour Pencils Waterbased Markers Pencil Colouring Alcohol Markers Altenew Markers Zig Brush Markers Easy Backgrounds Stamped Backgrounds Small Stamp Ideas Simple Cards Complex Cards Cardmaking For Beginners All
Painting With Acrylics Painting With Gouache Painting With Watercolours Drawing With Fineliner Minimal Supplies Cards Christmas & Holiday
Love & Valentine Mother's Day Father's Day Halloween Spring Cards Summer Cards Autumn/Fall Cards Winter Cards Cards For Children Cards For Women Cards For Men Thank You Cards Sympathy Cards Get Well Soon Cards Floral & Leav Cards Rainbow Colours Messy Watercolouring Modern Art Inspirations Geometric Patterns Landscape Painting Acrylics
Gouache Watercolours Watercolour Pencils Waterbased Markers Distress Inks Alcohol Markers Colouring Pencils No Stamps No Dies Cards
Cardmaking On A Budget Let’s Colour Quick Cards Fun Masculine Cards Background Ideas Distress Ink Combinations |
 RSS Feed
